Re: Winter Woodworking Projects 2009
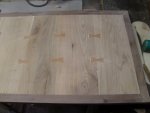
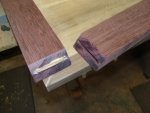
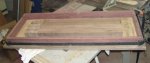
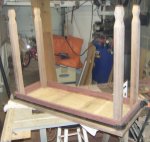
First you have to make the inlays. These are shapes usually 3/8"-1/2" thick. My first ones were butterflies in tables at the board joints to hold them tight. Then I progressed to the geometric shapes in the triangular table (above). These shapes are fairly simple to do and look good without too much time.
Start by tracing your shape on whatever wood you want to use. Mind your grain. Simple shapes like a butterfly or something geometric can be cut with a bandsaw. The more intricate things require a scrollsaw.
Next lay the inlay over where you want it on your board. Trace around it. I use a lead pencil so the line is fine...but hard to see - a trade-off. I have a Fein laminate trimmer with a plunge base. Using a downdraft bit (or updraft), set your depth just a little less than the thickness of the inlay. Remove the bulk being careful not to go outside the line. Clean up with chisels. For sharper areas such as tight corners, I use an Xacto knife with a heavy blades (for an Xacto). Don't worry about getting the hole perfect. The closer the better, but it can be very time consuming to get it perfect. Glue in place. File, shave, plane, and/or sand off excess above surface. Use putty for any gaps (putty is my buddy!). Sand. Finish. Viola! You have your first inlay.