


07 df250 Valve Shim Question

frustratedboater

Chief Petty Officer
Thread starter
Joined
Jul 10, 2007
Messages
505
Good afternoon,
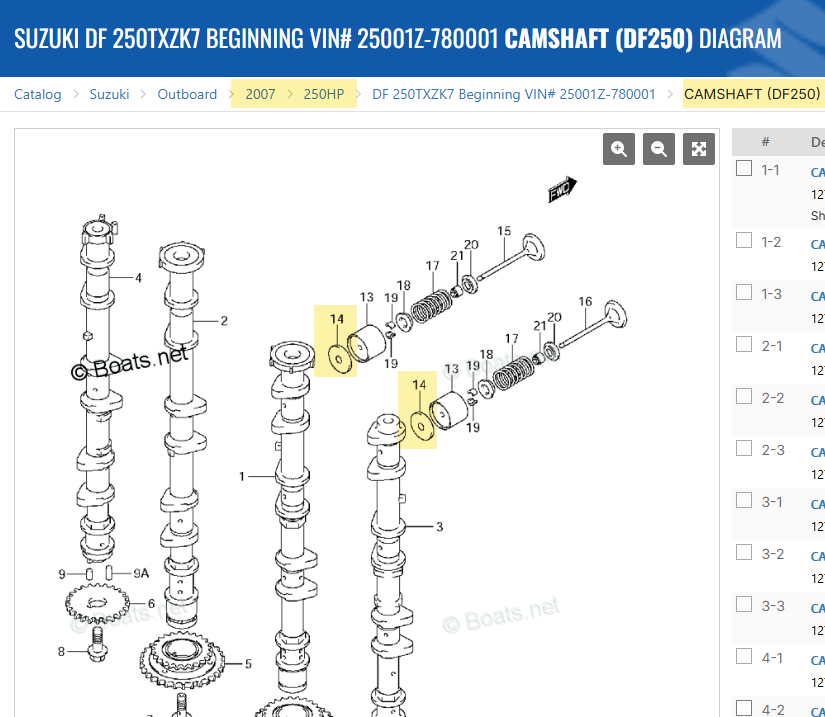
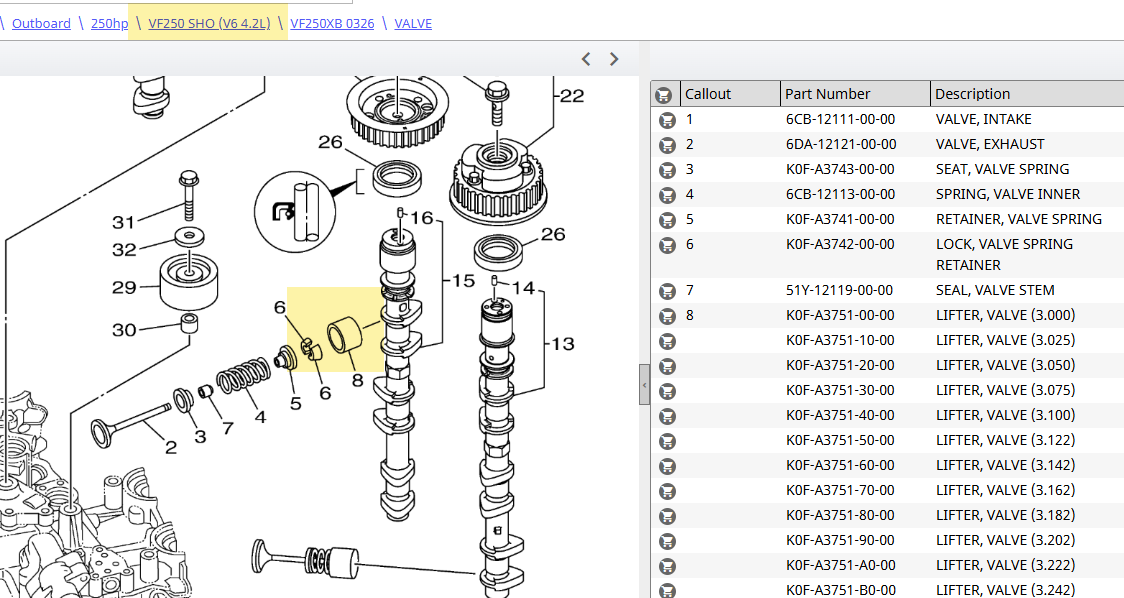
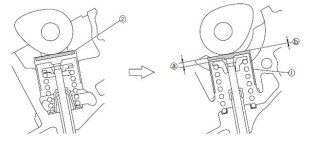
I am looking to check/adjust my valve clearances on my 2007 Suzuki df250z and looking for conformation on what type of shim style I may have on my application. Attached is an image on both styles, if someone can kindly confirm which one. ThanksShim Type.jpg
 

Lou C

Supreme Mariner
Joined
Nov 10, 2002
Messages
14,487
It's interesting that there are 2 styles of these, the one on the left side is what has been used on Yamahas and Toyota engines for a long time, in fact I think that Yamaha pioneered this style of bucket tappet + shim valve actuation and designed cylinder heads for Toyota (and others no doubt).
I had a 1989 Toyota Corolla GTS with the 4AGE twin cam engine and it had that style of valve lifter. To check them you just use a standard feeler gauge but if any are out of spec, there is a special tool that you use to compress the lifter and then use a magnet to pull out the shim. You then measure the shim with a micrometer and have to figure out what thickness shim you need to buy to get the adjustment correct. All this was detailed in the Toyota factory shop manual. Mine were in adjustment thankfully but my take on this is that mechanics rarely if ever adjust these unless there is an audible tapping noise coming from the valve train. It's just too time consuming. The real issue is if the clearance is too tight, which can lead to burned valves. I have heard that Toyota techs never adjust them, but don't know if that's true.
So yes you can check em, but if any are out of spec, you have a time consuming job on your hands
The other style on the right looks like you'd have to remove the cams to change that style shim.
This makes you appreciate nice quiet hydraulic lifters!
 

Mc Tool

Commander
Joined
Aug 7, 2024
Messages
2,010
Yeah , just measure the clearance 1st , doesnt matter what type they are untill you need to remove them and you would have to do that to measure the shim before ordering new .
as for the 4age , we did 300,000 kms in our MR2 ( aw11 ) and the valve clearances never went out of spec .
 

boscoe99

Commander
Joined
Aug 22, 2013
Messages
2,398
Yamaha has transitioned to the updated style as well in a number of their models.

Much more difficult to remove the bucket/shim than to just remove and replace the shim in bucket style. If and when it comes to that.


Mc Tool

Commander
Joined
Aug 7, 2024
Messages
2,010
Yamaha has transitioned to the updated style as well in a number of their models.

Much more difficult to remove the bucket/shim than to just remove and replace the shim in bucket style. If and when it comes to that.

Yeah but if one uses decent oil and changes it on time .....just how often do you have to do this ? . I noticed some time ago ( talking motorbikes ) that the clearance spec's got quite a bit wider no motors using these bucket shims .
 

boscoe99

Commander
Joined
Aug 22, 2013
Messages
2,398
Too many variables for me to hazard a guess as to what the clearances will become and when they will be there.

Starting clearances (do they start at the minimum?) being just one of many many variables.
 

Mc Tool

Commander
Joined
Aug 7, 2024
Messages
2,010
I figure that ...maybe not correctly , as the valve and seat wear closing up clearance the cam and follower wear opening clearance and with a fair bit of lee way in the clearance spec's the thing ballances out for the useful life of the motor .
 

Lou C

Supreme Mariner
Joined
Nov 10, 2002
Messages
14,487
Ask Toyota mechanics, I bet they will what "what valve adjustment"
you need the special tool, a micrometer, and a bunch of shims to choose from to actually "adjust" anything. As long as the engine is supplied with good clean oil, and high enough octane fuel to keep cylinder temps normal, I bet very few of these engines ever need an adjustment.
the adjusting screw and lock nut method worked fine on other OHC engines I have owned, (Honda, VW, Mazda) but these did actually go out of adjustment at times.
BTW I just checked the adjustment on the engine of my brother's BMW R-1800 motorcycle. Beautiful machine, but simple screw adjuster and locknut. Just like my 1965 VW Beetle!
We used to use the idea of going .002 under the spec (feeler gauge should just fall thru the gap) and .002 over the spec (feeler gauge doesn't want to go in the gap). That much leeway I think is OK, it takes practice to hold the feeler gauge right so you can actually feel it sliding between the tip of the valve and the adjuster screw, like setting points, same concept.
I can still recall the VW spec for their air cooled flat fours:
.004" intake
.006" exhaust
 

boscoe99

Commander
Joined
Aug 22, 2013
Messages
2,398
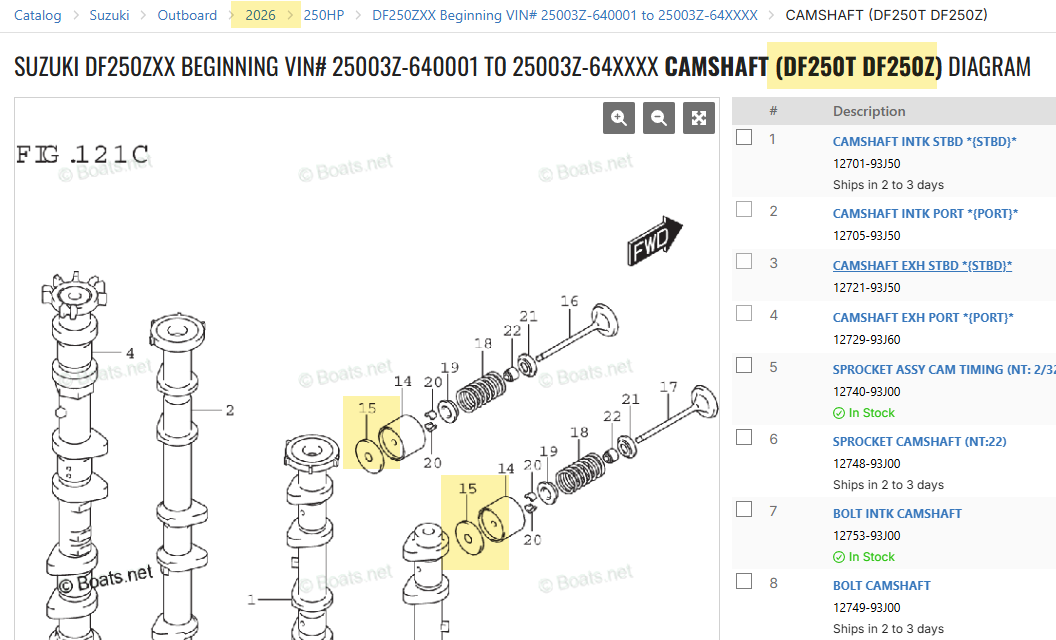
"I am looking to check/adjust my valve clearances on my 2007 Suzuki df250z and looking for conformation on what type of shim style I may have on my application. Attached is an image on both styles, if someone can kindly confirm which one. ThanksView attachment 420202"

That appears to be a Yamaha service manual diagram. Why are you asking your question about a Suzuki DF250 model?

From what I am seeing in a Suzuki parts catalog the latest Suzuki DF250 model still uses the shim in a bucket configuration.


Attachments

  • zuk.png
    zuk.png
    181 KB · Views: 1

frustratedboater

Chief Petty Officer
Thread starter
Joined
Jul 10, 2007
Messages
505
It's interesting that there are 2 styles of these, the one on the left side is what has been used on Yamahas and Toyota engines for a long time, in fact I think that Yamaha pioneered this style of bucket tappet + shim valve actuation and designed cylinder heads for Toyota (and others no doubt).
I had a 1989 Toyota Corolla GTS with the 4AGE twin cam engine and it had that style of valve lifter. To check them you just use a standard feeler gauge but if any are out of spec, there is a special tool that you use to compress the lifter and then use a magnet to pull out the shim. You then measure the shim with a micrometer and have to figure out what thickness shim you need to buy to get the adjustment correct. All this was detailed in the Toyota factory shop manual. Mine were in adjustment thankfully but my take on this is that mechanics rarely if ever adjust these unless there is an audible tapping noise coming from the valve train. It's just too time consuming. The real issue is if the clearance is too tight, which can lead to burned valves. I have heard that Toyota techs never adjust them, but don't know if that's true.
So yes you can check em, but if any are out of spec, you have a time consuming job on your hands
The other style on the right looks like you'd have to remove the cams to change that style shim.
This makes you appreciate nice quiet hydraulic lifters!
Thanks Lou.. Yes the tool is necessary and did not have that in my box. Should be coming in today. The other tip was to be sure that the cam lobe needs to be up before performing the bucket pressing, obviously to get the valves out of the way.. Thanks for the comments and reply!
 

frustratedboater

Chief Petty Officer
Thread starter
Joined
Jul 10, 2007
Messages
505
Yeah , just measure the clearance 1st , doesnt matter what type they are untill you need to remove them and you would have to do that to measure the shim before ordering new .
as for the 4age , we did 300,000 kms in our MR2 ( aw11 ) and the valve clearances never went out of spec .
Totally agree..
After the heads were done I started having clicking issues so I "assumed" two of the buckets got mixed up..
 

frustratedboater

Chief Petty Officer
Thread starter
Joined
Jul 10, 2007
Messages
505
"I am looking to check/adjust my valve clearances on my 2007 Suzuki df250z and looking for conformation on what type of shim style I may have on my application. Attached is an image on both styles, if someone can kindly confirm which one. ThanksView attachment 420202"

That appears to be a Yamaha service manual diagram. Why are you asking your question about a Suzuki DF250 model?

From what I am seeing in a Suzuki parts catalog the latest Suzuki DF250 model still uses the shim in a bucket configuration.


I am asking because upon reassemble I may have switched the buckets and my engine is getting a 'valve' clicking at idle. It goes away as I increase the throttle.. I noticed a much lower idle rpm as well since rebuild.
 

Mc Tool

Commander
Joined
Aug 7, 2024
Messages
2,010
you should be able to suss that by checking the clearances.
Lucky its not Desmo , my Ducati has another set of shims to clearance the closing rockers ( they dont have valve springs ) too ......thats 16 shims for a 2 cylinder engine and if I hammer it I get about 5000km's . Good fun :LOL:
 

99yam40

Fleet Admiral
Joined
Sep 7, 2008
Messages
9,352
I am asking because upon reassemble I may have switched the buckets and my engine is getting a 'valve' clicking at idle. It goes away as I increase the throttle.. I noticed a much lower idle rpm as well since rebuild.
I believe he was asking why you were looking at a Yamaha service manual when working on a Suzuki, if that is a Yamaha service manual diagram
 
Last edited:

Lou C

Supreme Mariner
Joined
Nov 10, 2002
Messages
14,487
I think the person who posted that did it to show what the other style is that doesn't have an easily replaceable shim, where the cams have to come off to do it.
In the Suzuki manual it shows the replaceable shim style.
 

frustratedboater

Chief Petty Officer
Thread starter
Joined
Jul 10, 2007
Messages
505
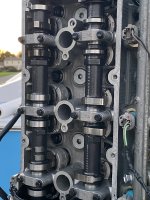
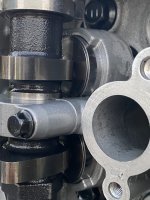
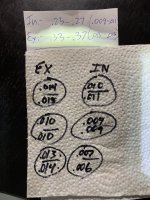
Pulled the valve cover and checked clearances the left side where the clicking noise was coming from. Attached are the numbers and the spec at the top in pen. 2007 Suzuki df250z: ( In. .009 - .011 Ex. .013 - .015 )
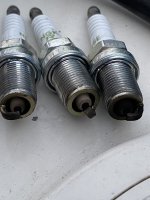
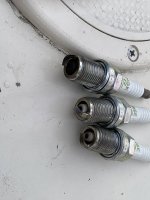
I also noticed both top plugs (Port/Star.) were darker. This motor never really ran much at all since being assembled. It may have idled 5-10 min. tops! Any thoughts on the dark plugs?
Also, I do see the middle EX. and the bottom right IN. being an slight issue. I believe that i did mention that idle was around 300-500 rpm. Way too low.
 

Attachments

  • IMG_6953.jpg
    IMG_6953.jpg
    1.5 MB · Views: 3
  • IMG_6954.jpg
    IMG_6954.jpg
    1.5 MB · Views: 2
  • IMG_6955.jpg
    IMG_6955.jpg
    1.2 MB · Views: 2
  • IMG_6957.jpg
    IMG_6957.jpg
    1.4 MB · Views: 3
  • IMG_6959.jpg
    IMG_6959.jpg
    2.1 MB · Views: 3
Top