1955 25Hp Big Twin....

Solomon_Man

Petty Officer 2nd Class
Joined
Sep 16, 2009
Messages
110
Re: 1955 25Hp Big Twin....

All,
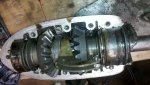
I hooked up a hose to see if the top end is not clogged. Its clear and water flowed out as expected.

I noticed the following;
Around the shift rod (at least from what I can tell) a large amount of water was flowing down the rod. (No leaks at my connection as I doubled clamped it)

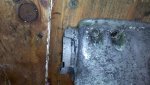
Also there appeared to be a man-made hole (maybe drilled/machined/foundried) just below the exhaust on the interior portion of the exhaust housing which allowed a decent amount of water to flow on the insde of the exhaust housing.

I am not sure if any of the above is normal.....?

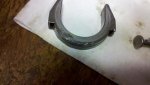
I also tried to remove the copper tube to put into the water pump for a test. I cannot just pull it out as my diagram shows it is "fitted" with a some type fitting. Trust me this morning I tried pulling it. Does this seem correct?

I was thinking I could try some pipe as a replacement for the copper tubing for the waterpump/lower unit testing.

So I was going to hook my drill to the driveshaft and see if it could pump. Unfortunately, the drive shaft is about 5/8....my largest drill is a 1/2...Looking for ideas on this one....Any have any suggestions?

Thanks,
Chris
 

Solomon_Man

Petty Officer 2nd Class
Joined
Sep 16, 2009
Messages
110
Re: 1955 25Hp Big Twin....

All,
I got some more time to think about the problem today and figured out something that worked to test the lower unit.

I will mention it here just in case someone only has a 1/2 drill and the driveshaft thats more like 5/8.

I took a 5/8 piece of reinforce hose (Automotive Heater Hose - I had some sitting), a 3/8 inch autmotive rachet extenion, and finally two hose clamps. I took hose over the top of driveshaft and the wide end of the extension placed the other side of the hose. The hose made the connection between the shaft and extension. I clamped it down good. For the copper tubing I cut a 20 inch piece of copper tube and place it in the top of waterpump outlet. It was common plumbing copper, believe 1/2 or 3/8, so the size was not dead on. So I took a little electrical tape around the copper end going into the pump outlet. It took no more the 2-3 wraps.

I then took my 18 volt Milwaukee cordless drill on high setting and placed the Lower Unit into my Barrel (trash can more on this later) and fired the drill up. It pumped water right out of the tube at a very consitent and fair rate of flow. As you would guess the faster the drill speed the faster the pump. I even dropped the speed of my drill to normal-low speed and it still pumped water over the top. So I think the lower unit looks good.

As far as the barrel is concern, the local guy has been on vacation and he sold out but will have more by this coming weekend when he goes back to work.

So I think the issue is either the top half of the outboard or the barrel is the issue.

Anyone have any thoughts on the upper half? The barrel will take a week.....

Thanks,
Chris
 

HighTrim

Supreme Mariner
Joined
Jun 21, 2007
Messages
10,486
Re: 1955 25Hp Big Twin....

Ok so you now know your gearcase functions. Good.

Also know that your cooling circuit is clear. Must be your connection at your water line when you install the gearcase?
 

Solomon_Man

Petty Officer 2nd Class
Joined
Sep 16, 2009
Messages
110
Re: 1955 25Hp Big Twin....

High Trim,
Good point!

I will have to check either yet tonight or early tomorrow before work....

I did get it in a large 55 gallon barrel today (water filled to top exhaust port) and no change....Did a compression test and both cylinders are around 95+ lbs. Also verified using a no contact thermal temperature reader that the head temperatures rise to 210 or better before I shut it down. The engine will stay idling without any issue.

I read somewhere that you should be able to touch the heads when the engine is running....Is this true ?

One thing I also wonder is it possible the connection/copper line to the powerhead or just before has a issue and the water is not all getting somehow into the power head? I assume my house hose at ~70psi is higher then the waterpump...what do you think?

I assume to confirm top end connection would require a power head removal...

Thanks,
Chris
 

oldybutagoody

Petty Officer 1st Class
Joined
Dec 30, 2011
Messages
207
Re: 1955 25Hp Big Twin....

You should put the copper pipe into the upper fitting of the leg first (use a flashlight to make sure it's properly in the rubber grommet at the top of the leg) and THEN install the lower unit taking care that the bottom end of the copper pipe engages the rubber grommet on the water pump housing.
High Trim,
Good point!

I will have to check either yet tonight or early tomorrow before work....

I did get it in a large 55 gallon barrel today (water filled to top exhaust port) and no change....Did a compression test and both cylinders are around 95+ lbs. Also verified using a no contact thermal temperature reader that the head temperatures rise to 210 or better before I shut it down. The engine will stay idling without any issue.

I read somewhere that you should be able to touch the heads when the engine is running....Is this true ?

One thing I also wonder is it possible the connection/copper line to the powerhead or just before has a issue and the water is not all getting somehow into the power head? I assume my house hose at ~70psi is higher then the waterpump...what do you think?

I assume to confirm top end connection would require a power head removal...

Thanks,
Chris
 

Solomon_Man

Petty Officer 2nd Class
Joined
Sep 16, 2009
Messages
110
Re: 1955 25Hp Big Twin....

All,
I believe this really could be the issue.

I took the lower unit out tonight and the copper line was on the opposite side of the waterpump area.

Last time, I lubed up both the waterpump and copper tube and then assembled worrying more about the shift rod then the copper tube.

The tube was probably off angle as this engine did not have a lower unit and sat on its leg so to speak. So the copper line may have gotten bent/straightened because of being moved around sheds/garages over the past 15 yrs.

I had to slightly reroute the copper tube as the line was pretty much straight and the diagrams show a slight curve to it at the end before going into the waterpump. I believe this is to dodge the shifter rod.

I will not know till 8am tomorrow morning when I fire it up.

Thanks Again,
Keep you posted,
Chris
 

Solomon_Man

Petty Officer 2nd Class
Joined
Sep 16, 2009
Messages
110
Re: 1955 25Hp Big Twin....

All,
We are pumping water!!!

Head temperatures after about 10-15 minutes of runnning is around 95 degrees....I am glad its not something big and a rookie mistake....won't forget this any time soon.

So I shifted into reverse and propellor ran to move the water all around. Let it run low RPM and High RPM no problem.

Did a similar test in Forward gear and we are popping out of gear at hight RPMs. I am guessing its my shift rod connection not being 100% correct seated correctly...It was dark last night and my eyes are not great in the dark.The lever does not look like its forward enough.

Its raining here in NW Ohio. So I am letting the engine cool down more before picking it out of the tank....will work on it at lunch time. Anything else I should look for other then the adjustment? If its not the adjustment what else could be warn out/out of adjustment in the lower unit.... just curious. All of these outboards in the fall will be having the lower units resealed. Kits are here waiting on the 3M-847.

She idles pretty good and at high RPM its smooth.

All I am very thankful for your help!
Chris
 

oldybutagoody

Petty Officer 1st Class
Joined
Dec 30, 2011
Messages
207
Re: 1955 25Hp Big Twin....

If it's not the shift rod adjustment (which it easily could be since you've been tweaking it,) then it's the lobes on the clutch dog and gears being rounded. For your wallet's sake, pray it's the former and not the latter.
By the way, you should NEVER run at full throttle in a bucket. Wait till you get it on the water to set the high speed needle.
All,
We are pumping water!!!

Head temperatures after about 10-15 minutes of runnning is around 95 degrees....I am glad its not something big and a rookie mistake....won't forget this any time soon.

So I shifted into reverse and propellor ran to move the water all around. Let it run low RPM and High RPM no problem.

Did a similar test in Forward gear and we are popping out of gear at hight RPMs. I am guessing its my shift rod connection not being 100% correct seated correctly...It was dark last night and my eyes are not great in the dark.The lever does not look like its forward enough.

Its raining here in NW Ohio. So I am letting the engine cool down more before picking it out of the tank....will work on it at lunch time. Anything else I should look for other then the adjustment? If its not the adjustment what else could be warn out/out of adjustment in the lower unit.... just curious. All of these outboards in the fall will be having the lower units resealed. Kits are here waiting on the 3M-847.

She idles pretty good and at high RPM its smooth.

All I am very thankful for your help!
Chris
 

Solomon_Man

Petty Officer 2nd Class
Joined
Sep 16, 2009
Messages
110
Re: 1955 25Hp Big Twin....

All,
The rod goes up when I shift into forward and I placed the rod as deep as I could in the brass shift rod connector and tightened (going the opposite direction. So I would think it would meshing the gear as tight as possible ....hopefully reducing the slippage.

Its unfortunately still slips out.....

Is there any other linkage adjustments (say around the handle)?

To be more clear, the slippage is not like I put it in and instantly it pops out...more like runs 3-4 seconds or more (10 seconds one case...I counted) before it pops out at high RPM...if that makes any difference. Also the shift handle and Shifting Ratchet/pawl does not sit exactly the same locations as my 30Hp or 35 hp...seems almost opposite...I am not sure if this is a factor or not going to study it more after work.

So at this point I know this much, the brass shift rod connector was off the shift rod when I got engine to my work bench originally. So unless the top shift rod connection is off, as I only messed with the lower connection this time, we are as good as it will get....I believe...probably will work on it more tonight.

So lets approach this a different way; Assuming the shift rod is adjusted correctly my pinion set and most likely the clutch dog could be shot. I have never disassembled a lower unit but have rebuilt my fair share of transmissions both automatic and manual in automobiles....took a couple ASE Community college classes as well...as I have a few classic cars.

If I remove the Skeg, is the pinion set\clutch dog visible enough to see warn out parts..it appears to be?

What will be tall-tale visible signs of a bad pinion/clutch dog?

Looking at a diagram it would be best to attack this problem with the lower unit Skeg facing up.....Anything else I need to worry about?

I assume once I identify the problem, a used set\part are readily available....I see new sets on ebay and other places online and they range from $150-200...I have the parts manual to match numbers. I also know at the local marina salvage yard there are three lower units. So its just $$....in all fairness this project has not been horrible.

If things appear, non-rounder/overly warn can I just bolt everything back up? Do I need to reseal as this is necessary as seals are usually greatly affected by disassembly.

Another thing I noticed....concerning my armature plate and ignition components....I noticed after running the engine a while that it spits occassionally...nothing like its going to stall or anything but I took a look at the armature plate from underneath of flywheel and I notices it leans slightly down on one side. So I started up the engine let it run a while and I noticed the spitting occur again and I took a screwdrive and lightly pushed the armature plate from the bottom slightly and the engine smoothed right out. Is that the wave washer not being correct?

Getting my list of parts now so I know what to grab this next time out to the salvage yard....I was already going out there anyways....:)

Thanks for all the help...don't be discourage I have learned a lot....and I greatly appreciate the guidance,

Chris
 

oldybutagoody

Petty Officer 1st Class
Joined
Dec 30, 2011
Messages
207
Re: 1955 25Hp Big Twin....

Wow. A LOT of questions. I'll do my best...
First, a couple links to exploded views.
http://www.marineengine.com/parts/v...ntage-evinrude-johnson/376556/37655600001.htm

You can adjust the shift rod at the shift rod lever. There is a nut that you can loosen and move the lever towards forward or reverse to adjust it. Loosen that bolt and move the lever one way or the other while turning the prop by hand. Set it so that when it's in neutral the prop spins freely, when its it forward the prop clicks solidly into forward (you won't be able to turn it) and the same for reverse, clicks solidly into reverse (you won't be able to turn it). The part of the shift lever that follows the neutral safety lever (the part that goes up to the magneto that prevents full throttle in neutral) should be centered in the valley of the lever for forward and reverse. It's hard to say in words but if you look at it you'll know when it's in the right spot. It's a long shot that it's just the adjustment but you should rule it out before you tear it open. Chances are, it is the clutch dog and probably the forward gear too. You're on the right track finding used ones, (Ebay and salvage yard). You can flip the clutch dog around and sometimes that will give you forward gear and you'll lose reverse but if the forward gear is bad too, it won't last long as both the clutch and the rear have lobes that engage each other and if either is worn, they slip apart. If you do tear it apart to replace gears and clutch, definitely do a reseal while you have it apart, a reseal kit s cheap ($20-25). If you've done transmissions, this will be a piece of cake. Do a search here on iBoats for lower unit reseal and you'll find tons of info on how to do the reseal. You'll need a tube of 3m-847 too.
As for the magneto, the ring under it that holds down the stator plate does wear and can cause sloppiness in the magneto that vibrates and moves during running and affects point timing making it run rough. I recall a link here on Iboats about a way to fix that. Do a search for "Sloppy and Magneto" and I bet you'll find it. I did it on my Fastwin and it worked great.
Not sure what you mean by "Spitting" That could be a "lean Sneeze" or leaking carb, float needle. If you mean it's spitting out from under the magneto, then you need to replace the seal on the top of the crank shaft (under the magneto).

You'll get there. Once you do, you'll have a great old motor.

All,
The rod goes up when I shift into forward and I placed the rod as deep as I could in the brass shift rod connector and tightened (going the opposite direction. So I would think it would meshing the gear as tight as possible ....hopefully reducing the slippage.

Its unfortunately still slips out.....

Is there any other linkage adjustments (say around the handle)?

To be more clear, the slippage is not like I put it in and instantly it pops out...more like runs 3-4 seconds or more (10 seconds one case...I counted) before it pops out at high RPM...if that makes any difference. Also the shift handle and Shifting Ratchet/pawl does not sit exactly the same locations as my 30Hp or 35 hp...seems almost opposite...I am not sure if this is a factor or not going to study it more after work.

So at this point I know this much, the brass shift rod connector was off the shift rod when I got engine to my work bench originally. So unless the top shift rod connection is off, as I only messed with the lower connection this time, we are as good as it will get....I believe...probably will work on it more tonight.

So lets approach this a different way; Assuming the shift rod is adjusted correctly my pinion set and most likely the clutch dog could be shot. I have never disassembled a lower unit but have rebuilt my fair share of transmissions both automatic and manual in automobiles....took a couple ASE Community college classes as well...as I have a few classic cars.

If I remove the Skeg, is the pinion set\clutch dog visible enough to see warn out parts..it appears to be?

What will be tall-tale visible signs of a bad pinion/clutch dog?

Looking at a diagram it would be best to attack this problem with the lower unit Skeg facing up.....Anything else I need to worry about?

I assume once I identify the problem, a used set\part are readily available....I see new sets on ebay and other places online and they range from $150-200...I have the parts manual to match numbers. I also know at the local marina salvage yard there are three lower units. So its just $$....in all fairness this project has not been horrible.

If things appear, non-rounder/overly warn can I just bolt everything back up? Do I need to reseal as this is necessary as seals are usually greatly affected by disassembly.

Another thing I noticed....concerning my armature plate and ignition components....I noticed after running the engine a while that it spits occassionally...nothing like its going to stall or anything but I took a look at the armature plate from underneath of flywheel and I notices it leans slightly down on one side. So I started up the engine let it run a while and I noticed the spitting occur again and I took a screwdrive and lightly pushed the armature plate from the bottom slightly and the engine smoothed right out. Is that the wave washer not being correct?

Getting my list of parts now so I know what to grab this next time out to the salvage yard....I was already going out there anyways....:)

Thanks for all the help...don't be discourage I have learned a lot....and I greatly appreciate the guidance,

Chris
 

Solomon_Man

Petty Officer 2nd Class
Joined
Sep 16, 2009
Messages
110
Re: 1955 25Hp Big Twin....

All,
Thanks for your patience in all of this....I did remove the flywheel and replace the Support and Retaining Ring underneath the Armature plate under the Flywheel with one from a Power Head that I have Ohio title (no other parts). Its actually is a 1962 40HP Lark powerhead. I will get another (support and retaining ring) the next time out in the salvage yard.

Anways with that change the engine is even more smooth running especially at low RPMs.

I also tried to adjust the shift lever which was way off in the forward gear. The pin was not even sitting in the groove area. Its even better but still pops out of gear.

Anyways something has been bothering me and if I am going to end up taking the outboard apart then I want to make sure I get things correct on reassembly. The thing is the driveshaft will come out of the lower unit...This kinda bothers me as none of my other outboards do I belive this possible. Is this normal?

If not what could be missing?

I am going to try and create a form to place the lower unit into so I can work on it...Saw something online make things easier in the tear down. Going to need it sooner or later.

Thanks again,
Chris
 

oldybutagoody

Petty Officer 1st Class
Joined
Dec 30, 2011
Messages
207
Re: 1955 25Hp Big Twin....

I believe it is normal on this model but I'd wait for HighTrim to weigh in. He does lower units in his sleep.
All,
Anyways something has been bothering me and if I am going to end up taking the outboard apart then I want to make sure I get things correct on reassembly. The thing is the driveshaft will come out of the lower unit...This kinda bothers me as none of my other outboards do I belive this possible. Is this normal?
 

jbjennings

Captain
Joined
Jul 18, 2007
Messages
3,903
Re: 1955 25Hp Big Twin....

It's normal, but it shouldn't happen if the water pump is intact, because the flywheel key should catch on the water pump housing. You just better make sure that it gets seated back in the pinion correctly.
JBJ
 

Solomon_Man

Petty Officer 2nd Class
Joined
Sep 16, 2009
Messages
110
Re: 1955 25Hp Big Twin....

All,
Thanks for the followup;

I hope tomorrow morning or at lunch time to pull the lower unit and open things up. The outboard is on the stand and draining the hypoid oil.

Good news... my 3M-847 came in the mail today and the LU seal kits are in the garage.

Keep you posted on what I find.

Thanks again,
Chris
 

Solomon_Man

Petty Officer 2nd Class
Joined
Sep 16, 2009
Messages
110
Re: 1955 25Hp Big Twin....

All,
Got some pictures....

First Set (5 file limit)

Thanks,
Chris
 

Attachments

  • 2012-06-12_09-28-04_20.jpg
    2012-06-12_09-28-04_20.jpg
    152 KB · Views: 0
  • 2012-06-12_10-03-23_639.jpg
    2012-06-12_10-03-23_639.jpg
    150.3 KB · Views: 0
  • 2012-06-12_10-03-51_294.jpg
    2012-06-12_10-03-51_294.jpg
    148.1 KB · Views: 0
  • 2012-06-12_10-07-31_344.jpg
    2012-06-12_10-07-31_344.jpg
    143.4 KB · Views: 0
  • 2012-06-12_10-09-30_436.jpg
    2012-06-12_10-09-30_436.jpg
    139.8 KB · Views: 0

Solomon_Man

Petty Officer 2nd Class
Joined
Sep 16, 2009
Messages
110
Re: 1955 25Hp Big Twin....

All,
Another Set of Files....

Thanks,
Chris
 

Attachments

  • 2012-06-12_10-09-37_274.jpg
    2012-06-12_10-09-37_274.jpg
    139.5 KB · Views: 0
  • 2012-06-12_10-09-44_647.jpg
    2012-06-12_10-09-44_647.jpg
    140 KB · Views: 0
  • 2012-06-12_10-09-53_311.jpg
    2012-06-12_10-09-53_311.jpg
    140.2 KB · Views: 0
  • 2012-06-12_10-10-23_657.jpg
    2012-06-12_10-10-23_657.jpg
    142.4 KB · Views: 0
  • 2012-06-12_10-10-29_823.jpg
    2012-06-12_10-10-29_823.jpg
    143.4 KB · Views: 0

Solomon_Man

Petty Officer 2nd Class
Joined
Sep 16, 2009
Messages
110
Re: 1955 25Hp Big Twin....

All,
The last pitcure.....

I took probably 20 more, for reassembly, but these show what I am dealing with in the Lower Unit. The opinion below is a novice optinion at best....so take it as a grain of salt. After cleaning the pinion assembly individually this is the worst of it. The bearings are very easy to rotate and the races are very clean.

There appears to be some small rust spots here and there that I can remove easily with my nail or crocis cloth (nothing major)...the worse\largest spots are on the Clutch Dog. The Lower unit oil was actually not gray in nature...the lower unit was sealed with blue\Black permatex. Mostly black but blue around the large o-ring. The clutch dog appears to be shot around mating surfaces...Do you all agree?

The one gear I think is in ok shape....The other has taken alot of abuse and is probably bad as well. The cradle has been used and abused ....Not exactly sure how it is so beat up...Any Ideas?....Is it necessary to replace the cradle?

The SKEG has a crack but it appears not to affect the seal portion of the housing...I may grab another just because if I end up at the Salvage yard. I am probably going to by a new Clutch Dog....Gear may be used....still looking online.

Please chime in and tell me what you think....Do we think the lower gear and Clutch dog is still the issue?

I have seal kits, and 3M-847, so just need my final list of "hard" parts.

Again, I appreciate all the help!,
Chris
 

Attachments

  • 2012-06-12_10-11-26_675.jpg
    2012-06-12_10-11-26_675.jpg
    146.4 KB · Views: 0

AlTn

Commander
Joined
Mar 9, 2010
Messages
2,813
Re: 1955 25Hp Big Twin....

looks like the anatomy of a "jumper" to me...I was surprised at the relatively justifiable cost of the lower unit parts for your motor at marineengine.com..1955..RD-17, RD-17L...you can at least get a comparision price cost...the dog and fwd gear need replacing, cradle? if it's tight and the ears fit the yoke well, I doubt the scars will affect it much..
 

kfa4303

Banned
Joined
Sep 17, 2010
Messages
6,094
Re: 1955 25Hp Big Twin....

Hi solomon. I agree that the clutch dog and FWD gear are on good. It's amazing how little wear it takes for them to go bad. I would suggest you replace them, however you may find that it's cheaper and easier to simply buy an entire donor LU. The clutch dog and gears on my '66 20 hp recently went kaput and I was able to get an entire new gear set for about the same price as a new clutch dog alone, by placing a WTB add on aomci.org and/or eaby. Once you have all the parts sorted out, use this link as guide to help you get her all back together again. It's for a different model than your motor, but the basic steps are the same.

http://forums.iboats.com/showthread.php?t=277190&highlight=lower+unit+seal+kit+installation
 
Top