"1956 Duratech S-13R "Project: Pop Can" SPLASHED"

pckeen

Commander
Joined
Jun 20, 2012
Messages
2,067
Re: 1956 Duratech S-13R "Project: Pop Can"

Re: 1956 Duratech S-13R "Project: Pop Can"

Sweet - when is the painting planned?
 

64osby

Admiral
Joined
Jul 28, 2009
Messages
6,826
Re: 1956 Duratech S-13R "Project: Pop Can"

Re: 1956 Duratech S-13R "Project: Pop Can"

Had to break out the sunglasses just to look at the pics. Shiny:D.

The basement sure seems to have been a great choice for getting work done.
 

hadaveha

Petty Officer 1st Class
Joined
Mar 17, 2009
Messages
389
Re: 1956 Duratech S-13R "Project: Pop Can"

Re: 1956 Duratech S-13R "Project: Pop Can"

Wow that looks great I have a 1957 lone star Malibu that me and my son are restoring, he doesn't know it yet but when we finish its going to be his, its so cool to see young guys like you working hard and making a classis all that she should be, with no spoilers and stupid tribal vinyl graffics. great great job
 

lakelover

Rear Admiral
Joined
Mar 26, 2003
Messages
4,386
Re: 1956 Duratech S-13R "Project: Pop Can"

Re: 1956 Duratech S-13R "Project: Pop Can"

Sweet project, I'll be following along!
 

Luke000

Restoration Forum Splash of the Year 2016
Joined
Aug 19, 2013
Messages
346
Re: 1956 Duratech S-13R "Project: Pop Can"

Re: 1956 Duratech S-13R "Project: Pop Can"

Had to break out the sunglasses just to look at the pics. Shiny:D.

The basement sure seems to have been a great choice for getting work done.

Yeah, It was nice to have a project down there this winter!
 

Luke000

Restoration Forum Splash of the Year 2016
Joined
Aug 19, 2013
Messages
346
Re: 1956 Duratech S-13R "Project: Pop Can"

Re: 1956 Duratech S-13R "Project: Pop Can"

Sweet - when is the painting planned?

Whenever this fabled thing called spring and warm weather gets here!!
 

Luke000

Restoration Forum Splash of the Year 2016
Joined
Aug 19, 2013
Messages
346
Re: 1956 Duratech S-13R "Project: Pop Can"

Re: 1956 Duratech S-13R "Project: Pop Can"

I thought I would show what I looked like after buffing 1/2 of the hull! I was wearing a hat....


kfa4303

Banned
Joined
Sep 17, 2010
Messages
6,094
Re: 1956 Duratech S-13R "Project: Pop Can"

Re: 1956 Duratech S-13R "Project: Pop Can"

YOWZA!!!!!!!!!! That's AMAZING!!!!!! How in the world did you do that? I was whining and quit after half of one rubrail! LOL!!!!
Me next please :) Champion work!!!
 

m casey stock

Chief Petty Officer
Joined
Apr 29, 2012
Messages
514
Re: 1956 Duratech S-13R "Project: Pop Can"

Re: 1956 Duratech S-13R "Project: Pop Can"

Shiney on top of Shiney on top of shiney! Lot of work involved in all that. The splash of color you plan on adding will add that little extra that will make your pop can POP! Great work.
 

Luke000

Restoration Forum Splash of the Year 2016
Joined
Aug 19, 2013
Messages
346
Re: 1956 Duratech S-13R "Project: Pop Can"

Re: 1956 Duratech S-13R "Project: Pop Can"

Happy Easter everyone! I got a little work done this afternoon...The boat is finally out of the dungon and blinding everyone in the sunlight! It went up the stairs much easier than it went down :laugh: We got her on the trailer and all the rollers and bunks leveled up. There is still some touch up that needs to be done on the trailer paint in the comming weeks. We installed the new bow eye, and I broke out the buffer to polish up the seat caps. We ordered the paint for the intirior from Bass Pro and that is the next step to spray it.

Picture time!


Backing for the bow eye


Seat caps
 

jbcurt00

Moderator
Staff member
Joined
Oct 25, 2011
Messages
25,111
Re: 1956 Duratech S-13R "Project: Pop Can"

Re: 1956 Duratech S-13R "Project: Pop Can"

Nice work, but I'd pull the bow eye thru bolt & seal the wood backer before you cinch the nut down for the last time. Epoxy, Spar, porch paint, anything will be better then nothing.

The shiny seat pans may be a tad bright in full sun for the occupants, but all the shiny bits look great, good work.
 

Luke000

Restoration Forum Splash of the Year 2016
Joined
Aug 19, 2013
Messages
346
Re: 1956 Duratech S-13R "Project: Pop Can"

Re: 1956 Duratech S-13R "Project: Pop Can"

Nice work, but I'd pull the bow eye thru bolt & seal the wood backer before you cinch the nut down for the last time. Epoxy, Spar, porch paint, anything will be better then nothing.

The shiny seat pans may be a tad bright in full sun for the occupants, but all the shiny bits look great, good work.

Sealing the bolt is Wednesday's project, and I will aso hit it with the paint when I spray the inside. As for the seat pans, we are having cushions made so that will not be an issue.
 

jigngrub

Fleet Admiral
Joined
Mar 19, 2011
Messages
8,155
Re: 1956 Duratech S-13R "Project: Pop Can"

Re: 1956 Duratech S-13R "Project: Pop Can"

The polishing looks great!

You're going to need some really really good sunglasses when you go out in that boat!:cool:

... maybe a welding hood...
 
Last edited:

Luke000

Restoration Forum Splash of the Year 2016
Joined
Aug 19, 2013
Messages
346
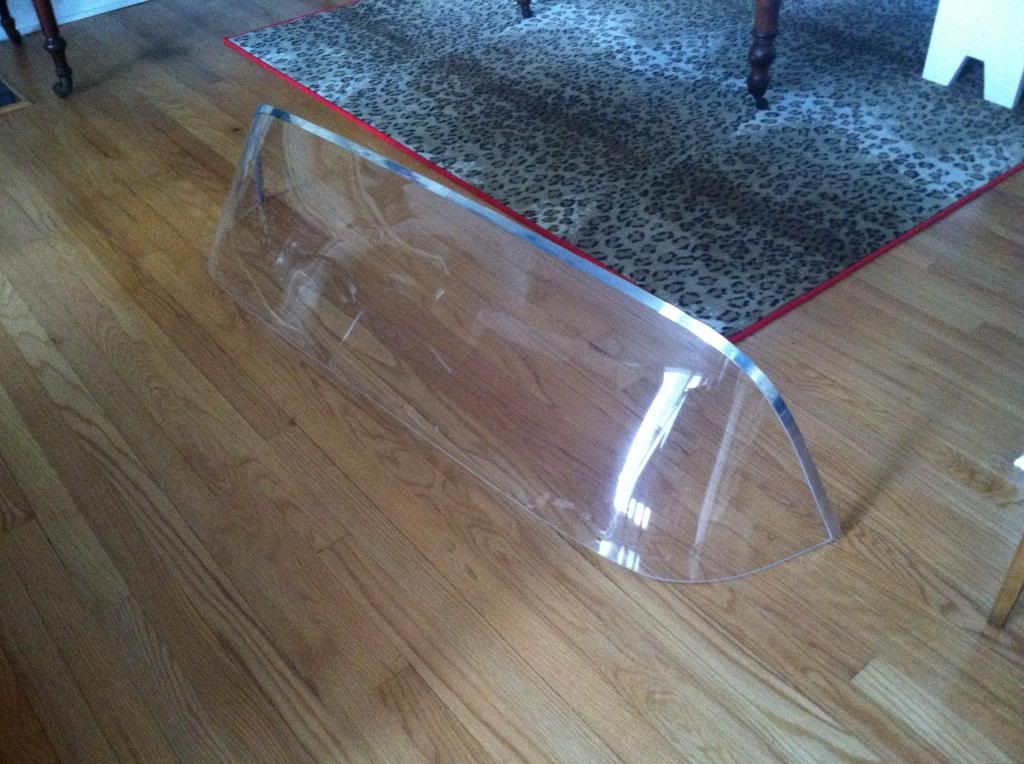
It has been a productive few weeks since my last update. To start with, we ordered and received a new windshield from Taylor made. It looks great and is very similar to the old one in style. However it is a little shorter and the curve for the bow is not as pronounced as the last one.


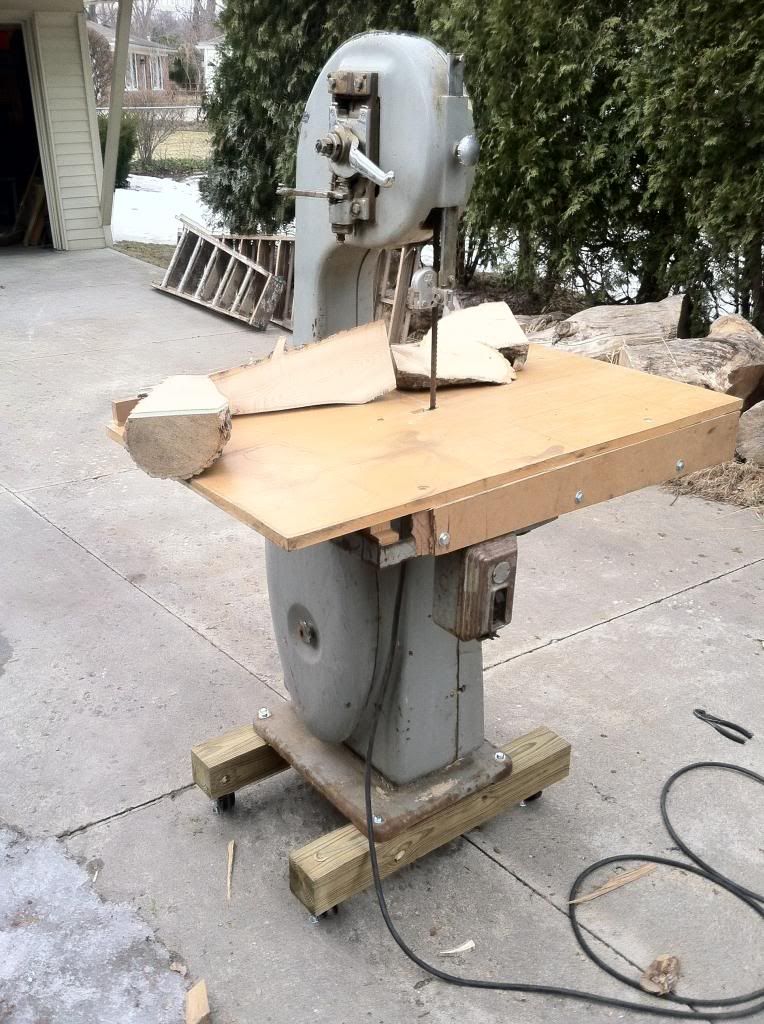
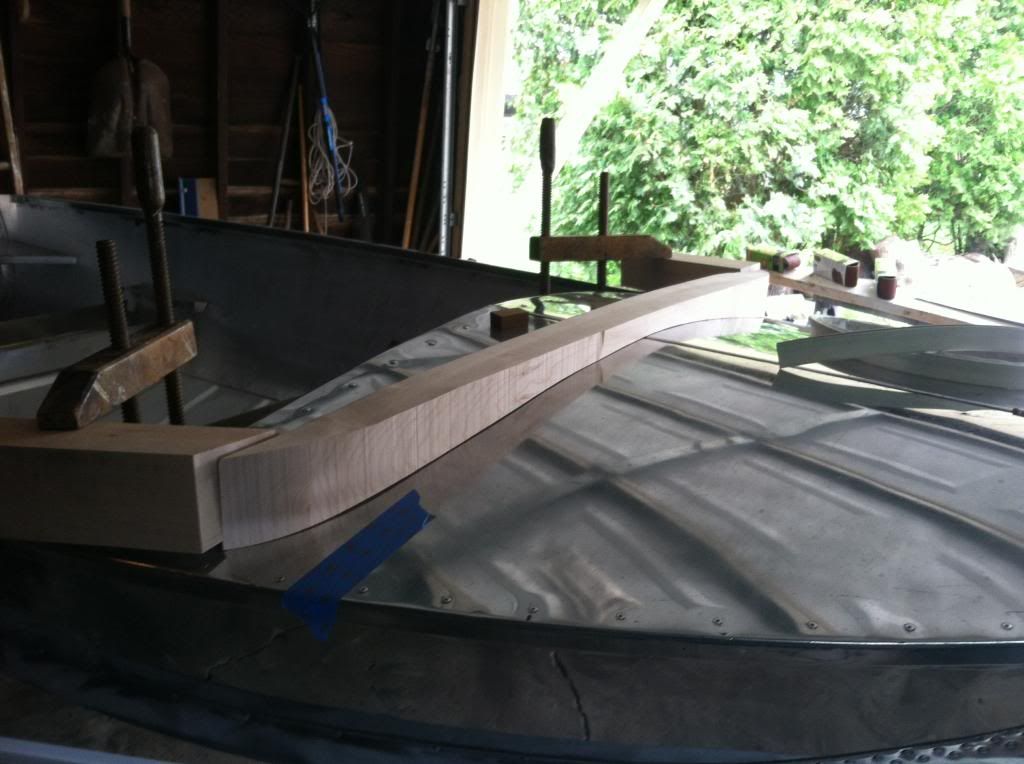
After hours and hours of trying to figure out what would be the best looking and easiest way to get the profile of the boat to meet up with the profile of the windshield, we decided to make an adapter/riser out of wood. We got a lumber yard to laminate 2 sugar maple boards into a 3-1/2in X 5-1/2in X 7 foot plank. The next step was to figure out a way to cut all the curves, accurately. We had a very anemic 1/4HP, bench-top bandsaw but there is no way it could do what we wanted. I hit craigslist and found a guy selling "wood saw" about an hour down the road, the picture was bad but I could tell it was a good sized band saw. That weekend my dad and I took his truck and trailer to the guy. It turns out it was an old industrial meat saw that was converted years ago for wood cutting (new table and blade) it weighed about 4-600 pounds and took a forklift to load on our trailer. THE man we purchased it from cleans out commercial foreclosures and was a very nice guy, we met at his shop and there was another saw that cought my eye by our new saw: it was a VERY large horizontal bandsaw (7X11" capacity) , jokingly I asked how much it was and if it ran (it did) and he says we could take BOTH saws for $250! ;D So the forklift was fired up again and onto our trailer it went. We didn't need the horizontal saw but... So we get the saws home, the wood saw got casters, a new and longer guide bar (not in the picture), new blade, brushes, and bearings. We rigged up a 220 extension cord so we can run it in the driveway (only have 220 in the basement) The saw ran amazingly, and will be getting a full resto in the future.


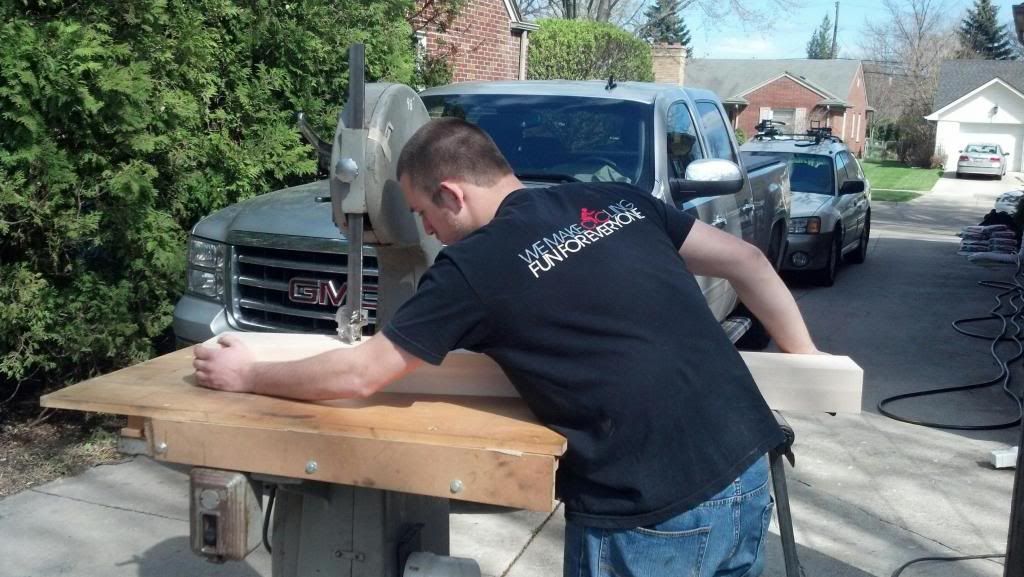
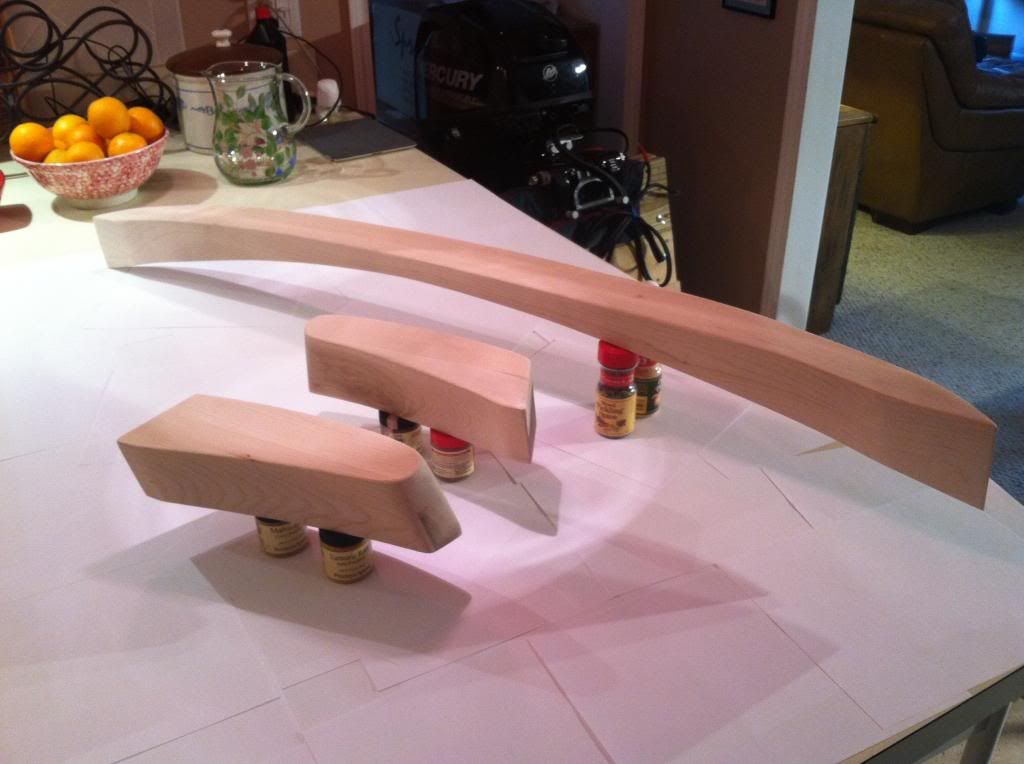
Back to the boat... we marked up the cuts for the board that were needed, I cut them up on the bandsaw, and they were fitted to the boat. The two tail pieces were done today, and are getting the first coat of finish now.


Last edited:

Luke000

Restoration Forum Splash of the Year 2016
Joined
Aug 19, 2013
Messages
346
Next thing that happened in the last few weeks is we ordered a brand new Mercury Marine 20HP outboard with power start, remote steering, and power trim/tilt all the way from California! On Wednesday Santa came a little early this year and left this in the driveway!


I decided to build up a mobile outboard stand out of some left over wood we had, it turned out really well for only having a picture to go off of. It took just under 2 hours to build up. It holds the 115lb engine just fine and easy to move around.


The other thing we did today was to fill up the boat a foot deep with water one last time to check for any remaining leaks, i found one leaky rivit and sealed it up the the G-Flex used earlier in this thread. I also polished the transom supports and rear seats once the boat was drained.


The things we have in the works right now over the next few weeks: We have cushions being made for the two main seats (should be done later this week). Lots of wood pieces are being finished. We ordered paint and primer for the interior so the inside needs final prep and then when I have a free day and warm weather the interior will get painted by myself. After the interior is painted and cured, it will be off to a body shop to have a stripe painted on the exterior hull. Then starts final assembly!!!!
 

Luke000

Restoration Forum Splash of the Year 2016
Joined
Aug 19, 2013
Messages
346
Got the boat all prep'ed and masked, time for primer tomorrow afternoon!


Luke000

Restoration Forum Splash of the Year 2016
Joined
Aug 19, 2013
Messages
346
Got the primer sprayed today, it looks good! The top coat will be a light grey and applied tomorrow.


Last edited:

jbcurt00

Moderator
Staff member
Joined
Oct 25, 2011
Messages
25,111
What primer did you use? Etching primer or something else specifically for bare aluminum?
 

Luke000

Restoration Forum Splash of the Year 2016
Joined
Aug 19, 2013
Messages
346
What primer did you use? Etching primer or something else specifically for bare aluminum?
I used the tuff coat system MP-10, it is a single part, water based primer specifically made for bare aluminum or steel :)
 
Top