1964 Starcraft Bahama Restore

hoffmanuno

Petty Officer 3rd Class
Joined
Jul 23, 2006
Messages
82
Re: Hollow glass stringers?

Re: Hollow glass stringers?

I updated all of my boat pics by transferring them from Facebook to Photobucket and posting the images straight onto my posts instead of links. I hope that makes it easier for you to look at, I know it's easier for me as well.
 

hoffmanuno

Petty Officer 3rd Class
Joined
Jul 23, 2006
Messages
82
Re: Hollow glass stringers?

Re: Hollow glass stringers?

With some help from my buddies I got the top of the boat off.
46d8a253.jpg


I wasn't quite sure if the wood stringers that go from port to starboard were used for structural support boys forms for the fiberglass late over the top of them which were the actual support
77980f11.jpg


So I decided to start replacing the Rottenwood stringers just in case.
0eff81ec.jpg


I also decided since I had a year driven steering system for a boat laying around I would install it in place of the old original cable system. It's a little long but if I wrap it around the other side it should fit perfectly.
fea6ae7a.jpg
 

Yacht Dr.

Vice Admiral
Joined
Feb 26, 2005
Messages
5,581
Re: Hollow glass stringers?

Re: Hollow glass stringers?

It kinda sorta looks like the wood was just for form and not part of the structural value of the boat.

Thats some heavy duty woving glass ..

As far as your 'nest'.. sorry but anything left in them wont be an issue after you foam it..consider them Filler ;) .

YD.
 

hoffmanuno

Petty Officer 3rd Class
Joined
Jul 23, 2006
Messages
82
Re: Hollow glass stringers?

Re: Hollow glass stringers?

It kinda sorta looks like the wood was just for form and not part of the structural value of the boat.

Thats some heavy duty woving glass ..

As far as your 'nest'.. sorry but anything left in them wont be an issue after you foam it..consider them Filler ;) .

YD.

So I'm not crazy? those wood stringers really are just for forms? I've agonized for the last week whether or not to cut into them to because they are so strong I can jump on them and they don't crack or give. It would be so much easier if I didn't have to cut into them at all. I've only replaced the back one that was clearly just tabbed in without fiberglass along the drain well and I think only there for the purpose of forming the drain well. I've already glued that new stringer in with PL Super Adhesive along the bottom and now Im going to totally enclose it in fiberglass instead of just tabbing it in. I wanted to make sure it never rotted.

So maybe the boards were just there for forming the actual fiberglass connection and then nailing in the floor to be glassed over like I thought? If everyone agrees that the wood doesn't need to be replaced I'll just do spot repairs on the fiberglass stringers and use weights to hold down the new floor while the PL super adhesive bonds the floor down until its ready to glass in.

So what's everybody think? Is the glass too heavy and reinforced to bother cutting into to replace the uncovered wood stringers that float around in them or did they actually serve a structural purpose and need to be replaced?
 

Yacht Dr.

Vice Admiral
Joined
Feb 26, 2005
Messages
5,581
Re: Hollow glass stringers?

Re: Hollow glass stringers?

Im just saying that it Looks like the wood is just for form..and not function in the integrity of the hull structure.

Thats a LOT of Friggin glass that you have there ! LOL !

If all that glass is put on correctly then you have a tank thats Tanked ! .. just my opinion :D .

YD.
 

hoffmanuno

Petty Officer 3rd Class
Joined
Jul 23, 2006
Messages
82
Re: Hollow glass stringers?

Re: Hollow glass stringers?

Im just saying that it Looks like the wood is just for form..and not function in the integrity of the hull structure.

Thats a LOT of Friggin glass that you have there ! LOL !

If all that glass is put on correctly then you have a tank thats Tanked ! .. just my opinion :D .

YD.

LOL. Ya, I'm starting to think that this fiberglass is the thickest ever used in boat construction. I've only seen one boat with stringers exactly like this and it was a 1963 model of similar size. That persons stringers had rotted and been damaged from I believe the rotten deck being abused. He just repaired the bad sections, removed the old rotten wood, filled the cavities with foam, and reglassed them. After checking in with some of the guys at fiberglassics who've restored a lot of these old style boats I've come to the conclusion that my boat's stringers are in 95% new condition and that just replacing the stringer near the transom and spot repairing some of the stringers is all I need to do.

Now that I feel comfortable going forward I can start making progress on the restoration instead of ***** footing around the last week on whether or not to rip into the stringers. Leave it to me to restore the one boat with a barely used stringer system that leaves most people scratching their heads in wonder. lol
 

hoffmanuno

Petty Officer 3rd Class
Joined
Jul 23, 2006
Messages
82
Re: Hollow glass stringers?

Re: Hollow glass stringers?

Well, I finally made some major progress on the boat this last week. Unfortunately, however, my laptop crashed out again so I'll have to take it apart again and fix the graphics card so I can keep posting on it. So my buddy helped me to get the forms set up on the boat for the Nida-Bond transom pour on Saturday. We picked up the marine grade 1/2ich sheet of plywood from Menards and found that it was sandwiched between a 1/2 inch sheet of chip board and a 1/4 inch sheet of plywood along with some fiberboard supports. This wood was perfect to use to make our transom supports for the inside and outside of the transom. First I ground down the edges of the outside transom and cutout and then cleaned up the cavity and skin with a wire brush and acetone. Then we cut pvc spacers to 1&3/8 inch, stuck them to the inside of the transom patch with resin, and then filled them with Nida-bond. They stuck perfectly and we figured that the nida-bond would bond well to the pvc. Then I just clamped the edges together and put on two layers of matting and resin to hold it in.

Here are the spacers inside the transom.
b3c67223.jpg

63e5201e.jpg


The transom glassed in.
18ccfbe1.jpg


Oh, and you can't buy MEKP hardener locally in large quantities anymore, so if you do this order it online and save yourself 8 trips to all the Walmarts and Menards selling it for $2 for .8 ounces. It'll also save you about $40-50. Time was a factor, so I bit the bullet and bought all the little ones while my buddy could help me. You live and learn I guess.
12477bfb.jpg
 

hoffmanuno

Petty Officer 3rd Class
Joined
Jul 23, 2006
Messages
82
Re: Hollow glass stringers?

Re: Hollow glass stringers?

Now we used the leftover wood from the Marine grade plywood purchase to make almost every bit of the bracing for the transom skins. For $63, the marine plywood purchase isn't seeming so bad now considering the quality of it and the fact that I'm even going to use the chipboard as a test sheet to fit in my floor and then use it as a template to cut my floor out of the marine grade sheet.
2c0bc2d6.jpg

3bcfbbc6.jpg

1e78293b.jpg

e69a6ba6.jpg

e53003e8.jpg


Next I made a bucket mixer out of some scrap metal in the garage. I made it long enough so that I didn't have to bend over while holding it, just held it right at waist level. It worked amazingly well and stirred it up like a blender does a shake.
34a9ca44.jpg
 

hoffmanuno

Petty Officer 3rd Class
Joined
Jul 23, 2006
Messages
82
Re: Hollow glass stringers?

Re: Hollow glass stringers?

There are no pictures of the Nida-bond pour because there were only two of us and we had to hustle. We used a cut up traffic cone as a funnel. he held it in the sides of the transom while I stood in the boat and poured it in. We also did the side stringers and filled them the same way with my buddy sliding the funnel up from the outside of the boat slowly as I poured from the inside. It heated up slowly, but within 45 minutes it was starting to really burn. Here's what the top looked like when I took it off 3 hours after the original pour when it was cooling down. I left the rest of the form on for another 2 hours until it cooled significantly and then pulled it off.

We only had one air pocket in the middle. It was probably from pouring from both sides. We could have eliminated this with putting a small air hole in the rubber shower drain floor covering we used to form the top and curved wings. We tried to use a palm sander to vibrate it but that did nothing and we gave up after a minute of trying.
1a381d1e.jpg

188bd1ed.jpg

cde79901.jpg


We had a small amount left in the bottom of the bucket and I tried to use it in the bow for the support. I never thought we'd have enough to do it and so I had to throw in some fiberglass matting to form a trench to pour it in at the last minute. It didn't work all that well, but I think I might just resin the matting on and then fill up the voids with fiber bondo. It's so strong I'd hate to waste it.
91eb2b4a.jpg


Here's the inside of the boat with the stringers along the sides poured of solid Nida-bond from Bow to transom. It should be amazingly strong now. I prepped the pour with acetone and I think that made a big difference in how the nidabond reacted with and bonded to the existing boat material.
46d8a253.jpg
 

hoffmanuno

Petty Officer 3rd Class
Joined
Jul 23, 2006
Messages
82
Re: Hollow glass stringers?

Re: Hollow glass stringers?

Whoops! That pic of the boat above was before the transom and side stringer replacement. Here is the after where you can see the nida bond poured in along the sides from bow to transom.
16ddac53.jpg
 

hoffmanuno

Petty Officer 3rd Class
Joined
Jul 23, 2006
Messages
82
Re: Hollow glass stringers?

Re: Hollow glass stringers?

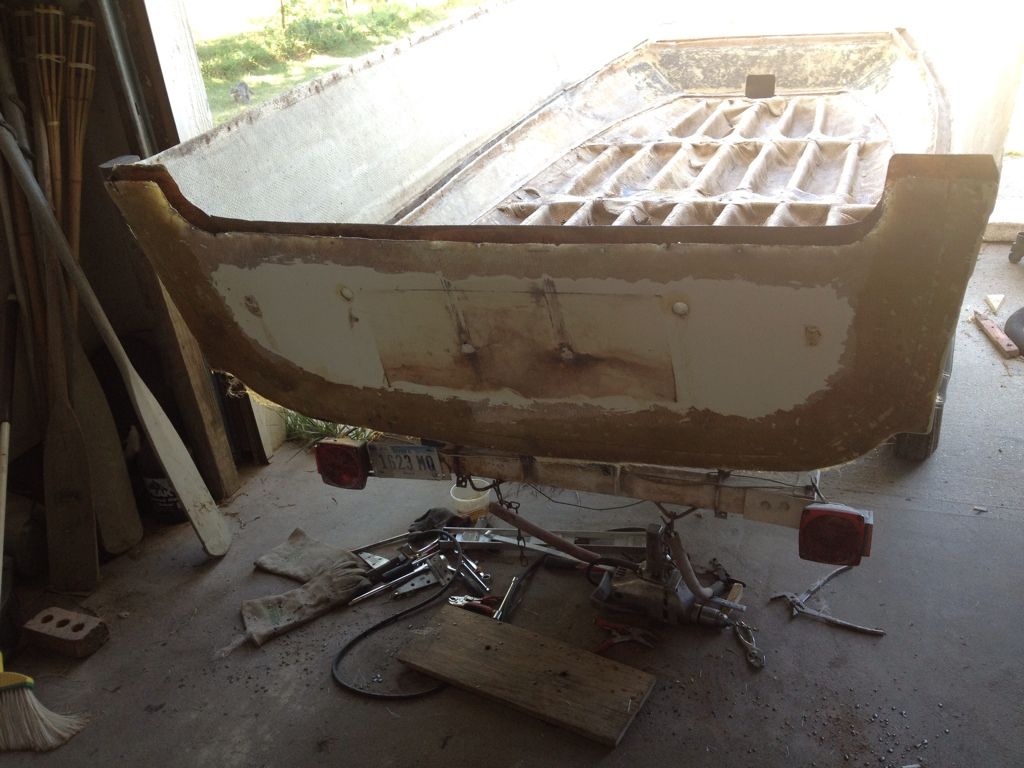
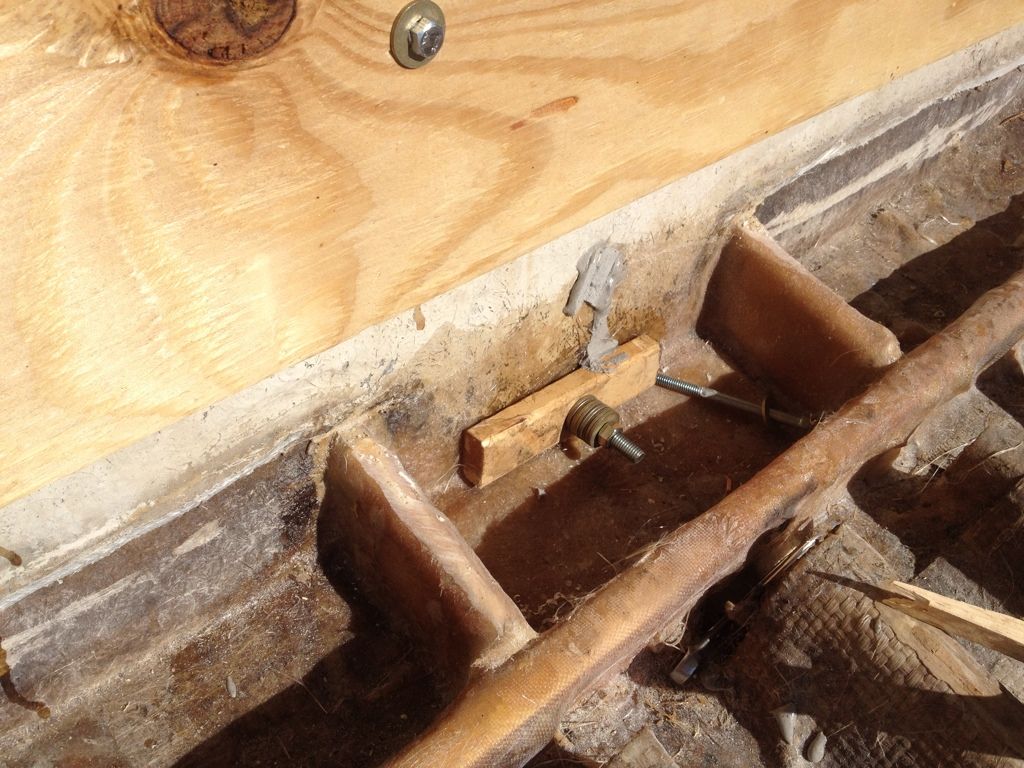
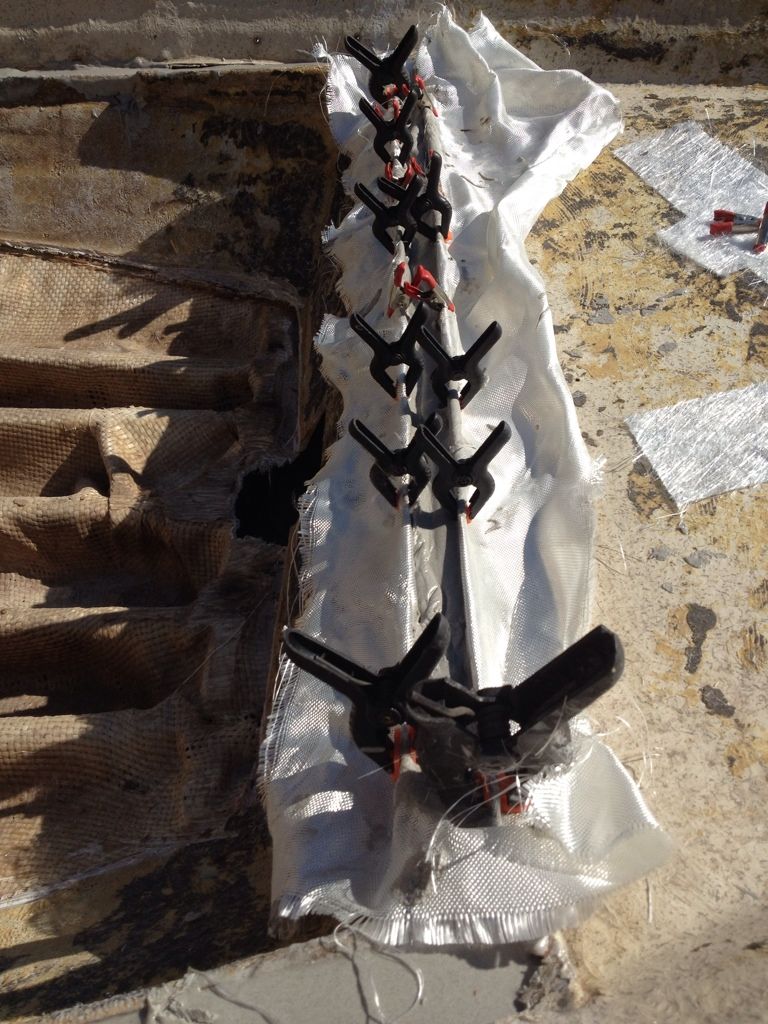
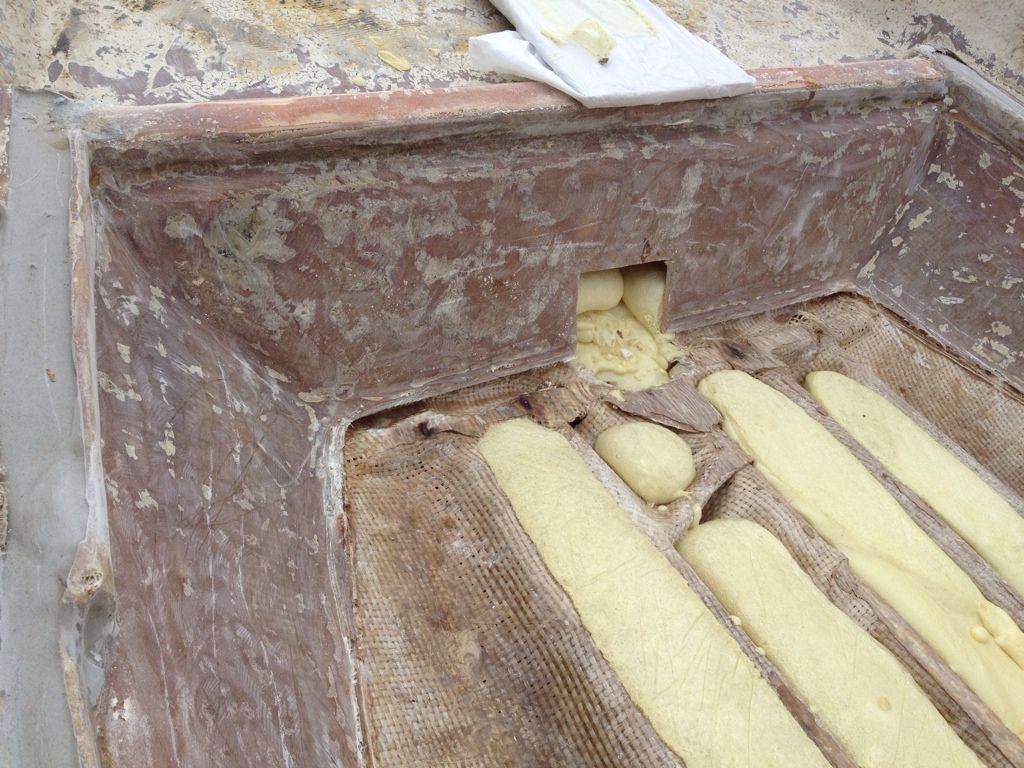
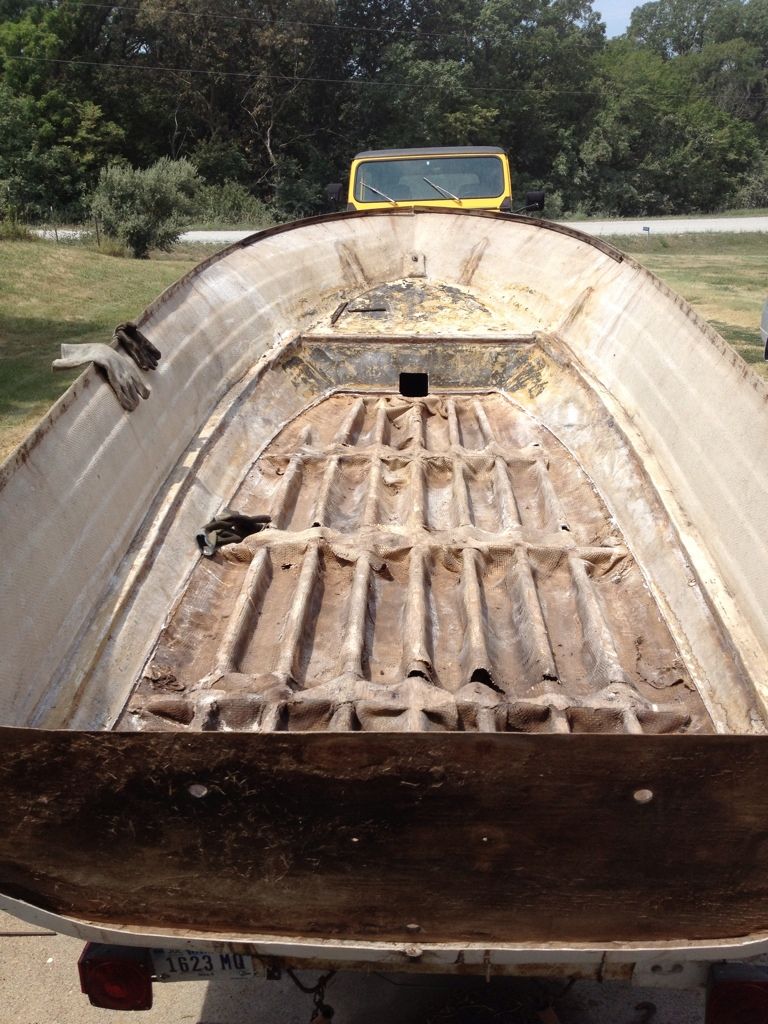
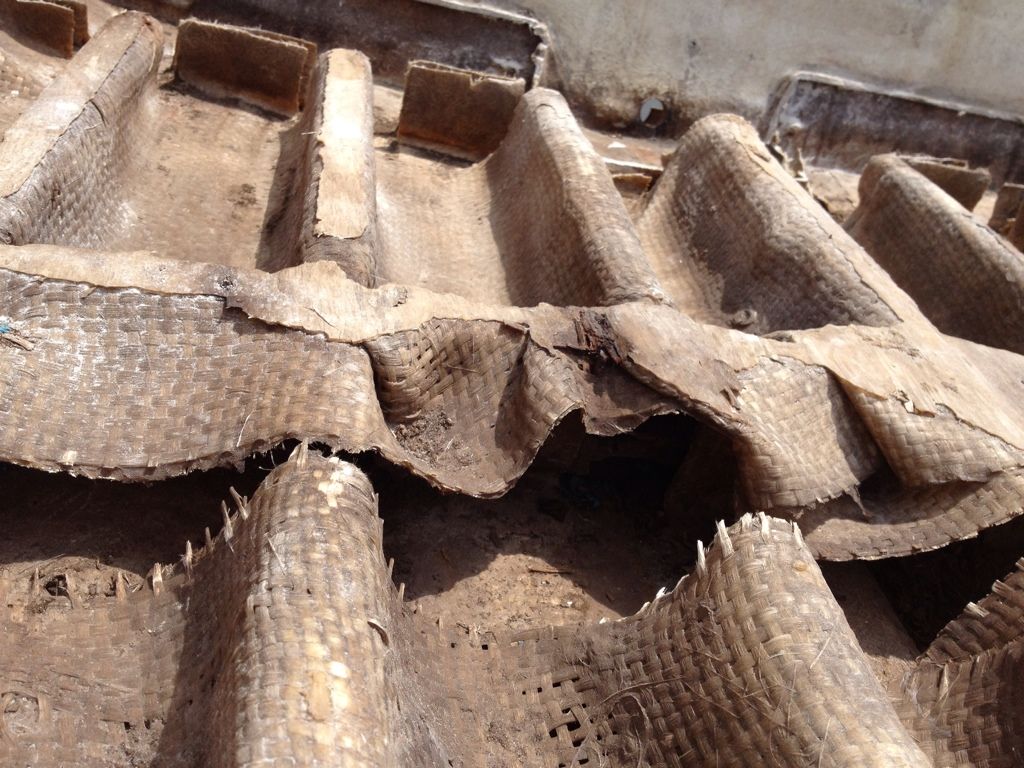
This week has been slow going. I took the braces I used to pour the transom out, ground off any of the excess nida-bond, rough shaped the areas, and then filled in any low spots and the wings of the transom with bondo glass. The transom is now amazingly solid. The nida bond was so strong and bonded so well to the side stringers on the boat as well that it stiffened up the sides of the boat dramatically. Before there was some flex and give to the side but now you can move the entire boat with one finger and it moves as one. The boat was never in any structural danger, outside of the transom, because the hollow glass stringers kept the hull strong and straight, but now it's so much more stiff. I have a feeling it will be even stronger once the stringers and floor are glassed in

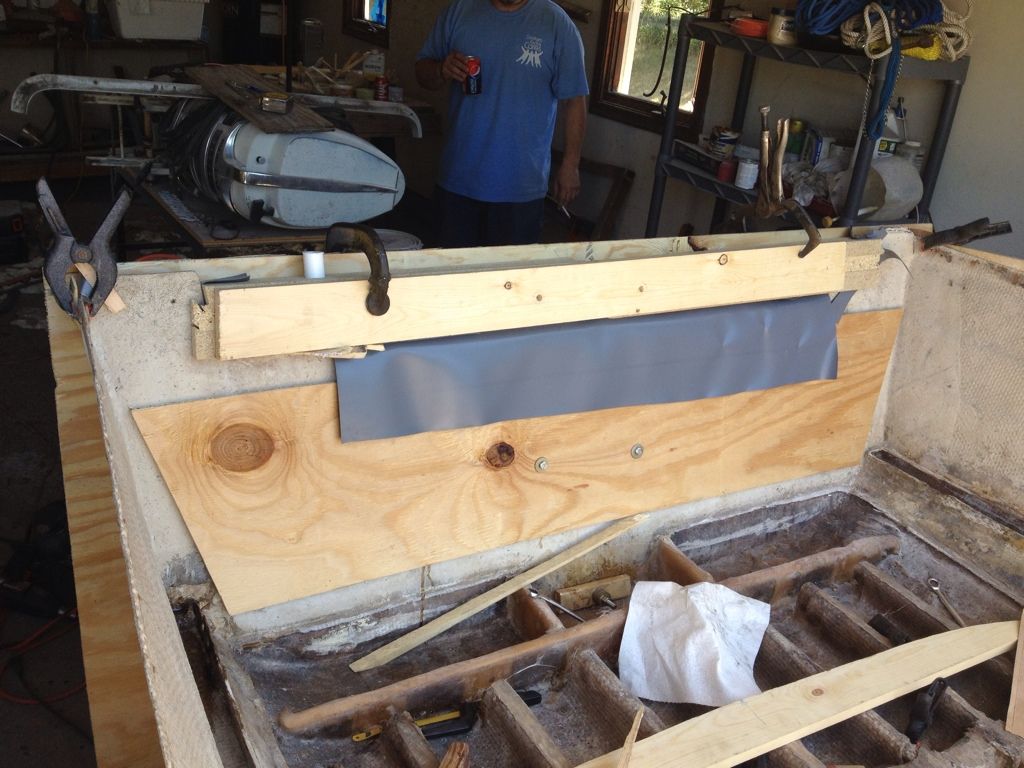
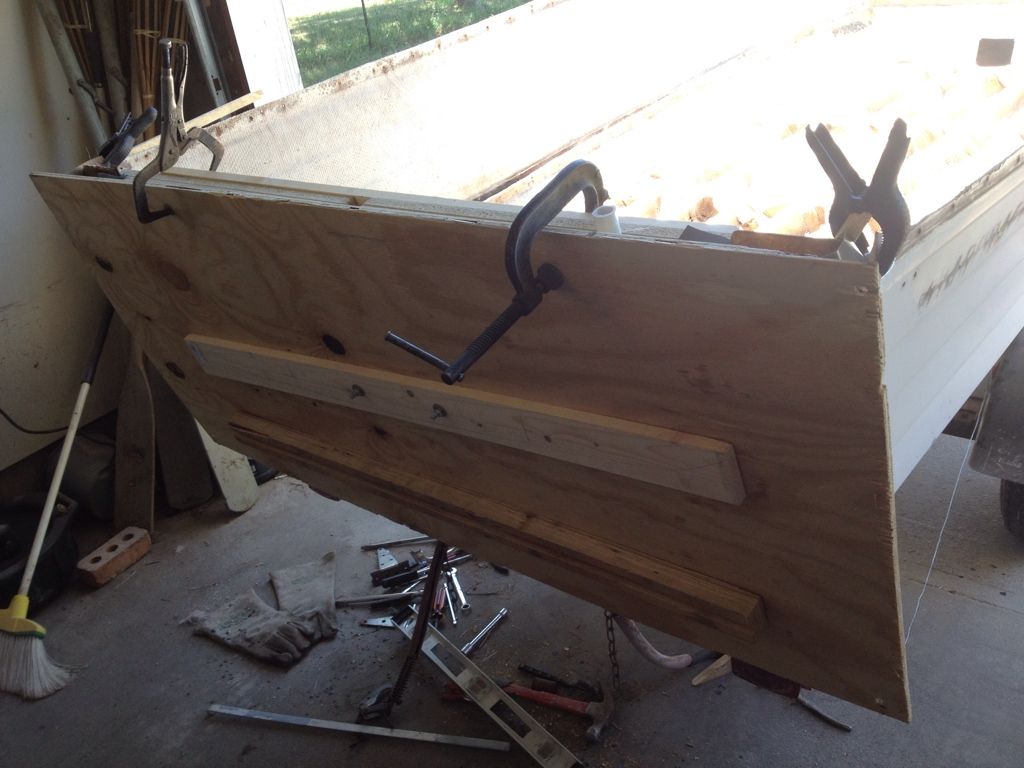
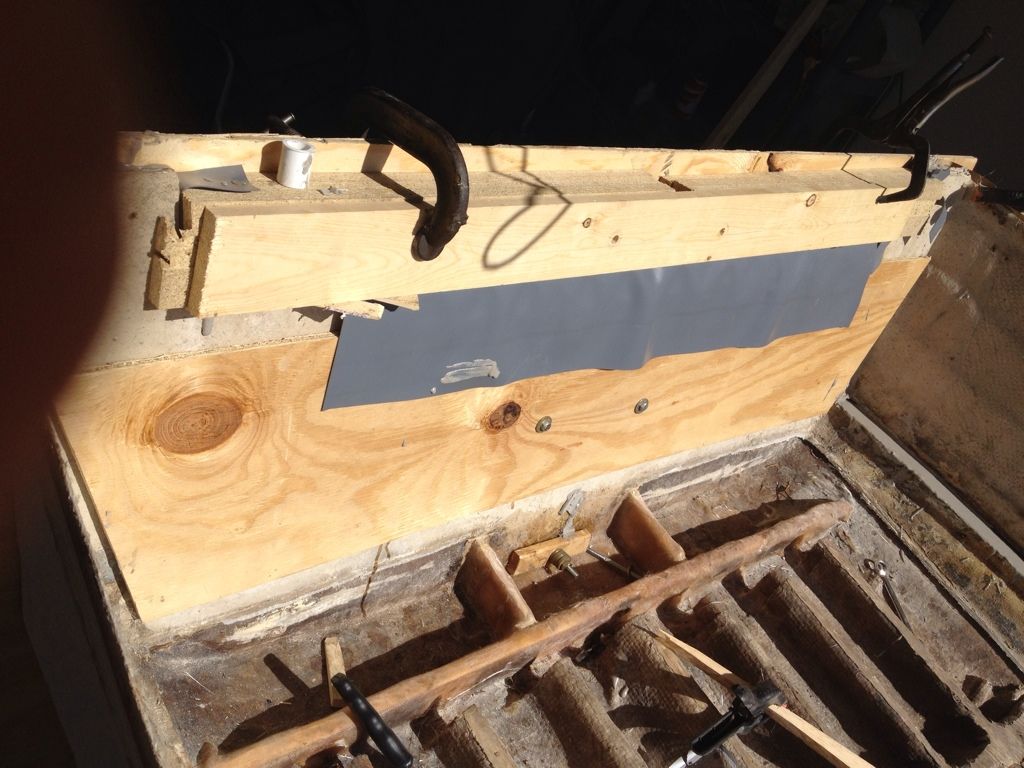
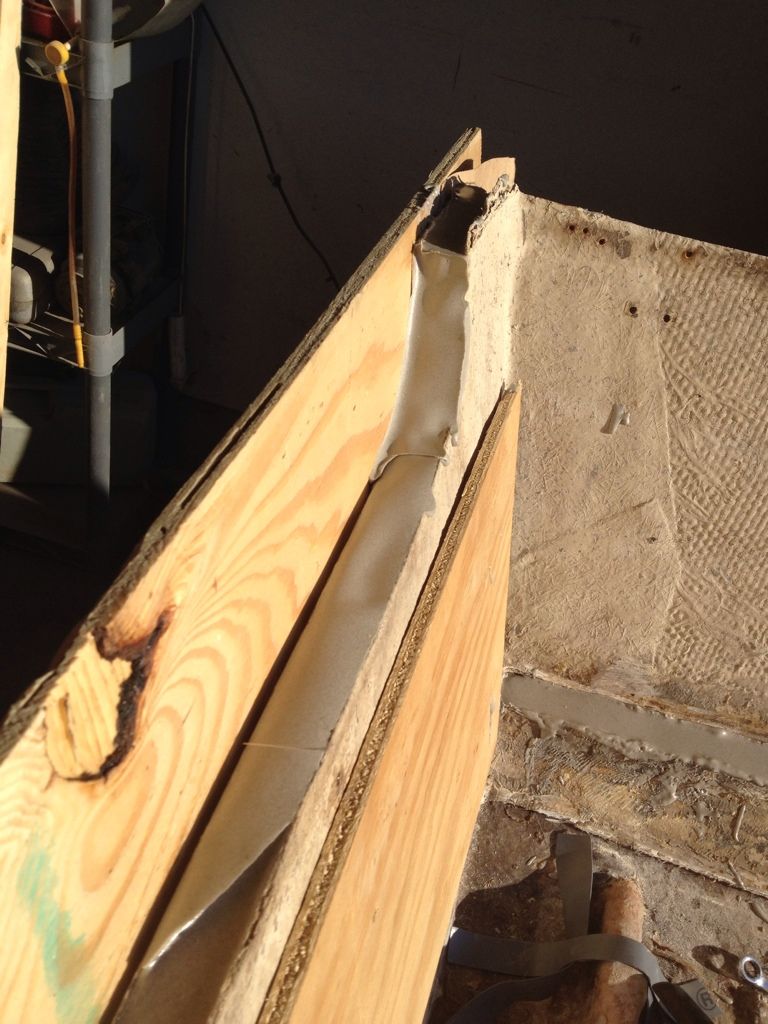
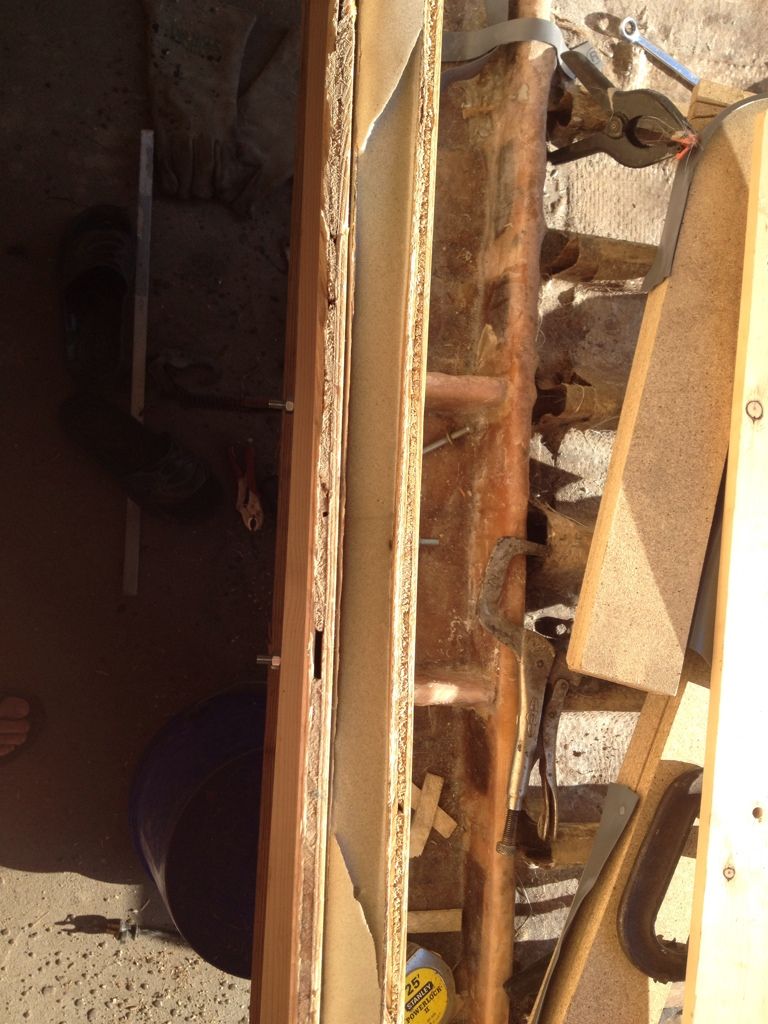
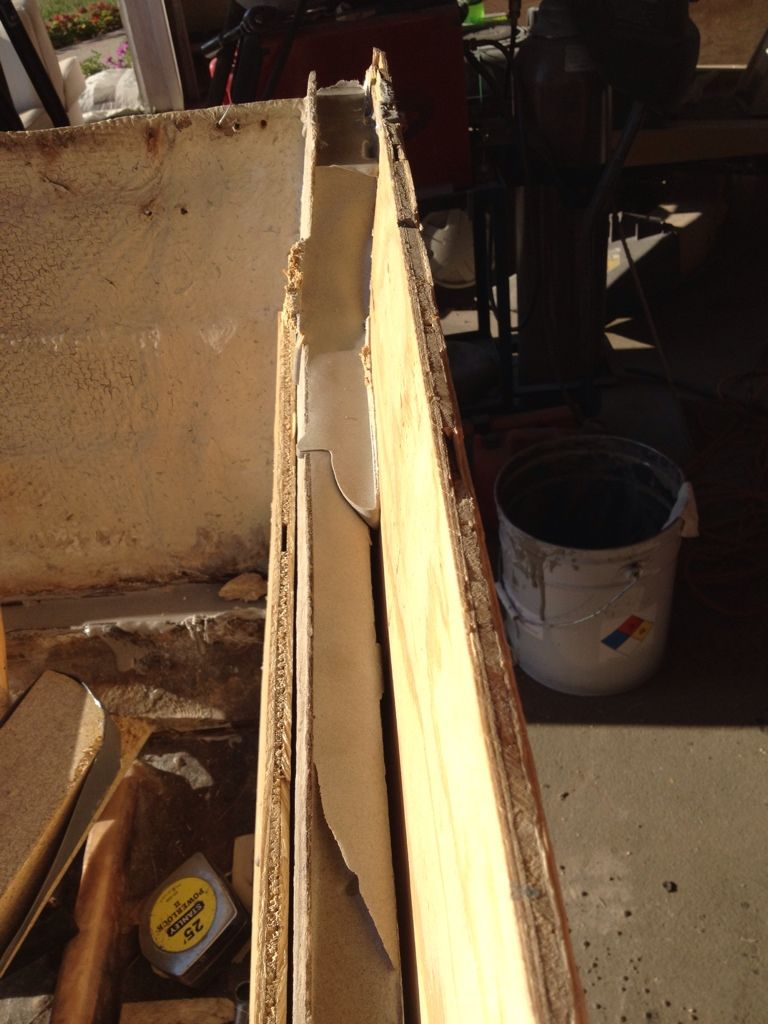
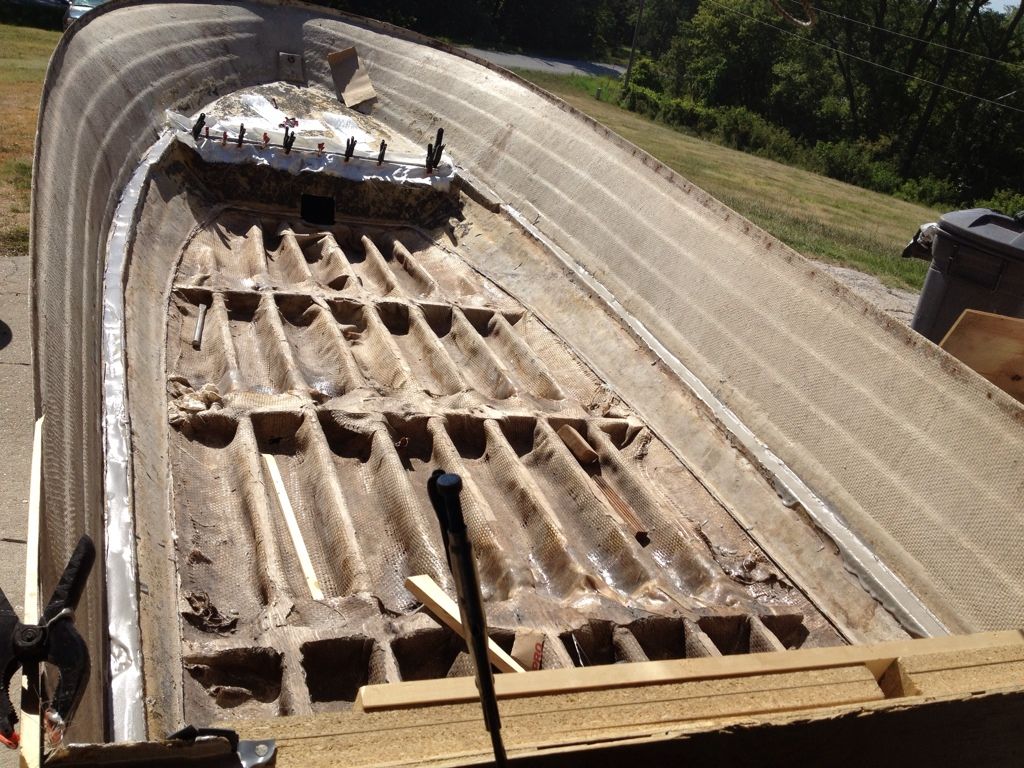
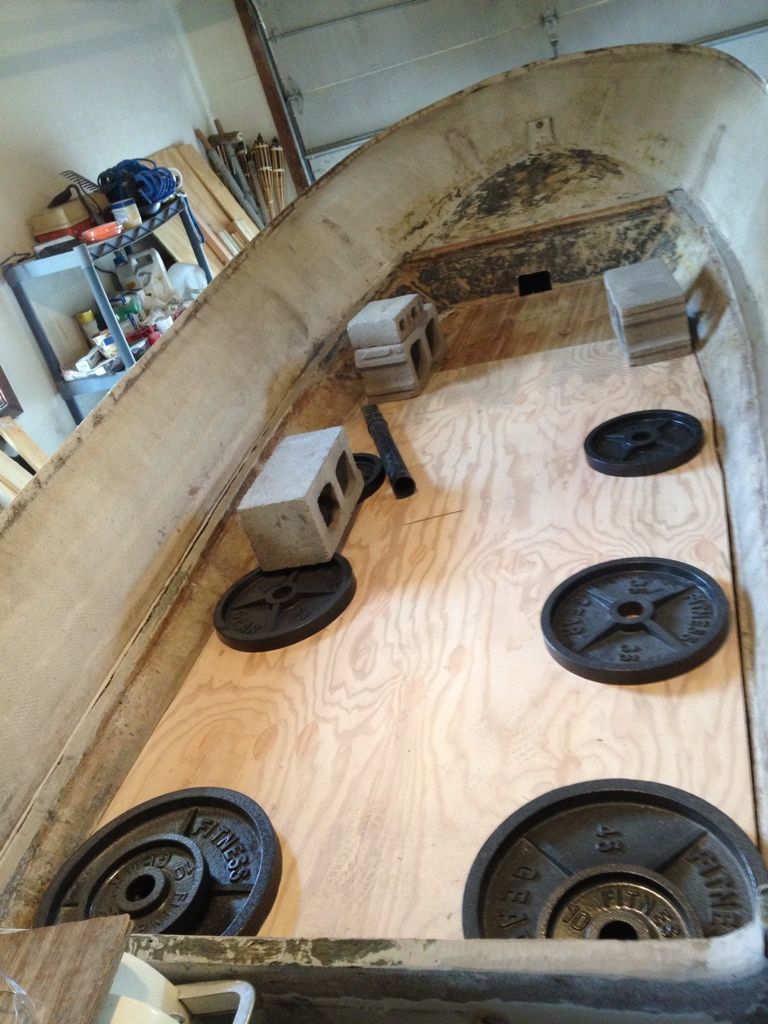
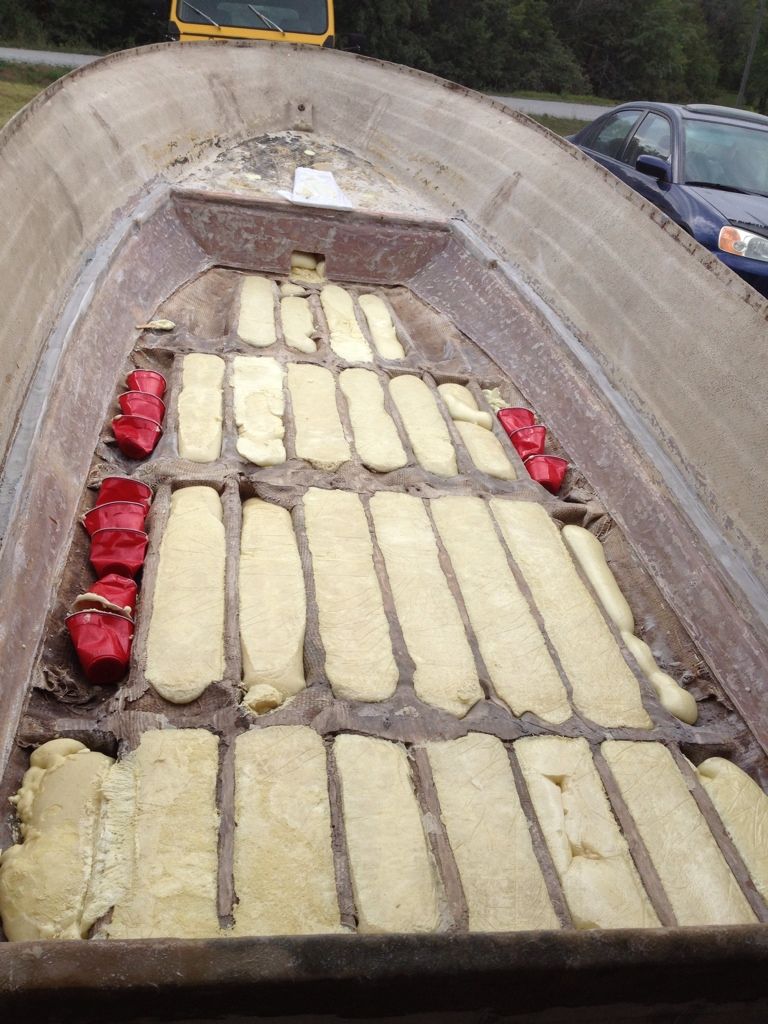
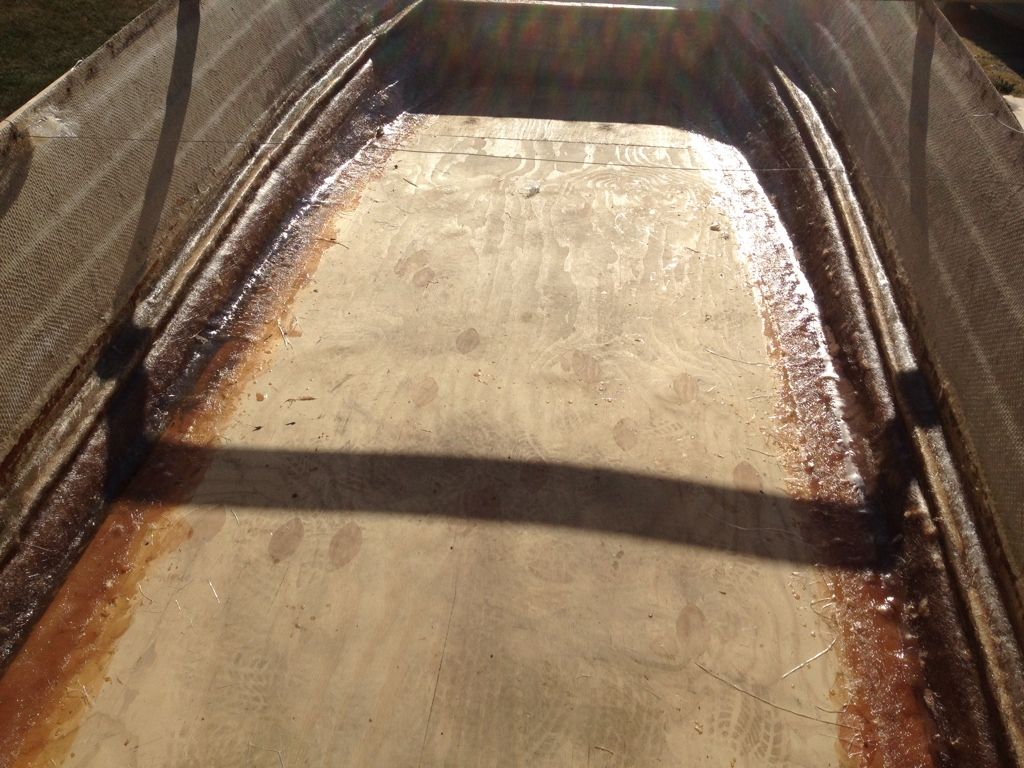
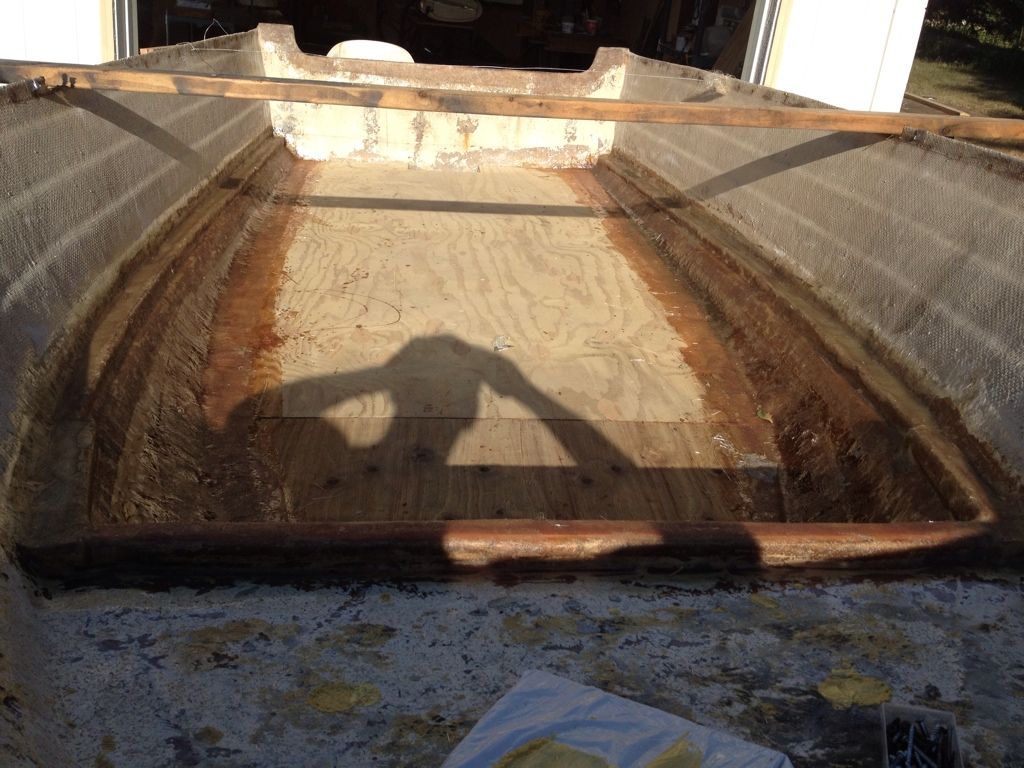
I took the crappily poured nida-bond front bow stringer out. I should have just poured the nida bond in the side stringers and made sure to over top them, but they're fine and it's all good. I just cut a 2x2 board to fit the area where the plywood was, covered it in a layer of resin and matting, and then shoved it in place. It fit like a glove. As soon as I get the area below the floor foamed in and the deck glued down I will begin glassing in everything uptop. I cut the floor boards up for the deck and then laid them down in the boat and weighed them down in the hopes that they will conform to the shape of the bottom of the boat before I put a layer of matting on the underneath side and then glue it down. I don't want to screw them down if I don't have to, but it looks like the edges just won't quite sit all the way down no matter how much weight I put on.

72cc7527.jpg


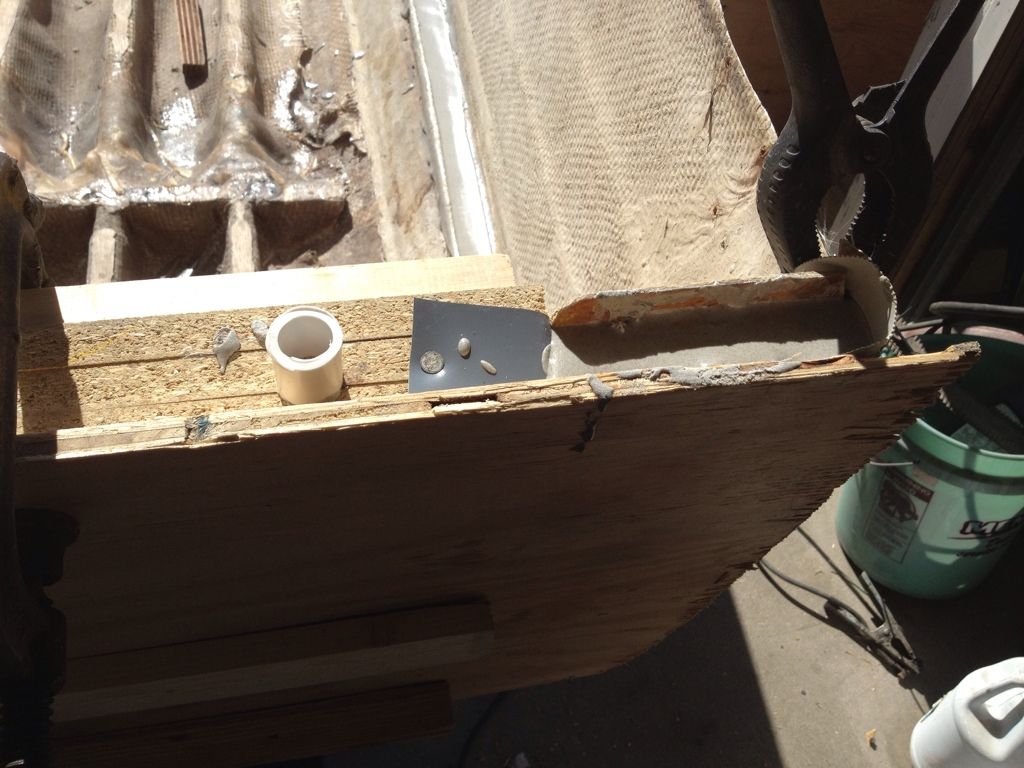
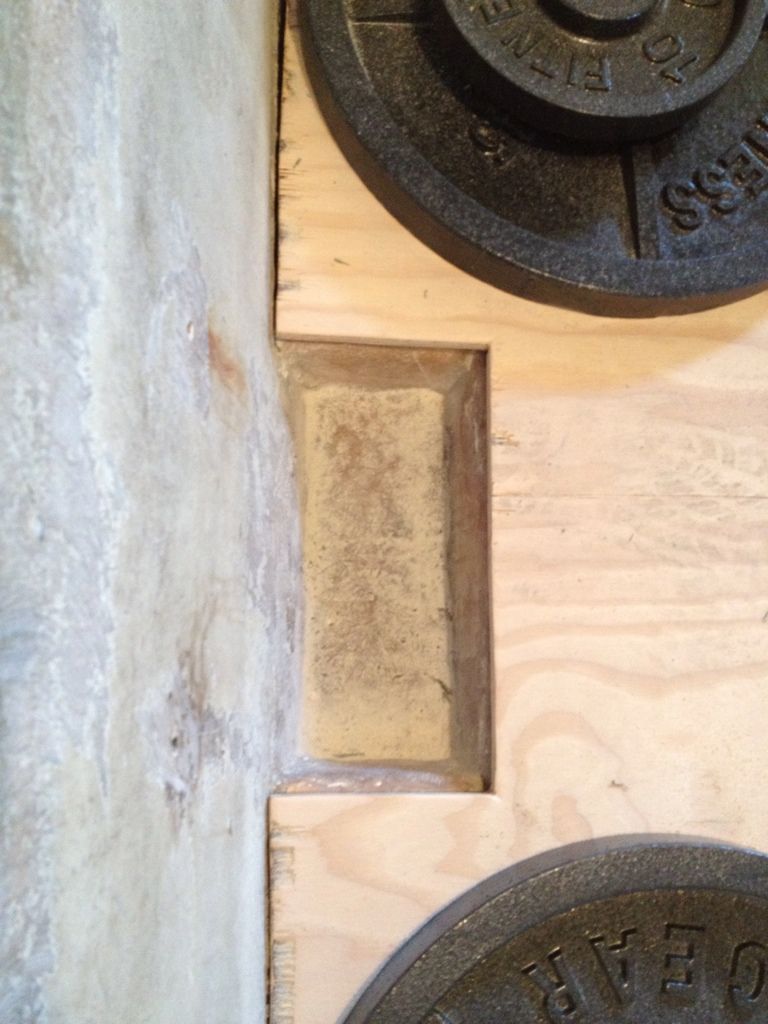
I do think I did a good job of cutting out the drain well area. I'm proud of that.
Measure 4 times cut once. lol
2a7f9f31.jpg
 

Woodonglass

Supreme Mariner
Joined
Dec 29, 2009
Messages
25,929
Re: Hollow glass stringers?

Re: Hollow glass stringers?

Have you measured your top dimensions to make sure the hull has not flexed. If it is not the same as before the top cap will not fit back on. The Nida bond poured around the outside might stiffen the hull, but it might also not allow the top cap to pull in and allow the top cap to fit. That could be a major issue. Especially now that the deck is cut and installed.
 

hoffmanuno

Petty Officer 3rd Class
Joined
Jul 23, 2006
Messages
82
Re: Hollow glass stringers?

Re: Hollow glass stringers?

Have you measured your top dimensions to make sure the hull has not flexed. If it is not the same as before the top cap will not fit back on. The Nida bond poured around the outside might stiffen the hull, but it might also not allow the top cap to pull in and allow the top cap to fit. That could be a major issue. Especially now that the deck is cut and installed.

I measured the transom tops and it was within the 60 inches I believe. I was thinking about test fitting the cap before I put in the deck, but I'm pretty much all alone working on it until the weekends. I know the floor has been solid because of all the fiberglass laid down into it during the factory has held up so well. I'll make sure to try and take some measurements from the cap and compare it to the top of the hull just to be sure. That's been in the back of my mind, but I was hoping that even if it was a little off on the sides it would squeeze back in. I'll check after work tonight and post about it. I'm assuming it's normal to be a little out off on the sides though due to flex, right?
 

hoffmanuno

Petty Officer 3rd Class
Joined
Jul 23, 2006
Messages
82
Re: Hollow glass stringers?

Re: Hollow glass stringers?

Oh, and I haven't installed the deck yet, I just cut it and layed it on top of the stringers with weights to get the wood to conform to the proper shape before I glassed a layer of matting on the bottom and glued it to the stringers so I should have a little more room to adjust yet if I need to brace it together a little more.
 

North Beach

Commander
Joined
Sep 29, 2008
Messages
2,022
Re: Hollow glass stringers?

Re: Hollow glass stringers?

hoffman, I'm no glass man. My deal is aluminum. But I just stumbled across this thread and thought I'd throw what I know your way.

Here's the glass section out of the 64 brochure. It shows the wooden longitudinal stringers and transverse braces that form what Starcraft calls the rib and frame skeleton. They talk about how it only fastens to the chine and does not rest on the bottom. Also they glassed in the Marine Grade plywood floor creating an AIR Chamber. I don't know how important this stuff is so maybe one of the glass guys can look at this and chime in. They do talk about how important all this stuff is in making the hull strong. Maybe it's all just marketing hype?

64Glass.jpg


I guess all the wood just rotted out and completely fell apart?
 
Last edited:

hoffmanuno

Petty Officer 3rd Class
Joined
Jul 23, 2006
Messages
82
Re: 1964 Starcraft Bahama Restore

Well that explains a lot. What little wood I found on this boat was rotted out. There wasn't even any wood left of the deck material. Except for the bow, where all the wood was in relatively decent condition but I replaced it anyway. That helps a lot thanks Nort Beach!
 

hoffmanuno

Petty Officer 3rd Class
Joined
Jul 23, 2006
Messages
82
Re: 1964 Starcraft Bahama Restore

Four feet up from the transom it's about 3 inches too wide at the top of the hull. About four or 5 feet back from the bow it's about 5 inches too wide. It still flexes a lot up top and I remember it being really tight and popping out when I took the cap off. I'll be sure to put a brace and those two locations to get it at about the right width before I Glasin the floor. That should make sure the cap goes on fairly easily.
 

hoffmanuno

Petty Officer 3rd Class
Joined
Jul 23, 2006
Messages
82
Re: 1964 Starcraft Bahama Restore

So I got the expanding foam poured in the deck floor and the . 2 gallons of it was just perfect to fill almost all the space between the stringers and the bow. I did chop up some of the foam under the cap and shove it in the bow through the hole though to take up some of the volume. I figured the foam glued to the cap was better off inside the bow where could do more good. I had some leftover foam in little red cups I used to mix it and there was a little foam left in each cup after I was done so I shoved them in the empty spaces along the sides of the hull and then glued the floor over it. Now the boat will always be little red cup ready. Lol
6bd8842b.jpg


The way we got the foam to level off so perfect between the stringers was that we cut a couple of boards the exact width of the stringer, covered them in trash bags, poured in the foam, and then placed the bag covered boards over the stringer spaces and stood on them for a couple of minutes until the foam was done expanding. Then we just ripped them back off and they were perfect!
2f8c97bb.jpg


I drilled three holes in the bow for the foam and it worked out pretty well.
6bd8842b.jpg


We weighed the boat floor down with weights from my weight set breaks a battery box and about eight landscape bricks we had laying around the house. They held the flooring in place while the PLM super adhesive cured. We tried putting in three screws along the very edges to suck the floor in along the inner edges of the hull but they could not suck the floor in to the fiberglass stringers so we gave up. The floor will just be about a quarter inch or so higher right along the edge of the hull. I glassed in the edges and use peanut butter to fill the voids. I'll take pictures tomorrow and post them.
 

Woodonglass

Supreme Mariner
Joined
Dec 29, 2009
Messages
25,929
Re: 1964 Starcraft Bahama Restore

I really hope you measured the top of the hull before you attached the deck. There have been several guys that did not and they were not successful in getting the top cap back on the boat. It is critical. the hull will not flex as much as you think once the deck is glued in. Good luck to you.
 

hoffmanuno

Petty Officer 3rd Class
Joined
Jul 23, 2006
Messages
82
Re: 1964 Starcraft Bahama Restore

Don't worry Woodglass I did. I braced the top near the bow with the notched 2 x 4 and in the rear we ran a wire through the screw holes between two boards. We sucked it into approximately within an inch of where it's supposed to go. I actually noticed that after the fiberglass dried today the tops got closer together and were under no tension practically.
d14b7936.jpg

65e172cc.jpg

a06fce55.jpg

20bb3083.jpg
 
Top