1968 Starcraft Jupiter - Rebuild

Status
Not open for further replies.

InMotion

Commander
Joined
Nov 3, 2011
Messages
2,080
Re: 1968 Starcraft Jupiter - Rebuild

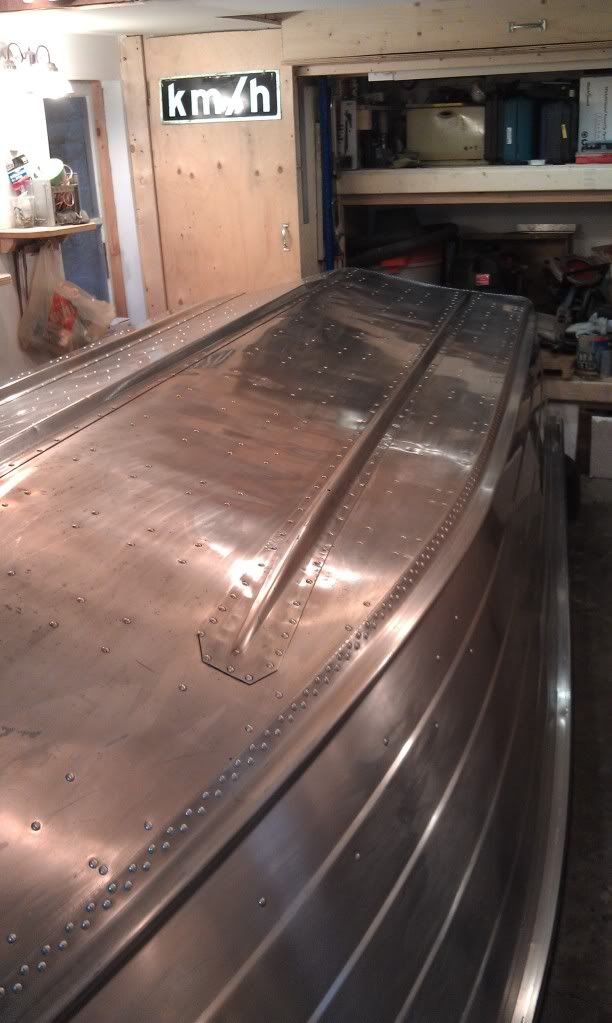
I made a decision on how far I am going to take the hull and sides regarding the "shine factor'... but first... I decided to take a quick step back and do a quick sand of the hull to really clean off all the crude that I was trying to polish out. Using 400, 600 1000 and 1500 sandpaper, sanded what I had polished. :facepalm: It only took about 3 hours... and then re-polished some of it before I ran out of time.

I felt it was the right thing to do as I had just kinda missed the step. It didn't clean everything up, but it is good enough for me as really, no one is going to be seeing the hull unless they go way out of their way. The sides are going to just be polished with exeption of where the old rub rail was and I am just going to use some 1500 grit sand paper to smooth markes it made and then polish it up

IMAG0211.jpg


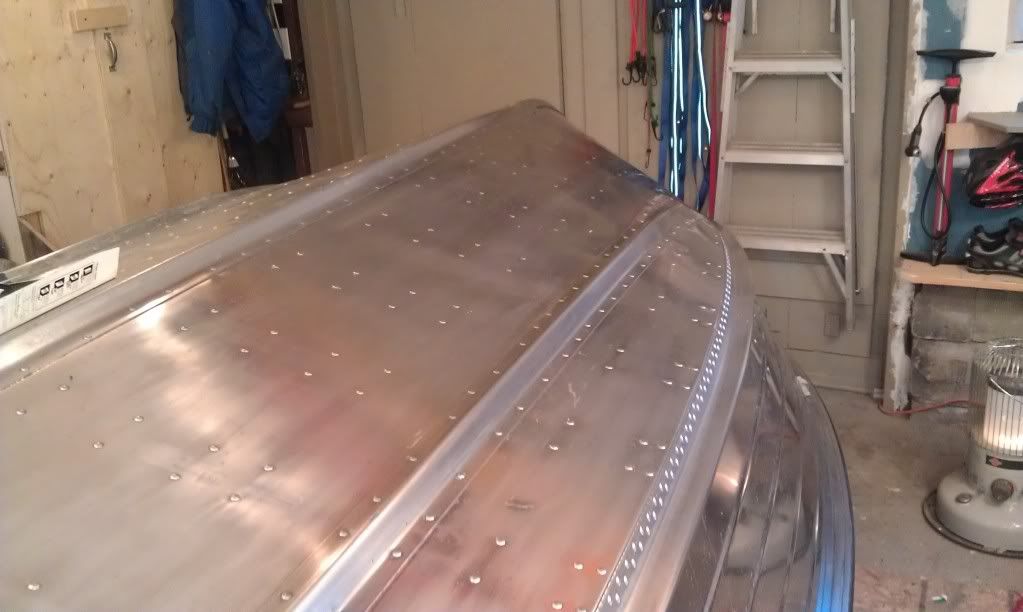
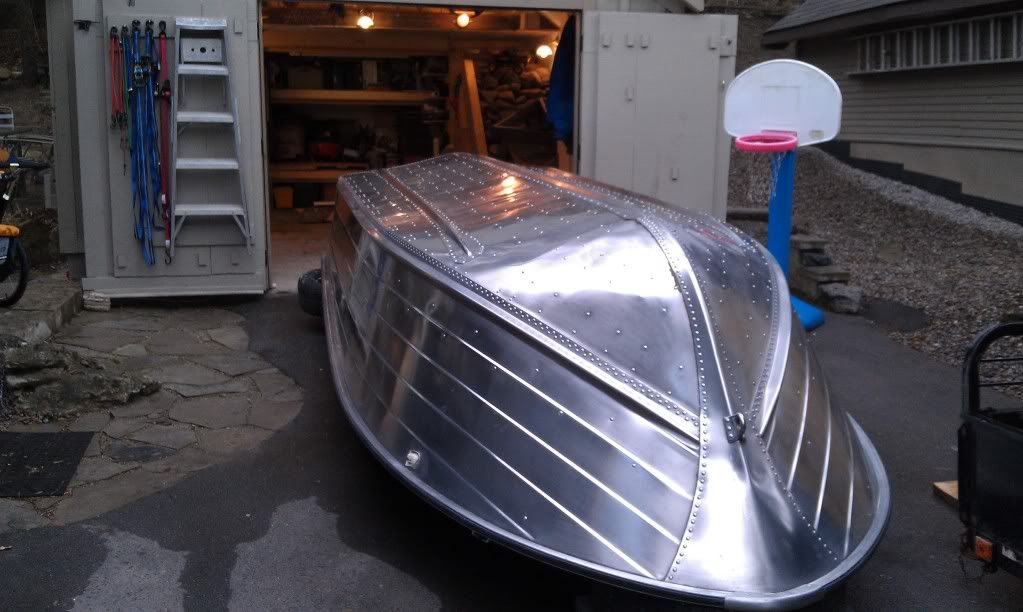
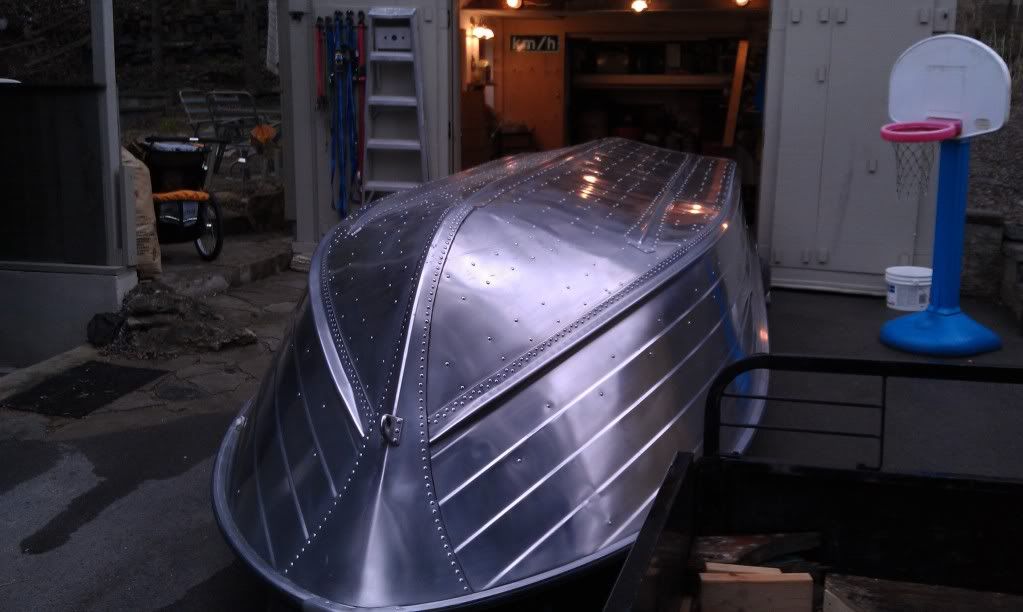
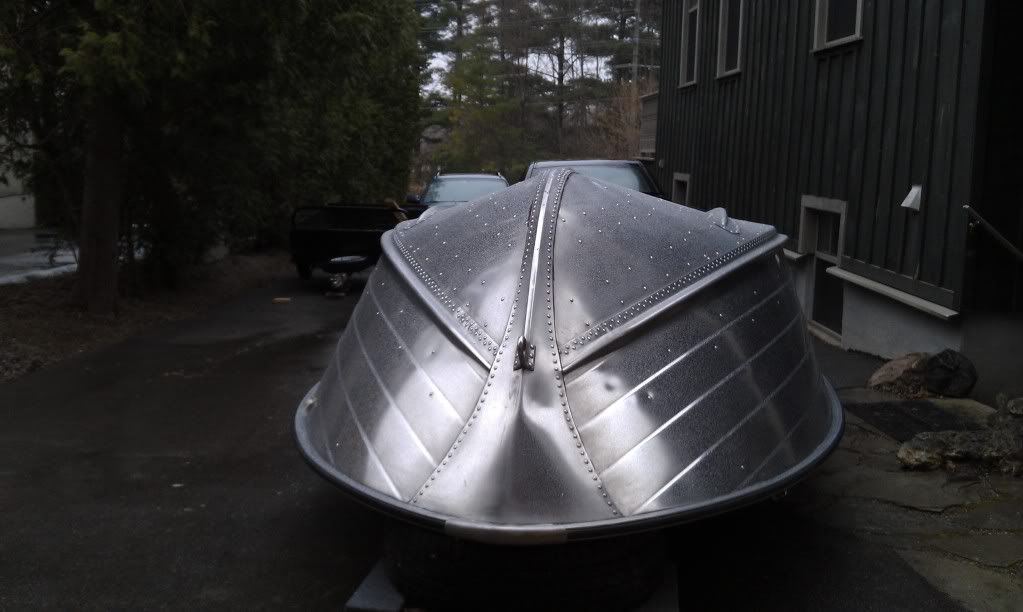
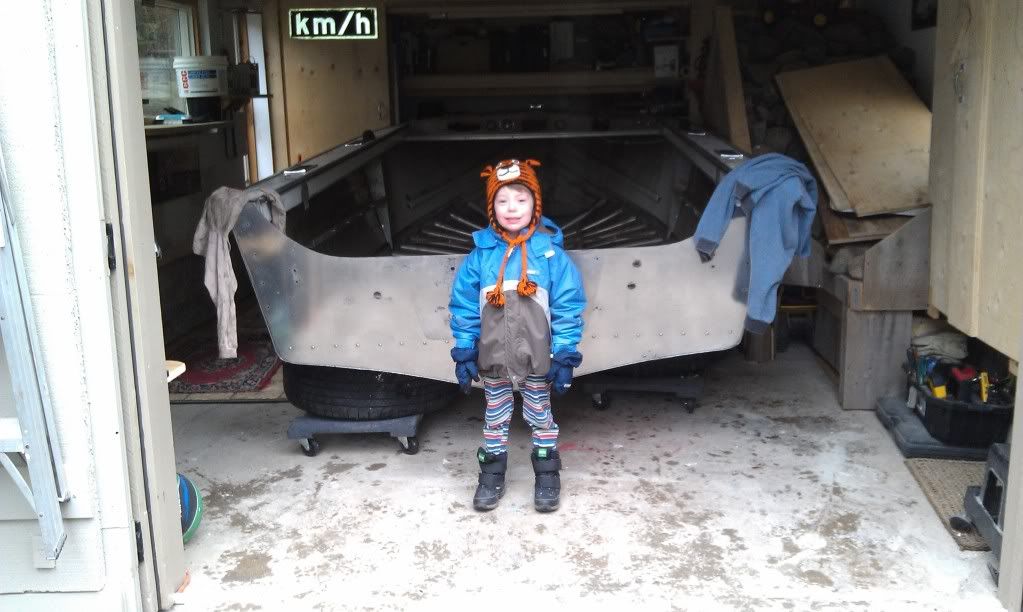
So... this is the level of shine that I am going to take it to... (only the left side of the hull is actually polished in that photo..)

IMAG0214.jpg


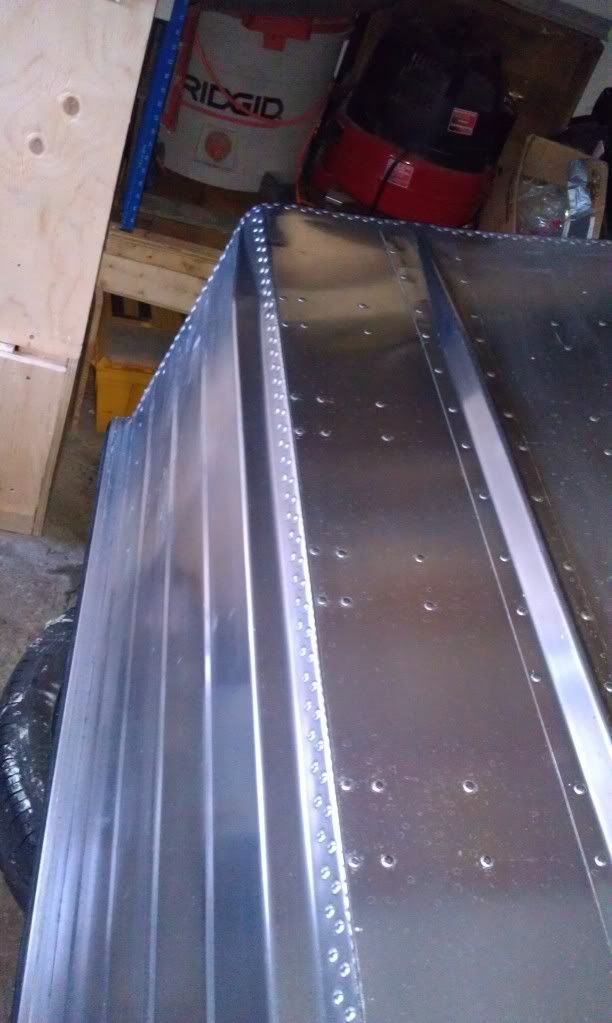
Not sure if the picture really does it justice, but I feel it is enough to look nice, but not enough that the fish or myself will be able to shave with! Kind of a low gloss satin finish. So I have an hour or so of polishing to do and then sand the other half of the boat and polish. Then... it's flip time. Oh ya, and the transom to and/polish.

On another note, had a great conversation wtih Glen (Dozer II) the other night. Really a super guy. Got some great ideas from him regarding my rebuild and just generally chatted for a good while. Glen it was great chattin' with you --- we'll talk again for sure!

Have a great evening folks!
 

jasoutside

Supreme Mariner
Joined
Dec 20, 2009
Messages
13,269
Re: 1968 Starcraft Jupiter - Rebuild

Canuck's yakkin on the phone bout boats n stuff....

Eh?

Polish the boat, eh?

Yah, eh?

Starcrafts are cool, eh?

Hockey, eh?

Beauty, eh?

:rolleyes::p;):D
 

InMotion

Commander
Joined
Nov 3, 2011
Messages
2,080
Re: 1968 Starcraft Jupiter - Rebuild

Canuck's yakkin on the phone bout boats n stuff....

Eh?

Polish the boat, eh?

Yah, eh?

Starcrafts are cool, eh?

Hockey, eh?

Beauty, eh?

:rolleyes::p;):D

LOL!!! :)

Ya'all forgott's bout Toque's and igloo's!! eh?

:D
 

dozerII

Admiral
Joined
Oct 25, 2009
Messages
6,527
Re: 1968 Starcraft Jupiter - Rebuild

Hey Jim, great talking with you the other night. Looks like the prgressive sanding worked out real well, that is a real good shine there.EH
Don't forget in Canada we have real beer not that low alcohol stuff they have in the US, EH Sometimes I think the reason for that is to keep our blood thinned out when it's 40 below 0
Glen
 

barato2

Commander
Joined
Dec 7, 2010
Messages
2,956
Re: 1968 Starcraft Jupiter - Rebuild

people who drink US domestic beer (aside from NEw Belgium and microbrews) deserve what they get. in a great step for world peace, the grocery at bottom of my hill has Carta Blanca for less than Buddwiper......:):):)
 

rheagler

Senior Chief Petty Officer
Joined
Jul 14, 2007
Messages
662
Re: 1968 Starcraft Jupiter - Rebuild

Boat is looking great Jim. All this talk about beer... I like beer. I should drink more.
 

InMotion

Commander
Joined
Nov 3, 2011
Messages
2,080
Re: 1968 Starcraft Jupiter - Rebuild

Good News!!! The boat is polished and sealed!!

Here are some photo's for ya:

Before shot (this morning sanding to 1500 grit...)

IMAG0218.jpg


After shots before flippage:

IMAG0220.jpg


IMAG0221.jpg


IMAG0222.jpg


IMAG0223.jpg


IMAG0224.jpg


Some more in next thread... read on...
 

InMotion

Commander
Joined
Nov 3, 2011
Messages
2,080
Re: 1968 Starcraft Jupiter - Rebuild

And finally right side up back in the garage... with my little "tiger" helper!!

IMAG0225.jpg


It came out pretty good... at least I think so. Good news too is that I can begin working on the inside of the boat... it really is ummmmm filthy I think is the best way to describe it. It needs a wash and then some Gluvit applied. I can also dry fit my floor pieces and begin sealing them up as well. Feels good!

Ok, so you may be wondering why I have a pile of rocks in my garage... well this is why...

IMAG0216.jpg


IMAG0217.jpg


A 1/10th scale rock crawler. Really neat how it basically pivots in the center of the body. This thing can scales some incredible slopes and angles. Kids kept smashing faster rc cars sooooooo, bought a really slow one. Technical vs speed. They (and myself) are totally stoked to get it build and running. Nice evening project with the kids.

Have a great Sunday guys!
 

GA_Boater

Honorary Moderator Emeritus
Joined
May 24, 2011
Messages
49,038
Re: 1968 Starcraft Jupiter - Rebuild

Nice and shiny, IM. Are you ready to put some pieces in her?

Hey! The rock crawler is taking Jupiter time, don't you know. :eek: Oh, you and the kids are building it together. :D
 

dozerII

Admiral
Joined
Oct 25, 2009
Messages
6,527
Re: 1968 Starcraft Jupiter - Rebuild

Looks Awsome Jim, what did you think of applying the sealant? You will have to post up some pics of the rockcrawler at work.
Glen
 

InMotion

Commander
Joined
Nov 3, 2011
Messages
2,080
Re: 1968 Starcraft Jupiter - Rebuild

Nice and shiny, IM. Are you ready to put some pieces in her?

Hey! The rock crawler is taking Jupiter time, don't you know. :eek: Oh, you and the kids are building it together. :D

Thanks GA! Just about ready to put some pieces. Just need to wash and scrub the inner hull and Gluvit it. Then it's pool noodle and floor time! Yeah!!!

No worries GA with the Crawler taking up boat therapy time... boat therapy = 4:45am to 6:45am... Crawler time = 6:15pm to 7:15pm. Thankfully no conflicts man!!! :D
 

InMotion

Commander
Joined
Nov 3, 2011
Messages
2,080
Re: 1968 Starcraft Jupiter - Rebuild

Looks Awsome Jim, what did you think of applying the sealant? You will have to post up some pics of the rockcrawler at work.
Glen
Thanks Glen!! Yup, I applied the sealant. It went on much quicker than the polish... although it did dull the shine a bit.
See on the one side of the hull I didn't sand it as I did a better job of stripping it. The other side was the first side I stripped and well.... it was a lot rougher and I had used a scotchbrite pad in my experimenting to get the paint crud off. So, I ended up putting 7 coats of Polish on!!! :eek:

Ya, I'll see if I can get a video... but at least some good action shots!!!

Jim
 

InMotion

Commander
Joined
Nov 3, 2011
Messages
2,080
Re: 1968 Starcraft Jupiter - Rebuild

Quick update today fellas: Inside of the boat --- hull and sides have been scrubbed and readied for Gluvit! Still some rust stains in the center of the hull from the PO leaving a lot of beer caps... but overall it cleaned up nicely.

IMAG0229.jpg


Ordered the noodles today... hopefully they will arrive on Thursday before the holiday.

So immediate next steps:

1. Gluvit hull
2. Patch 2 screw holes and a missing rivet head (the rivet is solidly in place... nothing moves on the inner side. Just want to make sure it is sealed up.)
3. Etch prime and spray paint center of hull where if any water were to sit... and right around transom brace for same reason as well as to look better as it will be open for bildge.
4. Noodles in.
5. Floor and transom test fit
6. Seal em up...

I hope I am not missing anything... :confused: Anyway that's it for now.

Have a good evening!

Almost forgot.. she's gonna get a stripe of paint down the sides (likely just 2 lapstrakes)... Mrs. Motion felt that it would look better. Shucks... I was just getting used to the shine!! :D

A little photo to leave you with --- taken this morning on the top of my car...

IMAG0228.jpg
 

dozerII

Admiral
Joined
Oct 25, 2009
Messages
6,527
Re: 1968 Starcraft Jupiter - Rebuild

Quick update today fellas: Inside of the boat --- hull and sides have been scrubbed and readied for Gluvit! Still some rust stains in the center of the hull from the PO leaving a lot of beer caps... but overall it cleaned up nicely.

IMAG0229.jpg


Ordered the noodles today... hopefully they will arrive on Thursday before the holiday.

So immediate next steps:

1. Gluvit hull
2. Patch 2 screw holes and a missing rivet head (the rivet is solidly in place... nothing moves on the inner side. Just want to make sure it is sealed up.)
3. Etch prime and spray paint center of hull where if any water were to sit... and right around transom brace for same reason as well as to look better as it will be open for bildge.
4. Noodles in.
5. Floor and transom test fit
6. Seal em up...

I hope I am not missing anything... :confused: Anyway that's it for now.

Have a good evening!

Almost forgot.. she's gonna get a stripe of paint down the sides (likely just 2 lapstrakes)... Mrs. Motion felt that it would look better. Shucks... I was just getting used to the shine!! :D

A little photo to leave you with --- taken this morning on the top of my car...

IMAG0228.jpg

Hey Jim, list looks good, boy that frost can sure make some real interesting patterens.
Glen
 

GA_Boater

Honorary Moderator Emeritus
Joined
May 24, 2011
Messages
49,038
Re: 1968 Starcraft Jupiter - Rebuild

Looking good, IM. Tell Mrs Motion that you went through a lot of pain to get the old paint off to put some back on. Wait - Never mind. Gotta keep the Admiral happy. :redface:
 

InMotion

Commander
Joined
Nov 3, 2011
Messages
2,080
Re: 1968 Starcraft Jupiter - Rebuild

Looking good, IM. Tell Mrs Motion that you went through a lot of pain to get the old paint off to put some back on. Wait - Never mind. Gotta keep the Admiral happy. :redface:

Thanks GA... no doubt about that!! We guys are known to have a "selective" memory... I may just forget to paint it!:D
 

InMotion

Commander
Joined
Nov 3, 2011
Messages
2,080
Re: 1968 Starcraft Jupiter - Rebuild

Gas Hose Question:

As you guys may remember, I am planning on putting either the 24 Gal aluminum tank that came with the boat or my other 12 Gal plastic tank up front. Either one will be vented and the area will be vented as well. The issue is the hose to the motor. The PO just had a regular hose with a couple of joints to connect pieces of hoses to get all the way back to the motor running under the gunnel. There was a pump bulb right under the dash about where your right knee would be.

Couple of issues with this: Many kink and wear spots. Also, the hose just ran right beside all the electrical (actually in spots the electrical wire actually held it up).

Options:

1. Run a pc of grey pvc pipe under the gunnel and run the hose through it.
2. Same idea but under the floor
3. Sames as it was
4. ??????

Whatcha you guys think?
 

Gibbles

Commander
Joined
Nov 14, 2009
Messages
2,027
Re: 1968 Starcraft Jupiter - Rebuild

Gas Hose Question:

As you guys may remember, I am planning on putting either the 24 Gal aluminum tank that came with the boat or my other 12 Gal plastic tank up front. Either one will be vented and the area will be vented as well. The issue is the hose to the motor. The PO just had a regular hose with a couple of joints to connect pieces of hoses to get all the way back to the motor running under the gunnel. There was a pump bulb right under the dash about where your right knee would be.

Couple of issues with this: Many kink and wear spots. Also, the hose just ran right beside all the electrical (actually in spots the electrical wire actually held it up).

Options:

1. Run a pc of grey pvc pipe under the gunnel and run the hose through it.
2. Same idea but under the floor
3. Sames as it was
4. ??????

Whatcha you guys think?

I like the sound of it

also pvc funny pipe might work also and eaiser to work with
 
Status
Not open for further replies.
Top