1973 Sea Ray SRV 190 O/B restore

Josh P

Petty Officer 1st Class
Joined
Aug 26, 2009
Messages
328
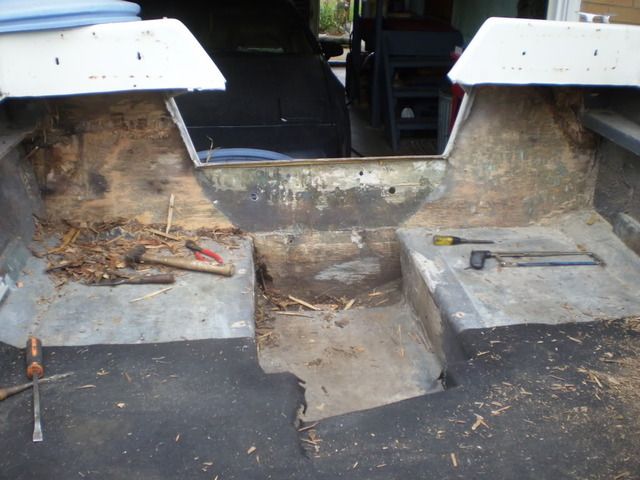
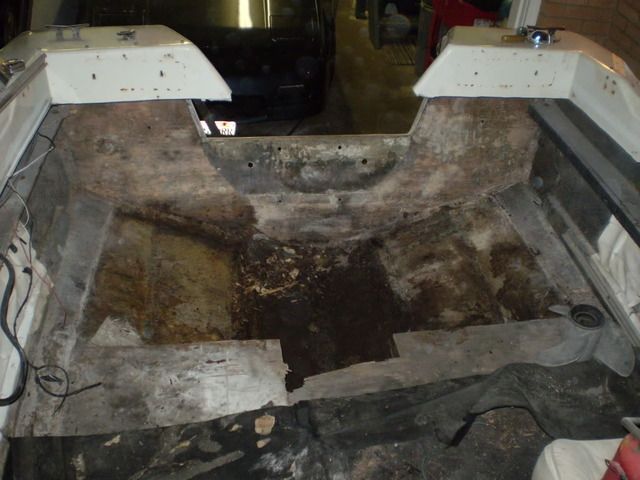
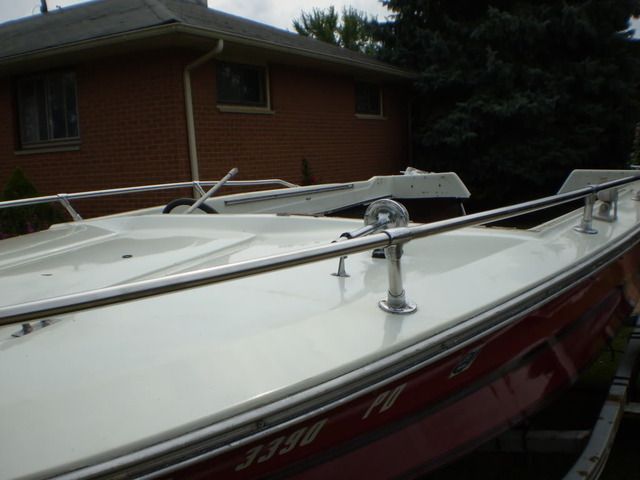
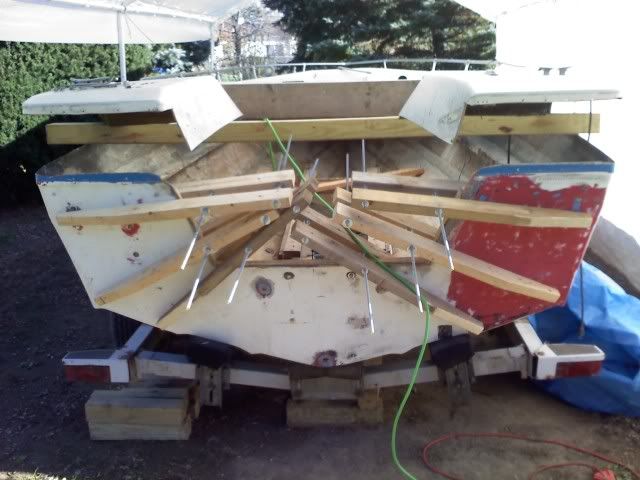
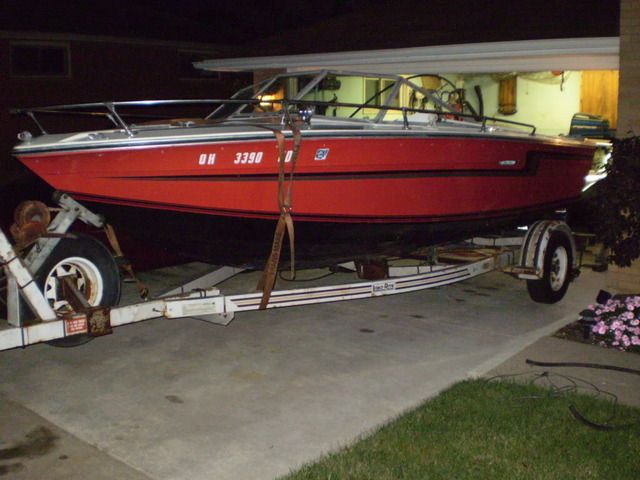
Ok I have done enough lurking around, check out everyone's builds. I have purchased a 1973 Sea Ray Srv 190 outboard boat, bought it on a trailer with a Force 120. Motor runs so i bought was told the transom rotted and the PO started to remove it but stopped didn't wanna replace it. Ok no big deal right just a transom.......

Boatontrailer.jpg

P8300321.jpg


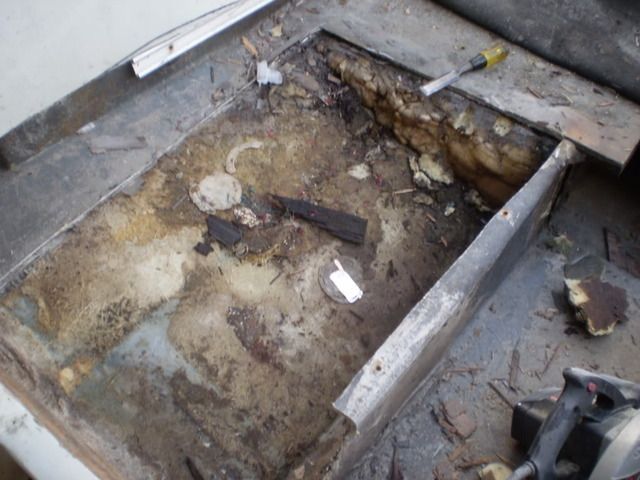
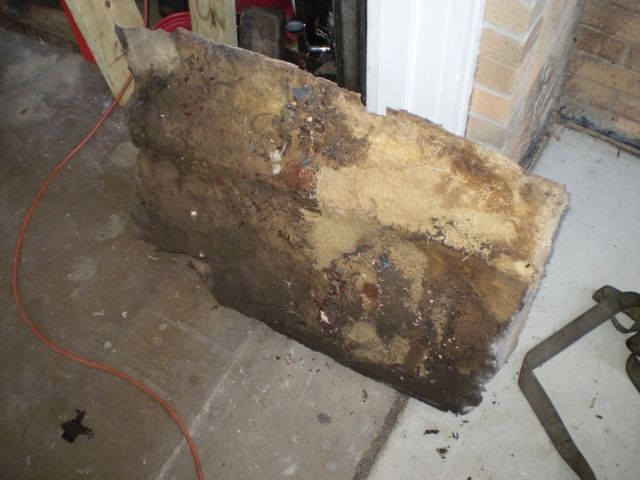
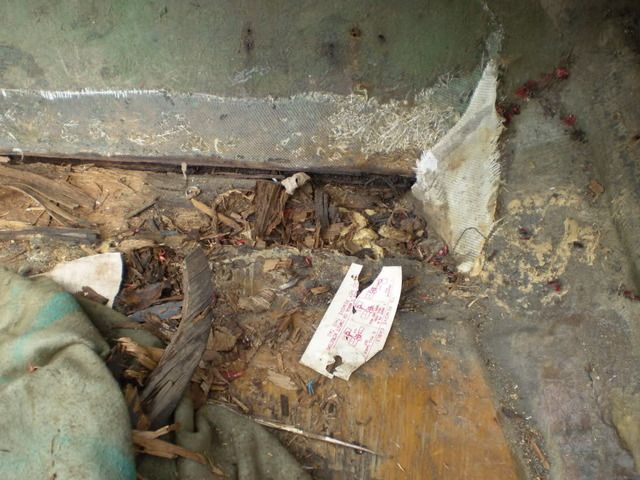
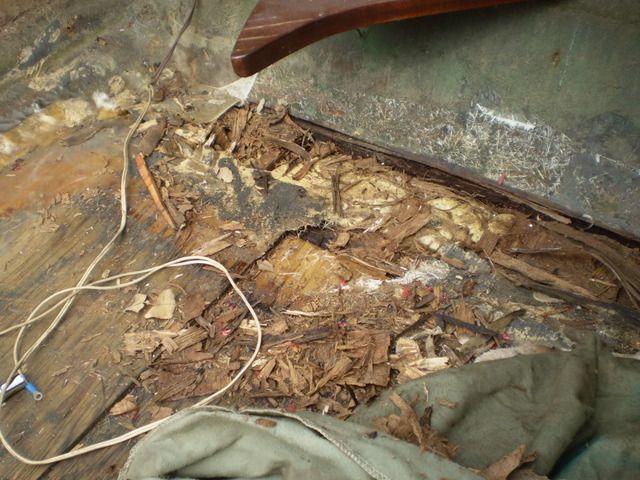
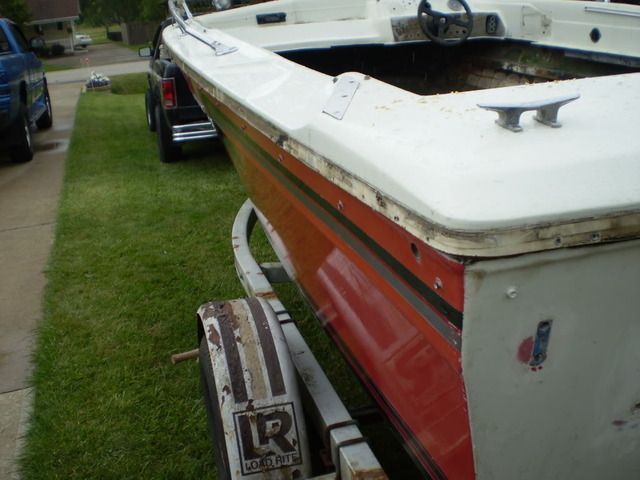
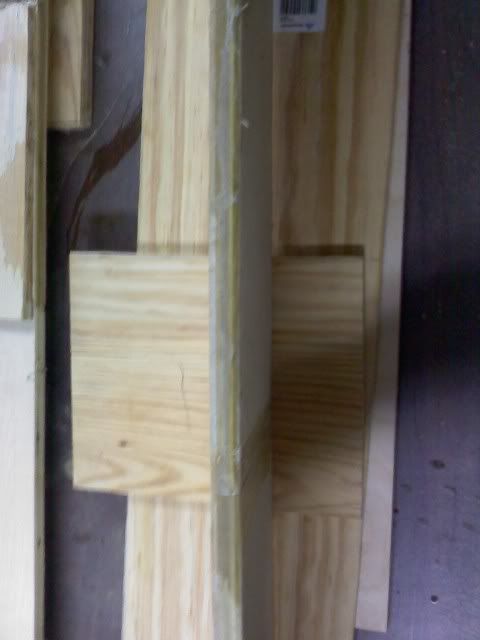
Well did some diggig and found this AWESOME "patch panel" that was installed.
P8300298.jpg


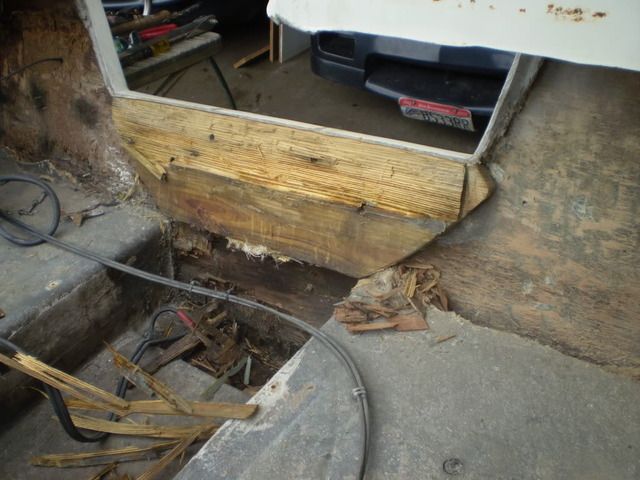
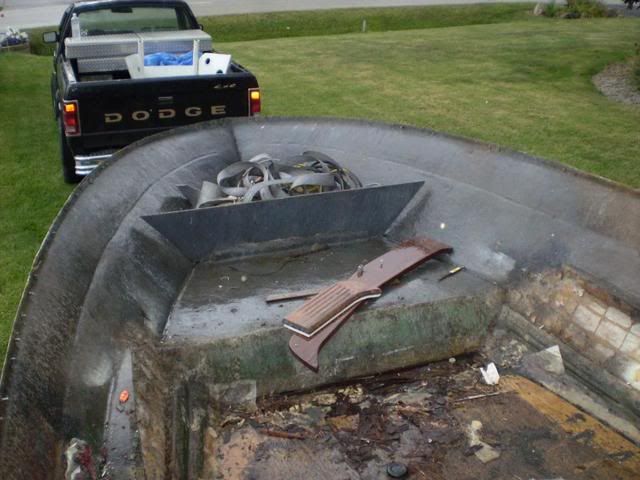
... Well ASSUMING it ONLY need a transom i cut out the splashwell.... dont yell at me yet this was before I found this wonderful place called IBoats.com. I wont post pictures of cutting the well because it hurts me that i did that:mad:.
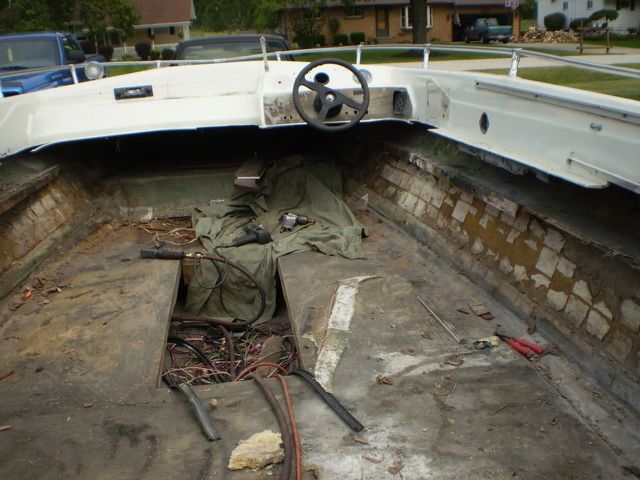
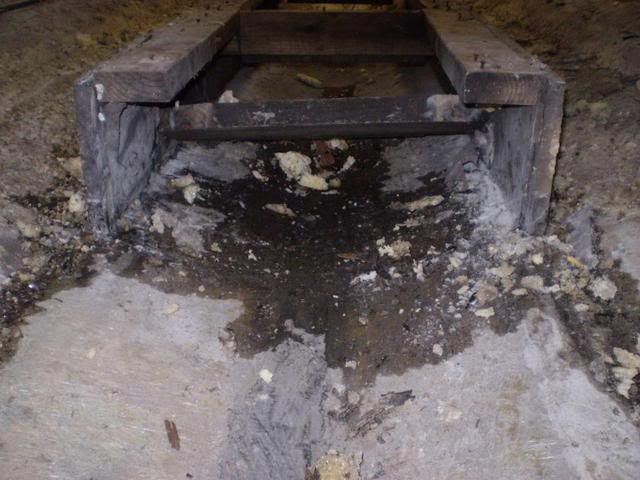
Well at the moment i have any open hull with just stringers. i will post more pics tommorw. its late here and im tired from resizing all my pics. (At the moment have 100 pics) Josh
 
Last edited:

Bob_VT

Moderator & Unofficial iBoats Historian
Staff member
Joined
May 19, 2001
Messages
26,097
Re: 1973 Sea Ray SRV 190 O/B restore

Welcome to iboats..... yes people have taken the route of cutting the splashwell out...... not our first choice but, it happens.

Resizing in photobucket is easy and gives you the 640 x 480 option ;)
 

erikgreen

Captain
Joined
Jan 8, 2007
Messages
3,105
Re: 1973 Sea Ray SRV 190 O/B restore

Okay, I'm not going to *try* to be the bearer of bad tidings... but I have done teardowns and resto work on two Sea Rays of that vintage, and learned some things.

In your bottom picture above, the small circular hole in the deck at the lower right is one of Sea Ray's foam injection holes. Part of their build process involves cutting these holes then injecting foam under decks to stiffen everything up and add floatation.

The problem is, the glue or putty they used to seal them shrinks over time, and cracks easily. Once that happens you have from 8 to 10 holes an inch or bigger on the top of the deck, usually under the carpet, that drain water right into the bottom of the hull.

Unless your boat is unusual, I'd recommend you plan on some serious work to get under the deck (which is probably wet too, from the edges of the holes) and remove a lot of wet foam. If you're lucky the rot of the stringers and the rest of the structure isn't too bad, but judging from the patch you found the boat has already needed work due to rot.

Soo.... I recommend you get all the disappointment out of the way now.. find out what repairs are needed. Dig in and plan your restore work. The question to ask yourself is whether you like this boat enough to do a complete rebuild so it's safe on the water.

I could be very wrong about the boat's condition of course, but it's a good idea to find out regardless.

On the bright side these are nice looking and handling boats, and once restored will last a long long time. Getting all the rot out will mean the boat will handle better and move faster... water is heavy.

One final note: Force outboards are not popular for a number of reasons, not the least of which is parts availability. If I were you I'd use it while it runs, but plan on replacing it when it breaks...

Erik
 

Josh P

Petty Officer 1st Class
Joined
Aug 26, 2009
Messages
328
Re: 1973 Sea Ray SRV 190 O/B restore

Thanks guys. ya erik ill post up more later but i found out someone was in there before me and usd dimensional lumber to replace stringers. and also 2 piece them and didnt biscuit or scarf joint them. The front half of the stringers are ok but the back half was rotted.(by the transom) But im replacing all of it. I have tore out the deck and the transom already. Ya i like the boat enough, I only paid 500 for the whole thing motor trailer and boat with some extra parts, and yes, i know all about the force outboards plus it has 150+ compression on all 4 cylinders. PLus i do not have the extra money to repower at the moment. Want to get it more sea worthy first. Like i said its just a empty hull with stringers right now i have done this work over the winter, now its warm so im more active to work......More to come, Josh
 

Josh P

Petty Officer 1st Class
Joined
Aug 26, 2009
Messages
328
Re: 1973 Sea Ray SRV 190 O/B restore

Ok well figured i post an update of stuff i've done. After i removed the splashwell, and chipped away the patch panel.

P8300302.jpg

I was chipping away the transom that was next to the deck and water was starting to pour out.
P8300308.jpg

So decided to tear up a section of the deck by the transom to inspect, and found nothing good.
P8300314.jpg

P8300313.jpg

this thing must have weighed 40 lbs.
So i removed both side and found tons of wet foam, this was my stopping point for the night it was getting late.
P8300316.jpg
 

Josh P

Petty Officer 1st Class
Joined
Aug 26, 2009
Messages
328
Re: 1973 Sea Ray SRV 190 O/B restore

This was around the time i found iboats and was reading drewpster's thread and oops thread i mean book, it gave me motivation to do mine and do it right. Up with the carpet off with the cap etc.

Deck with carpet removed

P9070295.jpg


After i removed the carpet, around the dash area i found the entry way for the water i found.
P9070297.jpg

This is starboard side by the helm around where your feet would go.

P9070298.jpg

This is port side same area by your feet, since this boat sat outside uncovered this was most definitely the entry point for the water. So off comes the cap i know there is problems underneath just waiting to arise.
P9070292.jpg


Windshield removed.
Rub rail removed and car ready for removal
P9070299.jpg

Cap is removed. In this pic you can see by the front there someone did a patch job on the deck and gave me a headache.
P9070303-1.jpg
 

Josh P

Petty Officer 1st Class
Joined
Aug 26, 2009
Messages
328
Re: 1973 Sea Ray SRV 190 O/B restore

The above posted was done right before winter and during winter, just catching up. After i removed the cap i added a support to stop the hull from spreading to much and cut out the deck. I used my air die grinder and a hammer.

After that i removed all the foam, sorry no pics was to busy ripping that garbage out. Here is a pic after

PA190313.jpg


And the water that was left over from the foam that was after some drying time.

PA190311.jpg


As you can see in this pic someone already did the stringers and used dimensional lumber.

PA190315-1.jpg


In the top pic you can see the stringers are about 2 feet short of the transom. Well those were rotted completely and who ever "repaired them" the didnt even scarf joint or biscuit them, just butted them together and threw some glass on them. So thats why they aren't there.

PA190314.jpg


This is after some grinding the transom a bit.
 

erikgreen

Captain
Joined
Jan 8, 2007
Messages
3,105
Re: 1973 Sea Ray SRV 190 O/B restore

Okay, I misunderstood where you were at. Nice work so far, looks very familiar :)

You're replacing the entire length of stringers, right?

Erik
 

Josh P

Petty Officer 1st Class
Joined
Aug 26, 2009
Messages
328
Re: 1973 Sea Ray SRV 190 O/B restore

Okay, I misunderstood where you were at. Nice work so far, looks very familiar :)

You're replacing the entire length of stringers, right?

Erik

Most definitely no point in half a**ing it now im there actually got some acx ply im picking up this weekend gonna get a ruf cut out done. Just added some PB to round the corners of the hull where the transom goes and hopefullly get it set in this weekend. (Had some voids in the hull)
I have a question or you when i bought this boat it didn't have a gas tank i would like to do a in deck tank, it looks like in this pic

P8300302.jpg


that some one installed fore of the transom can you give me an idea of where is good? im looking at a 19 gal tank. Thanks
 

erikgreen

Captain
Joined
Jan 8, 2007
Messages
3,105
Re: 1973 Sea Ray SRV 190 O/B restore

That's not a gas tank compartment I think... too far back.

It looks like the right location for the engine well for an I/O boat... is it possible the boat was converted, and someone redid the transom? That might explain the "patch panel".

Just re-read, and you cut out the splash well.. if that was factory, then it's an outboard model.

To answer your question, the fuel tank should go as far forward as possible to balance the weight on the transom. If you want to go under deck, look for the spot where your deck has enough space under it to hold your chosen tank.

Erik
 

Josh P

Petty Officer 1st Class
Joined
Aug 26, 2009
Messages
328
Re: 1973 Sea Ray SRV 190 O/B restore

ok so if i was to put one in front of the helm under the cap aft the bow storage, i would be ok its only 19 gal. i guess i was just worried about the boat getting up on plane. One more question for ya about the stringers, how far up should they go? as you can see they stop right around the helm and they aren't orginal i dot think, since they are dimensional wood. Thanks for your help erik since no one else has chimed in. OH and its an original o/b boat according to the HIN.
 

tinkeringwackyone

Chief Petty Officer
Joined
May 2, 2008
Messages
415
Re: 1973 Sea Ray SRV 190 O/B restore

welcome to iboats, you'll soon figure out better ways to do things.
I like the searays, I'm doing one as well. Good luck on the project.
 

Josh P

Petty Officer 1st Class
Joined
Aug 26, 2009
Messages
328
Re: 1973 Sea Ray SRV 190 O/B restore

welcome to iboats, you'll soon figure out better ways to do things.
I like the searays, I'm doing one as well. Good luck on the project.

Thanks, ya as they say you learn alot from your mistakes. Live and learn i guess. but hey glad to say transom is hopefully going in tomorrow and i am also pick up the ply for the stringers.
 

SnowHunter

Petty Officer 1st Class
Joined
Apr 4, 2010
Messages
285
Re: 1973 Sea Ray SRV 190 O/B restore

Nice Sea Ray Josh!! Looks like a newer version of mine! :D Seems like you're movin right along! I'm definetly gonna follow your progress!!! :)
 

Josh P

Petty Officer 1st Class
Joined
Aug 26, 2009
Messages
328
Re: 1973 Sea Ray SRV 190 O/B restore

well got the transom pl'ed in this past weekend will have pics soon, i woke up sunday morning to the tent that the boat was in for shelter blown over soo, i had to rush it before it rained to the girlfriend's parents barn for cover. pics soon
 

Josh P

Petty Officer 1st Class
Joined
Aug 26, 2009
Messages
328
Re: 1973 Sea Ray SRV 190 O/B restore

ok here is a couple of the transom installed, as soon as the high winds and rain stopped i can set up the boats new home, a 10x20 carport, since the last one got blown over and bent the legs i can get some glassing done.

Inside clamps
P5070381.jpg


Outside clamps
P5070380.jpg


OK one question on the stringers, how far up to the bow are they supposed to be since right now they stop just fore of the helm. I need to know so i can get my ply for it. One other question, when i glue my stringers, i am using 1/2 ply doubled up to make 1'' thick. Now my stringers will be longer then 8 ft so can i just alternate my end joint to the middle of the other piece? i plan to try to biscuit the end joint. Or should i really do a scarf joint?
 

jerryjerry05

Supreme Mariner
Joined
May 7, 2008
Messages
18,185
Re: 1973 Sea Ray SRV 190 O/B restore

This is what I did when installing a belly tank.I'm sure I am forgetting something.Any comments???Putting in a belly tank.The hull MUST be clean and nothing sticking out.The stringers made to accomadate the tank.About 1/4 in clearance on the sides.The bottom very smooth.The tank will need foam(window sealer)sprayed under it and all around the sides.If it's a plastic tank it needs to be supported with a cradle, pieces of wood to cushion it so it won't chafe.Foam the hell out of it.Metal regular metal tanks will rot in no time.Make sure it's not gonna move.
The stringer needs to be glassed(with matt) in place,even if no tank is gonna be put in.
Scarf joints to make it stronger good but not necessary.If you scarf it it won't matter which end you put the joint.No scarf the joint goes forward.
The rear where the stringer hits the transom it should join-up as tight as possible and extra glass and matting.Leave about 14-16" of clearance then a cross member for the end of the tank.That will leave a well for the bildge pump.
Fuel lines:position the fill so it's at the rear of the boat.The fill should be as direct as possible.The vent line should be higher than the fill with a loop in it above the vent.It should be positioned outside the boat.This is what makes it so you don't need a blower.The loop stops siphoning.You won't need an antisiphon valve as it's an outboard.
Maybe someone can post a drawing. Or pics.J
The gas line run it where it's the shortest.
 

Josh P

Petty Officer 1st Class
Joined
Aug 26, 2009
Messages
328
Re: 1973 Sea Ray SRV 190 O/B restore

OK well ive have had a rough time been through 3 jobs and i am now back on my feet and continuing progress on my ray.. i inspected the transom from the install and the sides were not against the skin. So i had to cut it out what a pain, and clean it up and redo it using a different clamping method.. i made 8 of these sytle clamps cant remeber what type they are.. this pic was mock up i ended up adding 1 more clamp down the center.
1110101248.jpg

so now thats in and then it was time for its winter storage, so i got some more money together and got some more plywood.
Recently i started making the stringers out of 3/4 inch thick birch, i cut out 4- 10'' wide strips, since my tallest height is 8.5 to 9 inches ill have some extra give room..
i then started to make a lap joint by making a few cuts to chisel out the chunks to make a 15ft long piece.
0328111631.jpg

0328111637.jpg

All chiseled out and ready for a final scrap and sand.
0328111741.jpg

ready for glue
0328111700.jpg

continued.............
 

Josh P

Petty Officer 1st Class
Joined
Aug 26, 2009
Messages
328
Re: 1973 Sea Ray SRV 190 O/B restore

Since the 3/4'' ply is 5 layers I chisel out 3 layers on two of the board and 2 layers from the other two boards, that way at the joint it was a flush transition..
0328111746.jpg

i put the two pieces one with 2 layers one with 3 layers together mocked it up screwed them together, removed the screws then added pl, spread it with a notch trowel then stuck them together and reinstalled my screws...
0330110051a.jpg

here is one stringer done ready to use old one as a template and do a trial fitting.
0330110051.jpg

here they both are i will hopefully get one side of the old ones removed from the boat to make the cuts on these..
0330110101.jpg

here is a pic of the joint to see how i made it flush..
0330110215.jpg

Continued..........
 

Josh P

Petty Officer 1st Class
Joined
Aug 26, 2009
Messages
328
Re: 1973 Sea Ray SRV 190 O/B restore

In the mean time i also have purchased a belly fuel tank... its 32 gal but i got it for 180 shipped.. its from moeller marine.. came with a sender and a pick up tube in the tank.....the only thing is i have to install 2 fills and vents.. unless some one knows a way to block off one of the fills/vent thats USCG approved?
0330110216.jpg
... more to come hopefully after the weekend (if anyone cares)...
 
Top