1977 Sylvan Sea Monster Side Console Rebuild

oldrem

Commander
Joined
Nov 7, 2013
Messages
2,002
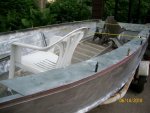
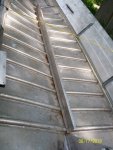
Can't seem to get much more than an hour each night this weak before I'm fatigued. I did manage to finish getting every last spec of residual paint off the starboard last night with the cup brush and started on the port. Once I finish that, my plan is:

Remove a few more dents and dings I discovered
Patch a few unwanted holes and a couple small corrosion spots with Quicksteel Aluminum Epoxy
Spray inside and out with cleaning vinegar and pressure wash
Leak test hull
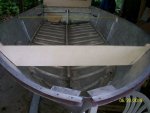
Fit and install new transom with SS nuts and bolts
Reassemble gunnels and bow plate with new bracing
Prime and paint

With everything my wife and family have planned this summer, that may take me to fall lol
Paint removal after wire brush.jpg
 

oldrem

Commander
Joined
Nov 7, 2013
Messages
2,002
Rem did you get a Doc to look after the accident? Just thinking.

Not yet - I have my annual "wellness checkup" tomorrow morning, so will mention it to him then. Until Medicare got on my butt 3 years ago about not having a doctor I finally got one after not seeing any for 22 years. :)
 

kcassells

Fleet Admiral
Joined
Oct 16, 2012
Messages
8,738
I hear ya... can only fool the Reaper for so long!:D I'm in the same boat. Hoping ya feel better.
 

oldrem

Commander
Joined
Nov 7, 2013
Messages
2,002
Thank you. Maybe it was the extra aspirin I took after having a tooth pulled today, but felt good enough to work until the port side was done - almost 2 solid hours. On to dent removal hopefully tomorrow evening
 

oldrem

Commander
Joined
Nov 7, 2013
Messages
2,002
Not much to report. Spent the entire weekend preparing for and hosting a graduation party for one of our grandsons. Was too pooped to do anything Monday night. Last night I did get 5 holes that are no longer needed filled with Quicksilver Aluminum and started some sanding after it cured. Was going to use the leftover of what I had prepared to patch some holes I don't want in the top gunnel plates, but about 10 minutes had passed when I went to use it and it was already too hard to use. I will definitely be better prepared next time.
 

oldrem

Commander
Joined
Nov 7, 2013
Messages
2,002
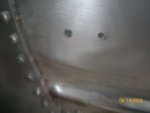
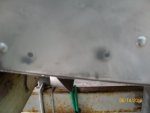
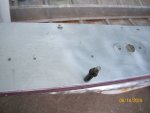
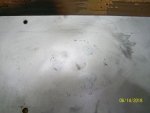
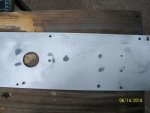
Sanded the first 5 holes tonight, then prepped the gunnel tops for plugging. I counted 25 unwanted holes in one panel alone, so I have a lot of plugging and sanding to do.
holes1a.jpgholes1b.jpgholes1c.jpg
Mocked it up with the Clecos to look at the fit.
holes1d.jpgholes1e.jpg
 

oldrem

Commander
Joined
Nov 7, 2013
Messages
2,002
Had to experiment tonight with some Alumiweld a friend gave me to try. I did the first 3 holes with it and was very pleased with how they came out. Pluses for the Alumiweld: 1) looks better if I was leaving it bare 2) stronger

Minuses: 1) takes forever to get the aluminum up to temperature 2) the aluminum began warping almost immediately and had to be straightened after it cooled 3) took a long time to cool back down 4) my newer torch kept kicking out at the angle I was using it
Click image for larger version  Name:	holes2a.jpg Views:	1 Size:	47.2 KB ID:	10591592

I finished the other 22 holes on the starboard panel with the Quicksteel
Click image for larger version  Name:	holes2b.jpg Views:	1 Size:	50.7 KB ID:	10591593
 

BWR1953

Admiral
Joined
Jan 23, 2009
Messages
6,278
Filling holes is the pits! :lol: :p

I counted 70+ on the top of one of my gunnels. Ugh!

Looks like you're doing well getting them filled. :)
 

oldrem

Commander
Joined
Nov 7, 2013
Messages
2,002
Filling holes is the pits! :lol: :p

I counted 70+ on the top of one of my gunnels. Ugh!

Looks like you're doing well getting them filled. :)

Thank you. Definitely not fun. I did experiment a bit more with the Alumiweld after work today, but that thin aluminum warps so easily under heat - otherwise it's ok. I used a different torch this time with an extension so the bottle could stay upright on the driveway. At least that helped to keep the torch from cutting out. The rest I filled with the Quicksteel and am waiting for a full cure before I sand them off. I only had 46 holes total between the two plates, but still haven't started on the bow plate yet. There are more than a dozen I'll have to deal with there.

At least the temps cooperated today. It's 82 a half mile west of me, but a comfortable 65 and sunny here near the "big pond". Tomorrow we won't be so lucky as the wind is supposed to shift to the SW with 95 being predicted. Might be a good day to go work on the new transom in the basement of my store after I play with spraying the inside with cleaning vinegar and pressure washing / leak test.
 

oldrem

Commander
Joined
Nov 7, 2013
Messages
2,002
Guess I'll be shopping for a new piece of aluminum sheet for the bow plate. #1 The original was designed with an arch 1-1/2" high in the center. Since I want to back it with 3/4" ply to make it stronger for the trolling motor etc, I'd rather it be flat. #2 there are a lot more holes in it than I remembered - it's kind of like a piece of Swiss cheese.

I'll do some local sourcing this week before we leave for Colorado on Thursday. Otherwise, best online price I found was $95 delivered.
 

oldrem

Commander
Joined
Nov 7, 2013
Messages
2,002
Lake Michigan is still giving us some reprieve today, only 78 here and 90 just west of us. Blew the hull and rib tubes out, sprayed everything down heavily with straight cleaning vinegar, plugged the drain hole, pressure washed the heck out of it, leveled it and filled with enough water to get a good leak test.

I already knew I had a small leak in the bow area. The only other water was some minor seepage along the chines. Now I know where I'll need to use the Coat-it.

Let it drain, vacuumed out the loosened dirt and crud, rinsed and repeated twice. Except for some old stains in the bottom, it's good enough and as clean as it's going to get.

Taking a break before I go cut wood for the new transom. I have to keep myself busy today. After 69 Fathers Days together, this is my first without him. He was one heck of a guy.

Cleaning and leak test.jpg
 
Last edited:

kcassells

Fleet Admiral
Joined
Oct 16, 2012
Messages
8,738
Great day, great work....Well at least you had the 69 years to share. Feel ya!
 

oldrem

Commander
Joined
Nov 7, 2013
Messages
2,002
Great day, great work....Well at least you had the 69 years to share. Feel ya!

Thank you. Yep - 69 great years.

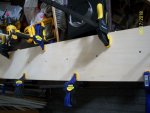
Got the new boards cut slightly oversized for the transom. Glued, screwed and clamped to be cut out after it dries. Used Titebond III with a 1/8" V trowel on one side and a skim coat on the other to insure a good bond. I'll worry later if I put a screw where a through bolt has to go. Can always epoxy the screw holes if I need to pull any. Had enough 3/4" ply left to make the bow supports. Now I just need to make templates to cut them.

Transom1.jpg
 

oldrem

Commander
Joined
Nov 7, 2013
Messages
2,002
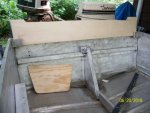
Had some hard rain the last 2 nights, so got nothing accomplished. Tonight was my last before heading out to Colorado for a 4 day visit. Was able to cut some of the wood, which will be fit, drilled and sanded before they get the OT treatment. Unfortunately, the transom board is too thick for the brackets. Looks like I'll be needing to set up my 12" planer to get it down to the right size. I want it slightly under to allow for build up of the OT and additional spar urethane. I'm thinking about .060 should do it?? Hopefully I can do it taking some off each side so I don't completely remove the skin on either side.

Wood1a.jpgWood1b.jpgWood1c.jpg
 

oldrem

Commander
Joined
Nov 7, 2013
Messages
2,002
Well that totally sucked! Problem with flying into a smaller airport. Flight was cancelled and rescheduled for 9AM tomorrow. Tried for anything going into Denver - a few hours away, but every flight was booked solid. All we could do was come back home and head back to O'Hare again tomorrow for a flight they added to make up for today. Raining here, so can't even work on what I would want to do outside.
 

oldrem

Commander
Joined
Nov 7, 2013
Messages
2,002
man that is some nice looking ply!

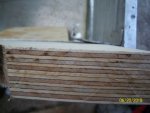
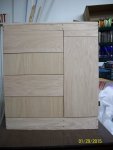
Thx Micky. It's ACX from Menards. Even finished both sides, it measures .765 so the total thickness of the transom ended up 1.531. Trying to fit it in a slot that measures as low as 1.508 (1.520 at the highest) doesn't work. I'll probably take about .035 to .040 off each side with the planer and should end up with about 1.50 after the treatments. I've used that same wood for several projects including my main reloading bench/cabinet
rbbase3.jpg
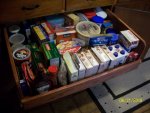
and a pair of slide out drawers my wife wanted in one of the the kitchen cabinets.
upper drawer.jpg
 

Woodonglass

Supreme Mariner
Joined
Dec 29, 2009
Messages
25,929
OT TIP: When soaking the edges of plywood with OT recipe try clamping several similar shape edges together to give a broader surface which allows the recipe to soak in a lot better The edges and any Penetrations ARE the most important parts to get treated. Do this well and the wood will last for decades.
 

oldrem

Commander
Joined
Nov 7, 2013
Messages
2,002
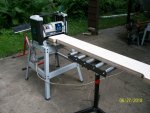
Rain finally quit today, so was able to set up the planer and get it down to where it fits properly.

Click image for larger version  Name:	Planing Transom.jpg Views:	1 Size:	88.9 KB ID:	10600306

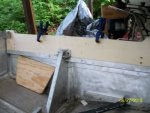
Got all the through holes drilled with the help of a Wellcraft Drill Guide. Amazingly all the holes lined up.

Click image for larger version  Name:	Transom Holes.jpg Views:	1 Size:	65.2 KB ID:	10600307
 
Top