1978 Reinell 1701 Restoration

ryan_eyres

Petty Officer 3rd Class
Joined
Jan 27, 2008
Messages
80
Hey all,
I guess I should introduce myself and my project. My name is Ryan and I live on Vancouver Island in BC, Canada.
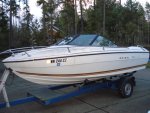
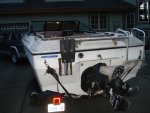
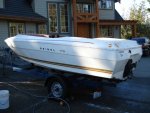
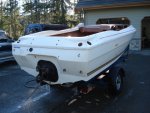
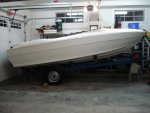
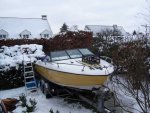
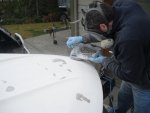
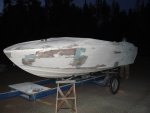
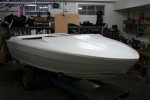
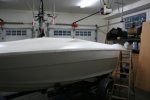
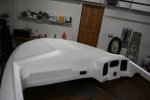
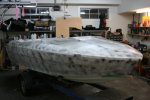
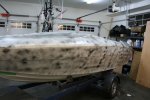
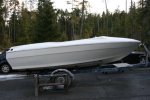
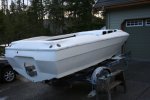
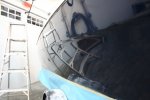
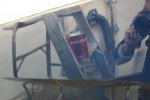
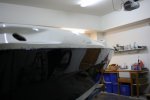
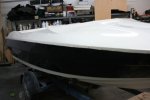
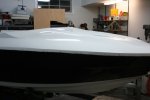
The Project: A 1978 Reinell 1701 with Mercruiser 140 and OMC Stringer leg (I know, I know). Anyhow, I really like the lines on the older Reinell boats, and figured it would make a good base for my project. The plan is to shave and modernize the exterior and interior of the boat, while still retaining some of the classic pieces like the teak strips on the deck, the low bow rail, and the teak swim platform.
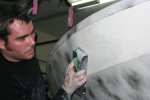
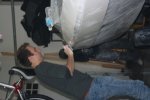
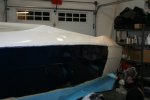
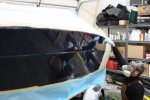
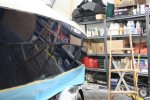
The donor boat came with 2 legs, I figure I'll need them, and a freshly rebuilt mercruiser 140 short block. The gelcoat had some crazing issues, so the hull and deck are being sanded down, all holes filled with marine tex, then a few coats of Interlux 2 part epoxy primer. Lots of block sanding, and then a few coats of Interlux Perfection.
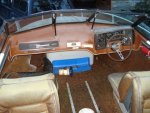
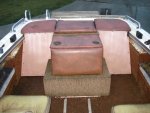
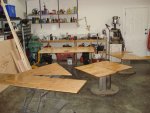
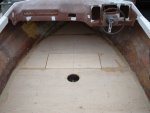
A complete new interior is planned, with a center console, sleeper seats, new doghouse with 2 removable rear benches, and a very loud stereo!
There are a lot of other modifications and upgrades planned, all with a projected completion date of May 4th!

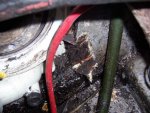
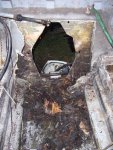
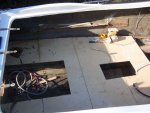
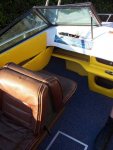
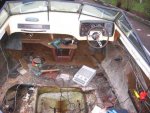
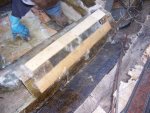
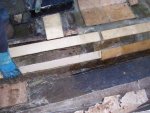
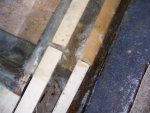
Here are a few pics of how it was when I got it:
 

Attachments

  • DSC01180.JPG
    DSC01180.JPG
    63 KB · Views: 4
  • DSC01184.JPG
    DSC01184.JPG
    70.9 KB · Views: 4
  • DSC01186.JPG
    DSC01186.JPG
    54.4 KB · Views: 5
  • DSC01192.JPG
    DSC01192.JPG
    68.7 KB · Views: 5
  • DSC01193.JPG
    DSC01193.JPG
    60 KB · Views: 5

ryan_eyres

Petty Officer 3rd Class
Joined
Jan 27, 2008
Messages
80
Re: 1978 Reinell 1701 Restoration

I forgot to mention I am working on this with a friend of mine who is also quite knowledgeable in fiberglass work and fabrication.
So far, we have gutted it completely and removed the old engine. All snaps for the top have been drilled off, and every bit of hardware has been removed from the hull and deck. All holes have been beveled with a countersink bit in order to provide a good surface area for the filler (marine tex) to adhere to. We scrubbed the entire boat down with dish soap and degreaser, then wiped it down with wax and grease remover. We've started sanding.. What a nasty job. We're using random orbit sanders and sanding all the crazing out of the gelcoat, as well as sanding all surfaces in order to make a good surface for the primer. Here's some progress pics:
 

Attachments

  • DSC01231.JPG
    DSC01231.JPG
    61.8 KB · Views: 3
  • DSC01232.JPG
    DSC01232.JPG
    66.1 KB · Views: 3
  • DSC01242.JPG
    DSC01242.JPG
    47.9 KB · Views: 3

oops!

Supreme Mariner
Joined
Oct 18, 2007
Messages
12,932
Re: 1978 Reinell 1701 Restoration

hi ryan

WELCOME TO I BOATS

the lines on that boat are really nice....

i cant wait to see what you mean by "shave"....

btw where in van isle....that looks like a fresh water boat ...would that be shawanigan lake????

lots of really good people here. and kots of know how....

cheers
oops
 

Ride The Lightning

Petty Officer 3rd Class
Joined
Oct 29, 2007
Messages
77
Re: 1978 Reinell 1701 Restoration

Hi (what is your name?),

I had to do the same thing with the same boat last year. If you have any questions, do not hesitate asking them. I post some photos of my boat, I had to remove everything but the hull! My decking was rotten, the transom either. So do not just do the visual things. While you are at it, make it right and with all consequences!
Your decking is in all probability rotten and the transom either. Make some test drillings...
Underneath the decking there is a lot of foam. This foam is probably also wet, so you have too much weight: remove the foam.
Here are some photos of my restoration:

Greetings from Hamburg
Lars
 

Attachments

  • 100_4131.jpg
    100_4131.jpg
    71.9 KB · Views: 6
  • 100_4154.jpg
    100_4154.jpg
    67.7 KB · Views: 6
  • 100_4165.jpg
    100_4165.jpg
    63.1 KB · Views: 6
  • 100_4184.jpg
    100_4184.jpg
    59.3 KB · Views: 6
  • 100_4187.jpg
    100_4187.jpg
    83.5 KB · Views: 6

Ride The Lightning

Petty Officer 3rd Class
Joined
Oct 29, 2007
Messages
77
Re: 1978 Reinell 1701 Restoration

Some more photos
 

Attachments

  • 100_4591.jpg
    100_4591.jpg
    70.7 KB · Views: 5
  • 100_4796.jpg
    100_4796.jpg
    45.3 KB · Views: 5
  • 100_4870.jpg
    100_4870.jpg
    48.2 KB · Views: 6
  • 100_4873.jpg
    100_4873.jpg
    46.4 KB · Views: 5
  • IMG_2012.jpg
    IMG_2012.jpg
    54.9 KB · Views: 5

ryan_eyres

Petty Officer 3rd Class
Joined
Jan 27, 2008
Messages
80
Re: 1978 Reinell 1701 Restoration

Hi Lars,
Thanks for introducing yourself.. I had seen photos of your restoration in the past, but they were on a German site so I couldn't tell what you had done other than by the photos.
I'm at the stage now where I'm trying to decide whether to replace the floor or not. Thinking from what I've seen on this site, it's a good idea to do it while I'm in there.
It looks to me like you pulled up the plywood floor, then there were stringers encased in glass underneath that? Were those just hollow channels filled with foam, or was there wood in them as well? What did you replace in them?

Thanks in advance,
-Ryan
 

jcsercsa

Captain
Joined
May 21, 2007
Messages
3,401
Re: 1978 Reinell 1701 Restoration

Hi Ryan , welcome !!!
Looks good !!! keep us posted , love the pics !!! john
 

Ride The Lightning

Petty Officer 3rd Class
Joined
Oct 29, 2007
Messages
77
Re: 1978 Reinell 1701 Restoration

Hi Lars,
Thanks for introducing yourself.. I had seen photos of your restoration in the past, but they were on a German site so I couldn't tell what you had done other than by the photos.
I'm at the stage now where I'm trying to decide whether to replace the floor or not. Thinking from what I've seen on this site, it's a good idea to do it while I'm in there.
It looks to me like you pulled up the plywood floor, then there were stringers encased in glass underneath that? Were those just hollow channels filled with foam, or was there wood in them as well? What did you replace in them?

Thanks in advance,
-Ryan

Hi Ryan!

Yes your are right I have documented the hole restoration on www.boote-forum.de. It is the best German platform around boating I think.

After I removed the plywood floor the stringers appeared. Underneath the glass I had foam which I have removed. The foam have been encased in glass, you are right.
I have replaced the stringers as follows:
- I have not removed all of the glass to have a profile on which I could built the new stringers
- I have glued some wood beams onto the remained glass with resin to make sure that the new glass mats do not go down into the stringer
- After that I have laminated 4 layers of 350 gr mat onto the stringers. That means that my stringers are hollow.

See the photos.

Regards,
Lars
 

Attachments

  • 100_4489.JPG
    100_4489.JPG
    43.3 KB · Views: 2
  • 100_4495.JPG
    100_4495.JPG
    48.9 KB · Views: 2
  • 100_4496.JPG
    100_4496.JPG
    38 KB · Views: 2

ryan_eyres

Petty Officer 3rd Class
Joined
Jan 27, 2008
Messages
80
Re: 1978 Reinell 1701 Restoration

Lars,

Thanks for the quick reply. Ok, I think I'm gonna do it.. Seems like there's a lot of people on this forum that are doing this job at the moment. I've got a few more questions before I dig into it this weekend.
It that foam a structural part of the stringers, or just put there to soak up water and cause grief? Will the boat be strong enough with the foam removed?
Whats the best way to pull up the old plywood, without causing too much damage? What's the best way to adhere the new plywood to the tops of the stringers and sides of the hull? I was thinking maybe a construction adhesive? After the plywood is down, I think I'll lay down a layer of glass over the whole thing just to seal it in.

Thanks again,

-Ryan
 

Ride The Lightning

Petty Officer 3rd Class
Joined
Oct 29, 2007
Messages
77
Re: 1978 Reinell 1701 Restoration

Lars,

Thanks for the quick reply. Ok, I think I'm gonna do it.. Seems like there's a lot of people on this forum that are doing this job at the moment. I've got a few more questions before I dig into it this weekend.
It that foam a structural part of the stringers, or just put there to soak up water and cause grief? Will the boat be strong enough with the foam removed?
Whats the best way to pull up the old plywood, without causing too much damage? What's the best way to adhere the new plywood to the tops of the stringers and sides of the hull? I was thinking maybe a construction adhesive? After the plywood is down, I think I'll lay down a layer of glass over the whole thing just to seal it in.

Thanks again,

-Ryan

Hy Ryan,

the foam is a structural part of the stringers. When removing the stringers partly and the foam completely you will see that your boat does not have the same stiffness as before.
You have to compensate the missing foam with 4 layers of glass mats (should be 300 grams per m? or stronger). They have to overlap and should be laminated from the one sides bottom over the stringers to the other sides bottom so that you have a good connection between stringers and hull.
I do not have foam any more and the boat is as stiff as before.
You remove the plywood with the help of a fret saw, a crowbar, a chisel and a hammer. Saw the plywood in little parts and remove them one after the other. A spade helped me also to divide the stringers and the plywood last year.
For adhering the new plywood I have used polyester resin and screws (high-grade steel) which I have screwed into the wood that I have laminated into the new stringers. At the sides of the hull do not remove the old laminate completely. Just remove the wood there and try to use a curb of old laminate (5cm or so) to glue the new plywood at with resin.
Be sure to protect the new plywood bottom side against water by brushing it with resin. After you glued and screwed your new plywood in you have to laminate it. Again, use 3 layers of glass mats and laminate the mats to the sides of the hull! Abrade that parts of the hull with sandpaper. Always do that to parts you are laminating at.
I hope I have not forgot something important.
Let me know if that helps and post some photos of your work.

Good Luck!

Regards,
Lars
 

ryan_eyres

Petty Officer 3rd Class
Joined
Jan 27, 2008
Messages
80
Re: 1978 Reinell 1701 Restoration

Well a lot of time has passed since I last updated this thread. Quite a bit of work has been completed since the last post. There was a lengthy hiatus, but I?m back at it. Since the last post, the deck has been replaced. The old plywood all pulled out, all the floatation foam removed, the stripped bare hull was allowed to dry out in the hot sun, and the stringers were then re-glassed.

An additional stringer was added along the side of the hull on both sides in order to give a ledge for the deck to sit on. The deck was replaced with 5/8 exterior grade plywood coated in resin on both sides and edges, then glued down with about 3 tubes of PL3000 Construction Adhesive. Then 2 layers of 1.5oz glass were layed over top of the deck and about 8? up the sides of the hull. The result is stronger and more solid feeling than any deck I?ve felt in a boat before. I?ve added small 3? waterproof deck plates to the side cavities at the stern so they can be removed when in dry storage to allow venting and prevent any future rot. The forward most cavity has been converted to an under-deck storage and a hatch was added for access.

Extensive bodywork - All crazing was ground out of the gelcoat, all holes beveled 45 degrees and filled with white marine tex. 3M Marine filler was used for fairing, and the boat was block sanded. 2 coats of Interlux epoxy coat primer were rolled on the entire hull, then it was sanded smooth (warning, this primer does not level out when rolled on and creates mega orange peel. It is, however, a very tough coating and once sanded smooth, is like glass). As if sanding the primer the 1st time wasn?t enough, 2 more coats of Interlux epoxy coat primer were rolled on the entire hull in order to cover any spots where we sanded through. A guide coat was sprayed, then the entire boat was wet block sanded with 150 grit ? 45 hours of block sanding! The result is as smooth as glass, and arrow straight. The boat was then scuffed lightly with 220 grit in order to remove any sanding scratches, then wiped down with Interlux N2333 reducer.

Which brings us to last week. We?ve started applying the Interlux perfection in Oyster White and Flag Blue, and let me tell you the end result is worth all the effort! 3 coats are recommended, though there is full coverage on the 2nd coat if applied properly. They recommend sanding between coats, though if painted within the max overcoat time, the paint will chemically bond to the previous coat. We?re pretty much sick of sanding, so the plan is 2 coats, then wet sand with 400 grit, then a final finish coat. We?re using the roll and tip method, and it is amazing. My buddy and I have both painted cars in the past with HVLP spray guns and proper techniques, and neither of us have seen results as glassy smooth and glossy as the Interlux Perfection lays down.

The color scheme requires the white to be painted first, then the blue. We will be applying 2 coats of white, then 2 coats of blue, then wet sanding, then 1 coat of each. Currently it is sitting in the garage with 2 coats of each color and looking really nice! (pics show after 1st coat of blue) We did forget to tack before painting the white, and the result is dust specs in the finish. This is ok, because it is getting sanded anyway, though you can bet we won?t be forgetting on the final coat. At this point we?re just waiting a few days for the paint to cure fully before wet sanding.

I?ll attach pictures of the progress, and there will be more updates to follow (Now for the fun part ? Trim and Interior).
 

ryan_eyres

Petty Officer 3rd Class
Joined
Jan 27, 2008
Messages
80
Re: 1978 Reinell 1701 Restoration

Picture updates:
Here is the beginning of sanding the crazing out of the gelcoat and fairing with 3m Marine Filler - this was last spring!
 

Attachments

  • DSC01264.JPG
    DSC01264.JPG
    71.2 KB · Views: 3
  • DSC01306.JPG
    DSC01306.JPG
    55.6 KB · Views: 3
  • DSC01308.JPG
    DSC01308.JPG
    70 KB · Views: 3

ryan_eyres

Petty Officer 3rd Class
Joined
Jan 27, 2008
Messages
80
Re: 1978 Reinell 1701 Restoration

Here's the process of the new deck, unfortunately I don't have any pics of the old deck and foam being removed. Just the new cutouts being coated in resin, then glued down with PL3000 construction adhesive. No pics of the glass being layed down over top though.
 

Attachments

  • DSC01304.JPG
    DSC01304.JPG
    88 KB · Views: 3
  • DSC01317.JPG
    DSC01317.JPG
    68.7 KB · Views: 3
  • DSC01315.JPG
    DSC01315.JPG
    76.2 KB · Views: 3

ryan_eyres

Petty Officer 3rd Class
Joined
Jan 27, 2008
Messages
80
Re: 1978 Reinell 1701 Restoration

There are some stages missed in the photos, these pics show the boat after the last 2 coats of Interlux Prime Coat had been applied, and then the guide coat sprayed.
 

Attachments

  • IMG_3703.JPG
    IMG_3703.JPG
    51.1 KB · Views: 3
  • IMG_3704.JPG
    IMG_3704.JPG
    48.3 KB · Views: 3
  • IMG_3705.JPG
    IMG_3705.JPG
    45.1 KB · Views: 3
  • IMG_3712.JPG
    IMG_3712.JPG
    62.6 KB · Views: 3
  • IMG_3716.JPG
    IMG_3716.JPG
    64.5 KB · Views: 3

ryan_eyres

Petty Officer 3rd Class
Joined
Jan 27, 2008
Messages
80
Re: 1978 Reinell 1701 Restoration

And now 45 hours of block sanding. The guy in the black shirt is my friend Darren who is helping with the project. I'm in the grey. The last pics are the boat fully block sanded and ready for masking tape and paint.
 

Attachments

  • IMG_3724.JPG
    IMG_3724.JPG
    49.5 KB · Views: 3
  • IMG_3725.JPG
    IMG_3725.JPG
    50.9 KB · Views: 2
  • IMG_3737.JPG
    IMG_3737.JPG
    75.8 KB · Views: 3
  • IMG_3738.JPG
    IMG_3738.JPG
    65.6 KB · Views: 3

ryan_eyres

Petty Officer 3rd Class
Joined
Jan 27, 2008
Messages
80
Re: 1978 Reinell 1701 Restoration

The first 2 coats of Oyster white have been applied to the upper and lower parts of the boat, and the pics show application of the first coat of Flag Blue to the middle. No pics of the second coat of Flag Blue yet, though it looks even better!
 

Attachments

  • IMG_3746.JPG
    IMG_3746.JPG
    45.5 KB · Views: 3
  • IMG_3749.JPG
    IMG_3749.JPG
    56.3 KB · Views: 3
  • IMG_3750.JPG
    IMG_3750.JPG
    76.7 KB · Views: 3
  • IMG_3763.JPG
    IMG_3763.JPG
    50.2 KB · Views: 3
  • IMG_3765.JPG
    IMG_3765.JPG
    42.7 KB · Views: 3

danm2a2

Cadet
Joined
Sep 30, 2007
Messages
21
Re: 1978 Reinell 1701 Restoration

Fantastic job on the paint and prep, looks incredible! Please keep updating, I really want to see this when it is done. Keep up the incredible work!
 

jcsercsa

Captain
Joined
May 21, 2007
Messages
3,401
Re: 1978 Reinell 1701 Restoration

Man thats not paint you playing a trick with some mirrors??? lol man she looks really great !! John
 

ryan_eyres

Petty Officer 3rd Class
Joined
Jan 27, 2008
Messages
80
Re: 1978 Reinell 1701 Restoration

Ok, been a while since I updated. We finished up the final coats of white and blue on the boat, and I've pulled the masking tape back. The result is unbelievable. It's hard to imagine that it was painted with a roller and a brush! I've never seen shine or glassy finish like this in paint, and it is rock hard!

Now to install the new rubrail (all $385 worth), and all other exterior hardware and teak. I've ordered 4 flush mounted pull-up cleats as well!

Here's a couple of pics of the finished paint.
 

Attachments

  • IMG_3822.JPG
    IMG_3822.JPG
    43.5 KB · Views: 1
  • IMG_3823.JPG
    IMG_3823.JPG
    52.3 KB · Views: 1
  • IMG_3826.JPG
    IMG_3826.JPG
    46.1 KB · Views: 1

ezmobee

Supreme Mariner
Joined
Mar 26, 2007
Messages
23,767
Re: 1978 Reinell 1701 Restoration

Looks amazing. Can't wait to see the finished product.
 
Top