1979 Imperial

bear_69cuda

Commander
Joined
Oct 10, 2008
Messages
2,109
Re: 1979 Imperial

So are you cats saying no glass is needed for keel repair? Just marine-tex, paint (rustoleum???) install keel guard, and I'm good to go?
 

JDA1975

Lieutenant
Joined
Aug 27, 2011
Messages
1,385
Re: 1979 Imperial

That part I can't comment on..I have read a lot, but still no practical experience with glass yet...soon, when the weather warms since I work outside! But as far as the smaller scrapes, filler and paint would "hide" it...might look into gel coat though, that color would be easy to match I bet.
 

Woodonglass

Supreme Mariner
Joined
Dec 29, 2009
Messages
25,929
Re: 1979 Imperial

You could use marine tex and Paint it but... I wouldn't. I LOVE Rustoleum paint and in most cases I'd recommend it but the damage you show is all the way to the glass and I would lay new glass and gelcoat it. All of those areas are a 3 hour fix. Grind out the area back about 3" all the way around and wipe down with acetone. On the big area, Lay two layers of 1.5 oz CSM, a layer of 1708 and then two more layers or CSM. Each patch should be 1" larger than the previous. Sand and fair with 80 grit down to 220 grit. Then mix up some Yellow gel coat and brush it on. Sand it down thru 600 grit and you're good to go. For the gouges and deep scratches, sand and or dremel tool them clean, wipe down with acetone and then mix up some resin with microballons to the consistency of mayonaise. Fill em in and sand em fair then brush on the Gelcoat. It won't be "Perfect" but darn close.
 

JDA1975

Lieutenant
Joined
Aug 27, 2011
Messages
1,385
Re: 1979 Imperial

http://www.iboats.com/Boat-Parts-Ac...lcoat repair kit yellow--**********.255591395

There are a ton of yellows...I couldn't find one for an Imperial so I don't know what color you would need...they sell kits for color matching yourself, so might try one of those. Gelcoat repair would probably be faster, a lot less steps...prep, fill, sand and polish! paint would be prep, prime, sand, prime, sand, paint, sand, paint, few more repeats, sand, polish!
 

Pmccraney

Lieutenant Commander
Joined
Jul 26, 2011
Messages
1,734
I'll defer to wog, oops and others, but I think you can use 3m marine fairing compound or our very own pb with micro balloons (easier to fair/sand) and then just paint to match with rusto/valspar, etc.. Assuming you don't plan to moor it in the water for extended time periods. You can paint over gel, but not over existing paint. Put a wet rag of acetone on it for about 10-20 mins. If the surface starts to peel away on you, it's prolly paint. If nothing happens, you prolly got gel. You could also do spot repairs with gel coat repair kit, but doing larger areas of gel may be tough without experience and the right equip. So prolly paint to match as needed with the keel guard. Hope this helps. If I have steppe on conventional wisdom please correct me...won't be the first or last time.
 

zopperman

Lieutenant Commander
Joined
Jun 22, 2011
Messages
1,551
Re: 1979 Imperial

that yellow is gel... the way it came off like that and how thick it is and how you see the glass... I would do what wood said and reglass... then re gel... make sure your grind outwards to see what other damage there is...
 

bear_69cuda

Commander
Joined
Oct 10, 2008
Messages
2,109
Re: 1979 Imperial

You could use marine tex and Paint it but... I wouldn't. I LOVE Rustoleum paint and in most cases I'd recommend it but the damage you show is all the way to the glass and I would lay new glass and gelcoat it. All of those areas are a 3 hour fix. Grind out the area back about 3" all the way around and wipe down with acetone. On the big area, Lay two layers of 1.5 oz CSM, a layer of 1708 and then two more layers or CSM. Each patch should be 1" larger than the previous. Sand and fair with 80 grit down to 220 grit. Then mix up some Yellow gel coat and brush it on. Sand it down thru 600 grit and you're good to go. For the gouges and deep scratches, sand and or dremel tool them clean, wipe down with acetone and then mix up some resin with microballons to the consistency of mayonaise. Fill em in and sand em fair then brush on the Gelcoat. It won't be "Perfect" but darn close.

WOG,

Thanks for the instruction above, I really appreciate it!

Do you think I can do the repair on the keel without flipping the boat?

The next item is to determine the supplies needed for my project. For glass and resin supplies I plan on ordering from US composites.. This is where I'm kinda in the dark,and will need some guidance for sure....

These pictures show where I would like to cut material away so I can construct my casting decks and storage. I was planning on using 1/2" ply for all decking and framing? In the bow area I was thinking about leaving the ~ 1.5" lip to the outside of the tape lines, I could uses as reference for new deck height, and possible mating surface.

Imperial%25252027DEC2011%252520004.jpg


Bow deck concept

front%252520deck_17DEC2011_032.JPG


The rear deck would be level with the tape line.

Imperial%25252027DEC2011%252520002.jpg


Rear deck concept only, (not level with current tape lines seen above)

rear%252520deck_17DEC2011_030.JPG
 

JDA1975

Lieutenant
Joined
Aug 27, 2011
Messages
1,385
Re: 1979 Imperial

cutting out the bow section will make that keel repair a lot stronger..I am no expert but thought it looked a little thin at the worse part...you can add a couple layers inside as well now to make it that much stronger...That's going to make an awesome little fishing rig set up that way
 

ezmobee

Supreme Mariner
Joined
Mar 26, 2007
Messages
23,767
Re: 1979 Imperial

I was planning on using 1/2" ply for all decking and framing?

1/2" will work but you'll want to beef it up anywhere it gets thin, like around hatches and stuff. I built mine out of 1/2" and it has unfortunately cracked in the two places marked below with red:

DSCF2539-1.jpg


I'll be redoing the deck there with 5/8" probably and adding thickness to those type of areas. I also think I'm going to look into attaching my hatch hinges with long rivets as opposed to screws. It's not the walking around on it that's the problem, it's the stepping into the boat on it with full body weight concentrated on one spot.
 

Woodonglass

Supreme Mariner
Joined
Dec 29, 2009
Messages
25,929
Re: 1979 Imperial

I agree with EZ on the 5/8" deck. As for the Keel It would be easier if she were flipped but it is doable like she sits. Pre cut your patch pieces and mix small batches of resin and you'll do fine. Based on what I'm seeing you'll need to order 10 gals of 435 resin, 15 yds of 1.5oz CSM, 5 yds of 1708 Biaxial cloth, Bubble roller, 5 qts of Cabosil, 1lb of 1/4" chopped fibers , 2 1/2 qts of microballons (to make your own fairing material), 1qt neutral Gelcoat for color mixing, 4oz of GoldenRod and 4oz of Maize yellow tint. (this will allow you to try to color match your gelcoat as best as you can.) Looks like Goldenrod is gunna be pretty close. You might check with OOPS on tips about color matching your gelcoat. I am NOT the expert on gelcoat like he is or Yacht Dr.
 

bear_69cuda

Commander
Joined
Oct 10, 2008
Messages
2,109
Re: 1979 Imperial

Hey gang

Thinking out loud here, due to EZ's post...

I plan on using MDO for deck and support framing.

If I use 1/2" MDO for deck support framing covered with one layer CSM, and tab to hull with 1708, then use 5/8" MDO for decking covered with two layers CSM, and tabbed in with 1708 give me enough support??
 

bear_69cuda

Commander
Joined
Oct 10, 2008
Messages
2,109
Re: 1979 Imperial

I agree with EZ on the 5/8" deck. As for the Keel It would be easier if she were flipped but it is doable like she sits. Pre cut your patch pieces and mix small batches of resin and you'll do fine. Based on what I'm seeing you'll need to order 10 gals of 435 resin, 15 yds of 1.5oz CSM, 5 yds of 1708 Biaxial cloth, Bubble roller, 5 qts of Cabosil, 1lb of 1/4" chopped fibers , 2 1/2 qts of microballons (to make your own fairing material), 1qt neutral Gelcoat for color mixing, 4oz of GoldenRod and 4oz of Maize yellow tint. (this will allow you to try to color match your gelcoat as best as you can.) Looks like Goldenrod is gunna be pretty close. You might check with OOPS on tips about color matching your gelcoat. I am NOT the expert on gelcoat like he is or Yacht Dr.

Thanks WOG for the ordering formula... Much appreciated, and it was gunna be one of my next questions. You rule!

When I get close to the gelcoat tinting stage I'll ask OOPS for advice.

Thanks again EZ and WOG for the advice!
 

bear_69cuda

Commander
Joined
Oct 10, 2008
Messages
2,109
Re: 1979 Imperial

Hey gang,

I decided to do some demo so I could assess how I'm going to build front casting deck supports. So out came cutting wheel and the old seating section. Sadly I love the residual smell of grinding fiberglass! ( Mask in use while grinding )

removed%252520seating%252520001.jpg


Strange thing I found is the triangular deck piece that supported the original bow seating area is not level with the rest of the main deck? I cannot have that going on as water can pool if it ever finds it's way there. So I'm thinking about PL premium bonding a ~ 3/8" section of ply to go over the top of the original deck ( bow triangle section) I'll tab it to the hull with 1708, fillet, and cover with CSM. I'm thinking of using some strips of scrap ply (like tiny stringers) to assure the new deck surface angles away from the bow ares.

bow%252520deck%252520triangle016.jpg


not%252520level%252520007.jpg


Another issue I've encountered is a large gap between the hull side support stringers ( not sure what to call them??? ) and the mid deck. I'm thinking about using the method above PL bonding a thin layer of ply, tab, and glassing to the hull sides, and mid-deck... Therefore assuring the mid-deck section is level. I plan on glassing in pedestal seat bases so I'll need a flat surface. I can use hairy PB for any small voids not covered by ply.

star%252520gap%2525203017.jpg


star%252520gap%2525202018.jpg


star%252520gap%2525201014.jpg
 

Woodonglass

Supreme Mariner
Joined
Dec 29, 2009
Messages
25,929
Re: 1979 Imperial

R U planning on putting Floatation foam in her? If so, what method R U going to use? The areas in question are really not much of an issue if you store the boat properly, by that I mean, if she is stored outside with a cover, she should still have the bow up enough to allow any and all water accumulation to drain back to the bilge and out the drain tube. JMHO.;)
 

bear_69cuda

Commander
Joined
Oct 10, 2008
Messages
2,109
Re: 1979 Imperial

Still thinking about foam... The upper bow sections of this hull are very thin, I'm debating adding some glass on the inside to beef it up... It will provide better anchoring for deck support stringers. Other than trolling motor batteries, and anchor storage under deck, the rest could be filled with liquid foam for support/rigidity, and flotation. I kinda like that idea...

For the front deck supports I planned on building bulkhead full width if the beam, directly in front of the side consoles. This would serve as tie in point for the new casting deck stringers, support for consoles, and rigidity of bow area, as some was lost when I removed the bow seating structure. For drainage I could glass some pvc in the grooves under the bulkhead. When I'm off the water bow high to drain any possible water pooled in that area. I could use PB to direct water to the hole. Less work again thanks dude!

I still want to make the area flat to mount my pedestal seat bases. How does my ply bonding method sound for that? Or should I just fill and contour with PB?
 

Woodonglass

Supreme Mariner
Joined
Dec 29, 2009
Messages
25,929
Re: 1979 Imperial

Still thinking about foam... The upper bow sections of this hull are very thin, I'm debating adding some glass on the inside to beef it up... It will provide better anchoring for deck support stringers. Other than trolling motor batteries, and anchor storage under deck, the rest could be filled with liquid foam for support/rigidity, and flotation. I kinda like that idea...

For the front deck supports I planned on building bulkhead full width if the beam, directly in front of the side consoles. This would serve as tie in point for the new casting deck stringers, support for consoles, and rigidity of bow area, as some was lost when I removed the bow seating structure. For drainage I could glass some pvc in the grooves under the bulkhead. When I'm off the water bow high to drain any possible water pooled in that area. I could use PB to direct water to the hole. Less work again thanks dude!

I still want to make the area flat to mount my pedestal seat bases. How does my ply bonding method sound for that? Or should I just fill and contour with PB?

If you're gunna level it, I'd just use some "Hairy PB" (Resin, Cabosil and Torn/Shredded by hand pieces of scrap CSM) mixed in and the troweld smooth. Watch out for the "Heat". You might need to do multiple layers so the chemical reaction Heat does'nt get to hot.
 

bear_69cuda

Commander
Joined
Oct 10, 2008
Messages
2,109
Re: 1979 Imperial

10-4 on the hairy PB to fill in the void. Thanks for the advice bro-

I managed to remove additional material from the bow gunnels. I dig the height their at, and the gained space will allow better access while building the bulkheads and deck stringers. I still have some trimming on the side consoles, but the bow it's starting to look how I envision things.

Imperial%25252031DEC2011%252520032.jpg


Imperial%25252031DEC2011%252520033.jpg


Imperial%25252031DEC2011%252520035.jpg


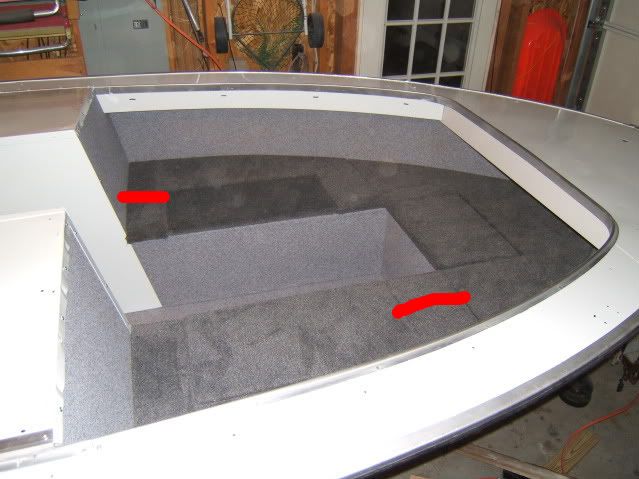
I also removed the rear seating area in preparation of aft deck construction. It really opened things up! I'm now able to day-dream about deck storage, the bilge area, starting battery, and fuel tank location.

I'll be removing all the foam from the main deck to the transom (painted grey), and under the splash well...

Imperial%25252031DEC2011%252520023.jpg


I did notice some water in my bilge that was previously dry... It appears the center stringer has de-laminated and water drained out when I moved the boat to dollies. My solution is to expand the small bilge area forward ~ 1.0' removal of this small deck area will let me inspect the stringers condition, as it's not possible with the cap on. Either way I like the idea of a slightly larger bilge area.

pics are at the end of stringer from the bilge looking forward.

Imperial%25252031DEC2011%252520027.jpg


Imperial%25252031DEC2011%252520029.jpg
 
Top