1980 Rinkerbuilt Renovation (Paint and Powder)

Woodonglass

Supreme Mariner
Joined
Dec 29, 2009
Messages
25,929
Re: 1980 Rinkerbuilt Renovation (Paint and Powder)

Programmer and Teacher, Hmmm where have I heard that before...?????
 

Woodonglass

Supreme Mariner
Joined
Dec 29, 2009
Messages
25,929
Re: 1980 Rinkerbuilt Renovation (Paint and Powder)

Well, Just don't become Old and Forgetful like me.:D:eek:
 

brewern

Cadet
Joined
Dec 31, 1969
Messages
12
Re: 1980 Rinkerbuilt Renovation (Paint and Powder)

Well, Just don't become Old and Forgetful like me.:D:eek:
Too late! :)

Chapter 4:

The goal of tonight was to finish removing the throttle control, and reduce the wire mess!

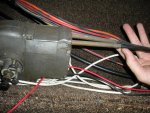
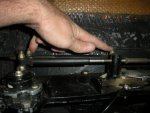
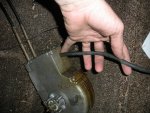
I started by figuring out the two stiff black lines that run to the back.

DSCN5998.jpgDSCN6000.jpg
One of them leads to the carburetor and obviously controls the throttle.

DSCN6002.jpgDSCN5992.jpg

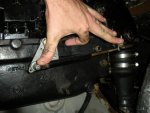
The other is located near the back, top of the engine. What's this one do?

DSCN6001.jpg

After documenting and photographing everything, I moved on...
 

brewern

Cadet
Joined
Dec 31, 1969
Messages
12
Re: 1980 Rinkerbuilt Renovation (Paint and Powder)

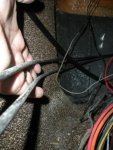
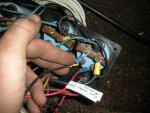
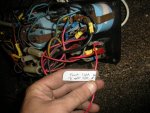
Next I pulled the dash and traced the black wire that leads out of the top of the throttle control. That black wire contains two smaller wires. The black one leads into the wiring harness, and the white one connects to the very back of the ignition switch.

DSCN6009.jpgDSCN6012.jpg

Finally, the throttle control could be removed in it's entirety. The heavens opened up and the angels sang! :) That was fun to trace, even though I'm still not sure of a few things.

Next up, find wires that were easy for me to understand, label and disconnect. The radio was the first to go. During that process, I found out I had a cigarette lighter port I never knew existed, and 2 extra sets of power and speaker lines for radios that no longer exist! I pulled the starboard kickplate, radio, speakers and wires. I disconnected the front light wires from the dash, and also the fuel sender wires.

DSCN6027.jpgDSCN6008.jpgDSCN6018.jpg

That was fun.....
 

jbcurt00

Moderator
Staff member
Joined
Oct 25, 2011
Messages
25,117
Re: 1980 Rinkerbuilt Renovation (Paint and Powder)

Doesn't the control box control both speed (throttle) & forward/reverse.....

That should mean the other cable connects to the shift linkage....

But I didn't stay at a Holiday Inn Express any time recently. Did go in 1 today though, so maybe had just a little bit rub off after all :)
 

brewern

Cadet
Joined
Dec 31, 1969
Messages
12
Re: 1980 Rinkerbuilt Renovation (Paint and Powder)

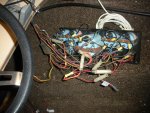
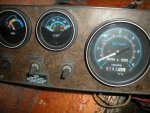
After all that, I'm left with a 'simplified' version of the dashboard. But now, I'm not sure what to do. I think it's time to call in my father, the electrical engineer.... but I'm open to any advice. What do I do with this rat's nest to make sure I can put it all back together again later...

DSCN6028.jpg

The wire mess is starting to look much better!

DSCN6031.jpgDSCN6037.jpg


Chapter 4 Questions:


a) One of the major black lines that lead from the throttle control to the carb is, in fact, the throttle control. What's the other one for?
Shift linkage

b) How to handle the rat's nest?
The same way you eat an elephant... very slowly. I'm simply tracing one wire at a time and documenting everything.
 

brewern

Cadet
Joined
Dec 31, 1969
Messages
12
Re: 1980 Rinkerbuilt Renovation (Paint and Powder)

Doesn't the control box control both speed (throttle) & forward/reverse.....

That should mean the other cable connects to the shift linkage....

But I didn't stay at a Holiday Inn Express any time recently. Did go in 1 today though, so maybe had just a little bit rub off after all :)


I thought about that too, but I just don't have an understanding of how it all works together yet. I'm enjoying reverse engineering it all though.
 

brewern

Cadet
Joined
Dec 31, 1969
Messages
12
Re: 1980 Rinkerbuilt Renovation (Paint and Powder)

Chapter 5:

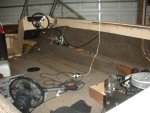
The starboard side is done, let's focus on the port side:
Panorama1.jpg

Nothing major, just ripping, sweeping, finding, and having fun.... until the rot...

DSCN6081.jpg

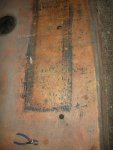
Ok, I expected to replace some plywood... i just didn't expect it to be so thin.
DSCN6092.jpgDSCN6094.jpgDSCN6108.jpg
Rip out the carpet, sweep it up, wash it down, get ready for the next step...
 

brewern

Cadet
Joined
Dec 31, 1969
Messages
12
Re: 1980 Rinkerbuilt Renovation (Paint and Powder)

For those of you that have pulled apart a boat.... tonight I found these. I wonder if they are missed:

DSCN6090.jpg
 

brewern

Cadet
Joined
Dec 31, 1969
Messages
12
Re: 1980 Rinkerbuilt Renovation (Paint and Powder)

Glassers... what should I do?

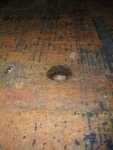
After ripping up the carpet, I found these funnels leading down to the foam. Of course the holes were used to pour the original foam, but left open. After watching Frisco's thread, I'd like to grind out the holes, plug them and cover with a new layer of glass.
But that brings up a couple of issues. First, I'd have to get rid of the carpet adhesive, which means nasty chemicals, but that's ok, I can get a respirator and go for it.
The other problem is the gas tank. Over the summer, during one of our trips, the engine just stopped. After a while it would start again for a little bit. Off and on, etc. I traced it down to the fuel line being clogged or collapsing. Either way, after replacing the rubber fuel line (vacuum tube leading to carb?), things worked great. After a while though, the engine acted weird, so I removed the metal fuel line, blew through it, and things started working again.

This led me to think maybe there's some crude in the fuel tank. Do I really want to seal it in with another layer? Or would it be worth it to rip up the floor and replace it? Or what other options do I have? Maybe I can get a small camera into the tank....


DSCN6108.jpgDSCN6113.jpgDSCN6115.jpg

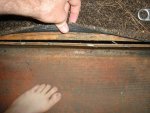
This picture shows the plywood leading up to the port side 'shelf' just below the gunwale. It opens up like that if I step there. But, I wouldn't consider the floor mushy or rotten. It just seems like standard flexing.
DSCN6116.jpg


Your thoughts?
 

brewern

Cadet
Joined
Dec 31, 1969
Messages
12
Re: 1980 Rinkerbuilt Renovation (Paint and Powder)

Programmer and Teacher, Hmmm where have I heard that before...?????

WOG (and other programmers or math nuts), in your spare time, you might enjoy the web site I run out of my garage, right next to the boat:

DSCN6120.jpgDSCN6124.jpg

Basically, fire up your best search algorithms. :) We're between contests right now, but a new contest will be starting on Oct 12th.

Programming isn't required, you can compete using pen and paper, tea leaves, or whatever you choose. I provide prizes when I can.

http://infinitesearchspace.dyndns.org/

-Neil
 

jbcurt00

Moderator
Staff member
Joined
Oct 25, 2011
Messages
25,117
Re: 1980 Rinkerbuilt Renovation (Paint and Powder)

Just caught the nonsmoking PSA sig line :)

Congrats!

The Admiral & I are on an 8day vacation to the beach in southern NC. She's down to her 2nd to last cigarette before she too is a non-smoker. Fortunately, got the bulk of the driving done today. 1 cig before we hit the road, maybe a half. Finish the other half at lunch. And after we check into the condo, last 1:)

Anybody else want to take over driving duty for a half day, I'll meet you at the beach :rolleyes:

Has quit before, once for almost 3yrs. Stress & work usually temp her, but she has quit for a few weeks or a month on & off for years too. Better then not trying I figure.

Back to your boat: :facepalm:

Not that it couldn't have been, but the deck foam cut outs & the odd separation in the plywood deck:
attachment.php


Make me think you are not the first to do some resto work on your Rinker.....

No matter, if you are at all concerned about the status of the gas tank, I'd suggest careful consideration to taking up some of the deck. At least to fully inspect the tank. If you can scope the fill line, it may or may not reveal how much scale is floating around in there. Know any plumbing contractors? They may have a camera snake they can run into the tank.....
 

brewern

Cadet
Joined
Dec 31, 1969
Messages
12
Re: 1980 Rinkerbuilt Renovation (Paint and Powder)

Just caught the nonsmoking PSA sig line :)

Congrats!

The Admiral & I are on an 8day vacation to the beach in southern NC. She's down to her 2nd to last cigarette before she too is a non-smoker. Fortunately, got the bulk of the driving done today. 1 cig before we hit the road, maybe a half. Finish the other half at lunch. And after we check into the condo, last 1:)

Anybody else want to take over driving duty for a half day, I'll meet you at the beach :rolleyes:

Has quit before, once for almost 3yrs. Stress & work usually temp her, but she has quit for a few weeks or a month on & off for years too. Better then not trying I figure.

Thanks JB! October 30th, my birthday, will be 1 year. I made a promise to myself a long time ago to quit smoking when I turned 40. And Yoda was running through my head, "Do. Or do not. There is no try." :) Most of the time, quitting cold turkey doesn't work, so if she needs an aid to help her, the one thing that really eased the transition for me was e-cigarettes. You get the same physical feeling of having a cigareet, and you even inhale and it feels about right. You are inhaling water vapor infused with nicotine. There are no health risks, and it costs about $8/month after the initial investment and it doesn't stink. I no longer use it, but my wife does, and I don't think she could have quit without it.
So, if that's an option, find your closest vapor store and after wasting a bunch of money figuring out the best system, I recommend you go with a tank system, and a 1000mAh manual passthrough system. Let me know if you need any more advice on that...
But either way, CONGRATS!

Back to your boat: :facepalm:

Not that it couldn't have been, but the deck foam cut outs & the odd separation in the plywood deck:
...

Make me think you are not the first to do some resto work on your Rinker.....

I think I am the first though. When I pulled up the carpet, it came up pretty easily until I got to the front, right at the walkthrough. The carpet actually went under the fiberglass floor, and it has some spray foam stuck to it. I had to cut it to get it out. This tells me this is the original carpet, put in place before the top cap went on.
And I don't think that plywood on the side is structural at all. It's simply there as part of the shelf for the cubby hole. But, I would think it would have been glassed over. I need to take a closer look at the starboard side.

No matter, if you are at all concerned about the status of the gas tank, I'd suggest careful consideration to taking up some of the deck. At least to fully inspect the tank. If you can scope the fill line, it may or may not reveal how much scale is floating around in there. Know any plumbing contractors? They may have a camera snake they can run into the tank.....

Hmmm, I know a couple guys in the media department here at the university. I think it's time for a phone call...

Thanks JB,
NB
 

Woodonglass

Supreme Mariner
Joined
Dec 29, 2009
Messages
25,929
Re: 1980 Rinkerbuilt Renovation (Paint and Powder)

I'd cut the deck and remove the tank and clean and inspect it. Lot's of ways to clean it. If it's leaking...well not so many ways to fix it. Best to buy a new one or a used one that isn't leaking. Just my 2? worth. Pretty easy to fabricate a hatch to cover the tank back up.
 

brewern

Cadet
Joined
Dec 31, 1969
Messages
12
Re: 1980 Rinkerbuilt Renovation (Paint and Powder)

I'd cut the deck and remove the tank and clean and inspect it. Lot's of ways to clean it. If it's leaking...well not so many ways to fix it. Best to buy a new one or a used one that isn't leaking. Just my 2? worth. Pretty easy to fabricate a hatch to cover the tank back up.

I don't want to tear things up if I don't have to, so I think I'll try and find a scope and look for scale, or other junk in the tank.

Chapter 6:

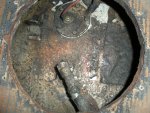
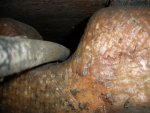
Through the fuel tank access hole, I took some pictures to see how things look in there:

DSCN6139.jpgDSCN6142.jpgDSCN6144.jpg

The tank looks dirty, but in good shape.
I might as well replace the fuel sender and fuel line while I'm at it.

If there is junk in the tank, maybe I can fit a filter inline before it gets to the fuel pump. Any suggestions?
Also, how do I know which fuel sender to purchase?
 

brewern

Cadet
Joined
Dec 31, 1969
Messages
12
Re: 1980 Rinkerbuilt Renovation (Paint and Powder)

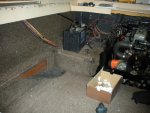
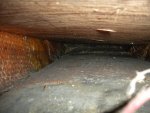
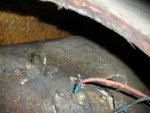
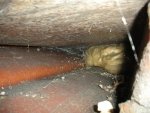
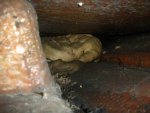
I decided to also take some pictures from the stern, looking back underneath the floor. And I'm surprised to see so much empty space:

DSCN6134.jpgDSCN6138.jpgDSCN6129.jpg

It looks like the foam stops 2-3 feet from the back.
Good for water drainage I guess...

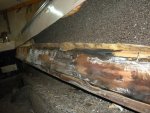
It also looks like the stringers are made of fiberglass, or thickly coated wood.

So... on to the wiring diagram...
 

brewern

Cadet
Joined
Dec 31, 1969
Messages
12
Re: 1980 Rinkerbuilt Renovation (Paint and Powder)

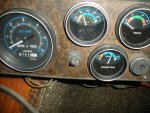
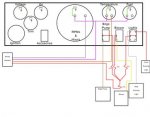
I figured it couldn't be too difficult to make a wiring diagram for this dash, and I was right. Once I dug into it, it wasn't that bad.

DSCN6153.jpgDSCN6146.jpgDSCN6151.jpg

I didn't get finished, but here's the beginning:

dash_wiring_diagram_right.jpg
Not the prettiest, but it's a start.

Chapter 6 questions:

Are there any problems putting a fuel filter inline, before it gets to the fuel pump?
How do I know which fuel sender to buy?
 

brewern

Cadet
Joined
Dec 31, 1969
Messages
12
Re: 1980 Rinkerbuilt Renovation (Paint and Powder)

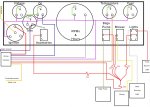
Finished the dashboard wiring diagram tonight.
That's probably it for a while. We're headed out camping this weekend, and taking the canoe for it's first trip out. :)

Finished wiring diagram for dashboard:

dash_wiring_diagram.jpg
 

brewern

Cadet
Joined
Dec 31, 1969
Messages
12
Re: 1980 Rinkerbuilt Renovation (Paint and Powder)

Chapter 7

Well, the day started off nicely.....


My mother and step-father were passing through the area and stopped by to say hello. She informed me the sewing machine was being worked on and I wouldn't be able to get my hands on it just yet. No worries, that's just cosmetics for later.
After they left, I decided to do the long awaited compression test.

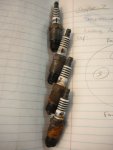
I pulled all the spark plugs:
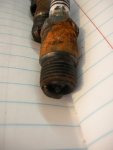
DSCN6316.JPGDSCN6311.jpg

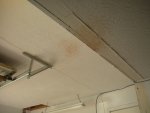
Then screwed the compression tester onto cylinder 1 and cranked over the engi.... OH CRAP! Rusty, nasty water shot out of cylinder 3 onto the ceiling, across the garage and onto my wife's stained glass work area!!!

DSCN6317.JPG

She wasn't happy about it, but she knew I didn't do it on purpose and laughed it off with me. But trust me, it's a lot messier than that image shows.... After crying a little, I looked at the gauge, and it showed 270! All you mechanics know what that means. I escaped the water from the gauge, removed it, threw some old jeans over the spark plug hole, and cranked it a few times.

DSCN6319.jpg

It looks like maybe I was wearing those jeans when I first saw the water shoot out...

After the water was gone from #1, I hooked up the tester again, cranked it over, and it showed 90.
#2: 140
#3: 150
#4: 110

90 on #1? Did I mess something up when I had the tester connected and cranked it over? I wouldn't think so, but let me know.
Either way, obviously I'm doing a complete rebuild of the engine. :mad:
The good news is my step-father said I was welcome to borrow his engine mount, and cherry picker. They are on vacation for the next week, but after that we'll arrange some time to yank the engine. He's a serious mechanic and has owned his own car lot, so his knowledge and experience will be invaluable during the overhaul.


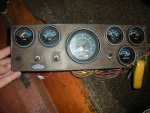
So, without much else to do, I traced a few more wires and finally removed the dash board.
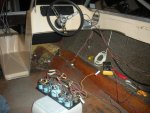

DSCN6334.jpg


It looks like the wires heading to the aft are in good condition. Hopefully I can just replace a few wires, and the new gauges will be good.

Not too much more to do until I can pull the engine, and that will be a couple weeks.
Signing off for now.

Chapter 7 questions:
1) Did I damage anything by having the gauge hooked up and cranking it with water in the cylinder?
 
Top