1984 Chris Craft Scorpion 186 Restoration

Status
Not open for further replies.
Joined
Jun 13, 2009
Messages
65
Re: 1984 Chris Craft Scorpion 186 Restoration

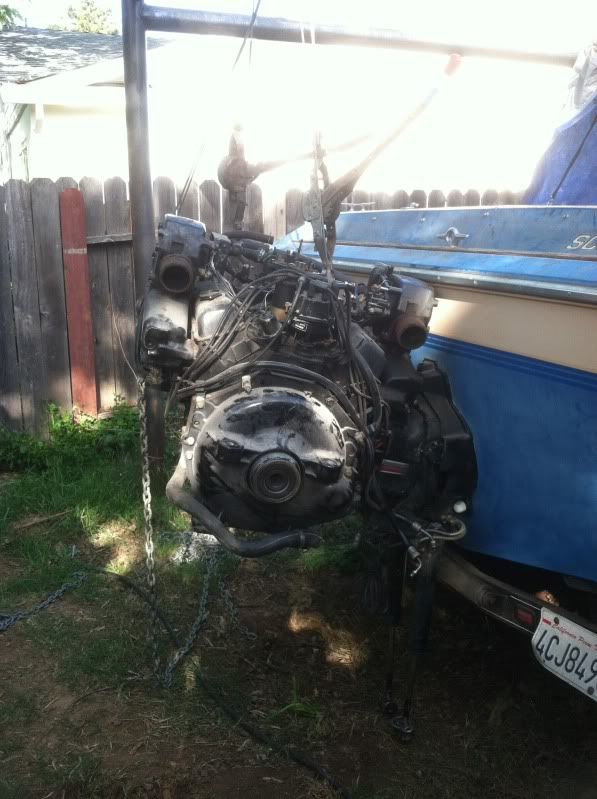
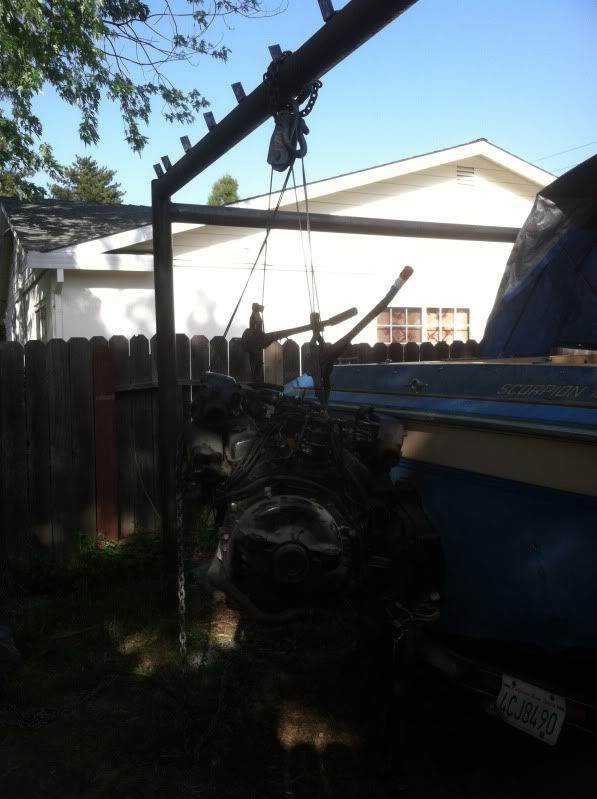
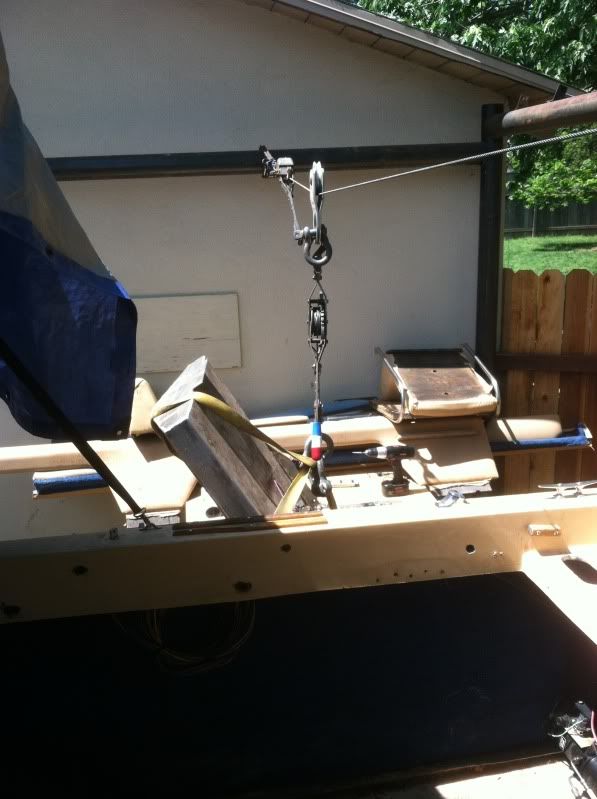
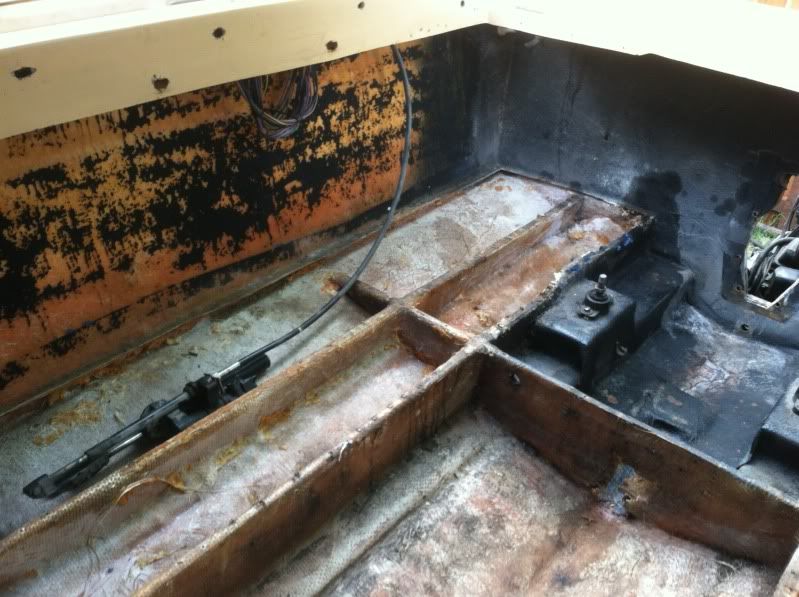
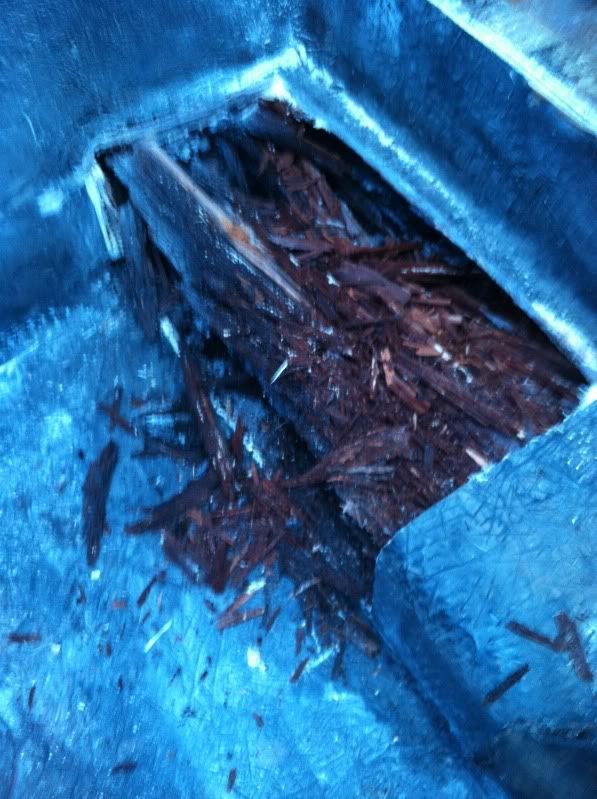
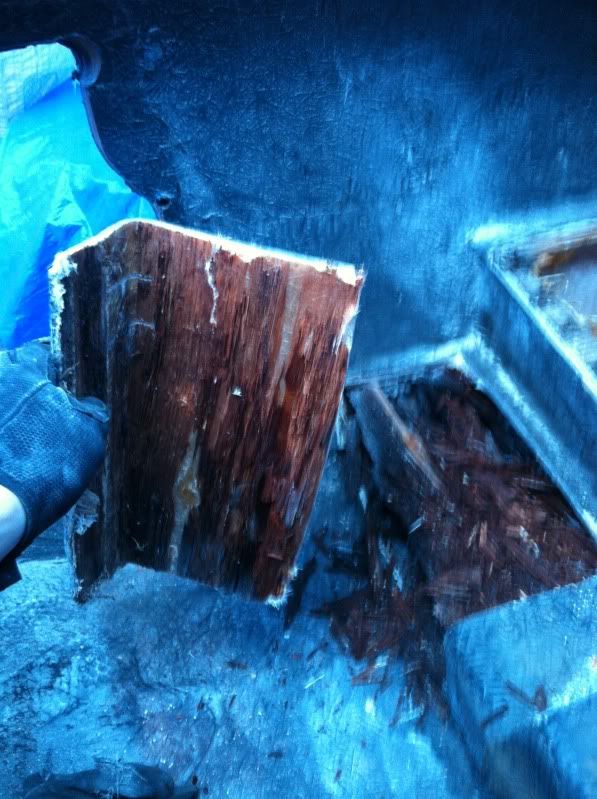
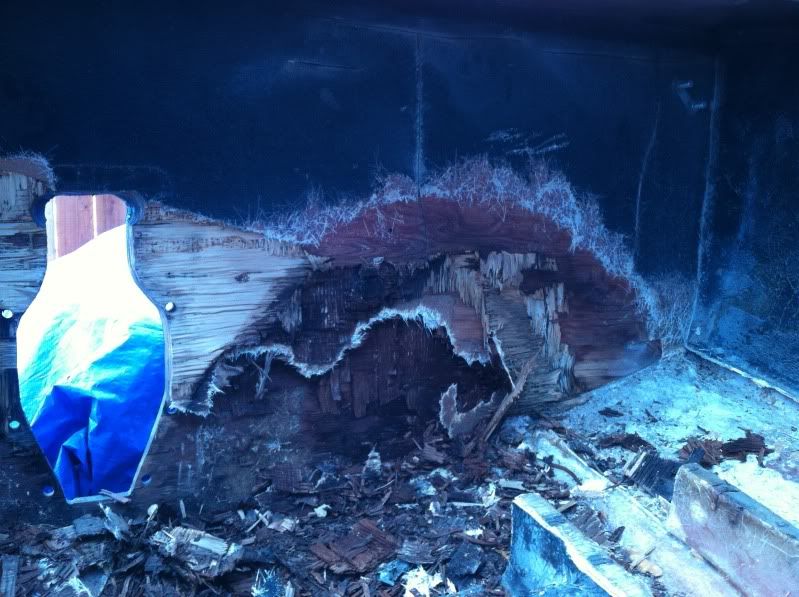
This weekend was not as productive as I was hoping. Motor is still in the boat, but I spent a lot of time cleaning my work area which will pay of in the long run when since I will not be tripping over crap.

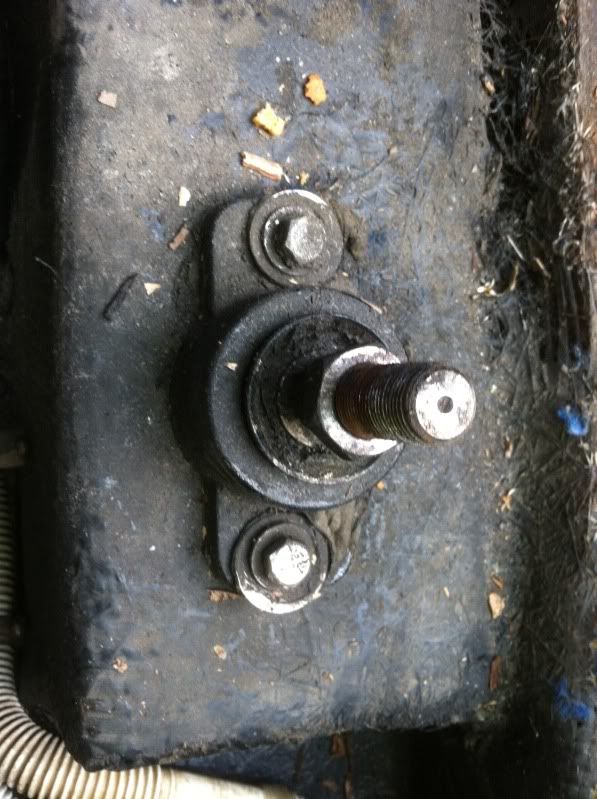
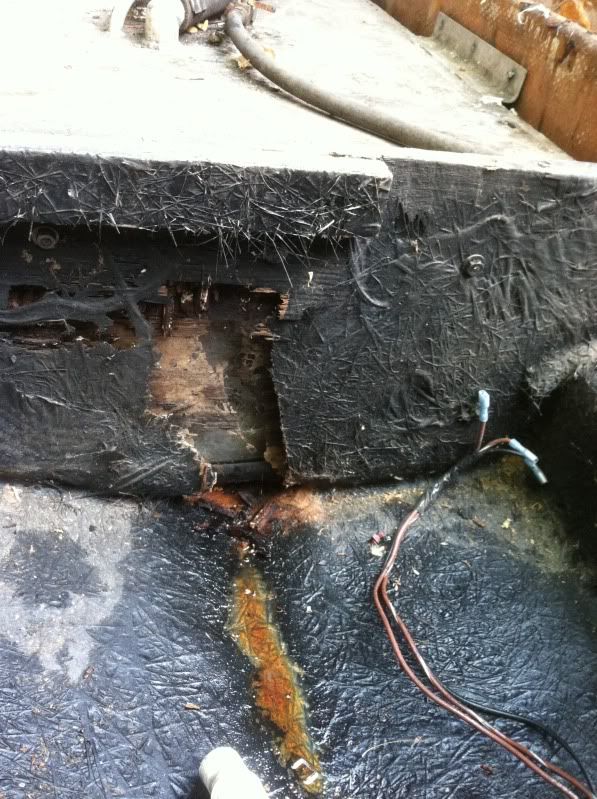
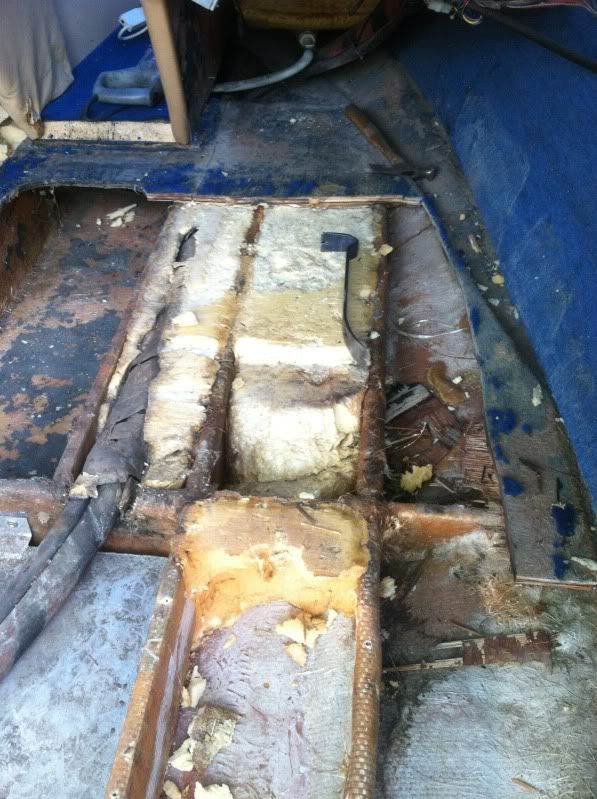
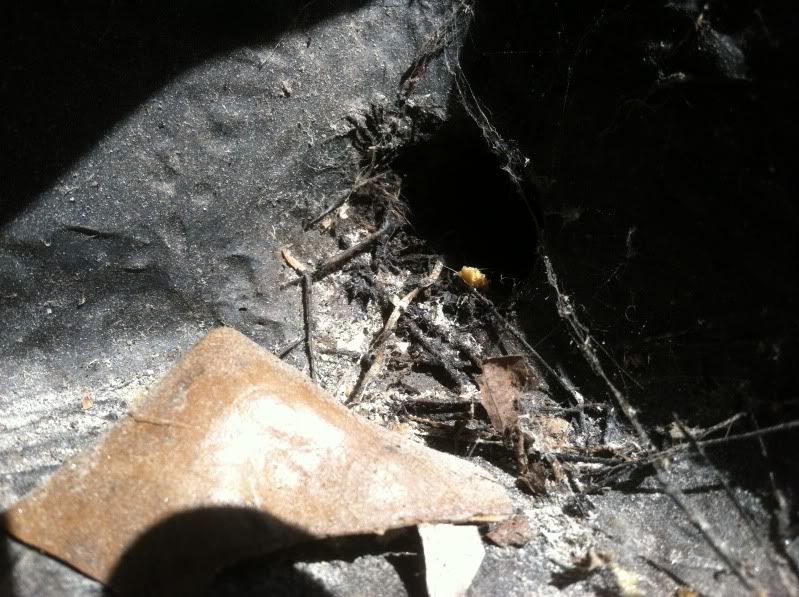
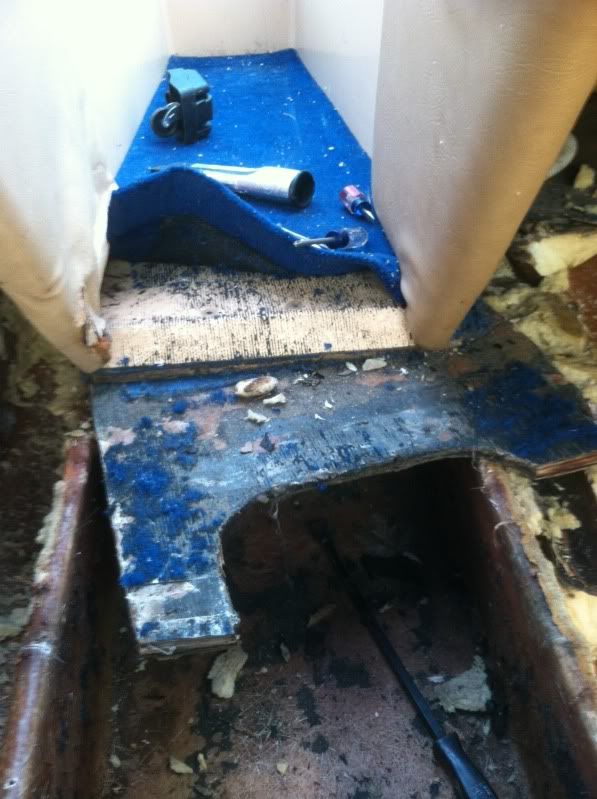
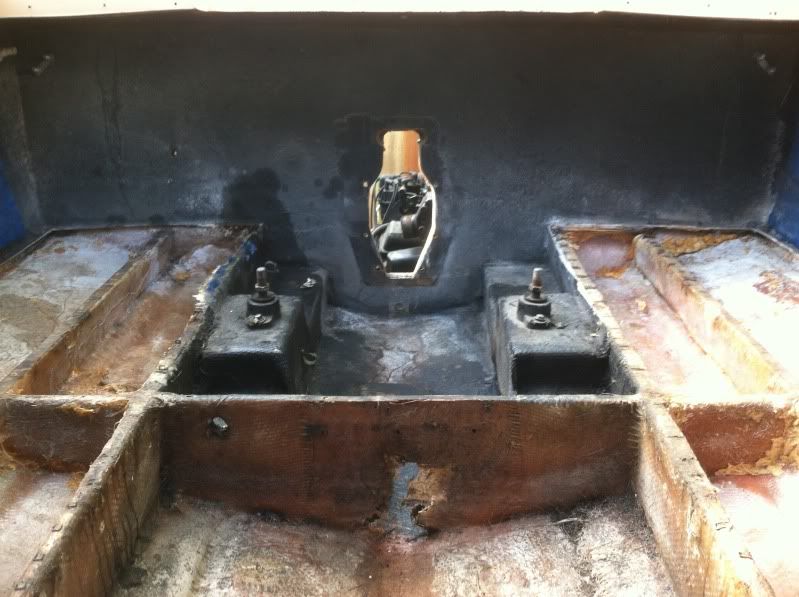
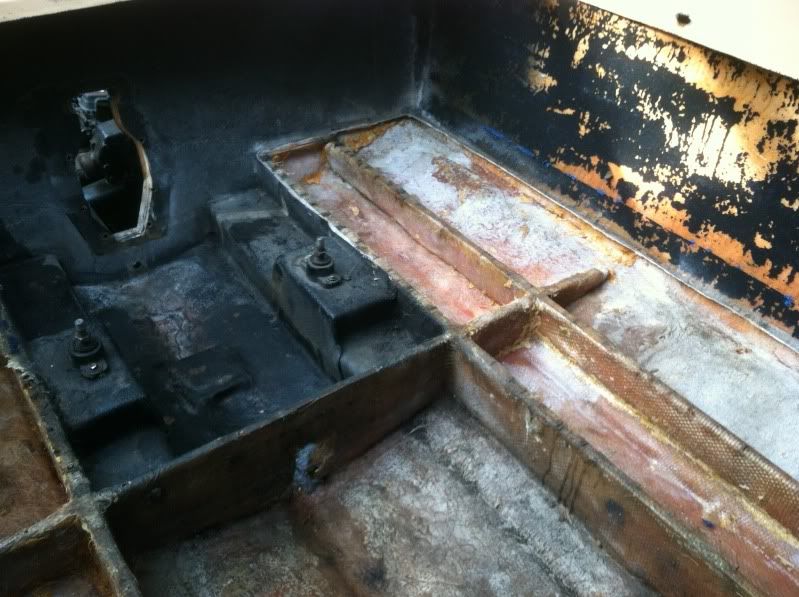
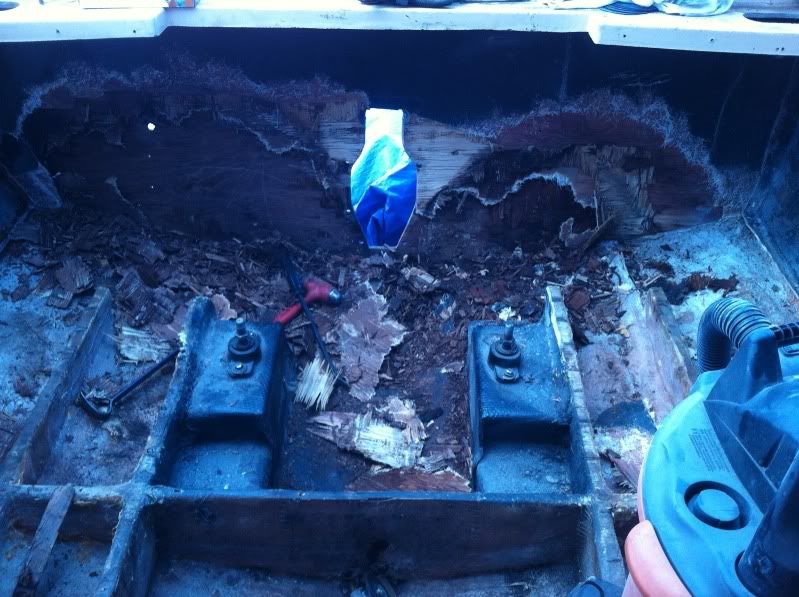
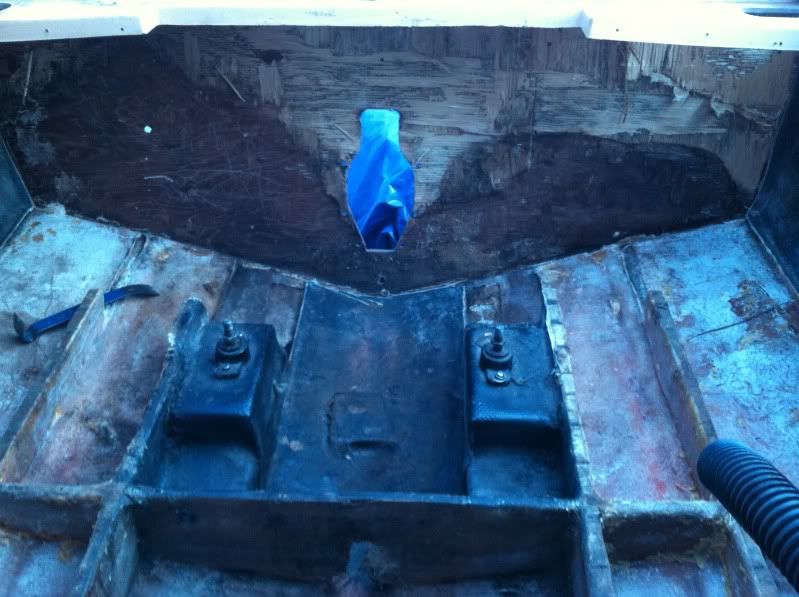
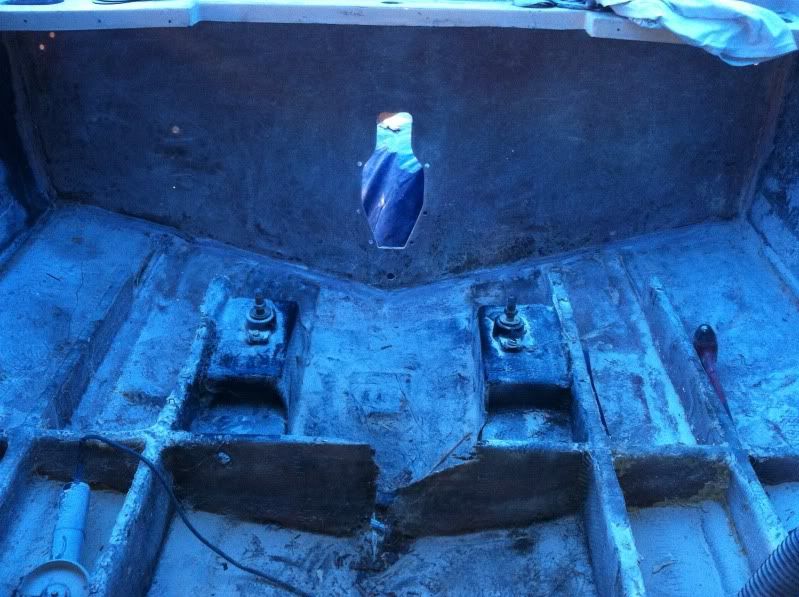
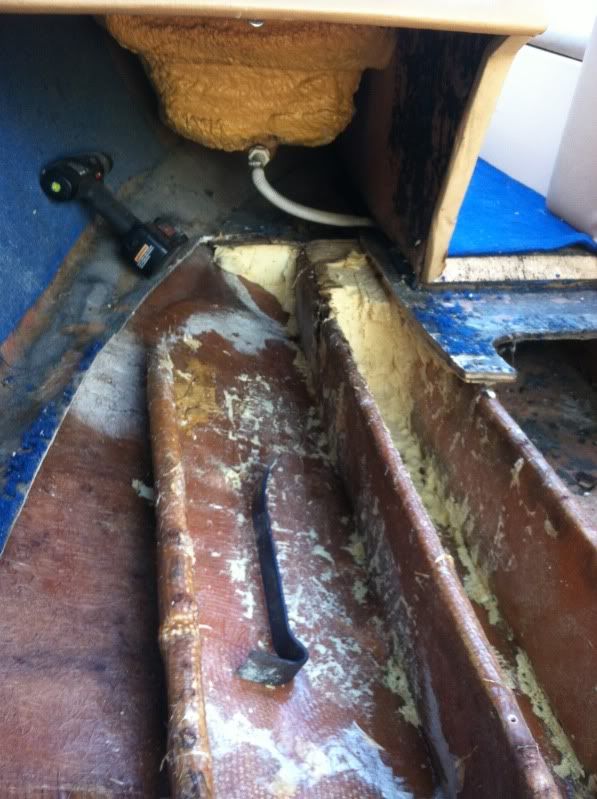
Pulled some more of the deck up and continued to pull out the foam. The concern I have now is how am I going to get everything re-installed up under the open bow area without pulling the cap? Not being a fat *** helps, but I still need to somehow cram myself under there to cut out/re tab in the stringers. Anyone have ideas? Another thought is to cut out the footwell area and the sides of the bow seats then re-glass everything back in? I plan on repainting the interior anyways but would like to avoid cutting the cap where I can.

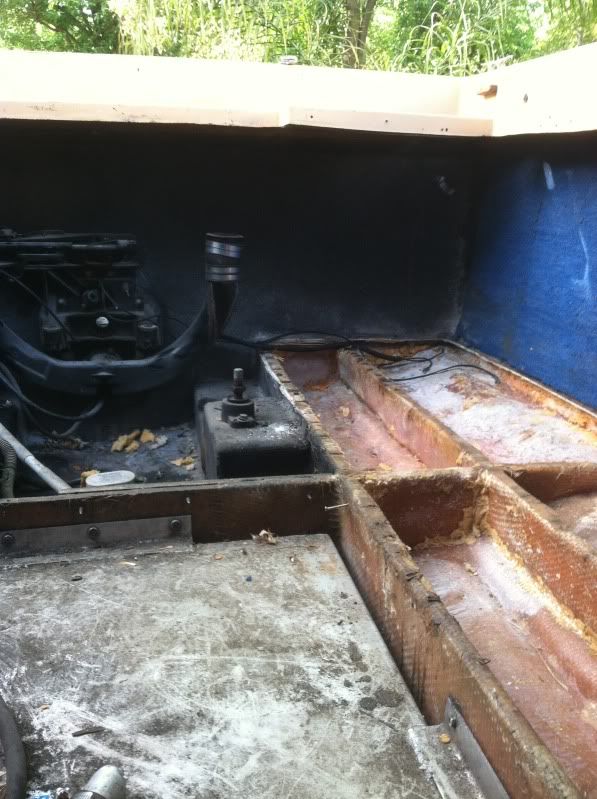
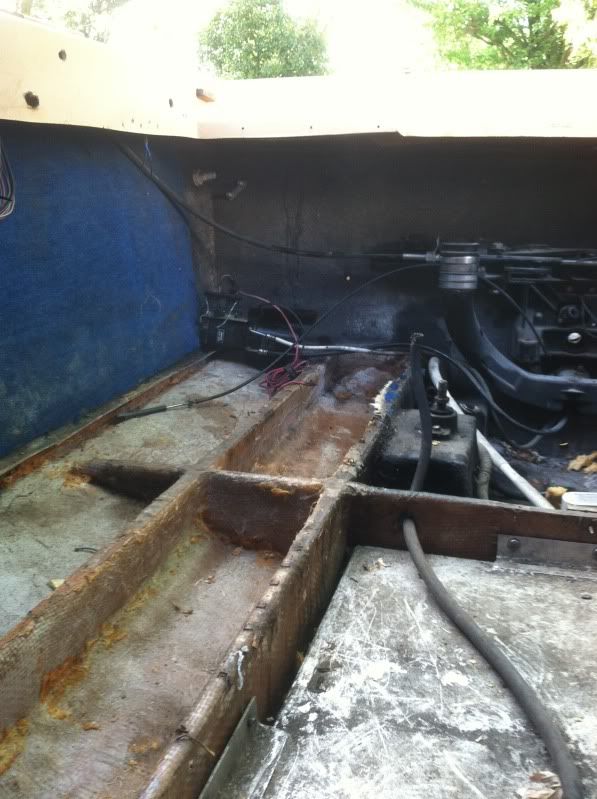
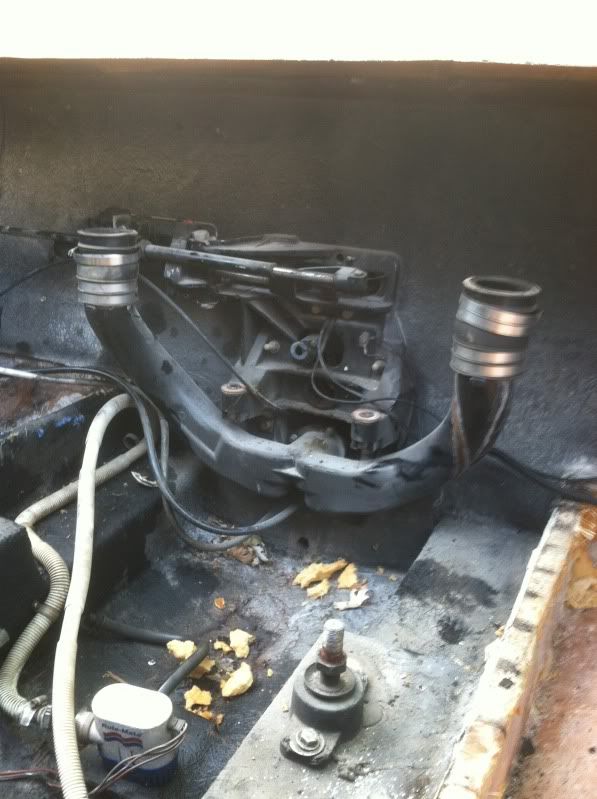
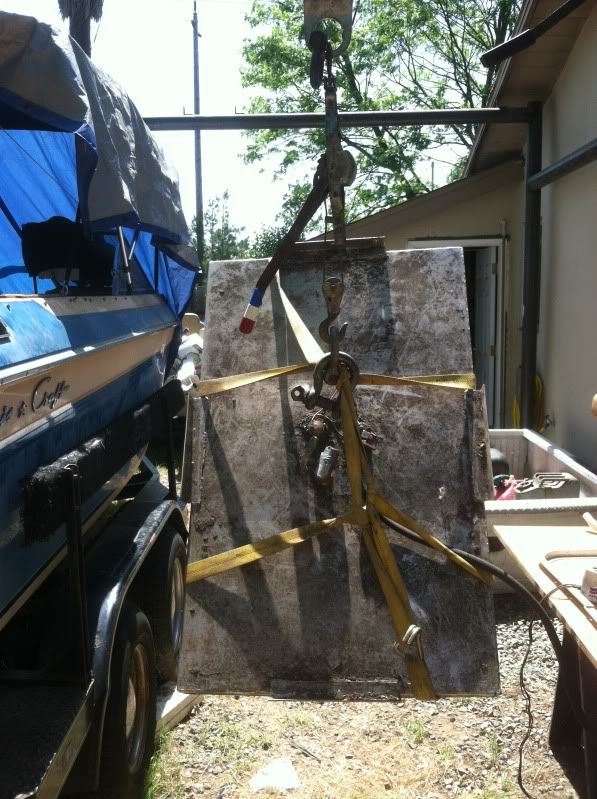
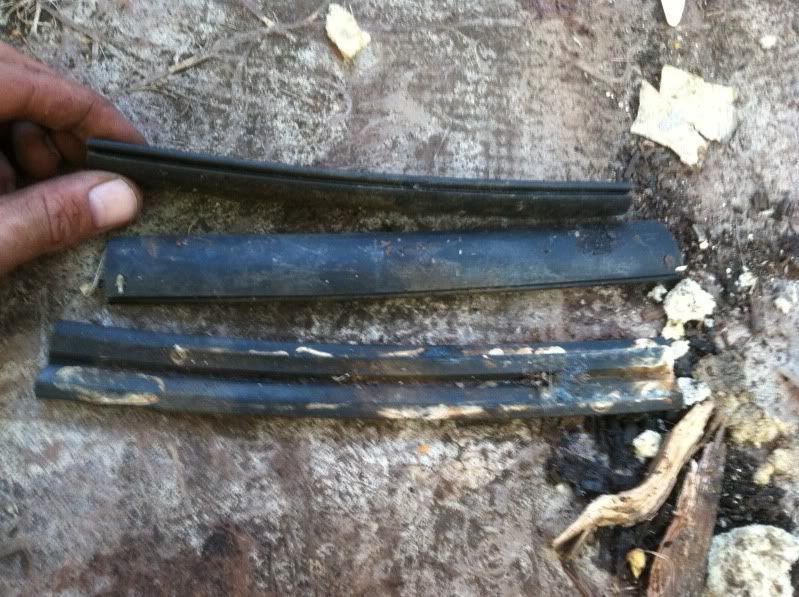
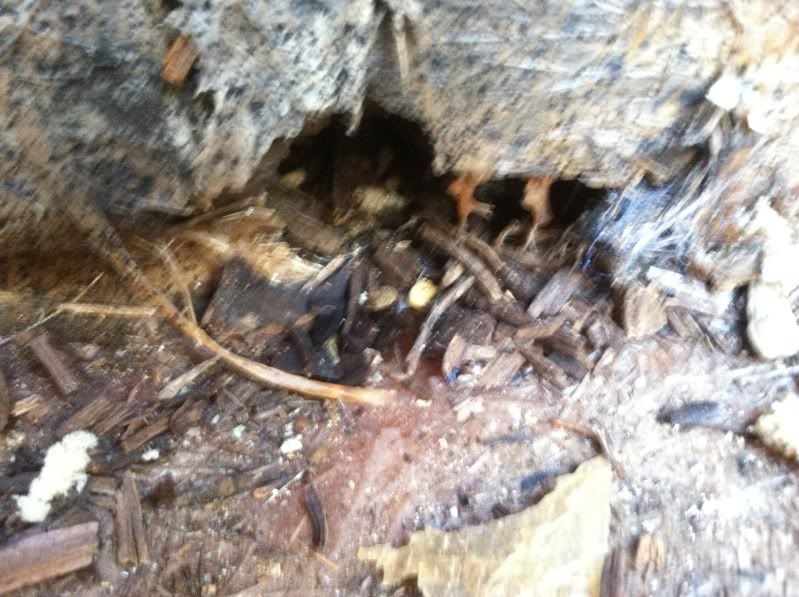
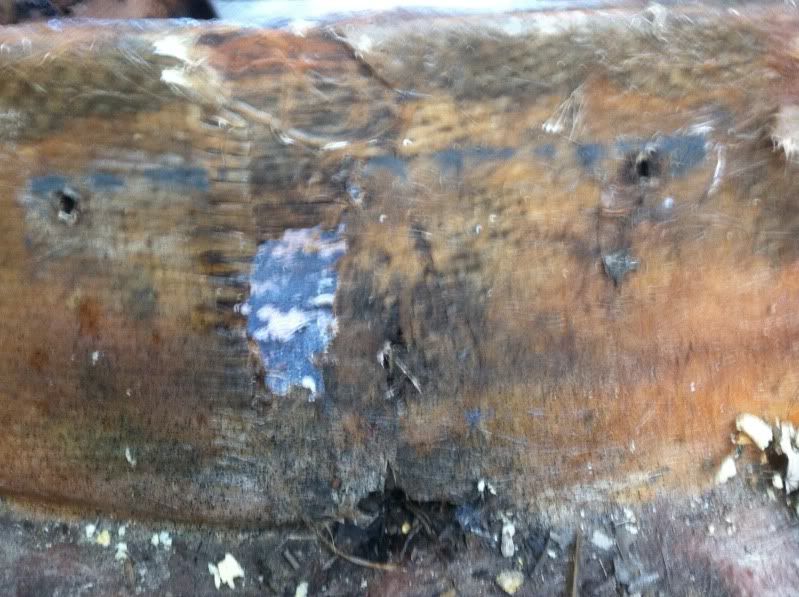
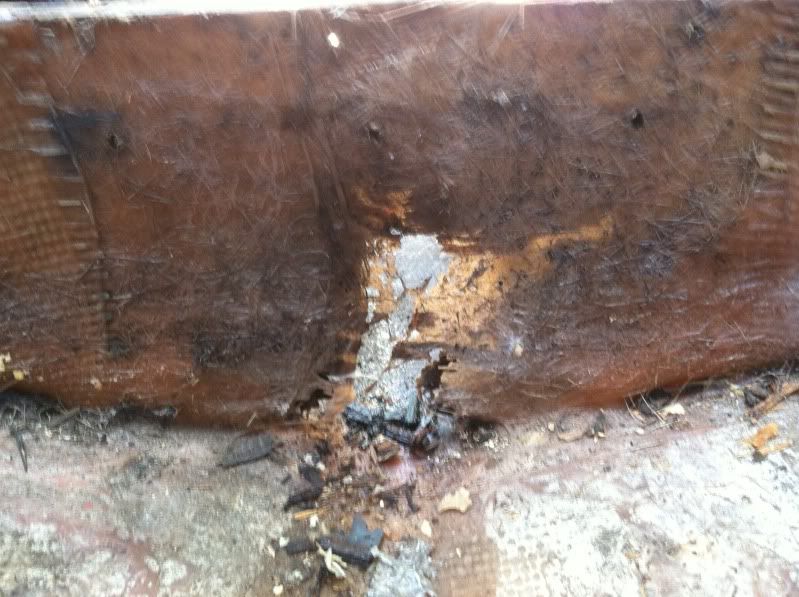
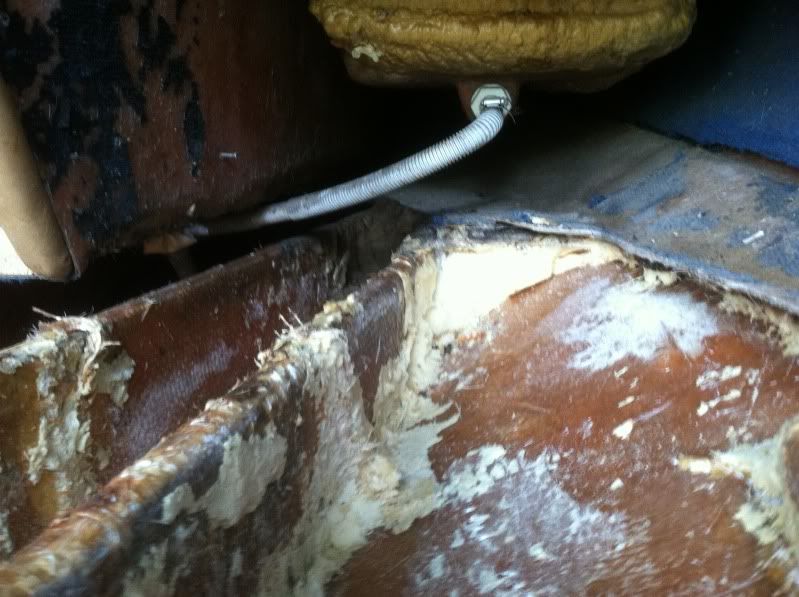
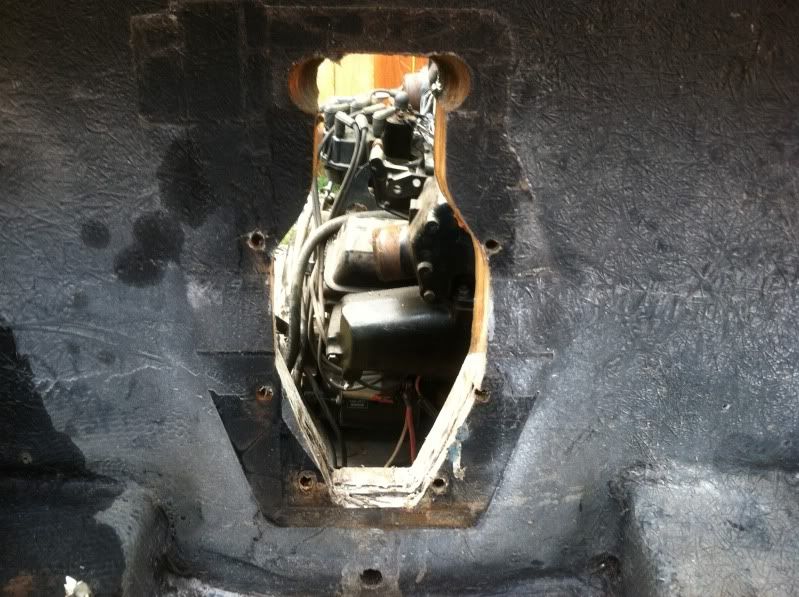
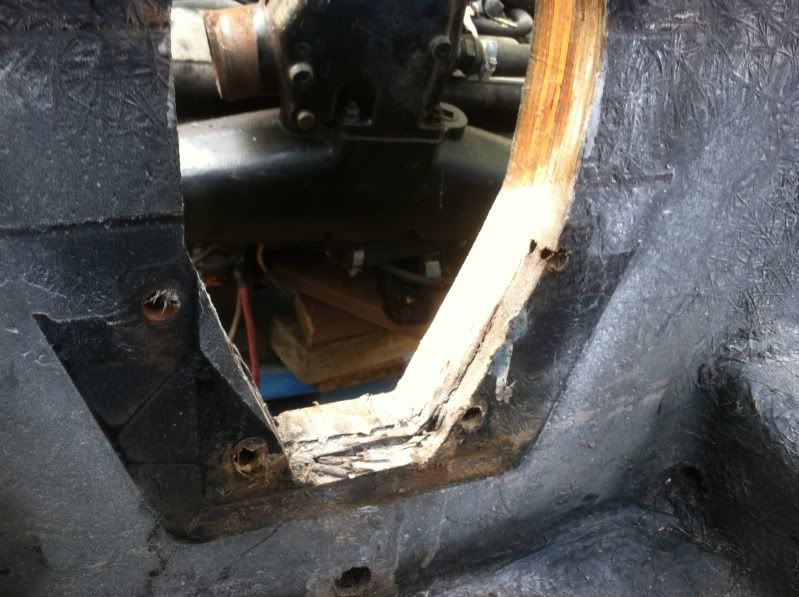
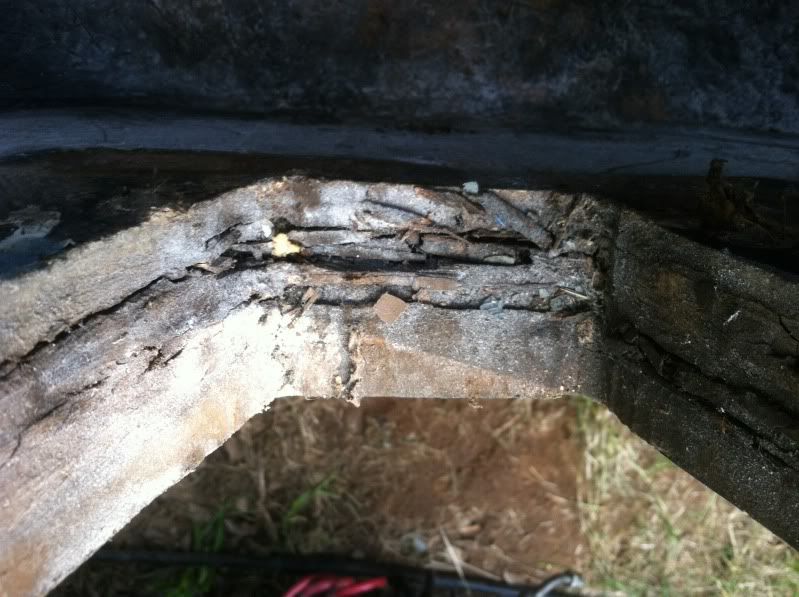
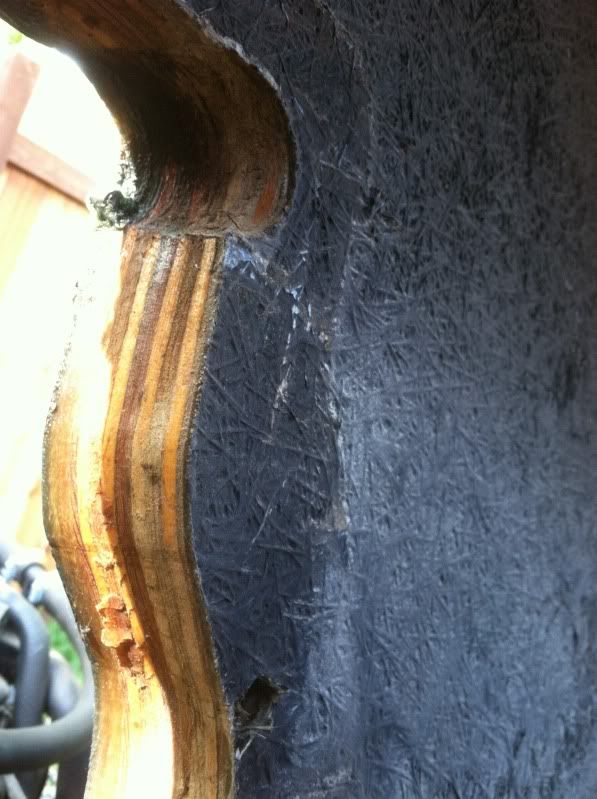
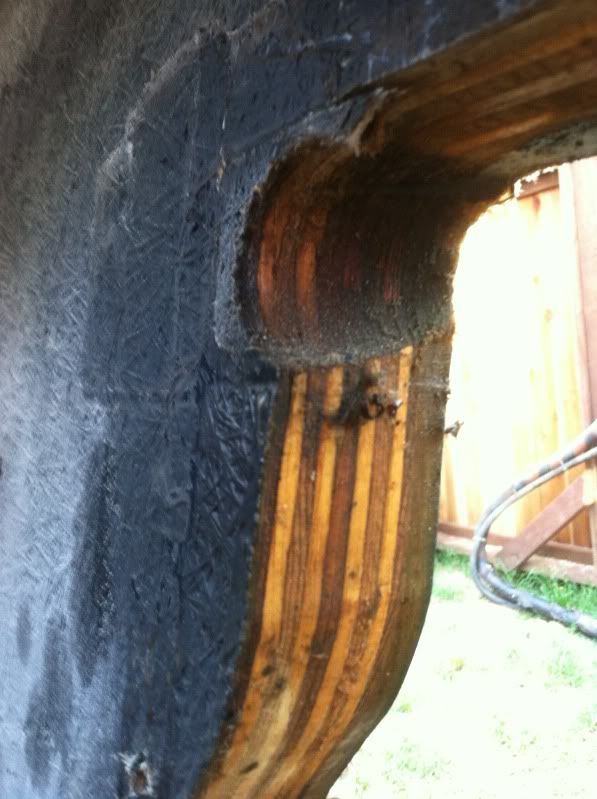
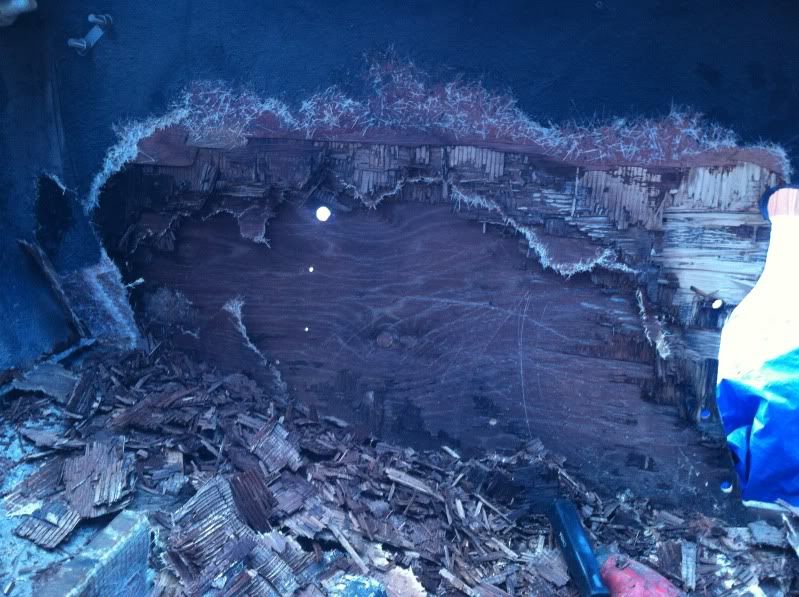
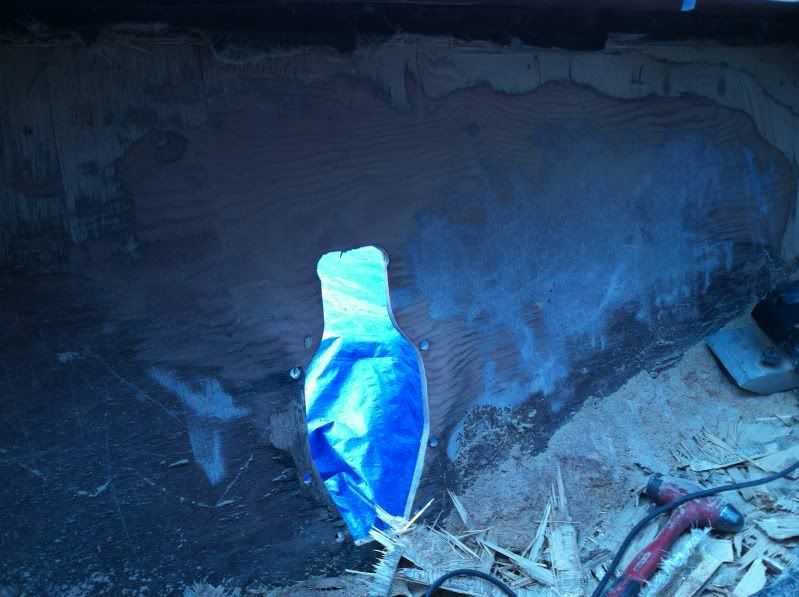
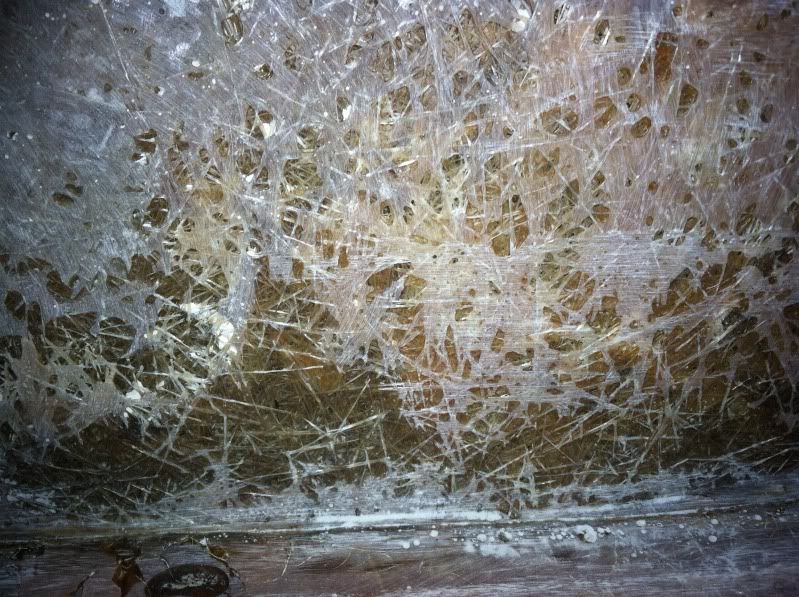
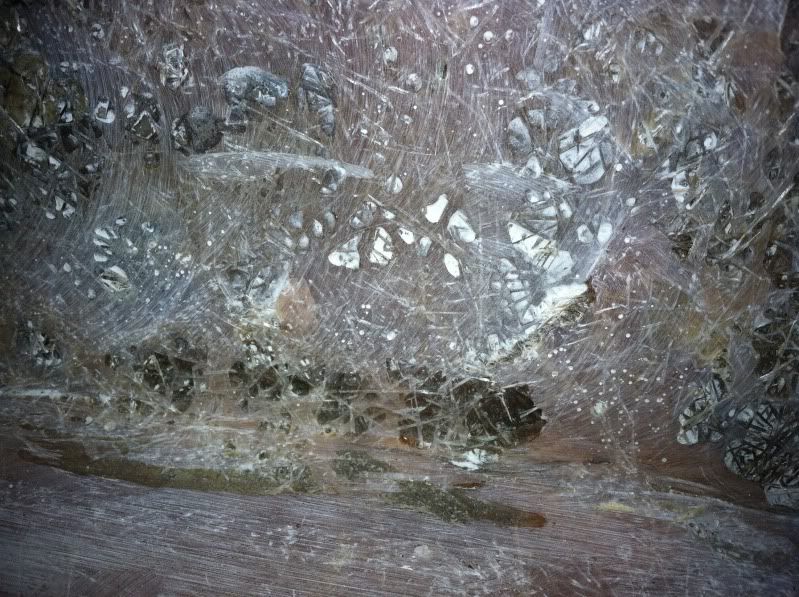
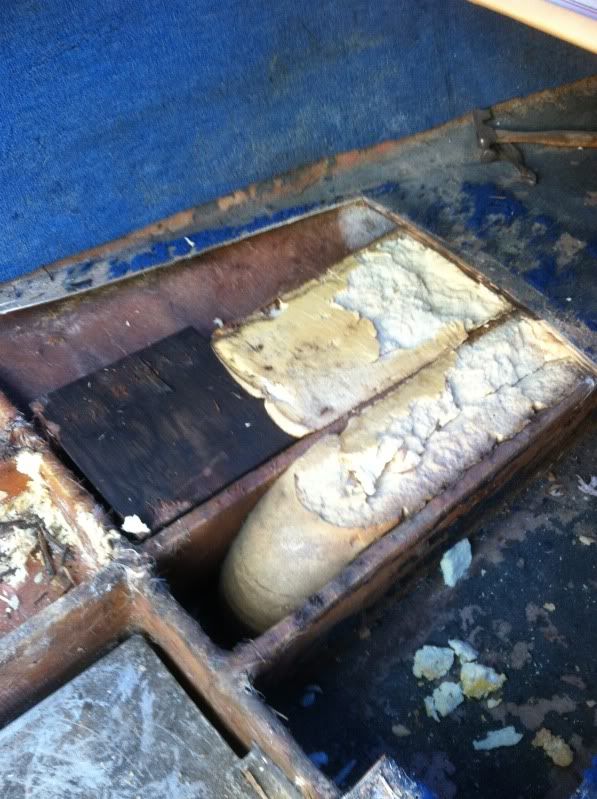
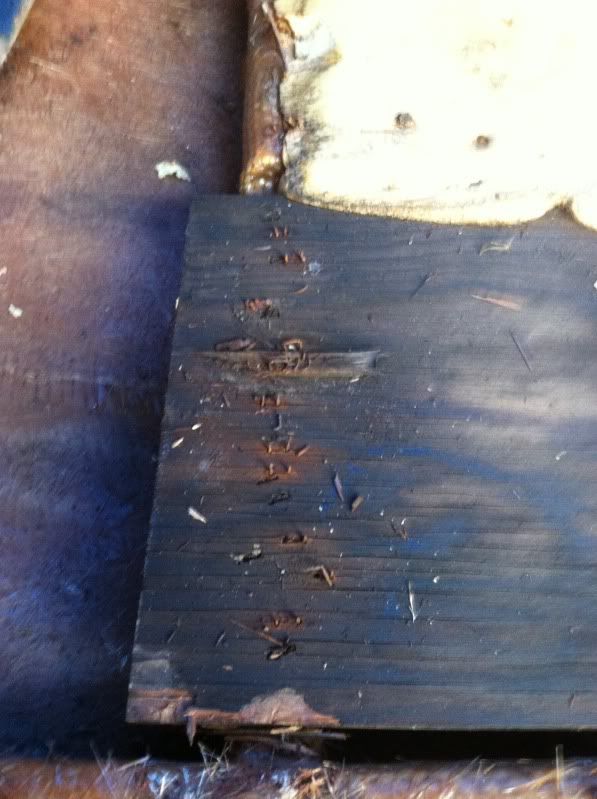
Here are a few pictures, the dark square of plywood was re-enforcing the seat mount I think. There was another on the starboard side also. Still amazed on the number of staples that were used and am very glad I have a tetanus shot.

IMG_0552.jpg


IMG_0553.jpg


IMG_0555.jpg
 
Joined
Jun 13, 2009
Messages
65
Re: 1984 Chris Craft Scorpion 186 Restoration

I had a productive weekend. Pulling the motor did not go as smoothly as I had hoped for but it is out.

IMG_0557.jpg


IMG_0558.jpg


IMG_0559.jpg


IMG_0560.jpg


IMG_0561.jpg
 
Joined
Jun 13, 2009
Messages
65
Re: 1984 Chris Craft Scorpion 186 Restoration

Figured I would post an update while having lunch.

Gas tank came out without to many problems. I had figured I could pick the tank up, balance it on the rail of the boat while I jumped out and get it to the ground. Didn't get to far with that plan since there was still gas in the tank :facepalm: Got resourceful and rigged up a gantry using a come-a-long and a snatch block. Made it simple for me to remove the tank myself.

IMG_0567.jpg


IMG_0568.jpg


This is all the tank was sitting on, looks like pieces of rub rail

IMG_0569.jpg


And some more pictures of why I started this project.

Drain from ski locker to gas tank area:

IMG_0570.jpg


Looking from tank area to ski locker:

IMG_0571.jpg
 
Joined
Jun 13, 2009
Messages
65
Re: 1984 Chris Craft Scorpion 186 Restoration

From tank area to bilge:

IMG_0572.jpg


You can barely make out the hole in the picture but it goes into the motor mount and feels hallow, probably the source of the rot in that area. Not sure why it is there.

IMG_0573.jpg
 
Joined
Jun 13, 2009
Messages
65
Re: 1984 Chris Craft Scorpion 186 Restoration

here is the rest of the update.

I am at the point I can cut the transom and stringers next weekend. I need to put together a starting list of what I need so I can place an order with US Composites and figure out what wood I am going to use and pick that up also.

IMG_0576.jpg


IMG_0601.jpg


IMG_0602.jpg


IMG_0597.jpg


IMG_0596.jpg


IMG_0595.jpg
 
Joined
Jun 13, 2009
Messages
65
Re: 1984 Chris Craft Scorpion 186 Restoration

Alright I need some help spending my money lol

I am going to order my supplies from US Composites in 2 orders. I am going to start with the transom, then the stringers and deck.

Initially I am going to order:

1.5oz CSM - 50" wide, thinking 80yards and that will be enough for everything? Should I start with less?

1.5oz CSM Tape - 1 roll is 110 yards, just not sure how wide I should get 4" or 6"

DMB 1708 Biaxial - 50" wide thinking 10 yards or should I get more?

435 Standard Polyester Layup Resin (Marine Grade Resin) - 10 gallons to start

Think that is a good start? The only thing i think I am missing is the chopped up material to make the peanut butter. Is that something I can order or to I just chop up the CSM? Going to scout wood today at a few different stores in the area.

Suggestions are appreciated and thanks for reading!
 
Joined
Jun 13, 2009
Messages
65
Re: 1984 Chris Craft Scorpion 186 Restoration

Another question, when I remove the motor mounts is it important to replace them exactly where they were or when I reinstall everything and align the motor is that the location they get bolted back in?
 
Joined
Jun 13, 2009
Messages
65
Re: 1984 Chris Craft Scorpion 186 Restoration

Got a chance to got some work done yesterday, about to go outside with the goal of getting the rest of the old transom out. The rotten wood is simple, but there is some dry would in there that is really fighting me. Angle grinder with a cutoff wheel makes short work of stringers. I also found that holding the shop vac nozzle while cutting almost eliminates dust flying around.

Port side motor mount:

IMG_0612.jpg


IMG_0613.jpg


IMG_0616.jpg


IMG_0615.jpg


IMG_0614.jpg
 
Joined
Jun 13, 2009
Messages
65
Re: 1984 Chris Craft Scorpion 186 Restoration

Didn't get as much as I had hoped done, but I should have the transom in by next weekend.

IMG_0617.jpg


I have some grinding to do still but the majority of the old wood is out.

I am getting my fiberglass supplies locally, USComposites wanted almost $300 in shipping/hazmat fees. I found a local place, TAP Plastics that stocks everything I need. Things run a little more, but with no shipping it will work out to be cheaper. The convenience of them being 10 minuets away is awesome also if I do come up short on supplies and need to run out.

Should have the wood for my transom tonight, going to pick it up after work.

The lack of comments make me feel like I am on the right track, hopefully someone chimes in if they see me making a mistakes. Maybe I should have said I was restoring a Starcraft lol
 

Pmccraney

Lieutenant Commander
Joined
Jul 26, 2011
Messages
1,734
Re: 1984 Chris Craft Scorpion 186 Restoration

I would add a few gallons of cabosil to the order - its not that expensive... You need this to thicken your resin...

I have also become a fan of micro-balloons (like cabosil, but makes a softer more pliable pb paste than cabosil).

Also, I would be some 1/4 inch milled fibers (way easier that cutting up CSM)...

You will go throw a bunch of the cabosil and milled fibers in making P.B. - so order lots of it...

You can order your 2-part foam later in the job... You will need more resin, but 10 gallons is a good start...

I just killed my second 5 gallon bucket on Saturday and I don't even have my stringers tabbed in yet... Still have to do all the stringers, the deck, etc...

Make sure you get a bubble-roller and some MEKP (catalyst for your resin)... I bought an MEKP dispenser that is really helpful... Its like a squeeze bottle with measuring cup at the top...

Also, from Lowe's or similar:

Bunch of measuring buckets
Stir Sticks
Box of nitrile gloves
Shop towels
6 inch foam roller with a bag of replacements
PL Premium Adhesive - good to use for gluing transom pieces together or bedding stringers (allow 48 hours to cure before you glass over it). Can save you some resin...
Lots of Acetone - I have gone through a bunch of this in cleaning the hull, cleaning my instruments, etc..
You will need a really good pair of shears (scissors) and keep them clean
Some masking tape
Several Sharpie pens...
 

Pmccraney

Lieutenant Commander
Joined
Jul 26, 2011
Messages
1,734
Re: 1984 Chris Craft Scorpion 186 Restoration

Another question, when I remove the motor mounts is it important to replace them exactly where they were or when I reinstall everything and align the motor is that the location they get bolted back in?

sorry for the double post, but wanted to respond to this too... Yes, take detailed measurements of all your stringers and bulkheads and engine mounts... When you grind everything down, you may be able to keep a faint impression of where all this was, but its good to draw it out on paper too...

If you are using the same engine/drive that you already have, I would build your engine/bildge box exactly the way it currently is... You will still have to do the alignment with an alignment bar, but you should be within tolerances if you build it back the way it was...

Remember when you rebuild your transom, you are shooting for 2 inches think (slightly more is okay but no thicker than 2.25), perfectly flat and parallel and you need a really good bond to the transom...

Hope this helps.
 
Joined
Jun 13, 2009
Messages
65
Re: 1984 Chris Craft Scorpion 186 Restoration

sorry for the double post, but wanted to respond to this too... Yes, take detailed measurements of all your stringers and bulkheads and engine mounts... When you grind everything down, you may be able to keep a faint impression of where all this was, but its good to draw it out on paper too...

If you are using the same engine/drive that you already have, I would build your engine/bildge box exactly the way it currently is... You will still have to do the alignment with an alignment bar, but you should be within tolerances if you build it back the way it was...

Remember when you rebuild your transom, you are shooting for 2 inches think (slightly more is okay but no thicker than 2.25), perfectly flat and parallel and you need a really good bond to the transom...

Hope this helps.

It does thank you.

One other thing I am trying to figure out is the construction of the transom. The original one had a layer of CSM between the 2 pieces of plywood. Should I rebuild like that or will using PL glue between them be enough? Or should I wrap each piece completely in CSM for waterproofing, then use PL to stick them together? That would give me 2 layers or CSM between the two 1/2" pieces of wood.
 

Pmccraney

Lieutenant Commander
Joined
Jul 26, 2011
Messages
1,734
Re: 1984 Chris Craft Scorpion 186 Restoration

Pl glue should be just fine... that's all I did on mine... No need to wrap individually with CSM before you PL them together.

Just PL (liberally) - and clamp it very good.
 
Joined
Jun 13, 2009
Messages
65
Re: 1984 Chris Craft Scorpion 186 Restoration

Quick update, picked up my first order of supplies from TAP Plastics.

5 gallons of resin to start the transom. What is nice is that TAP is really close by so I am going to just grab resin as I need it.

IMG_0628.jpg


Full roll of 1.5oz CSM and 10 yards of 1708

IMG_0627.jpg


Buckets, mixer, stir sticks, MEK, Cabosil, 1/4" chopped mat, 40 yards of 4" 1708 tape

IMG_0629.jpg


Heading to Lowe's later to get some acetone, brushes, and hopefully my wood. I don't have a truck that can carry plywood so I have been trying to coordinate with a buddy who does. I am hoping to get the transom at least cut with a coat of CSM on it so I can PL it in at the beginning of next week.
 
Joined
Jun 13, 2009
Messages
65
Re: 1984 Chris Craft Scorpion 186 Restoration

Grabbed a few things on my way home.

8 tubes of PL, they didn't have any of the 28oz tubes and the guy told me he has been trying to get them for awhile with no luck so I settled for the 10oz tubes.

IMG_0636.jpg


Also grabbed the all-thread and hardware for clamping the transom in, went with 3/4"

IMG_0635.jpg


So total that about $700 spent on supplies today.

Here is what I have left to sand on the transom, I am thinking 1 more hour with the belt sander should do it. A 36 grit belt on the sander is much quicker then using a flap disk on a grinder.

IMG_0637.jpg


IMG_0638.jpg


The dark part is where the transom was waterlogged and the wood just scrapped/fell off, the light part is a thin layer of wood still over the glass that I couldn't get off with the chisel. About 1/3 of the transom was rotten, the rest was a pain because the wood and resin were much stronger then I was expecting on 25+ year old boat.
 

Pmccraney

Lieutenant Commander
Joined
Jul 26, 2011
Messages
1,734
Re: 1984 Chris Craft Scorpion 186 Restoration

Nice little stash of goodies you picked up there... Looks like you did good... You will like that little MEKP dispenser... You are lucky that you have a local supplier.
 
Joined
Jun 13, 2009
Messages
65
Re: 1984 Chris Craft Scorpion 186 Restoration

Alright I need some input...

Had a chance to finish most of the grinding on the transom. One thing I ran across is that there are a few area where it looks like the original fiberglass mat didn't have enough resin. It looked like CSM with voids behind it. I ground out the areas, but am wondering if using PB to attach the new transom will fill in these voids or should I use PB to fill them in and smooth them before attaching the new transom?
 
Joined
Jun 13, 2009
Messages
65
Re: 1984 Chris Craft Scorpion 186 Restoration

Here is a couple picture of the glass I was talking about on the transom.

IMG_0651.jpg


IMG_0652.jpg


Will PB fill that up or should I do something different?

Finished grinding the transom enough to test fit the new one and got it cut/glued/clamped without much trouble. To make a template I used a heavy paper that my buddy had left over from installing a shower pan.

IMG_0654.jpg


I used 2 sheets of 3/4" of Auraco plywood from Lowes to make the new transom.

My buddy doing some sanding after I cut the sheets out

IMG_0645.jpg


Glued and clamped for the next 24 hours. I used a notched trowel to spread the PL, used 4 tubes. I figure between the C clamps, the all threaded 2x4's and all the crap piled on top I should get a good bond.

IMG_0650.jpg


IMG_0649.jpg


So the next step is to start soaking out the wood with resin then a layer of CSM. How should I mix the resin to make sure it really penetrates the wood? Just one coat before the CSM? I want to make sure this is totally waterproof. Would it be worth wrapping 1708 around the edges after I use CSM? Material cost aside.
 
Status
Not open for further replies.
Top