Re: 1984 Skeeter Champ 16' Restore
Well, it was my sons 8th birthday today so we spent the weekend celebrating. We bought him a little 110cc 4-wheeler, some more baseball equipment, and went to the indoor waterpark at the resort so there wasn't much work done on the boat. It was blast having the 4-wheeler, the go-kart, and the dirtbike all running around the land, though!

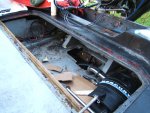
Anyway, I did decide to take some time this evening to try my hand at fiberglassing. I had decided I was going to enlarge my casting deck hatch so last week I cut out the casting deck, pried away the fiberglass shell, and cut the existing opening larger. This cutout is what I am going to use as the new hatch lid, so that meant filling the holes in it (the old match cutout and the old seat support cutout). I had bought a gallon of 3M resin and picked up about 3 yards of 6oz cloth from a local boat yard for $5. I ground down the hole opening and tapered it down. After cleaning it up and cutting the 'glass, I mixed up some resin and went to town.
I learned quite a bit on this small mini-project. The biggest thing I learned is that fiberglass work is not as easy as it seems/looks! I also learned that:
- A foam brush is NOT a replacement for a cheap chip brush. I thought I had some, but couldn't find any... so I thought maybe a foam brush would work. It worked... for about 10 seconds! I ended up having to use my fingers (had gloves on, of course), which I'm sure caused unnecessary hiccups (such as using too much resin and pulling the layers out of place due to the pressure/stickiness of my fingers)
- Don't mix more resin that you can use in a 10-15 minute window and don't mix it too hot! The first part of that statement I was well aware of and apparently the second part I didn't pay much attention to. I started by mixing up 16 ounces, but apparently I mixed it a touch too hot (probably 2% in a 75 degree temp). The cup didn't get hot or anything, but after about 10 minutes it started to gum up and get too thick to pour. I ended up having to dump about 4 ounces before it fully kicked. I mixed up another 4 ounces at about 1% and it worked just fine (so I learned quick on that one).
- 5 layers of 6oz cloth is not enough to fill a 1/4" gap. I used up all of the cloth I had, so this was the most I could do with what I had. I'll either sand it down and lay up some more layers or I'll just body fill it (which will work fine for this particular application).
Don't laugh at me, but here at the pictures. Being my first time, I'm sure I probably 'effed' it up, but it shouldn't be too bad. I'm open to all criticism.

*Edit*
After looking at the pictures on a bigger screen, it looks like there are some wrinkles and a large bubble in the middle. I just went out to inspect it, and it doesn't appear that there are bubbles or wrinkles in the layers. I think it's because of the wrinkles in the plastic wrap. I guess that's another lesson learned for me (to ensure that my plastic wrap is absolutely smooth underneath and not wrinkled/bunched up. It actually looks pretty good (to my untrained eye) right now.


