'93 Sea Ray 200br Overhaul

Sergi

Petty Officer 3rd Class
Joined
Jun 12, 2012
Messages
80
Re: '93 Sea Ray 200br Overhaul

At this point I noticed something very interesting with the PB. Something I think could be a good trick.
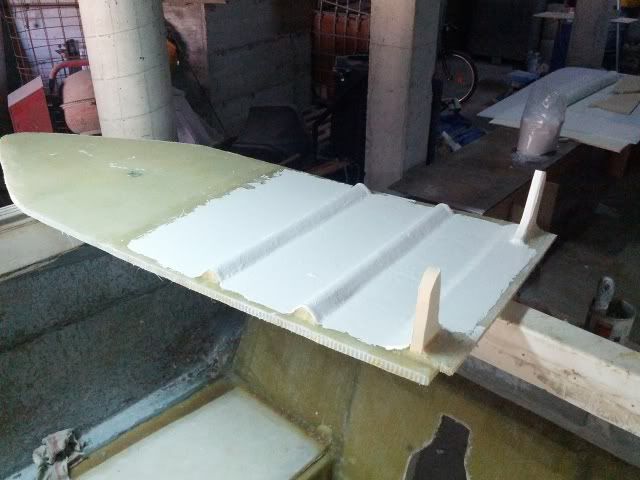
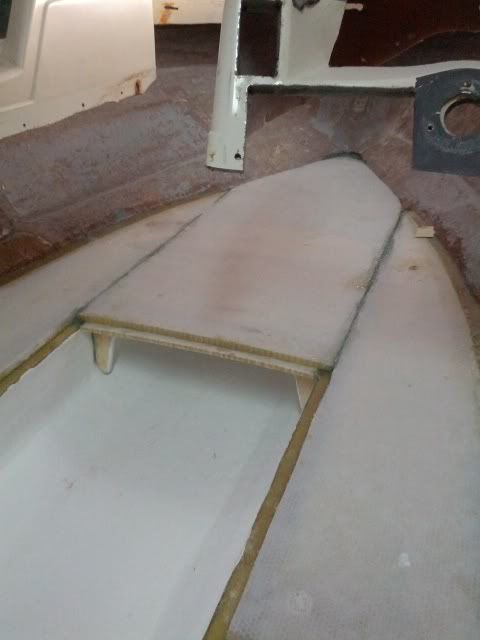
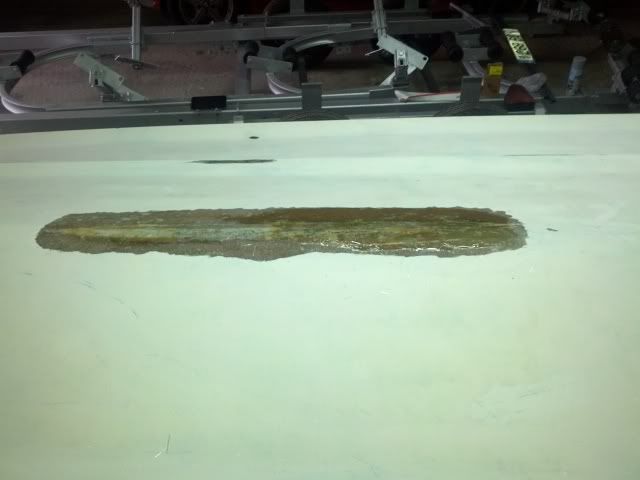
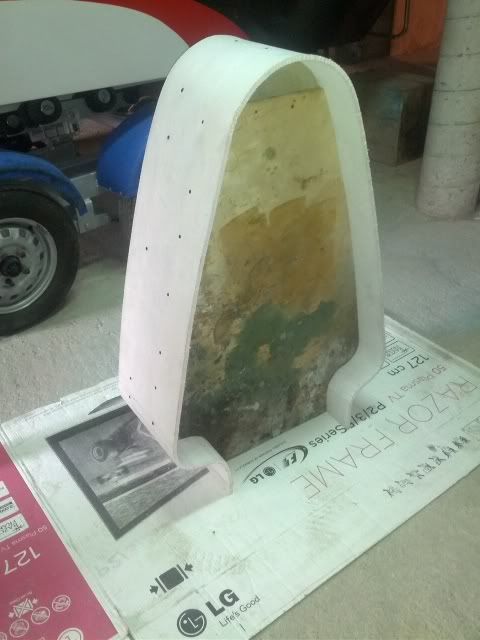
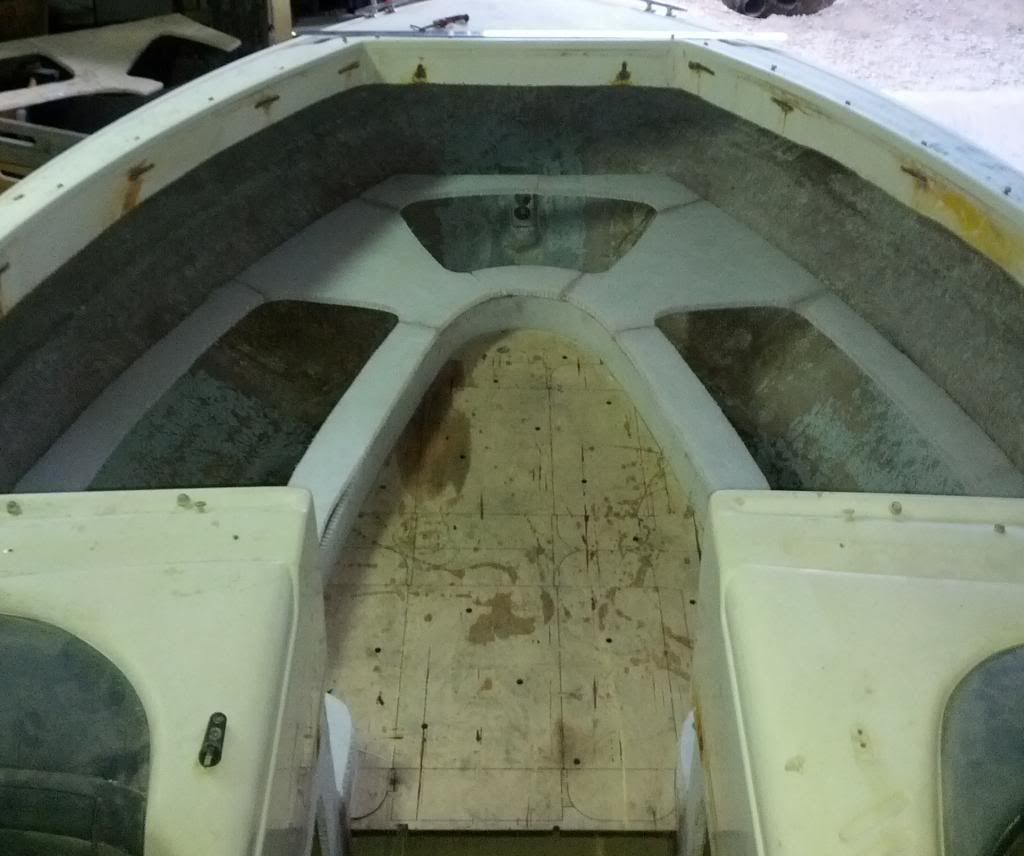
It was when I was placing the last layer of Mat over the bulkheads. As you can see on the previous pics, the small foam I added to increase the surface for the tank and sky locker covers was scratched and had some defects on them.

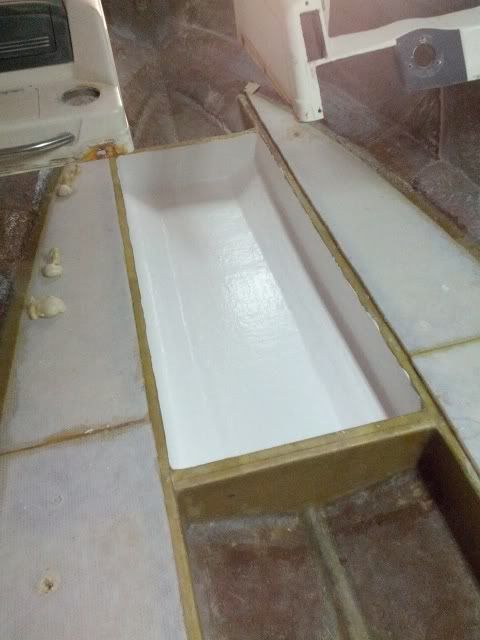
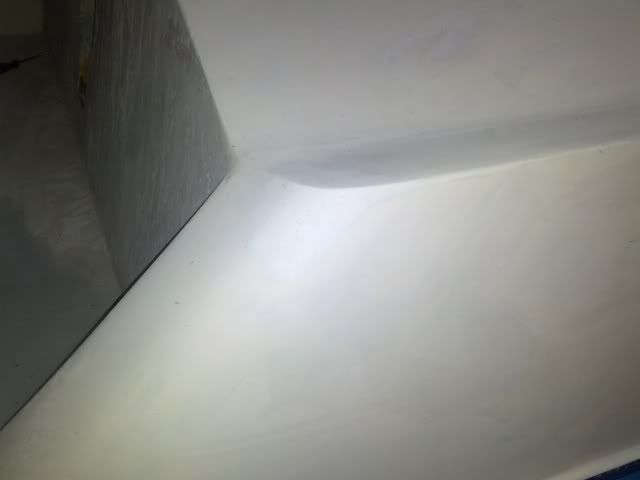
I also missed to smooth the rear inside corners of the tank hole, and I thought to finish them while layering the mat. So I prepared resin and PB.
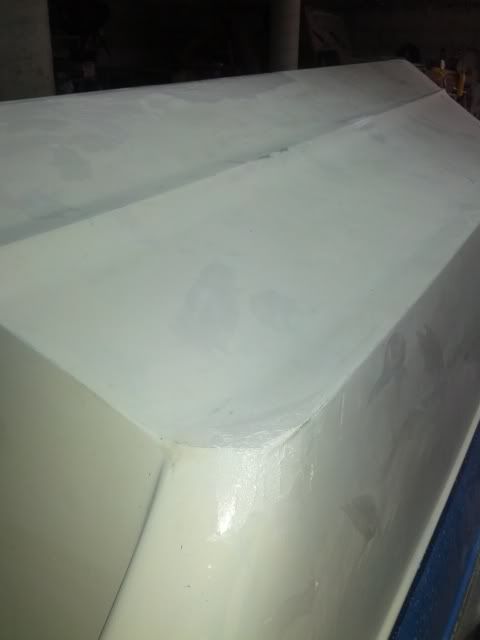
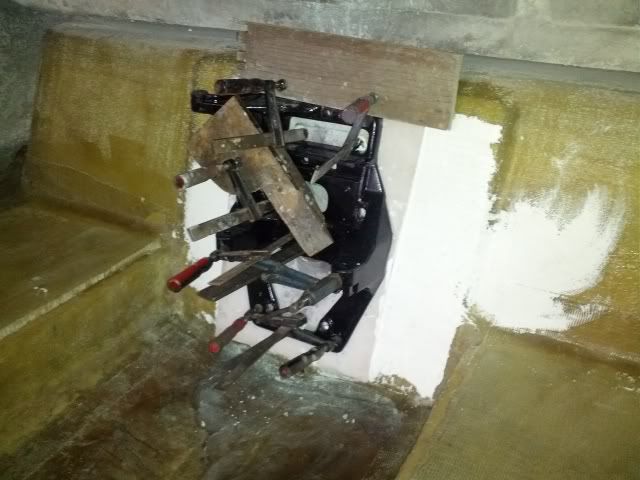
Well, the fact is that I could dump the PB in any way on the corners, then put the mat over it and then with the roller I got a perfectly rounded shape. Way better than with a spoon, without sanding or having to work the mat :eek:

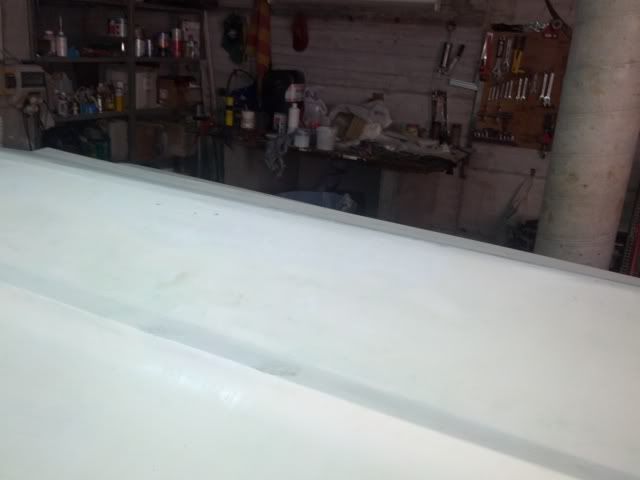
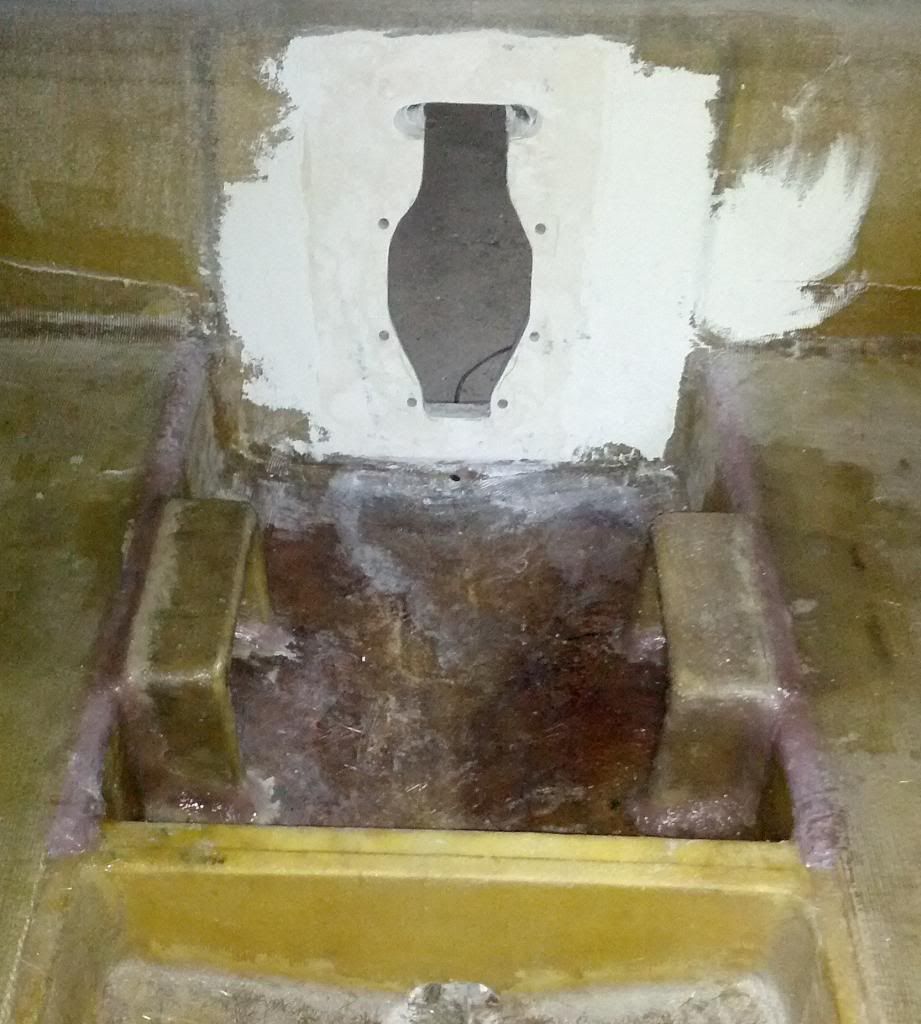
Then I picked some bits of PB and dropped them near the scratches. Yes, near, I even put them outside and without covering. Then I wet with resin and lay the mat and work it with the roller as usual.
The PB would move below the Mat until it managed to reach the holes and imperfections filling them, and leaving a smooth mat layer.

If there are no side effects, I think I'll use that technique on all the uneven surfaces.
I think that deserves a video. Perhaps I'll be making one, so you all can laugh at my inglis. :lol:

**Note that PB must be thick enough for not to dissolve when you cover with resin.
 

Sergi

Petty Officer 3rd Class
Joined
Jun 12, 2012
Messages
80
Re: '93 Sea Ray 200br Overhaul

So this last weekend I made the ski-locker and had my first touchdown with gelcoat.

First I made the cover for the front part of the boat with honeycomb. I reinforced it with some strips of PU layered tick with MAT. Remember that this part you'll walk on without any (not any, but..) foam below. It's also where the console's weight rest.
IMG_20130414_101436_zps3b60a43f.jpg


That thing is light. My wife could lift and carry it around with 4 fingers. Assure you my girl has really small hands. In fact I'm a bit scared that when on the water that boat would travel steep without remedy. Before that work, I couldn't move it, and now I can even raise it a little from the bow with my bare hands. That huge ski-locker would be the ballast space if she finally needs'm.


Well, the gel work... you can see it on the pic. I remembered something about spreading it after rolled and used a putty knife. It has marks all over.
So I went to see again the video on youtube about roll&tip and it was for paint (doh!)

But I finally managed to use a brush for tip it and obtain a good even surface.
IMG_20130414_101415_zpsd4c61d9f.jpg

That was over thick MAT.

Glued the cover on it...
IMG_20130414_111723_zpsb675cabd.jpg

And that's my first FAIL! Can you see the curve it has? That will make the locker cover not to adjust properly and have the front corners raised.

I'm evaluating on making some thin longitudinal cuts on the honeycomb for it to lower something, before I layer it.
Any thoughts?
 

Hoosmatroos

Petty Officer 1st Class
Joined
Jul 11, 2011
Messages
250
Re: '93 Sea Ray 200br Overhaul

You made nice progress the last few weeks. Looks great!
 

Sergi

Petty Officer 3rd Class
Joined
Jun 12, 2012
Messages
80
Re: '93 Sea Ray 200br Overhaul

Updates here!!!
I'm so sorry to left that thread alone, but those had been several hard working weeks. I've tried my best to get the boat running for this summer, but I'm afraid that I'm already late. the worst part of it is that the fault it's not mine. It happens that customs where so bored that they decided to play with my replacement parts from the states. They have the packages for more than a month and still don't know if they will to let them arrive. Disastrous.

25/05/2013: Let's work on the outside.
With the only help of two winches, we managed to flip out the boat. We have to re-paint the hull.
IMG_20130525_194309_zpsef79d7b1.jpg

The screwdriver it's here only to avoid the knot to go.

After so much pain, I managed to take all the antifouling out. I really hate this sh**
IMG_20130609_115607_zps4089e4e5.jpg

You can see the repaired patch on the keel.

IMG_20130609_115742_zps304b3cbe.jpg

The trailer, also being restored, at the background.

09/06/2013: And those, are the both the keel damage and one of the rear corners, patched with gelcoat.
IMG_20130609_134009_zps399fdf74.jpg


The finished products:
IMG_20130622_163057_zps9c6991e7.jpg

IMG_20130622_163203_zpse165e6f2.jpg
 

Sergi

Petty Officer 3rd Class
Joined
Jun 12, 2012
Messages
80
Re: '93 Sea Ray 200br Overhaul

22/06/2013 (sure you've noticed that dates are in euro format :facepalm:)
All the mechanical parts also had to be repaired, and the engine wasn't an exception.
IMG_20130622_162924_zps720ea2e8.jpg


I found one perfectly round spot of different color in one cylinder and I wasn't sure of it not being a pore, crack or something, so I took the block to the machine shop. They made some tests and concluded that the spot (and the others on each cylinder) where welds, made by the manufacturer itself. The bores where standard, so there's not any other option. They showed me that the area on the spot was a different alloy. The first time I hear about.

They covered the cylinders in some ridiactived products to test for leaks and imperfections. I left one for you to see.
IMG_20130622_162945_zps396a5d18.jpg


I don't know if the spot would be visible on the following picture:
IMG_20130622_182633_zps8b4aa332.jpg


Anyhow the engine looked to me brand new, used only or two times by the worst owner ever. I had to open it only to redo the valve seats, because some idiot left the boat alone too much time and salt vapors came back the exhaust.
 

Sergi

Petty Officer 3rd Class
Joined
Jun 12, 2012
Messages
80
Re: '93 Sea Ray 200br Overhaul

06/07/2013: Last weekend we started to paint the hull. I'm using a polyurethane marine paint for it, from a local brand that only makes marine paints. We'll see how it does, but by now I realized that It's a very good quality paint, talking from the application point. I'm very impressed with the result, with almost no orange-peel.
I must say that I use a small compressor and gun from the local mart. The one for checking tire pressures and so... :rolleyes:

That's the primer laid:
IMG_20130706_212410_zpsa32b8b7e.jpg


Important: You must notice that I altered the shape of the area where the logo goes. Originally follows the shapes of the letters that go there, but I bought the newer style logo to give him a fresh look.

Where the keel hole went?? (niiice)
IMG_20130706_212335_zps3c65dff7.jpg


And that's the first section of paint. I wanted it to be a very dark marine blue, but It had to be manual made and also my wife wanted it black. Inferno scheme :laugh:
IMG_20130707_213959_zpscb107a90.jpg
 

Sergi

Petty Officer 3rd Class
Joined
Jun 12, 2012
Messages
80
Re: '93 Sea Ray 200br Overhaul

A picture with the changes from yesterday night.
IMG_20130710_144905_zps64409bd9.jpg


The black shade over the white primer it's a light tracer I lean so I can see what areas I've already painted (white over white...)
I'll post you a pic without all the masking tape when it's finished. Take it as an opportunity to exercise imagination :joyous:
 

NoSkillz

Seaman
Joined
Mar 31, 2013
Messages
50
Re: '93 Sea Ray 200br Overhaul

22/06/2013 (sure you've noticed that dates are in euro format :facepalm:)
All the mechanical parts also had to be repaired, and the engine wasn't an exception.
IMG_20130622_162924_zps720ea2e8.jpg


I found one perfectly round spot of different color in one cylinder and I wasn't sure of it not being a pore, crack or something, so I took the block to the machine shop. They made some tests and concluded that the spot (and the others on each cylinder) where welds, made by the manufacturer itself. The bores where standard, so there's not any other option. They showed me that the area on the spot was a different alloy. The first time I hear about.

They covered the cylinders in some ridiactived products to test for leaks and imperfections. I left one for you to see.
IMG_20130622_162945_zps396a5d18.jpg


I don't know if the spot would be visible on the following picture:
IMG_20130622_182633_zps8b4aa332.jpg


Anyhow the engine looked to me brand new, used only or two times by the worst owner ever. I had to open it only to redo the valve seats, because some idiot left the boat alone too much time and salt vapors came back the exhaust.


Is that some sort of dye penetrant test?
 

Sergi

Petty Officer 3rd Class
Joined
Jun 12, 2012
Messages
80
Re: '93 Sea Ray 200br Overhaul

Is that some sort of dye penetrant test?

Don't know. They told me that it involved first soaking in a marker, and then letting it stay for some time, and then painting it with the white thing. Then let dry and look with a lamp for a reaction on the white from the first solution.
If there was a crack or pore, it should became bright magenta, like it did on the very bottom of the cylinder, or the water holes.

Also on this last picture, there are some straight marks I can't find on the engine. Perhaps it's the camera blinded by that bright spot. :confused:
I was more concerned about the dark shape at the bottom, where some water stood. The upper limit was so defined that it seemed a crack.
 

Sergi

Petty Officer 3rd Class
Joined
Jun 12, 2012
Messages
80
Re: '93 Sea Ray 200br Overhaul

This past weekend was a long weekend for me, and I done some things. I worked on the trailer, putting the fenders and lights to it and I ended the hull paint.
IMG_20130711_132059_zps703310ef.jpg


The boat is already flipped and on the trailer. We have some problem during the flip-out, as the weight of the bottom made the thing rotate so fast that it hit to a nearby column. Lucky enough it hit by the fenderline and around I had put a tremendous reinforcement on the inside as part of a small crack repair.
It was nothing more than a fright, with me being dragged along the ground and my wife almost appearing inside the boat after the flip. :lol:

I put two pivoting points, one at the nose and other at the transom, raised it leveled and as the bottom weighted more than the cap, tried to slowly let it flip.
I was preventing the movement grabbing from the lowering side, the brother-in-law on the raising side (starboard) and my wife around controlling the lift.
But when my brother-in-law loosed his grab (his side was raising) I was dragged by the increasing force below the boat, and my wife was around and was picked by the rail and lifted. She ended hanging like a potatoes bag on top of the portboard rail so comically. It deserved a video.

There was no danger thou, as there was plenty of room around, the straps where so big and the movement slow. But at the moment I was so afraid.
I'll make some pics of the trailer and boat this mid-day.
 

GT1000000

Rear Admiral
Joined
Jul 13, 2011
Messages
4,916
Re: '93 Sea Ray 200br Overhaul

Hola Sergi,
You have been doing an amazing restoration on this boat.
I really like how you have used modern materials for the structure, it should outlast us all...
With the use of light weight, modern materials, this boat should FLY...
The colors look amazing!
Keep up the great work!
Saludos y que tengas un dia fantastico!:D
GT1M


Sergi

Petty Officer 3rd Class
Joined
Jun 12, 2012
Messages
80
Re: '93 Sea Ray 200br Overhaul

This past week also had a large weekend, so I finished the engine rebuild and painted all the mecanic parts.
Here I'm reinstalling the pistons using a self-made ring compressor. Please don't blame me, it was already holidays and the nearby car shop didn't want to lend me their tool. (normal)
IMG_20130716_210125_zps635769a9.jpg


The engine almost rebuilt:
IMG_20130720_173701_zpsb5691cec.jpg


I only had the same primer for painting the driveline that used for the hull. It was white and there wasn't any other color available but red. So I tried to darken something using some black polyurethane tint I had around. The result was unexpected. the tint mixed very well on the can but when I applied it with the gun it seemed that the tint was emerging while drying. It seemed like the paint used in 4wd suspension kits and I was so happy to obtain the effect. But as it completely dried It turned urban camo. :)

IMG_20130726_122107_zps0f59717e.jpg

IMG_20130726_122140_zps22e7b0d0.jpg


There are some pictures of the final product.
IMG_20130728_112435_zpsa8bf334d.jpg


Do you know about the spanish "Jamones"?, not talking about girls with fat legs (typical spanish joke) but the cured, salad ham. This scene reminded me about, the weekend along.

At the background of the previous pic, you can admire the real hero of that rebuild. That little compressor made the effort of painting the hull and all those parts, first on epoxy and then a final coat of polyurethane. I think it was 100€ or less with all the accessories and the gun I used.

...
 
Last edited:

Sergi

Petty Officer 3rd Class
Joined
Jun 12, 2012
Messages
80
Re: '93 Sea Ray 200br Overhaul

Here! some "Jamones" for you. It's healty
tienda-de-jamones-online.jpg

jamon-iberico.jpg


...
Back on the paint, It turned out great, and it's very hard.
IMG_20130728_112507_zps890ed081.jpg


I tried to make some pics of the boat in the trailer, but seems that my garage isn't large enough for something with a minimum quality. Sorry guys.
IMG_20130728_112633_zps6903428c.jpg

IMG_20130728_112828_zps388b6edd.jpg


I also started to make the bow seats area. They'll also be made of honeycomb. It's an amazing material for this. Look of what I could make with a pair of templates.
IMG_20130728_112538_zps2eb3999e.jpg


You are seeing the vertical surface of the seats, and the wood template it's the hole where you walk. I only had to let it conform the templates and lock it in place with some bolts. It's already glued in place and with one layer of combi. I'll get one pic asap.
From there, only put it a cap with holes for access and that's it.


I'm currently reassembling the tail. I think that by the next weekend it will have all mounted back.
 
Last edited:

Sergi

Petty Officer 3rd Class
Joined
Jun 12, 2012
Messages
80
Re: '93 Sea Ray 200br Overhaul

And now, I have to ask you for some help.

When I rebuild and engine, I always have the habit of manually turning the oil pump for priming and oil covering the engine throughout.
For that, I remove the distributor and use a home made tool to a drill. I turn it until the oil reaches the rocker area.

I happens that this time, I could make flow the oil but never arrived to the valve train area. I didn't service the pump. The engine was good enough I didn't thought that was necessary.
I looked through the holes on the heads and saw plenty of oil on the tappets area and on the cam.

?That's normal?

Then I jumped the starter and made the engine turn for a minute or so, but oil didn't came to the rockers.
?Perhaps it needs some revs the first time in order to fill the valve rods?

Also, I have to replace the thermostat housing. This engine had the volvo accessory configuration, so the alternator is on top port side and the housing is faced to starboard so it clears the alternator tensioner bar.
Is it possible that the merc housing could hit that tensioner. Can someone measure their housing so I can see if it would fit in place?
I'm talking about the straight, the one that only has two outputs for the exhaust.

Thanks.
 

GT1000000

Rear Admiral
Joined
Jul 13, 2011
Messages
4,916
Re: '93 Sea Ray 200br Overhaul

If the oil pump is in perfect working order, you should get a healthy amount of oil to come up to the vale train using your homemade tool...using an electric drill, you can apply over 1500 RPM to the pump, which much more than the engine at idle...it actually turns only about 300-500 RPM at idle, since it is driven off of the cam, which turns at half the speed of the crank...
If you don't, I believe it would be cheap insurance to remove the oil pan and either rebuild or replace the pump...the last thing you want is to damage the engine because of lack of oil...also make sure the pick up screen is clean, if it is clogged, it will affect oil pressure...another thing you can do is when your mechanic is available, ask to borrow an oil pressure gauge and make sure you are getting the recommended oil pressure. Usually for the 4.3 engines it should be about 20 PSI at idle and Max out at about 60 PSI.
If you are not getting these readings you need to be suspicious of the cam bearings, if they were not replaced in the original rebuild...
Sometimes debris can remain in an engine block after rebuilding and cleaning, and if that debris is blocking a critical oil passage, that can cause trouble, also...
Good Luck.
And yes, I like the Jamones...:)...
 

Sergi

Petty Officer 3rd Class
Joined
Jun 12, 2012
Messages
80
Re: '93 Sea Ray 200br Overhaul

Gracias por las ideas, GT.

Unfortunately, borrowing any part for this engine or any other for my jeeps are not cheap being overseas. Other members of the forum told me that the distro may be in place to get enough pressure to reach the valvetrain, that would explain what I was getting so much oil coming from the distro hole. Bond-o also told that are the lifters pumping effect what makes the pushrods to fill in.

So I guess I'll wait until he's running to see if it's all Ok.
 

GT1000000

Rear Admiral
Joined
Jul 13, 2011
Messages
4,916
Re: '93 Sea Ray 200br Overhaul

De nada, Sergi...
Yes, they are correct...it has been so long since the last time I did any serious engine work, I forgot that I used an old GM distributor with the drive gear removed to get proper oil pressure, that would effectively seal up the oil passages and provide more pressure to the valve train.
You can perform the same pressure test by installing the distributor without any electricity going to it, and spin the engine with the starter, with the valve covers off...If the battery is fresh and you can get the engine to turn over at least 200-300 RPM, you should get the desired oil coming through the push rods...
It would still be a good idea, when you have the engine running to hook up a oil pressure gauge.
Buen Dia,
GT
 

Sergi

Petty Officer 3rd Class
Joined
Jun 12, 2012
Messages
80
Re: '93 Sea Ray 200br Overhaul

Some more work done this weekend. It's awesome how time goes by when you have lots of things to do.

I've applied a getcoat base to the transom assembly so it's smooth and level.
First I've made a "mold" from Methacrylate I had around. I applied some gelcoat to the center of the transom, covered with the mold, moved in circles so the gel spreaded and then clamped the transom until it cured.
IMG_20130803_130400_zps0442aa34.jpg

The result was a nice flat surface.

Then I made the cap of the bow seats. As always with honeycomb.
IMG_20130803_213546_zpsdbc54a8a.jpg

IMG_20130803_213535_zps4c833829.jpg


There all the small pieces glued together.
IMG_20130804_202743_zpsd65f7f23.jpg

At this time, I'm already using the small remnants of materials. That's why it's formed of various small pieces. Also It's practical for best fitting.

Also made the engine supports. Frisco was right, they're so hard to laminate.
IMG_20130804_202716_zps671c2dbd.jpg


Today I'll cut the gas tank and sky locker cover and if I have enough time I'll also cut the lateral padding supports.
Just a little more, just a little more.
 
Top