99 Larson 186 SEI Ski-n-Fish Re-Deck Project

Grub54891

Admiral
Joined
Jun 17, 2012
Messages
6,146
Them orange ear plugs work pretty good for filling holes and usually easy to remove. I've even coated them with Vaseline before putting them in.
 

QuickPuppy

Petty Officer 1st Class
Joined
Oct 18, 2017
Messages
230
I must have just not gotten a good mix the other day as the two batches of resin I made today both worked properly.

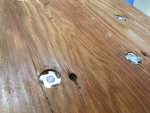
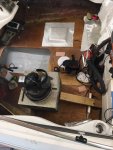
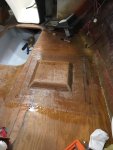
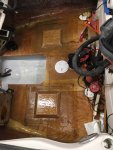
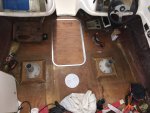
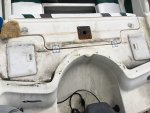
I finally got both seat bases glassed in. I used the cotton and candle wax as recommended above to temporarily seal up the holes. I’ll find out tomorrow if it worked although I see no reason why it wouldn’t have.
Click image for larger version  Name:	IMG_7582.JPG Views:	1 Size:	1.03 MB ID:	10640327

I did have a little issue with the corners. They did pucker a little as the resin dried. I don’t think it’s that big of a deal though.
Click image for larger version  Name:	image_299258.jpg Views:	1 Size:	984.0 KB ID:	10640328
Click image for larger version  Name:	IMG_7585.JPG Views:	1 Size:	1.10 MB ID:	10640330

Click image for larger version  Name:	IMG_7587.JPG Views:	1 Size:	1.11 MB ID:	10640331
 

QuickPuppy

Petty Officer 1st Class
Joined
Oct 18, 2017
Messages
230
On the SB side base that I did first, I used duct tape to cover the t-nuts on the bottom. It worked for three of the five holes. I did have to tap the other two out, which was difficult because I didn’t countersink them enough. I imagine that the wax should work much better as it is filling, not just covering the holes.
 

QuickPuppy

Petty Officer 1st Class
Joined
Oct 18, 2017
Messages
230
Click image for larger version  Name:	IMG_7595.jpg Views:	1 Size:	981.8 KB ID:	10640730 Thanks guys.

The seat bases are done. The cotton was a bit difficult to dig out but I eventually got it all. The passenger side bolted up perfectly because I had recessed the t-nuts a bit more than the drivers side. No modification to the length of the bolts was needed. I had to trim an 1/8” or so off of the bolts ondrivers side though. I love tap and die sets!

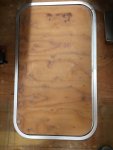
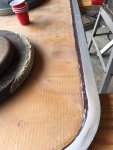
My next dilemma is the ski locker hatch. When I cut it out, I made it the same size as the original with the carpet removed. I forgot to take into account that the old carpet took up space. My new hatch fits horribly.😖

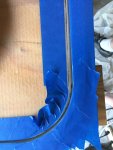
I need to fill the 1/2” or so gap around the edge. I’m wondering if I waxed the trim piece and masked it off if I could pour thickened resin into the gap and pop it out like a mold when it is dry.

Click image for larger version  Name:	IMG_7593.JPG Views:	1 Size:	866.2 KB ID:	10640731
 
Last edited:

AShipShow

Lieutenant Commander
Joined
Jul 8, 2016
Messages
1,803
what about putting a thin foam gasket around the perimeter after its gelcoated/painted. I plan to do that on mine, cuz it drove me nuts on my old stingray when I was in choppy water, it would rattle like crazy. Would help keep water out too.
 

QuickPuppy

Petty Officer 1st Class
Joined
Oct 18, 2017
Messages
230
I do like the gasket idea... I may do that if my previous idea fails miserably. 😬 I am already committed to it as the resin is drying now.

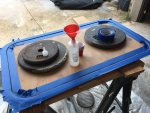
I slightly thickened the resin with cabosil, and poured it into an empty hardener bottle. That worked great for squeezing it into a narrow gap.
Click image for larger version  Name:	IMG_7598.JPG Views:	1 Size:	1.05 MB ID:	10640809Click image for larger version  Name:	IMG_7599.JPG Views:	1 Size:	1.21 MB ID:	10640810Click image for larger version  Name:	IMG_7600.JPG Views:	1 Size:	967.7 KB ID:	10640811

I hope that it will pop out once the resin sets up!
 

AShipShow

Lieutenant Commander
Joined
Jul 8, 2016
Messages
1,803
Yea, not sure I would trust that, especially on a hinged piece. Plenty of after market ski pylons out there tho.
 

JASinIL2006

Vice Admiral
Joined
Feb 10, 2012
Messages
5,716
I wouldn’t pull a tube off a ski pole no matter where it was located or how it was mounted. If the tube submarines, it could rip the pole out of your boat. Better to pull a tube from the transom eyes...
 

QuickPuppy

Petty Officer 1st Class
Joined
Oct 18, 2017
Messages
230
Good info.

My hatch idea failed, but not miserably. The hatch did come off of the frame with a little persuading. The resin once again only partially set up. I may have tried to take it out of the frame too soon. It ended up that the top of the gap did dry but the bottom was still wet and fell off as soon as I popped it out of the frame. I ended up with a ragged diagonal edge in some spots. I think it would’ve worked if the resin had set. I will probably try it again and add surfacing wax.
 

AShipShow

Lieutenant Commander
Joined
Jul 8, 2016
Messages
1,803
Shouldn't need surfacing wax (plus surfacing wax doesn't work great in thickened resin because it has a hard time getting to the surface). The frame is essentially sealing the resin off from air except at the top (lack of air is what fully cures resin). I would question whether or not the resin is any good if you've had it not set up successfully more than once.
 

mickyryan

Rear Admiral
Joined
Apr 18, 2016
Messages
4,216
use hairspray on the aluminum frame coat it heavily and it will pop right off once the resin is dry or pva release but hairspray works too :)
 

QuickPuppy

Petty Officer 1st Class
Joined
Oct 18, 2017
Messages
230
I know that poly cures faster in an anaerobic environment but it’s weird because the top that was exposed to the air the most is actually what cured first. I checked on it tonight and the runny stuff did eventually harden. Since I began the project, I’ve been mixing at 1% without issue until the past couple weeks... maybe I just need to go to 1.5%. I know that the resin is on the edge of being too old. I bought it several months ago and who knows how long it was sitting on the shelf prior. I have about 2.5 gallons left so I don’t want to purchase more since I am so close to being done.

👍 on the hairspray!

I may have asked this before but does anyone have a good fairing compound recipe? I have the resin, cabosil, glass bubbles, and I think micro balloons.

I tried making it out of resin and cabosil and it seemed to be a bear to sand.
 

mickyryan

Rear Admiral
Joined
Apr 18, 2016
Messages
4,216
micro balloons, cabosil is diatoms its basically glass exoskeletons of micro organisms that's treated in a way to make use of it for this application D e pool filter media can be used as well , i was told you use cabosil for structural and micro balloons for fillers and fairing when i did mine i only used a small amount of the cabosil and the rest was thickened with balloons made easy sanding
 

89 resorter

Petty Officer 1st Class
Joined
Oct 3, 2013
Messages
287
WOG gave me the below fairing compond formula ….. and like he stated, it did sand like a dream!

One 250ml of resin, 400ml of Glass bubbles, use a bit of Cabosil to take it to it's final thickness and then 1/2 teaspoon of surfacing wax. 1%MEKP. I like it to be somewhere between catsup and mayonaise. You'll get about 30 mins working time and it sands like a dream!!! For that big patch double the recipe. but keep the MEKP ratio at 1%
 

QuickPuppy

Petty Officer 1st Class
Joined
Oct 18, 2017
Messages
230
Cool. Did you use a plastic scraper to apply it? I’m trying to smooth out some cloth transitions and fill in the weave of the 1708 before gelcoating.
 
Top