Aluminum v hull restoration, how-to's? Lmuss53's 171CC Sea Nymph Striper

Status
Not open for further replies.

lmuss53

Lieutenant Junior Grade
Joined
Sep 9, 2008
Messages
1,227
Re: Aluminum v hull restoration, how-to's? Lmuss53's 171CC Sea Nymph Striper

IMAG0259.jpg


After a week looking at these kinds of boats I'm ready to get back to my SN. I'll be back in PA today.
 
Last edited:

lmuss53

Lieutenant Junior Grade
Joined
Sep 9, 2008
Messages
1,227
Re: Aluminum v hull restoration, how-to's? Lmuss53's 171CC Sea Nymph Striper

Not a lot of progress while I was gone. :mad: The fellas said they were hesitant to do a lot of permanent type stuff without me here, even though we had a plan. So everything is cut, sealed, mostly wrapped. (Some of the carpet was locked in my pickup and no one new where to get a key). The bow pieces are cut out for the hatches, and wrapped. The console should be wrapped by now, Will was working on it when I left. He and I put the rest of the aluminum trim on the gunwales this afternoon. He is starting a new job tomorrow, but GUARANTEES that the boat will be ready to bring to my house on Saturday to start hanging the motor. I admire this guy for his skills but next time I will do everything myself, then if I fall behind I have no one to blame but me.
 

lmuss53

Lieutenant Junior Grade
Joined
Sep 9, 2008
Messages
1,227
Re: Aluminum v hull restoration, how-to's? Lmuss53's 171CC Sea Nymph Striper

IMAG0332.jpg


Sea Nymph rebuilders take note, if you are adding carpet to the gunwales the trim/rubrail track is not necessarily made to allow for the thickness of the carpet. We had the first of a few compromises here tapping the trim on as far as we could and screwing it fast. It has a little bit of a downhill cant, but the alternative was pulling the carpet off or trying to cut the carpet right up to the trim. I chose this as the least tedius route.

IMAG0336.jpg


Ugly transom with new angle aluminum trim cap. It is one piece of 1/16 sheet aluminum trimmed with this Stanley aluminum angle from the hardware store. It bent fairly easily and cost $6 each.

IMAG0334.jpg


IMAG0344.jpg


Trim looking good, the screws from the center piece will be removed in the Fall when we refinish the exterior and the gap filled with 3M automotive seam sealer.

IMAG0356.jpg


Transom looking a little more presentable, 3 coats of Krylon rattle can, it's good til November.

More coming.
 

lmuss53

Lieutenant Junior Grade
Joined
Sep 9, 2008
Messages
1,227
Re: Aluminum v hull restoration, how-to's? Lmuss53's 171CC Sea Nymph Striper

IMAG0347.jpg


No two ways about it this is just plain fugly. We thought the corner cap did something else here, I'm not sure what we thought it did but that's our story. The fix is probably going to be putting a new piece of Stanley angle on and trimming it out right.

IMAG0338.jpg


I think the plastic splashwell drains look good, they went in easy, and have all kinds of room for sealer around the heads, in the hole, everywhere. I can't think of anything I didn't like about them. We'll see how they hold up.

IMAG0342.jpg


95% done bow.

IMAG0350.jpg


IMAG0351.jpg


90% stern The dirty hatch was a big one that got broken by the P/O. I took it to work and cut it down on my break, then got the frame welded. The next night I took the cover and cut it down and bent it to fit the frame. the corners could be a little sharper but for a little maintenance dept. brake it worked OK. I wired brushed the dirty one and took the clean one to a big belt sander. The dirty one was already at home or it would have gotten sanded too.

The boat is back at my house, with the interior work almost wrapped up. I will be able to get at it a little every day before work, maybe after. Realistic splash is the week after next depending on if I have weekend work or not. My favorite Striper tournament is the weekend of the 18th, I want to use this boat for then.
 

lmuss53

Lieutenant Junior Grade
Joined
Sep 9, 2008
Messages
1,227
Re: Aluminum v hull restoration, how-to's? Lmuss53's 171CC Sea Nymph Striper

IMAG0343.jpg


The console came out pretty nice but needs some tweaking. I told Will to bump the right side up to keep any of the mounting bracket from showing and the little bit it kicked it up really shows. I have the original pieces it sat on which will bring it up just enough to level it out I think. I have to wrap them when I get more carpet. We ran out of carpet so there are some areas not done, hatch covers, the inside of the console, and some inside areas. I will get another piece to finish up with. Along that line, we (I'll take the blame too) got some sawdust down in this carpet that is going to be a SOB to get out. It's not hard to get caught up in what you're doing and drag your building dirt back into the project. The sawdust may not come out at all, if that is the case this will be a very short lived carpet job. I will pull the deck and casting deck pieces up and put down Nautolex.

IMAG0355.jpg


View from in my garage in the dark. I'll try to get it outside this week to put up a better pic. I've got about 24 hours in it on Saturday and Sunday. I'm about wiped, but really psyched to get her wet.
 

lmuss53

Lieutenant Junior Grade
Joined
Sep 9, 2008
Messages
1,227
Re: Aluminum v hull restoration, how-to's? Lmuss53's 171CC Sea Nymph Striper

IMAG0360.jpg


IMAG0358.jpg


IMAG0346.jpg


IMAG0352.jpg


Just a few more.
 

carpedium

Petty Officer 1st Class
Joined
Jun 20, 2011
Messages
258
Re: Aluminum v hull restoration, how-to's? Lmuss53's 171CC Sea Nymph Striper

Awesome. It is looking great! I'm sure you will be able to get the sawdust out of the carpet... maybe a regular vacuum cleaner with a "beater bar" will work once all the cutting is done?

The splashwell drains did seem to work out well - i'm glad for that! The transom looks awesome now, good job on the paint! I think you are right on the transom cap, just need to cut an angle on a new piece to fill the gap. The only alternative I can think of, if its only aesthetic, is get some aluminum colored 100% silicone and dab some in the void. Let it dry a little and then smooth it out with some mineral spirits or water on a rag. It will look just like the aluminum.
 

lmuss53

Lieutenant Junior Grade
Joined
Sep 9, 2008
Messages
1,227
Re: Aluminum v hull restoration, how-to's? Lmuss53's 171CC Sea Nymph Striper

IMAG0365.jpg


1am to 3 am today, layed out seat placement, drilled out holes for bases, drilled holes for blind nuts, placed and seated blind nuts and mounted 2 seats. I am considering not putting the other bases in. I have a big 30 gallon bait tank and a 155 quart cooler that I am always jockeying around seat bases that don't get used. Extra passengers can sit on the rear and bow decks, and on the cooler. I think I will wait and see how this works out with only the two bases in.

IMAG0364.jpg


I have one Sea Nymph base and 1 Teleflex in, and I don't like the looks of the round base and square base together. I have a second Sea Nymph base but only seat hardware to go with one base. My thoughts were to use the heavier base at the helm and the teleflex bases everywhere else. I have seat hardware and bases for at least 6 Teleflex set ups if I want them. I have a heavy round helm base in my pontoon, and Teleflex bases in 4 corners there. It looks fine there, so I thought it would be OK here, but I don't like it.
 

lmuss53

Lieutenant Junior Grade
Joined
Sep 9, 2008
Messages
1,227
Re: Aluminum v hull restoration, how-to's? Lmuss53's 171CC Sea Nymph Striper

I pulled that square base out this morning and put another round one there and I found a round tube from the old Starcraft. I'll put bushings in the tops of the aluminum tubes so I can use the 3/4 inch pins in all the seats.
 

lmuss53

Lieutenant Junior Grade
Joined
Sep 9, 2008
Messages
1,227
Re: Aluminum v hull restoration, how-to's? Lmuss53's 171CC Sea Nymph Striper

IMAG0366.jpg


I got a couple of 1 1/2 to 3/4 inch bushings made.

IMAG0367.jpg


Pressed them down into the Sea Nymph seat tubes.

IMAG0368.jpg


Now the 3/4 pins on all my seats will fit in the Sea Nymph tubes or the Teleflex tubes/bases on the casting decks.

I'll be able to use the heavier tubes in the helm and passenger positions and the 1 1/2 inch tubes with the 3/4 pins on the casting decks.
 

carpedium

Petty Officer 1st Class
Joined
Jun 20, 2011
Messages
258
Re: Aluminum v hull restoration, how-to's? Lmuss53's 171CC Sea Nymph Striper

Those bushings look nice!
 

lmuss53

Lieutenant Junior Grade
Joined
Sep 9, 2008
Messages
1,227
Re: Aluminum v hull restoration, how-to's? Lmuss53's 171CC Sea Nymph Striper

Thanks, they are actually scrap pieces from my work. The concentricity was too far off to use them for tool bushings but just right for Sea Nymph seats.:D

No pics because when I walked out of the garage this evening it sort of looked like a bomb had gone off.

Today I:

Finished mounting seat bases.
Installed through hull fittings and hoses for livewell pump and drain.
Installed bilge pump #1 with float switch.
Buttoned all the interior transom stuff up.
Mounted the OMC controller.
Delivered the 48 SPL to Will the Bodyman.
Hung the 70 Johnny on the Sea Nymph and hooked everything up, ready to connect to the battery and run on the muffs.

Mother's Day tomorrow, I'm lucky enough to have my 80 year old Mom around still, so I'm gonna try to spend the day with her. Brother Mike is in rehab hospital recovering from back surgery, I'm gonna take Mom in and stay as long as she wants to. Then all out for supper when my sister gets off of work.
 

lmuss53

Lieutenant Junior Grade
Joined
Sep 9, 2008
Messages
1,227
Re: Aluminum v hull restoration, how-to's? Lmuss53's 171CC Sea Nymph Striper

This old girl will get splashed Saturday.

Today (Friday) I:

Put batteries in, wired and tested auto bilge pump.
Took a switch plate I bought but never used apart and used the parts to assemble a 6 position breaker buss for lights and accessories. Ran 6ga wire from trolling batteries to console to power accessory buss. The only thing on my starting battery will be the big motor, anchor light, and automatic bilge pump. Everything else will run off 2 group 27s in the bow.
Installed lights, but did not connect them yet.
Zip tied and hid cables, wires, harness. The steering cable is a foot short, but it reaches and everything works so it will do until I sell the CC rack steering and get a longer one. It just shows up in a couple of spots, and keeps me from opening the one hatch cover.
Put on the rest of the trim.
Built and installed a vertical rod holder for 3 rods.

Tomorrow it gets a dip and a sea trial, then back here for:

BOW TO STERN BATH!!

Trolling motor install.
Lights, second bilge pump, livewell, and a section of rope light I'm putting under the trim, hooked up and wired to Tracker console switches.
Lowrance GPS/Sonar install

Tomorrow I may come back from sea trial and hook up lights, troller, and fish finder and go back for some all night plugging. I missed the tournament, but I may still get some fishing in on her this weekend.

Anyone got a pic of a transducer on a cutting board? I don't really want to start poking underwater holes in the transom again if I can avoid it.

Pics to come. Maybe a video.
 

jasoutside

Supreme Mariner
Joined
Dec 20, 2009
Messages
13,269
Re: Aluminum v hull restoration, how-to's? Lmuss53's 171CC Sea Nymph Striper

Awesome, have a great float today!:D
 

Teamster

Lieutenant Commander
Joined
Nov 8, 2010
Messages
1,923
Re: Aluminum v hull restoration, how-to's? Lmuss53's 171CC Sea Nymph Striper

This link should take you to a pic of a transducer on a "board",.......
http://www.cabelas.com/product/Boating/Boating-Electronics/Sonar-Accessories|/pc/104794380/c/104707080/sc/104587380/Cabelas-Transducer-Mounting-Plates/701430.uts?destination=%2Fcatalog%2Fbrowse%2Fboating-boating-electronics-sonar-accessories%2F_%2FN-1100523%2FNs-CATEGORY_SEQ_104587380%3FWTz_l%3DEML%253Bcat104794380%26recordsPerPage%3D108

Personally I would try to have the locator/gps on a different circuit/battery than the trolling motor, I have seen trolling motors cause interference with sonar/gps,....
 

lmuss53

Lieutenant Junior Grade
Joined
Sep 9, 2008
Messages
1,227
Re: Aluminum v hull restoration, how-to's? Lmuss53's 171CC Sea Nymph Striper

Only have a second, we're walking out the door.


Worked well, didn't get a new top speed. Sorry for the chipmunk sound effects, I'll take a better camera next time.

Some of the things I said were.

"Plenty of debris still around."
"Beautiful day but nobody is here."
"She's noisy without the foam."
"I've got lots and lots of throttle left."


More later.
 

jasoutside

Supreme Mariner
Joined
Dec 20, 2009
Messages
13,269
Re: Aluminum v hull restoration, how-to's? Lmuss53's 171CC Sea Nymph Striper

SN on the water!!!!:D:D
 

lmuss53

Lieutenant Junior Grade
Joined
Sep 9, 2008
Messages
1,227
Re: Aluminum v hull restoration, how-to's? Lmuss53's 171CC Sea Nymph Striper

Yep she works fine. I think she'll have a higher top speed, but time will tell. I'm not really concerned about top speed but I want to keep the Johnny in the 5500 to 5750 RPM top end zone. Once I get her loaded down with bait tanks, coolers, more batteries, tackle, wideazz fishing buddies, etc. we'll see where she ends up.

You're probably right about the sonar and the trolling motor Teamster, I had that issue with these two units once before and forgot about it. I guess I'll pull a wire up from the rear for the Sonar/GPS, thanks for the reminder.

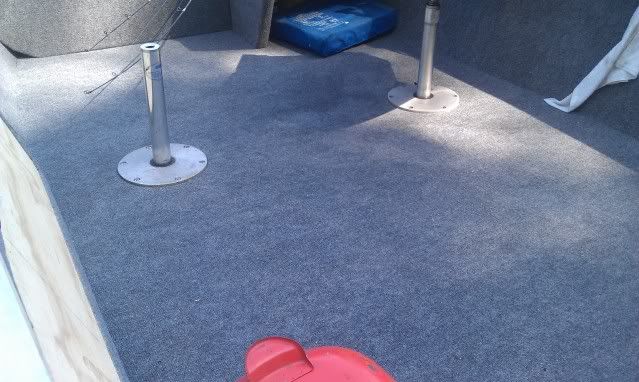
I learned at least one thing about rigging your resto boat. The float switch goes forward of the bilge pump, else the pump runs out of water before the switch can drop and open the circuit.:facepalm: This only happened while I was loading, so it wasn't a biggie. As soon as I pulled the boat out it shut off, but I moved them today.

This boat is going to go into service as a fishing rig for the duration of the Summer and Fall. Updates to the post will come in the form of fish pictures and any small improvements I get done. December 1, 2012 she will go back down to Will's to be flipped, stripped and painted. Next Spring we will see the finished resto.

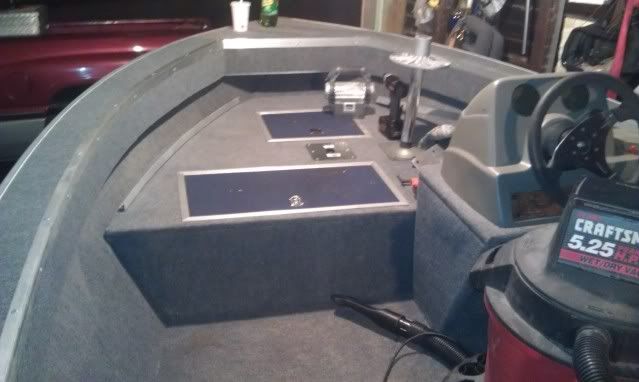
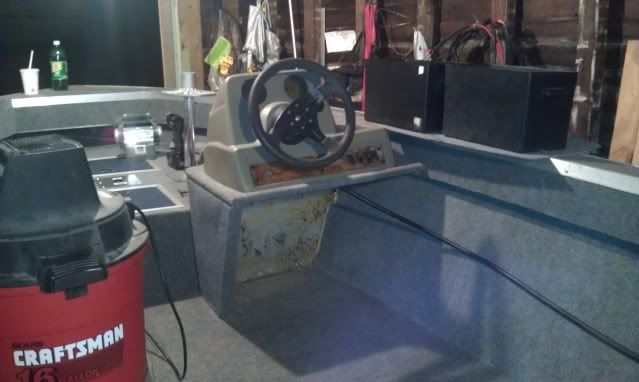
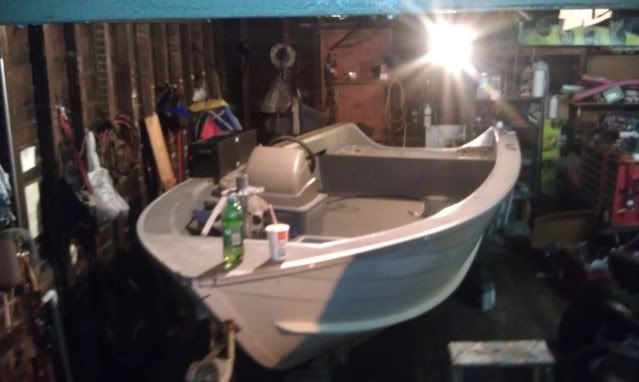
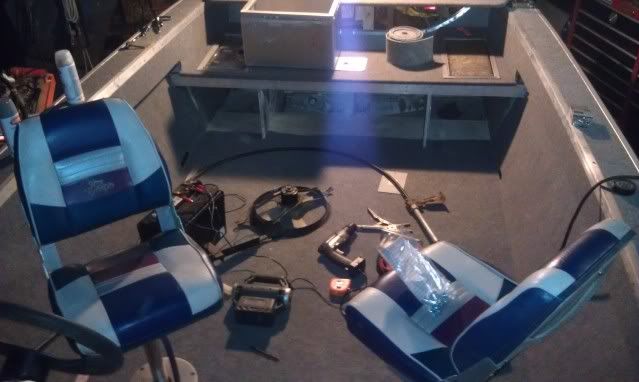
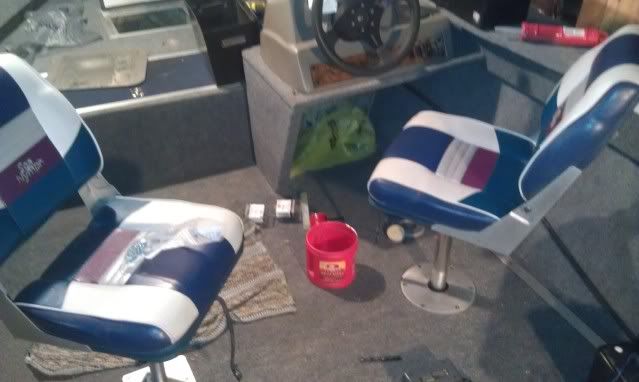
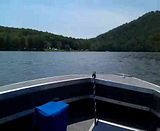
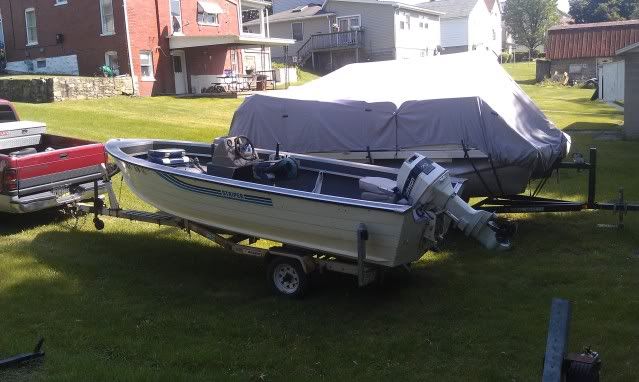
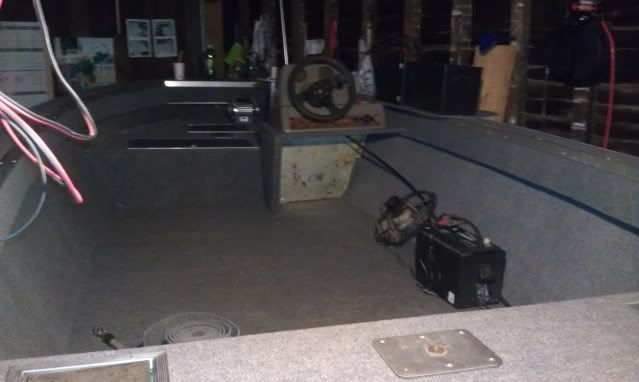
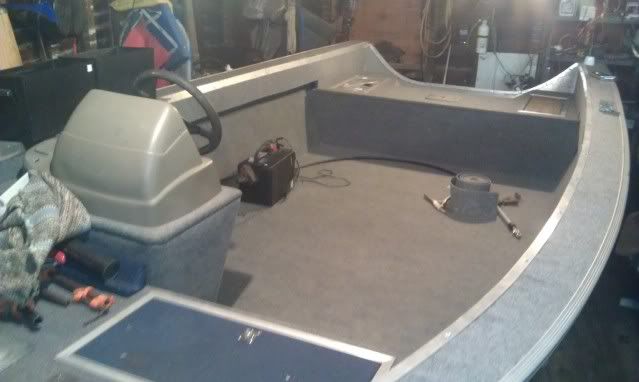
Here's a couple more recent pics.

IMAG0373.jpg


IMAG0372.jpg


IMAG0377.jpg


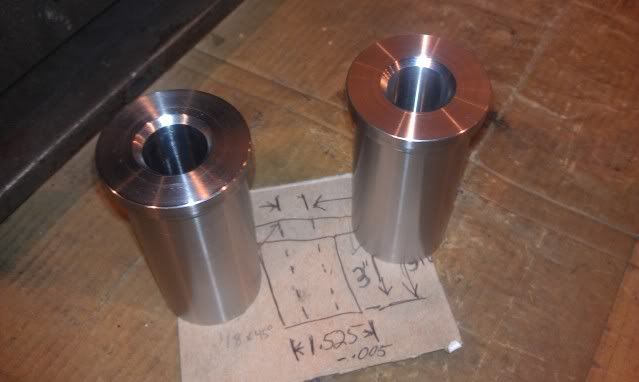
Have to be careful tilting the motor with a seat in the base.

IMAG0375.jpg


Quick and dirty rod holder, from old stuff that I had laying around.

IMAG0379.jpg


Car wash pushed a lot of the sawdust up so I can vacuum it out, I guess it will all come out eventually.
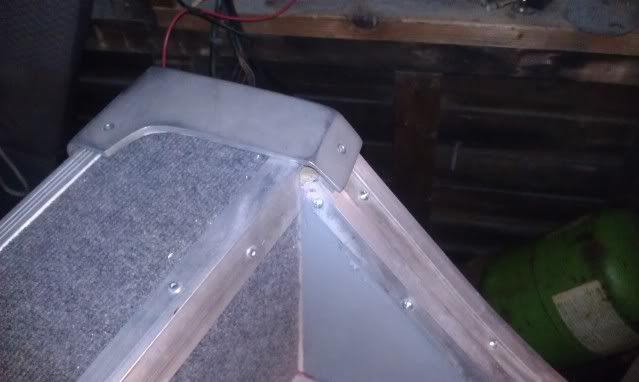
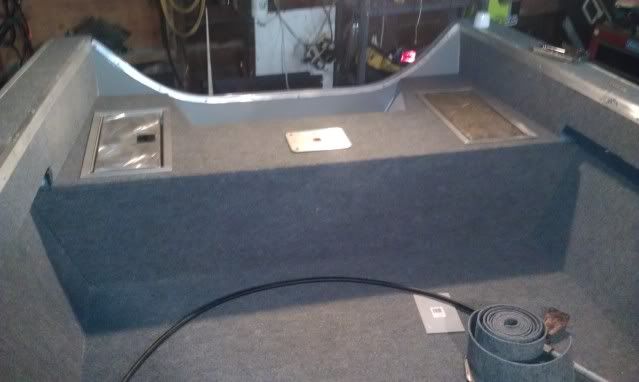
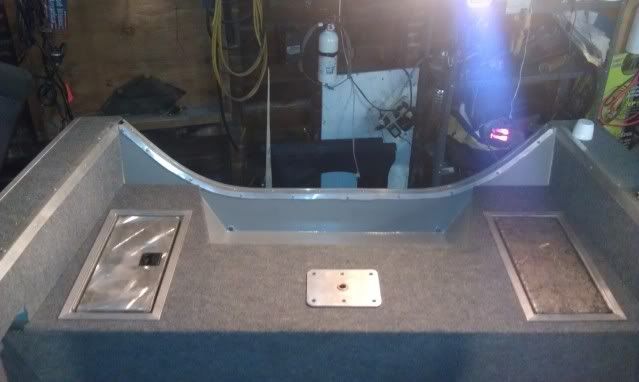
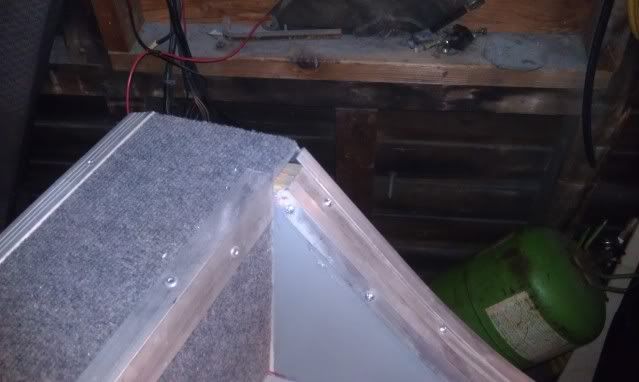
 

ezmobee

Supreme Mariner
Joined
Mar 26, 2007
Messages
23,767
Re: Aluminum v hull restoration, how-to's? Lmuss53's 171CC Sea Nymph Striper

Looking good. Congrats on the splash.
 

carpedium

Petty Officer 1st Class
Joined
Jun 20, 2011
Messages
258
Re: Aluminum v hull restoration, how-to's? Lmuss53's 171CC Sea Nymph Striper

nice! Good to see it on the water.
 
Status
Not open for further replies.
Top