Bayliner Capri unintentional restoration project

Piece715

Senior Chief Petty Officer
Joined
Jan 26, 2009
Messages
757
Re: Bayliner Capri unintentional restoration project

Great Work so far! You are moving right along... that lil lady will be up and running in no time! Tin owner myself always admire the amount of work redoing a glass hull can be... maybe some time in the future but it would have to a a dream hull like an ole VIP Vindicator 25th anny. Great job JM!
 

jmmacky

Petty Officer 2nd Class
Joined
Jun 20, 2011
Messages
177
Re: Bayliner Capri unintentional restoration project

Taking a step back with this post. Grinding fibreglass is a horrendous job - I've been itching every night for 2 weeks! All is removed from the hull...although there will still be yet more grinding to do with time.

I found a masonry cutting disc was very useful for slicing through the fibreglass and a 36 grit pad was best for everything else although you get through a lot of them.

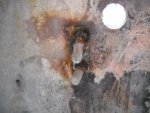
I've left the upper bits for now as reference points for when I'm building the rest of the boat back up later. The centre of the hull from bow to stern was designed as basically one through drain to the bilge under the deck and under the fuel tank. I plan to seal most of this off in the rebuild. This was covered in a deep layer of paint/gel coat which I decided to grind down so that glass for the stringers would stick better...I was glad I did as I found the hull underneath to be very thin and even non-existent in places:

DSCN1125.jpg

I will reinforce the length of the bottom of the hull and other holes made by accident - not sure how yet but I will search on iboats and find the answer I'm sure!

I have had major problems with fibreglass delamination and have taken up loads of layers of matt using my hammer and a masonry chisel. I think this all needs to be removed so that I am applying new layers to solid foundations.

I have been going round getting supplies that I need to start and my fibreglass stuff arrived today. I have bought 1/2" and 3/4" exterior grade birch ply sheets. The transom will be made of 2 bits of 3/4" stuck together which will be thicker than what was there before. The exterior transom skin seems v thin so when I'm glassing the new transom in place I was wondering about continuing the cloth across the entire width of the stern and around the corner along the hull for about a foot for added strength. What do people think of this plan? The stringers will be 2 bits of 1/2" stuck together to make them 1" wide which is a bit thicker than they were before I think. The deck will be one sheet of 1/2" to save weight but with added supports/bulkheads underneath than was there before. The previous deck was 2 layers of I think 3/4" ply which seems like enough support for a car ferry let alone a leisure boat!

The chine that the stringers run in had 1/2' lengths of wood baton in towards the bow - I presume to provide a base for the stringers. These were completely wet as well. However, right at the bow end the stringer went in a straight line up the side of the hull where as the chine obviously bends around the corner following the lines of the boat to the front. The batons were butted together and followed the chine. They would have been providing no strength themselves whatsoever but I suspect the fibreglass covering them would have. I'm not going to put the same thing back but haven't yet decided what I'm going to do.

DSCN1111.jpg

This is the boat now - most of the grinding done and swept out. It has had one jet was so far but will need another after I have done the final bits of stringer grinding. Tomorrow I hope to get the transom cut and waterproofed. Never done any fibreglassing before so a bit worried about it but looking forward to not grinding! Also not sure how I'm going to clamp the bottom of the transom to the skin while the 'peanut butter' sets as don't really want to put any holes through it for putting a bolt through to clamp that way. Anyone have any ideas? I think this bit would be easier if it was a i/o transom.

DSCN1124.jpg
 

Attachments

  • DSCN1122.jpg
    DSCN1122.jpg
    37 KB · Views: 0
  • DSCN1107.jpg
    DSCN1107.jpg
    37.7 KB · Views: 0

jmmacky

Petty Officer 2nd Class
Joined
Jun 20, 2011
Messages
177
Re: Bayliner Capri unintentional restoration project

.......
 

jmmacky

Petty Officer 2nd Class
Joined
Jun 20, 2011
Messages
177
Re: Bayliner Capri unintentional restoration project

One thing to consider is to make a craddle for the hull. Now that the cap is off the hull can flex as much as it wants. It would be terrible to get the repairs done and then find out the cap won't fit back on.

Thanks for the advice. i did think about that but decided not build a cradle due to the cost of wood that would be involved. The trailer is quiet supportive and I'm using the original cushions/seats forced in between the hull and trailer for extra support! I have also put straps around the entire thing to reduce sagging but I will add more. I think since you have said this though I will rest the cap back on while I do the deck to make certain it will fit!
 

jmmacky

Petty Officer 2nd Class
Joined
Jun 20, 2011
Messages
177
Re: Bayliner Capri unintentional restoration project

Haven't got as much done this weekend as intended as I forgot to order the applicator to fit the adhesive but I do have the transom pieces cut and ready to glue then waterproof with CSM.

I've done a lot of reading to see how other people have done it and basically following this advice.

I used polystyrene to make templates first of all. A sharpie attached to a screwdriver to trace the shape of the hull:

DSCN1133.jpg

This was a fairly rough so I then used my finger as a spacer to make a more accurate line:

DSCN1136.jpg

I cut the polystyrene using a scalpel then snapping for straight lines and a hand jig saw for curved ones.

DSCN1135.jpg

Then used these templates to make the actual ply pieces of transom which I cut using a power jigsaw and sanded to shape a bit more with a belt sander.

DSCN1140.jpgDSCN1141.jpg

I'll be able to glue these as soon as the applicator arrives then shape further using the belt sander. The inner piece of ply as slightly longer at the bottom (keel end) so that they can be sanded with an angle to better fit the line of the boat. Each piece will be waterproofed using poly and CSM. I decided to use poly rather than epoxy because many other people on here who are much more knowledgable and experienced have used it and its cheaper. My first fibreglass order (including all the extra bits and pieces) needed came to just over ?500 so trying to save money where I can!

Still not sure how I'm going to clamp the bottom of the transom pieces effectively to the hull if anyone has any ideas?
 

Flashisafool

Recruit
Joined
Jul 20, 2011
Messages
1
Re: Bayliner Capri unintentional restoration project

JM this is.......thorough to say the least. Your hands look lovely in some of these photos. All covered in fibreglass dust. I'm glad to see you have some face masks though. When do you hope to get this wet?
 

jmmacky

Petty Officer 2nd Class
Joined
Jun 20, 2011
Messages
177
Re: Bayliner Capri unintentional restoration project

So...I have finally got the transom set in! I glued 2 bits of 3/4" birch exterior grade ply together using crestomer 30 and a tiling trowel for each piece of the transom. I cut the inner piece a bit longer so that it overlapped the other - I was then able to use a belt sander to make the angle necessary to make it fit more flush with the hull. All of the 3 bits were cleaned up and made to fit better using a belt sander, then the edges were rounded off with it as well so that the csm could be layed over them better.

DSCN1146.jpg

I covered each piece in resin (did one at a time) and let this begn to kick off before applying 1.5oz csm over the top and sides. I used my bubble buster roller and chip brushes for this. Once dry I could use the belt sander to sand off the sharp bits before applying the csm to the other side...then sand again! Before applying resin/matt to anything I sanded using 40 grit paper to get better adhesion then cleaned thoroughly with acetone.

DSCN1145.jpg

I later added a strip of combi matt (1708 equivalent) to the top of the main transom bit for added strength and waterproofing. I belt sanded each side piece of transom to an angle so that it butt joints in nicely. All pieces nice and flush with the hull:

DSCN1152.jpg

I mixed up 'peanut butter' (chopped strands, fumed silica and poly) and plastered it onto the hull and new transom using a tiling trowel. I then clamped each piece along the top with G-clamps. The middle I was able to get to with some big clamps with a wrench type mechanism and the bottoms I had to push up against the side with cement bags.

DSCN1160.jpgDSCN1159.jpg

By the way - peanut butter is great to work with - I really like it.
 

jmmacky

Petty Officer 2nd Class
Joined
Jun 20, 2011
Messages
177
Re: Bayliner Capri unintentional restoration project

Here is the entire transom finally in:

DSCN1166.jpgDSCN1165.jpg

I filled the chines in with peanut butter and all the gaps. I also tried to get a nice curve from around the edges of the transom and at the corners to make laying combi matt over the top easier later.

DSCN1163.JPGDSCN1168.jpg

For the bilge plug hole I layed a piece of 1 1/4" pipe (which I had made to fit the back of the transom) into some peanut butter and then filled in all around with it as well. Later I will grind this pipe off so it is flush with the transom. Hopefully no water will be able to get anywhere near this transom wood!

DSCN1173.jpg

The next step is tabbing in the transom and repairing the holes in the hull.
 

jmmacky

Petty Officer 2nd Class
Joined
Jun 20, 2011
Messages
177
Re: Bayliner Capri unintentional restoration project

I got my transom tabbed in today - milestone!! I cut pieces of stitch/combi matt to overlap the hull and transom by about 4 inches. I also cut wider pieces to then go over the top so that the tabbing is 2 layers thick. Dry fitting some of the tabs:

DSCN1176.jpg

I used a chip brush and bubble buster roller to lay them in. All surfaces were abraded with sandpaper first to get better adhesion then cleaned with acetone. I applied resin to the substrate first, then layed the matt down and wetted it out trying to make sure there were no bubbles. First bit of tabbing done:

DSCN1178.jpgDSCN1177.jpg

After this had dryed I ground/sanded all the surfaces down again before cleaning with more acetone. I could then apply the second bigger layer of tabbing and 2 layers to the entire transom. I tried to inter-lap different bits of tabbing to increase strength - not sure if there is any truth in this! This is the transom finally done:

DSCN1179.jpg

Its still wet in this photo. Tomorrow I will sand off the sharp edges. I hope everyone thinks this will be good/strong enough? My 25 litre drum of resin is now running low!
 

ezmobee

Supreme Mariner
Joined
Mar 26, 2007
Messages
23,767
Re: Bayliner Capri unintentional restoration project

Real nice work on the transom.
 

Woodonglass

Supreme Mariner
Joined
Dec 29, 2009
Messages
25,929
Re: Bayliner Capri unintentional restoration project

Was the Original Transom in 3 pieces?
 

jmmacky

Petty Officer 2nd Class
Joined
Jun 20, 2011
Messages
177
Re: Bayliner Capri unintentional restoration project

Was the Original Transom in 3 pieces?


Yes the stern is basically in 3 flat sections so I couldn't make one bit of wood go all the way across unfortunately. There are a couple of previous photos (that aren't very good) that show the original transom being in 3 sections - but it was completely wet and fairly rotten so not sure how it was originally joined together.

I'm really pleased with the way it has turned out and it feels very solid. I really appreciate your input; do you think its ok?

The holes are pretty much all patched up now - photos to follow later. There were only 2 stringers in it before so think I'm just going to put two back in but slightly thicker. Am planning on using 1/2" ply lap jointed together to make them long enough so I will end up with 1" thick stringers. Can anyone see a problem with this plan?
 

jmmacky

Petty Officer 2nd Class
Joined
Jun 20, 2011
Messages
177
Re: Bayliner Capri unintentional restoration project

The patching of the holes:

This is the hole in the keel:

DSCN1185.jpg

Hole up in the bow from inside and out:

DSCN1184.jpgDSCN1188.jpg

Hole at the stern end of one of the chines:

DSCN1183.jpg

I feathered each hole from inside and outside using sanding pad on my grinder. The keel didn't need any feathering on the outside as it was so worn away:

DSCN1189.jpg
 

jmmacky

Petty Officer 2nd Class
Joined
Jun 20, 2011
Messages
177
Re: Bayliner Capri unintentional restoration project

I made backing plates for each hole out of non-stick baking foil and cardboard which I pushed up against the hull with tape and support sticks.

DSCN1190.jpgDSCN1192.jpg

Each hole I applied 1 layer of biax stitch matt (1708 equivalent) just bigger than the hole, then another slightly larger piece. Over this I applied a bigger still piece of csm. The bow and keel holes:

DSCN1197.jpgDSCN1198.jpg

Once this had set for the bow hole I applied a bigger piece of stitch matt and an even larger piece of csm over that. For the keel hole because I was worried about the integrity of the entire front section of it I put down 2 layers of stitch matt gradually getting bigger then csm even bigger over that.

DSCN1196.jpg
 

jmmacky

Petty Officer 2nd Class
Joined
Jun 20, 2011
Messages
177
Re: Bayliner Capri unintentional restoration project

For the hole at the back of the chine I filled in some of the space with peanut butter so that it was easier to lay matt over:

DSCN1195.jpg

I was then able to repair the hole exactly as I did with the others.

DSCN1200.jpg

I used csm as the last layer on the first set and on the final layer as it is so much easier to sand for getting a better adhesion with future fibreglass than stitch matt is. The final product:

DSCN1199.jpgDSCN1201.jpg

When I am repairing and painting the outside of the hull I will add a couple of layers of csm to the outside of each hole and also reinforce the keel from the outside as well.
 

jmmacky

Petty Officer 2nd Class
Joined
Jun 20, 2011
Messages
177
Re: Bayliner Capri unintentional restoration project

I've started on the stringers now. I am replacing the stringers similar to how I found them but mine are slightly thicker and follow the hull of the boat rather than sitting on fibreglassed batons of wood in the chines.

I think it was Oops who invented this method of tracing the hull onto the stringer plank:

DSCN1203.jpg

I set up a frame which suspended the plank I had made along the line of the hull where I wanted it to lie. Using the same method used for the transom I was then able to trace the hull onto the plank. Along the actual chine the hull was flat but fore and aft of it it is on an angle. I cut 2 squares of cardboard and then sat them on the hull in the places where I needed the bottom of the stringer to be angled. I then cut the bottom edge until the upright was perfectly vertical to get the exact angle. I could then set the blade on my circular saw/jigsaw to get the correct angle.

DSCN1204.jpg

DSCN1205.jpg

My old fuel tank was too corroded to repair and the new one is finally going to be ready tomorrow! I hope it fits between the stringers!

I have 2 weeks left now before I move house and jobs so am just going to try and get as much as I can done in this time!

I then marked where it didn't fit and shaped it using a belt sander. I had to repeat this several times for both stringers! Was really happy with the final fit on both of them. I then covered in poly resin and allowed to dry on both sides before fitting. I used the same frame to suspend each stringer in turn about 1/4" off the hull and glued in place with Crestomer 30.

DSCN1208.JPG
 

jmmacky

Petty Officer 2nd Class
Joined
Jun 20, 2011
Messages
177
Re: Bayliner Capri unintentional restoration project

I have now made and fitted bulkheads and deck supports to go outside the stringers. Towards the bow the stringers come out of the lowest chine as they bend inwards. The manufacturers had glassed in batons of wood into the rest of this chine so I thought I should replace these to mimic that stiffness the fibreglass would have provided. But I have improved on what they did (I think!) and moulded an extra short stringer that butts onto the actual stringer on an angle to fill in this chine at the bow. I glued these extra stringer pieces to the main stringers using Crestomer 30. All bulkheads etc were fitted so they weren't actually touching the hull and set in place using the peanut butter mixture.

DSCN1214.jpg

Not sure how obvious it is in this photo but everything has been filleted and gaps filled with peanut butter. This uses a huge amount of materials! Everything was covered in resin before being put in place. The most stern bulkhead will become the front of the bilge so I have given this extra waterproofing with a full covering of csm. In hindsight I wish I had also coated the stringers in this area with csm as well for extra protection as they will make the edges of the bilge.

I haven't cut drainage holes into the bulkheads because I don't know what to do with this. I have ordered a transom plug to put in the bilge bulkhead. My idea is that the fuel tank is likely to let some water in around it because of the pipes coming out but hopefully not much. The previous design had water free flowing right up the keel. What I'll do is (when the bilge is drained and boat out of water) unscrew the plug in the bilge bulkhead and let any water out that has got in. Should I seal the others up and only drain the fuel tank compartment?? Or cut holes in all the bulkeads for drainage right down the keel?? Thoughts would be really helpful!
 

jmmacky

Petty Officer 2nd Class
Joined
Jun 20, 2011
Messages
177
Re: Bayliner Capri unintentional restoration project

Also...I know in the last photo it looks pretty rough and non-flat on top but this is because it all needs to be cut down to deck height!

Lots of people have given info in other threads on peanut butter - but just thought I'd add my advice on how to make it.

I mix my polyester resin and hardener well first. This is then poured out of the measuring container and into a bigger bucket. I mix up a litre at a time then pour into a 2.5 litre bucket. I put it into a bigger bucket because the first time when I didn't then put mechanical stirrer in it went everywhere and all over my trousers and shoes! I then add cabosil (fumed silica) and chopped strands mixing by hand until it becomes a v thick milkshake consistency. Thickening it first also helps to prevent it going all over you when you stir mechanically. You need to use a bit more cabosil than chopped strands or it may become more difficult to work. Once it has reached this consistency I mix it with a metal mixer that fits in my drill - this brings it to the needed peanut butter consistency. I definitely recommend you do it with a mechanical stirrer because it is so much more effective than doing it by hand.
 

jmmacky

Petty Officer 2nd Class
Joined
Jun 20, 2011
Messages
177
Re: Bayliner Capri unintentional restoration project

i spent most of the day today cutting the stringers and bulkheads to deck height. It takes ages! I just have the bilge area left now then I'm going to tab them all in with my stitch matt. I've ordered some rubber matting to put stick under the fuel tank - thought this might provide a bit of shock absorption and protect both the hull and tank. I've also ordered some special stuff to paint onto the fuel tank to protect it which also contains zinc so will act a bit like an anode I think.
 

jmmacky

Petty Officer 2nd Class
Joined
Jun 20, 2011
Messages
177
Re: Bayliner Capri unintentional restoration project

Here is the photo of the stringers and bulkheads cut to deck height. I did this by cutting off the excess with a power hand saw thing. I then used a power planer and belt sander to bring most of it to the correct height. The power planer was really good because it is quick and only removes 2mm at a time so you can cut then re-measure. I measured by pulling pieces of string taught across the hull and removing wood which was too high. The only problem was I couldn't go right to the ends with the planer as the hull got in the way so I used my grinder with a 36 grit flap disc on it to get the rest down.

IMG_0020.jpg

You can see in the stern my new fuel tank fitted with about 1/4" of gap above to what will be deck height. To see that fitted nicely in there was a massive relief!

You can see in this photo the fillets made by the peanut butter mixture around all the joints:

IMG_0021.jpg

Next I need to grind off the fibreglass lip from the original deck in the bow that I left in place for reference, round off all the tops of bulkheads/stringers for easier glassing then tab it all in!
 
Top