can of worms?

jrttoday

Lieutenant Junior Grade
Joined
Feb 8, 2010
Messages
1,081
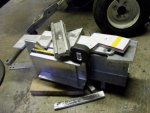
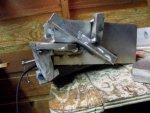
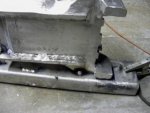
am curious too, this is the 3rd or 4th time I've changed from starting. But, think this is the final direction; it IS quite a bit of material - that I-beam is "light" but will be trimmed down later. Haven't weighed it yet, but doubt it will not be much heavier than a stock swivel bracket for this t/t unit. DSCF0005.JPG


9/16" plate it's laying on is the one I welded together - 13" x 15" and only weighs 10lbs, not going to use it, making smaller plate from 1/2" material.

On the lighter side, if it doesn't float or just doesn't work; I'd recommend investing in pacifiers cos I'll be crying!!! :facepalm: There's an unspoken rule about buying steel at the scrapyard - I'll recycle whatever isn't used..... :D

I'm an old stick welder too; wire welding is for people that can't burn a rod, imho. However!!,stick aluminum is for the birds......
Regardless, just saying what "might" be obvious? Aluminum MIG is NOT very forgiving; it's a "whole body" kind of welding and not "just" in your wrists. But my gun and whip are very stiff; and not using a spool gun to pull wire adds to the difficulty.

Big wire on small pieces in small paces is another hurdle; and having to brace everything to keep them from distorting makes it more difficult to weld. Because this isn't a casting, there going to be many little gussets etc to stiffen it up - and it takes awhile to make 'em.
 

jrttoday

Lieutenant Junior Grade
Joined
Feb 8, 2010
Messages
1,081
this picture is how it was

DSCF0002_zpsk0bpfxkl.JPG

OMC design on a CMC t/t - side clamps against motor mount brackets with swivel bracket in between. Originally had the thought mount it all to the plate :facepalm: lol, for reasons of twisting torque. Torque will be there regardless those clamps/brackets, am now considering just using the pivot bolt at top of bracket ears. BUT, it has to be strong enough to not let this turn into a pretzel.

When you get down to it, there are only two 3/4" bolts holding everything together on that CMC; and only one bolt anchoring the swivel bracket to the motor clamps. Since the boat is free to move around in the water, maybe there's not as much stress there as one would think? But none of that can be Mickey Mouse....
Any constructive thoughts on what's needed there? OR eggs!! lol
 

jrttoday

Lieutenant Junior Grade
Joined
Feb 8, 2010
Messages
1,081
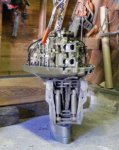
took my old '72 100 off its stand and that's enough for Sunday - going to start building off of that stand and was wanting a visual reference. The 115 and 100 are identical in many respects - this one's only a part motor now. Probably need to finish removing a few things and send the rest down the road

DSCF0001.JPG

thinking out loud - brackets and hydraulics are history. The only thing I like about manual trim is being able to leave the motor unlocked. Not sure if I'll try to keep that much intact??
But there isn't much there and need to figure out exactly how to attach it; shouldn't be that difficult - famous last words LOL
 

jrttoday

Lieutenant Junior Grade
Joined
Feb 8, 2010
Messages
1,081
wow... starting to wonder how much more I can stand.... lol
DSCF0003.JPG


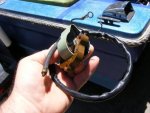
went back to the salvage yard to look at some other motors for ideas; plus I was feeling neglected :rolleyes: - they always give me a hard time, I'm known as the "electric shift guy" lol. Seems I'm about the only person still running one, but this is a brand new coil for a Johnson 115esl70d - in other words 1970 115hp electric shift.
$10 and not that I need one now....
 

StarTed

Senior Chief Petty Officer
Joined
Jul 14, 2015
Messages
694
I think you're as bad as me. Maybe even a little more so. :D
 

jrttoday

Lieutenant Junior Grade
Joined
Feb 8, 2010
Messages
1,081
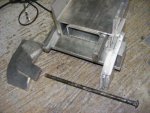
sitting on a bucket and thinking..... and wondering what have I gotten into? :facepalm: piece on top is one of the arms (not using, both are scrap).

DSCF0001.JPG

Cut up the plate I welded and made it to fit the beam. Drill/slot holes for plug welds - probably gouge beam to tie in to tubing directly


below is the end the swivel bracket will attach to; need 6" between the inside of ears to bracket. A 9/16" bar on each side of rectangular tubing (only 1 showing) gives exactly 6". Outside of ears require 7.5"; by splitting I-beam and covering it all, I have 8" - shims (1/2" washers) will do the rest. That's a 1/2 x 12-1/2" carraige bolt that OMC figures is enough and I've no reason to disagree.

Three 1/2" plates plus the 9/16" bar for more shoulder than the original brackets on the bolt. And there's more coming, hang on......

DSCF0005.JPG

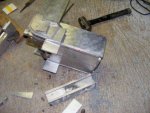
piece on edge of plate goes in before 9/16 bar making it almost flush with top, and has to be drove in, it's tight!! - everything gets welded wherever possible, there are no voids.

Bevels not yet cut and not trimmed for final fit, just looking..... See where the beam is split, gets welded to the tubing - plug welded too. Beam flanges on top were not cut, will use them for bracing while welding

DSCF0008.JPG


Kind of sort of? lol The flanges on the bottom of both will be cut back a lot if not completely? There'll be a brace/gusset or something with trim cylinder pin bracket on the bottom also.
Pretty close to what it'll be like when done. Wut? y'all thought I was going to put a potato chip back there? lol
Haven't weighed it yet, thinking 20ish pounds after welding


DSCF0009.JPG

Really not going to need that much on the bottom - the swivel bracket that's on there shoud do most of the work. In all likelihood, I could just stop at the bottom of the 9/16" plate under the beam. I also plan on bolting through the bottom of side ears into the swivel bracket where the hydraulic cylinders used to mount - cylinders are history.
Actually, those holes will be just under the plate - if you'll notice the J shaped bracket
 

jrttoday

Lieutenant Junior Grade
Joined
Feb 8, 2010
Messages
1,081
nothing to brag about, if I make an exceptional weld, it was by accident!! lol Been welding so long it's like whatever....

DSCF0012.JPG

Just showing how flat a fillet weld should be - one in and two over, aprx 8" long. The one thing I hate about this machine is that it doesn't have a way to set "post gas" - leaves surface porosity just about every time you stop.


Having to do some major bracing for every "little" weld!!! And the thing about Aluminum MIG is that you're finished welding three seconds after you start - not kidding.

DSCF0013.JPG
 

jrttoday

Lieutenant Junior Grade
Joined
Feb 8, 2010
Messages
1,081
DSCF0001.JPG

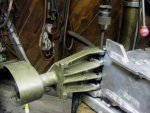
closer, not yet... Swivel bracket off my 100, supposed to be identical, just checking for fit. Something moved cos the bar coming out of the bracket is high on that end, barely see it - it fits flush on the bottom, there's a piece welded in there. Bar for port side on top

Probably notch the plate to move it all forward another 1/4" or so. Doubting I'll use I-beam down; am thinking bolt through original bracket hole, another lower through cylinder hole, and something down to where the locking mechanism was. A hole is already there in the port side (light coming through), none on starboard.
There are tiny holes in the center where the latch fit, but not certain I can open them up for another straight through bolt Might interfere with the steering arm?
 

jrttoday

Lieutenant Junior Grade
Joined
Feb 8, 2010
Messages
1,081
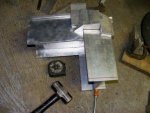
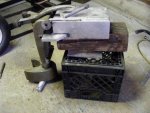
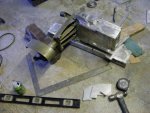
maybe I should've used a steel milk crate or a better block of wood? DSCF0003.JPG
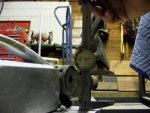
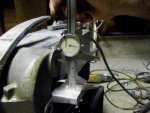
Looks like the micrometer moved while trying to balance the camera DSCF0007.JPG
etc. I measured ten thousandths and that's showing closer to 15? (hard to tell in pic)
Whatever!! sand that out after I finish welding...


Just saying, there's a HUGE difference between a "shop welder" and one that welds on the boat. I'd make better welds if I put all of this under a bench and threw a bunch of crap on top of it all. Not that there's anything wrong with the welds I'm making.
And there's also a huge difference between "shopfitters" and ones that work out in the field - guess which way I lean LOL.
 

jrttoday

Lieutenant Junior Grade
Joined
Feb 8, 2010
Messages
1,081
In case anyone's paying attention, I'm not paying enough!! Maybe I should know better by now, but had to find this out by accident. Accidently had the trigger depressed when I turned the machine on; and PRESTO!! the settings menu displayed :)

I'm an old rod burner and have only welded Aluminum on Miller Aluma-Pro and am no pro with any type wire welding - we've already seen that lol. Pre-gas isn't as critical because I break the wire flush with the tip after every weld; which gives some delay before contact is made to weld. ALWAYS at least cut the burnt end off before starting again.

I'm very pleased with this 252, but this particular whip is is way too much for what I'm trying to do. And just because you can do something doesn't mean that you should :facepalm: :lol:

Had to send the drill bit back, was for #3 Morse taper, need a #2. Have a #2 1-7/32" should arrive tomorrow; plus a #2 1/2" x 12" bit arriving as well (my press has #2 5/8" speed chuck). Bushings are 1-1/8; I think it might be better to finesse that last 1/32??? will see.... couldn't locate a #2 1-1/8th.

PS: as you might have known, that .010 disappeared with the touch of a sanding pad.
And at this point, I'm starting to actually see that my geometry is correct?? :lol: I hope :facepalm: maybe she'll get on plane :rolleyes:
 
Last edited:

jrttoday

Lieutenant Junior Grade
Joined
Feb 8, 2010
Messages
1,081
DSCF0001.JPG

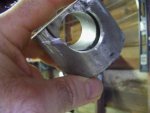
this is the hole I drilled awhile back that made me scrub the direction I was going in. An 1-18th hole saw ended up 1-3/16" - unusable. Guessing, not really lol, I don't know enough about Morse taper :facepalm: it's all good, never too old to learn... my press takes a different style taper, but has 2MT stamped on the arbor.

Can drill a pilot hole straight through and "maybe" use a 1" or 1-1/16th hole saw on each side; then figure out "how to enlarge hole where it goes through the rectangular tubing" - a plate gets welded on the end which would make it inaccessible by the time I get there.

Sending another drill bit back means $15 for the lesson :lol: Whenever I get to that point, thinking machine shop....
 

jrttoday

Lieutenant Junior Grade
Joined
Feb 8, 2010
Messages
1,081
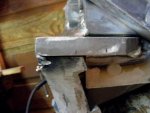
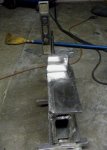
nothing much again; unless you consider lining that up on an uneven floor something - it is!!

DSCF0001.JPG

nailed it...

DSCF0005.JPG

just using the old bracket for alignment - it's tacked on as well as the rectangular tubing. Now that the two holes are drilled for the swivel bracket, I'll weld the others on and drill back through for them.
Everything's a bit oversized so I'll have something to weld to. Leaves a LOT to be trimmed down....
 

chevymaher

Commander
Joined
Mar 29, 2017
Messages
2,932
I am new to boats. I been seeing you make this. Is it a Out board bracket? To hold the motor. All I know for sure is this. You can't find one and your going through it to make one.
 

jrttoday

Lieutenant Junior Grade
Joined
Feb 8, 2010
Messages
1,081
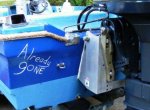
chevymaher Welcome aboard!! I'm running a 1970 Johnson 115 and they only made it with manual trim - it will not adapt to later model t/t units because of the swivel bracket design. What I'm making is a way to mount its swivel bracket to a 1985 140h t/t.

Swivel bracket in pic is off my '72 100h but identical to the 115. One shown has been gutted and will do the same for other when I get there.

Had a CMC PT130 and it wasn't enough for the torque of this motor. Could have taken several different routes and even saved time and money? Just something constructive to do.......

The pics are now gone, but that's kinda what this whole thread has been; something to do LOL!!
 

jrttoday

Lieutenant Junior Grade
Joined
Feb 8, 2010
Messages
1,081
Hoping that everyone's been safe!! (Floridians Texans etc).

DSCF0002.JPG

Having a hole to work from really didn't help much cos I won't know until I chuck it up if it can be drilled in the press - might have to do it by hand; which is OK. Have some minor touch up (scars etc), but that's just about how both sides look.

I "think" I want to plate that end? or just weld up the two open places - might not matter

Just showing how much each side drew up from welding!!! You can't really tell from this pic - but BOTH SIDES MEASURE THE SAME!! :D

DSCF0003.JPG

that's a 9/16" plate and 11" wide on that end; figured it'd pull and had no practical way to stop it. Welded both sides using the same sequence and settings; just got real lucky.
As can be seen, I'm not trying to make stellar looking welds when most everything will be ground down - takes tooooo much time and effort with this rig; and I've made over two hundred welds (probably) on this one little job. With aluminum, complete fusion is a must, penetration, zero porosity, tie ins.... etc.
Aluminum is not very forgiving in several ways, but it's easy to work with in others.
IMHO, the fit is more crucial than with steel and so is cleanliness - been through some sandpaper and acetone, prefer 120g but am out and using 80.

Still aways to go....
 

jrttoday

Lieutenant Junior Grade
Joined
Feb 8, 2010
Messages
1,081
thinking out loud and no thoughts are coming!! lol There's just so many little things to consider.... trying not to miss.

Need to hang the 115 and gut the bracket, check measurements to start dialing in final position - height and pitch of motor, position of tilt cylinder brackets, and what that looks like. Can't believe I'm still wrestling with machine shop or DIY? - not there yet but close to having to have that hole. I'd like to be finished with most of the welding first; distortion with aluminum is almost unreal.

(and I have to put it back together enough to rehang on its stand) it's a good day's work setting it all up to recheck measurements and then putting it all back!!! I have all the measurements written down, BUT!! things change during the process....

I drilled last two holes through by hand; too much trouble in trying to make it perfectly square with the press - a few thousandths "might" have practically ruined the holes. I've seen people do it and it's totally foolish to weld anything on machinery.
Sometimes, my biggest challenge is to figure out "what's next?"
Whose idea was this anyway???? LOL

Anyone had any luck drilling straight through to the other side for centerpoint and boring that side so things are equal giving a line bore effect? I've used that trick on steel with things not as critical.
thanks
 
Top