Changed my shift cable, here is what I did. NOTE ** NEWBIE **

bruceb58

Supreme Mariner
Joined
Mar 5, 2006
Messages
30,581
Re: Changed my shift cable, here is what I did. NOTE ** NEWBIE **

You would be surprised!
What i dont know, is what theboat manufacturer did for adjustments. If any.
No matter what they used early on, they definitely used the bellcrank tool later on after all the recall nightmares. That alone would be reason enough to use the proper tool specified in the OMC service manual, wouldn't you agree?
 

Idlespeedonly

Senior Chief Petty Officer
Joined
Jun 30, 2011
Messages
779
Re: Changed my shift cable, here is what I did. NOTE ** NEWBIE **

If I had access to the tools I would definately use them. I kinda cringe when I see posts like this one. Wcasey has a disclaimer though on this one. I would hate for someone to stumble across a post similar to this one thinking this is the correct way to do this procedure, when it is not the right way. And end up wiping out their lower. I just read Stuarts article. On one of his papers it describes using a straight edge. This appears to be from a factory manual. I have used the staight edge before with 100% success. I was told this was the purpose of the rib. As long as the tools are used properly the only user variable is removing the slack from the control cables. These drives are great drives design wise. The shift mechanism is a different story.
 

bruceb58

Supreme Mariner
Joined
Mar 5, 2006
Messages
30,581
Re: Changed my shift cable, here is what I did. NOTE ** NEWBIE **

The only manual I have ever seen the straight edge method mentioned is in a Seloc manual.
 

bruceb58

Supreme Mariner
Joined
Mar 5, 2006
Messages
30,581
Re: Changed my shift cable, here is what I did. NOTE ** NEWBIE **

I don't see the section where the straightedge is mentioned. Wrong page?
That looks like an OMC manual though!
 

Idlespeedonly

Senior Chief Petty Officer
Joined
Jun 30, 2011
Messages
779
Re: Changed my shift cable, here is what I did. NOTE ** NEWBIE **

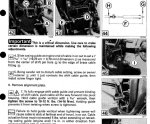
#82 is referring to it. And in picture 82, that is what appears they use.
 

Idlespeedonly

Senior Chief Petty Officer
Joined
Jun 30, 2011
Messages
779
Re: Changed my shift cable, here is what I did. NOTE ** NEWBIE **

According to Stuart, later service bulletins required the special tools. Now were his information comes from, I dont know. I still believe both ways will get you the same results. Using the tools is surely the foolproof way (and better method) to do those certain steps.
 

Ck111484

Petty Officer 3rd Class
Joined
Apr 12, 2012
Messages
94
Re: Changed my shift cable, here is what I did. NOTE ** NEWBIE **

Alright, I've got the new cable in.

So with my bellcrank @ 90 degrees (via lining up the tab with the gasket surfaces), at the engine end I don't seem to be able to get 7 9/16" from the cable casing to the pin hole, but rather something more like 8 5/16". That is with the cable pushed all the way in to the end of the plastic piece with the pin hole and everything screwed all the way in.
What do I do to achieve a shorter distance? Since the bellcrank is already at 90 degrees, it doesn't seem like I can adjust anything at the engine end...? Do I snip the wire at the engine end?
 

bruceb58

Supreme Mariner
Joined
Mar 5, 2006
Messages
30,581
Re: Changed my shift cable, here is what I did. NOTE ** NEWBIE **

http://www.hastings.org/~stuart/cobra/kw-shift.html

C. Perform the transom bracket shift cable adjustment. Use only the 914017 alignment plate to hold the bellcrank at the 90 degree position. Always use the new 915271-M tool to hold the 7 9/16" dimension. "PW" (1990) and newer models may have a collared retainer nut on the aft end of the shift cable core wire, leave it off!

here is the actual OMC document:
http://www.hastings.org/~stuart/cobra/kwshift1.jpg

There is a good reason they started using this tool, OMC lost millions of dollars from the original cables not being adjusted correctly.
 

Idlespeedonly

Senior Chief Petty Officer
Joined
Jun 30, 2011
Messages
779
Re: Changed my shift cable, here is what I did. NOTE ** NEWBIE **

I do understand the purpose of these tools Bruce. The following is were they explain the straight edge.
" I have the two applicable pages 11-16 (290k) and 11-17 (288k) here. This procedure requires only common wrenches, a straightedge, and a ruler; note that subsequent Service Bulletins from OMC require you to use special Cobra-specific tools to make this adjustment."
We can argue this both ways. I agree the tools are the foolproof way. But as long as you are careful, all parts are within their serviceable limits it will work fine.
 

Idlespeedonly

Senior Chief Petty Officer
Joined
Jun 30, 2011
Messages
779
Re: Changed my shift cable, here is what I did. NOTE ** NEWBIE **

You need to get the 7-9/16 dimension correct first. Then climb back out of the boat remove the screw from the retainer(metal teardrop shaped piece). Then screw it in till it contacts the black plastic piece that is being held with the special tool. An alternative method that is used with sucess it making the lower tab flush. You will probably have some of the threaded portion protruding from the retainer. This is ok. Then double and triple check every meassurement again. Do NOT cut the cable though.
 

wcasey5

Petty Officer 2nd Class
Joined
Feb 27, 2012
Messages
197
Re: Changed my shift cable, here is what I did. NOTE ** NEWBIE **

I held my cable with my homemade tool at the engine end for my 7 9/16 dimension.

Then I adjusted the drive end using the non tool methods to get 90 degrees. Basically I adjusted the retainer circled with the cable sticking out, to get the bellcrank resulting in a 90 degree position to the gasket surface. The pivot housing is not 90 degrees to the ground because it keeps moving around.

7255326954_e796b0f578.jpg
 

bruceb58

Supreme Mariner
Joined
Mar 5, 2006
Messages
30,581
Re: Changed my shift cable, here is what I did. NOTE ** NEWBIE **

Just checking but you guys do use the engine alignment tool to check alignment before you put the drive back on right?
 

wcasey5

Petty Officer 2nd Class
Joined
Feb 27, 2012
Messages
197
Re: Changed my shift cable, here is what I did. NOTE ** NEWBIE **

Just checking but you guys do use the engine alignment tool to check alignment before you put the drive back on right?

Yes.
 

palace

Petty Officer 2nd Class
Joined
Mar 19, 2011
Messages
154
Re: Changed my shift cable, here is what I did. NOTE ** NEWBIE **

I got my tools from here http://www.marinepartshouse.com/ind..._1837?osCsid=95911e5e26a910a7666526966c201f57 my cable was probably original "87" 3.0 OMC.
Here is a pic with the pivot housing removed


7213032492_42cb1052dc.jpg


With the cable in place, I needed to attach the engine end. My cable came with a threaded end called the casing end guide. The spec calls for the maximum length of 4 15/16 inch when seated in the cable. Mine was right on 5 inches, so I ground about 3/32 off the end of the guide. Installed the locking nut, trunion (had to look up what a trunion was on wikipedia) and the plastic end. Then I got my son to hold the end of the cable while I kind of screwed it into the plastic engine end, and tightened the cable holder bolts (the 2 very small ones)

Then I greased and installed the bellcrank and the plastic shift actuator. NEXT, my homemade engine end template for the 7 9/16 cable end measurement. I used a piece of laminate flooring, with a bolt in the end holding the cable end. It fit the hole very well.

7213033178_2843db3c86.jpg


The red line is my mark, and I used masking tape to hole the cable casing.

7213033692_7414fdfedf.jpg


Then I adjusted the transom end of the cable until the bellcrank was at 90 degrees to the case.

7213035536_2dfc348129.jpg


I used a protractor, and adjusted the cable end srew thing until it was 90 degrees. Then I used the adjustable to hole the plastic sctuator and tightened the bolt.

Here it is hooked up to the engine end. WHen I tried it by turning the prop by hand, it wouldn't come out of forward until I moved the shifter a bit in reverse. I fixed this by screwing the trunion back (leaving more length in the cable). Ran it on muffs, and it shifts great. Will water test tomorrow.

7213036190_7a064a2783.jpg
 

Ck111484

Petty Officer 3rd Class
Joined
Apr 12, 2012
Messages
94
Re: Changed my shift cable, here is what I did. NOTE ** NEWBIE **

Welp, finished up changing my shift cable, all seems to have gone well. Sea trialed it today and everything shifts as it should, except it's still tough to shift into neutral just like before; however I realized today that my ESA isn't working, so I imagine that's why. Just ordered a new switch/module.

Thanks for the write-up, I made a similar "tool" for keeping the distance at the engine end (board with marks and a nail through it), and just used the straight-edge method at the bellcrank.
 

palace

Petty Officer 2nd Class
Joined
Mar 19, 2011
Messages
154
Re: Changed my shift cable, here is what I did. NOTE ** NEWBIE **

Where did you order the new ESA switch module?
Welp, finished up changing my shift cable, all seems to have gone well. Sea trialed it today and everything shifts as it should, except it's still tough to shift into neutral just like before; however I realized today that my ESA isn't working, so I imagine that's why. Just ordered a new switch/module.

Thanks for the write-up, I made a similar "tool" for keeping the distance at the engine end (board with marks and a nail through it), and just used the straight-edge method at the bellcrank.
 

wcasey5

Petty Officer 2nd Class
Joined
Feb 27, 2012
Messages
197
Re: Changed my shift cable, here is what I did. NOTE ** NEWBIE **

my esa wasn't working either. I disconnected the plug for the esa and jumpered the leads from the switch, and bam it started working. I think it may have been a bad ground. It seems to work consistant since then. I have had other electrical issues that have gone away since I cleaned up the connections.
 

Ck111484

Petty Officer 3rd Class
Joined
Apr 12, 2012
Messages
94
Re: Changed my shift cable, here is what I did. NOTE ** NEWBIE **

Where did you order the new ESA switch module?
MarineEngine.com - http://www.marineengine.com/newparts/part_details.php?pnum=OMC0987602&ptype=&Engine=&Model=
Not sure if that includes the switch as well as the module, but the description and diagram makes it seem that way.

my esa wasn't working either. I disconnected the plug for the esa and jumpered the leads from the switch, and bam it started working. I think it may have been a bad ground. It seems to work consistant since then. I have had other electrical issues that have gone away since I cleaned up the connections.
Interesting - how exactly do you "jumper" the leads?
 
Top