Finally began my summer project and I am already confused...

fishKILLER1987

Petty Officer 3rd Class
Joined
Mar 22, 2010
Messages
86
Re: Finally began my summer project and I am already confused...

Great instructional video. A pour-in transom seems like the only way to go to avoid popping the cap. What is the general method used to attach the stringers to the transom?

Will the nida bond to the stringers on its own? If so, then how do you protect the stringers from future water intrusion??
 

jonesg

Admiral
Joined
Feb 22, 2008
Messages
7,198
Re: Finally began my summer project and I am already confused...

Great instructional video. A pour-in transom seems like the only way to go to avoid popping the cap. What is the general method used to attach the stringers to the transom?

Will the nida bond to the stringers on its own? If so, then how do you protect the stringers from future water intrusion??


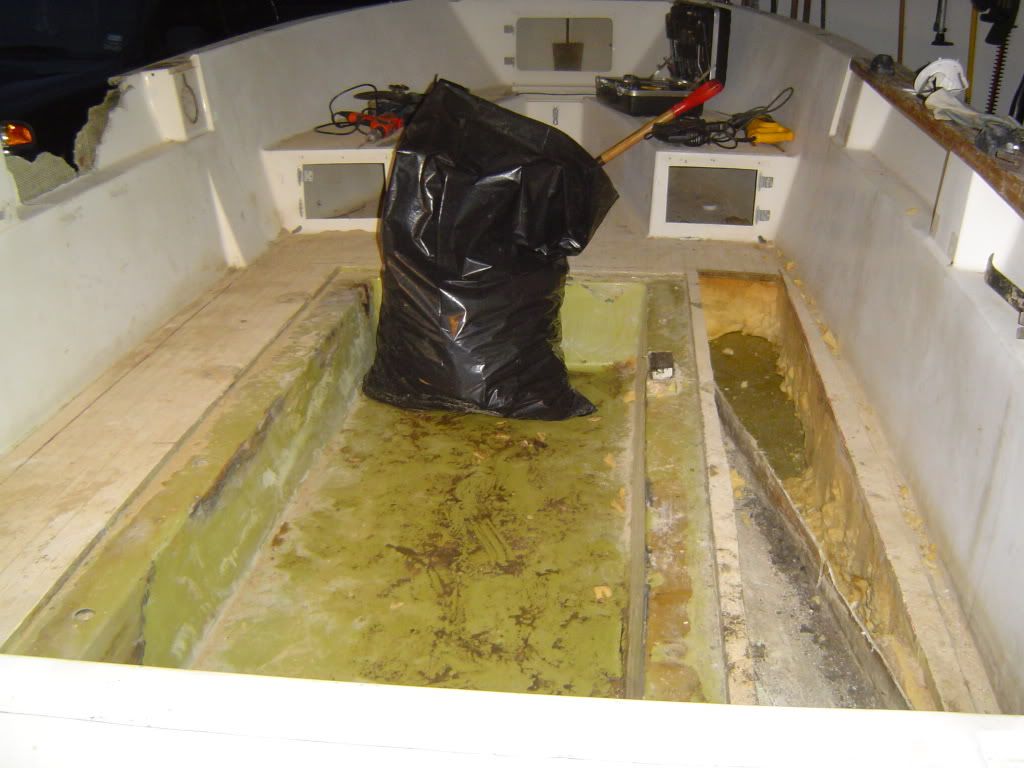
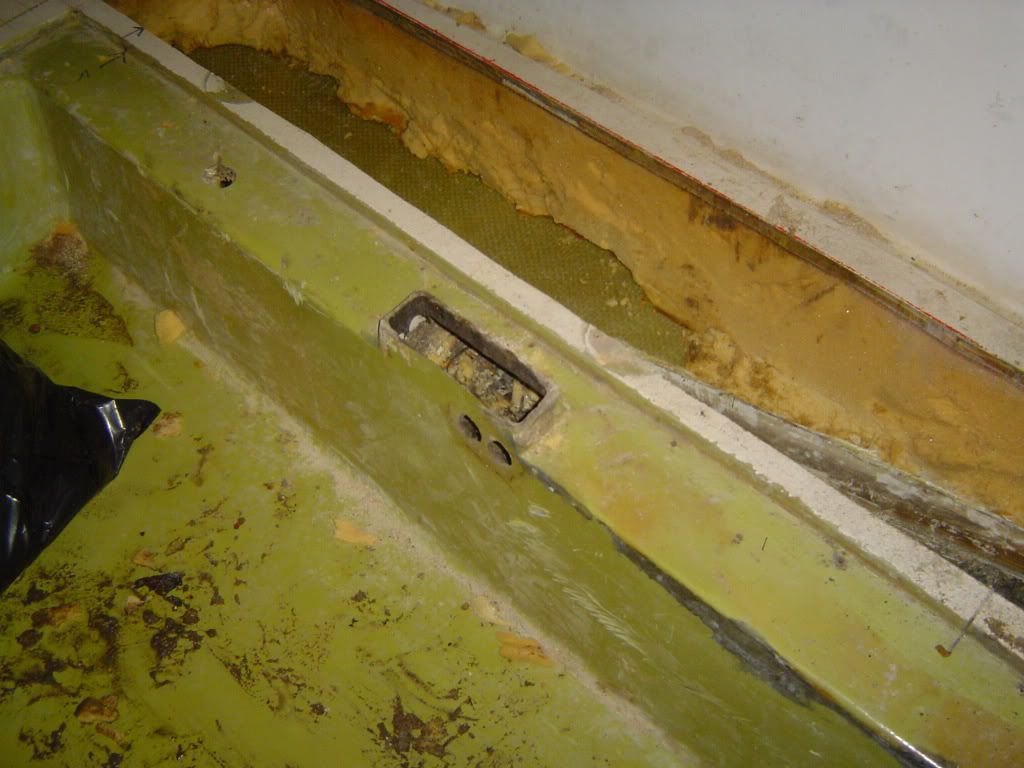
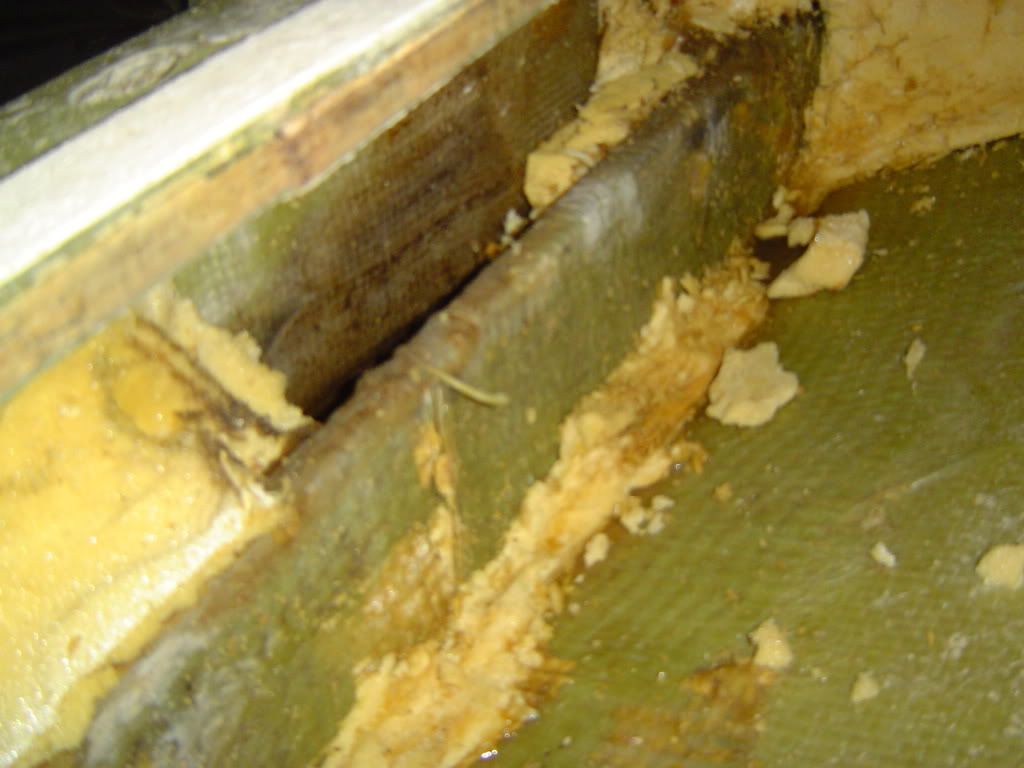
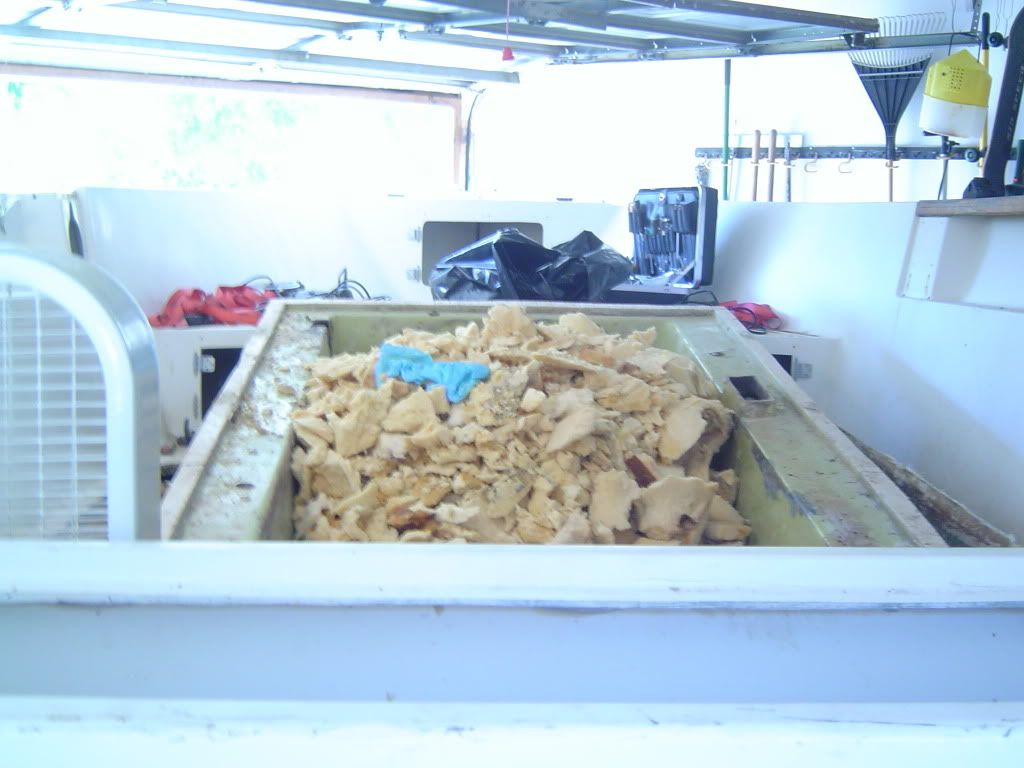
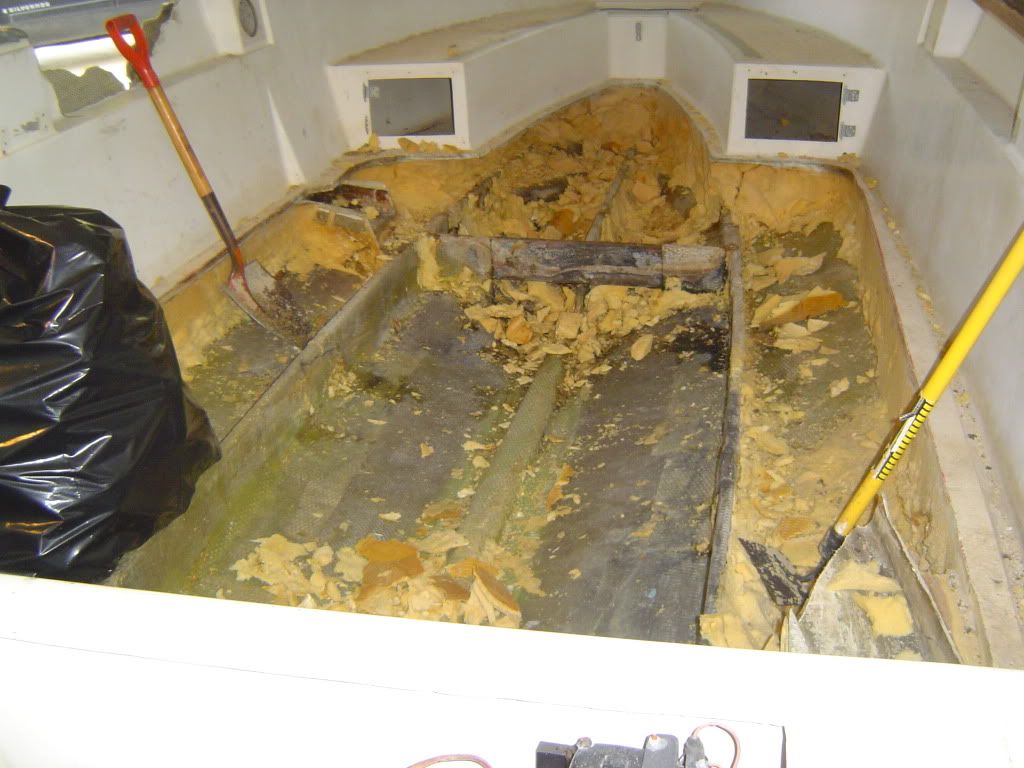
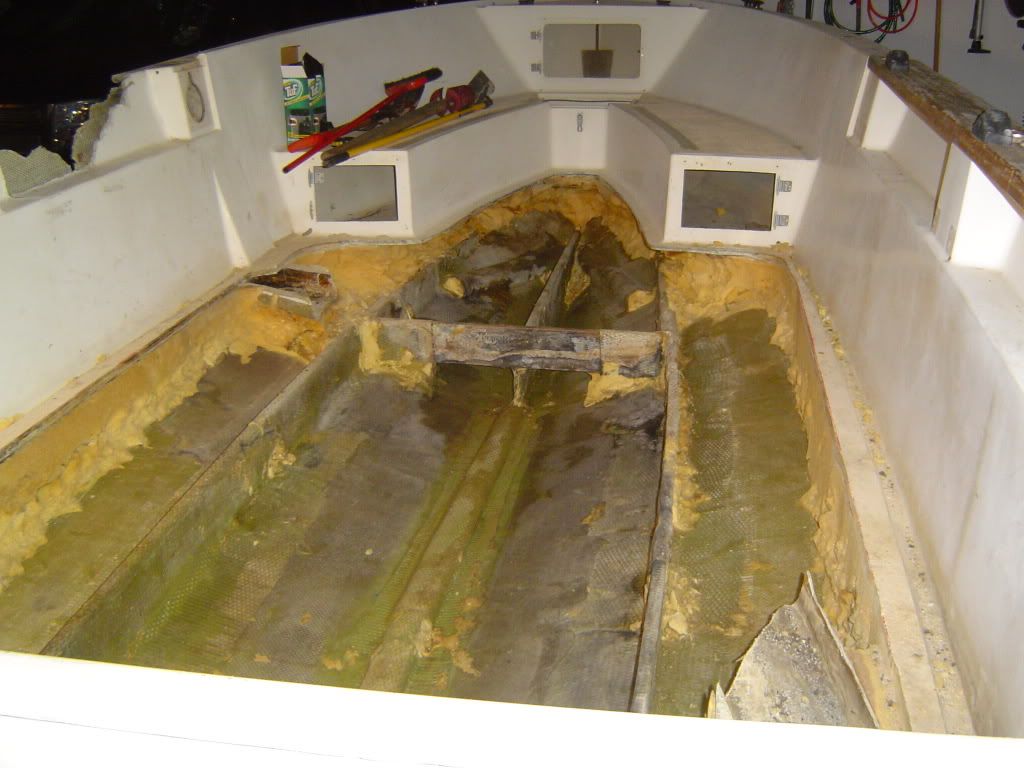
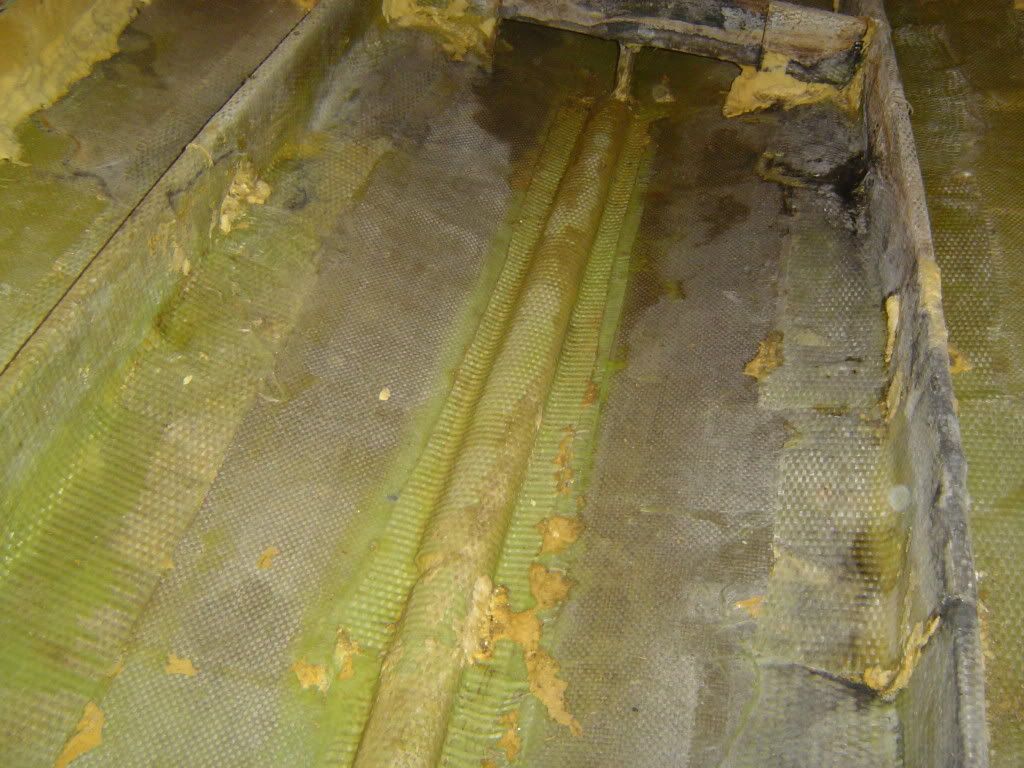
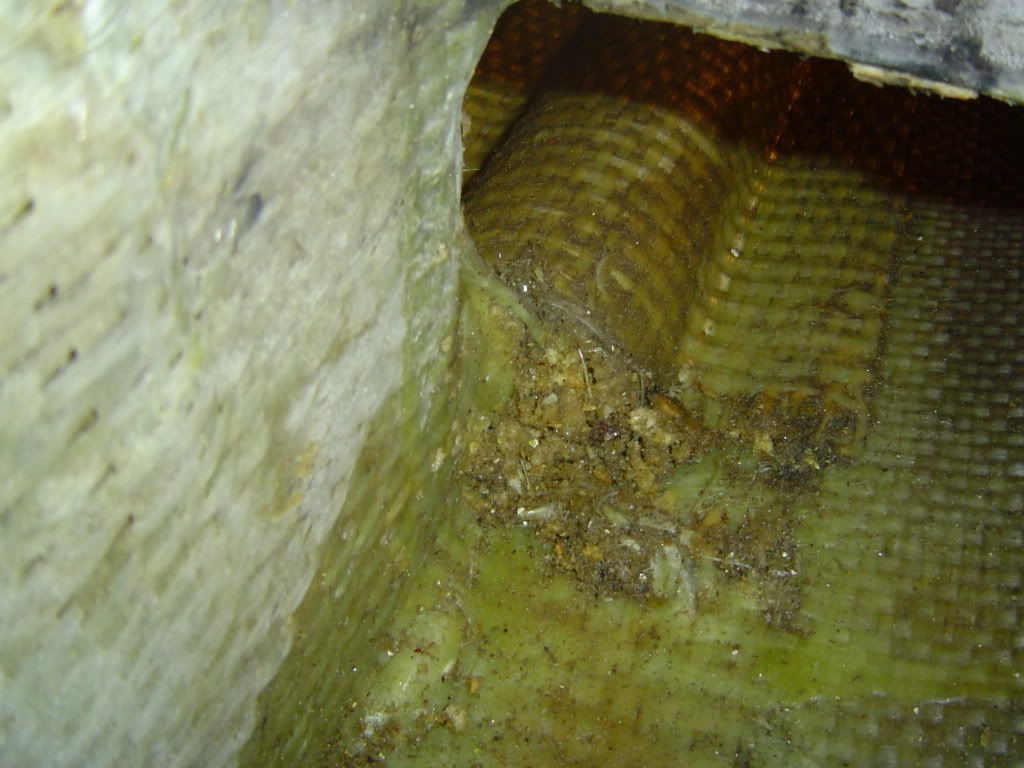
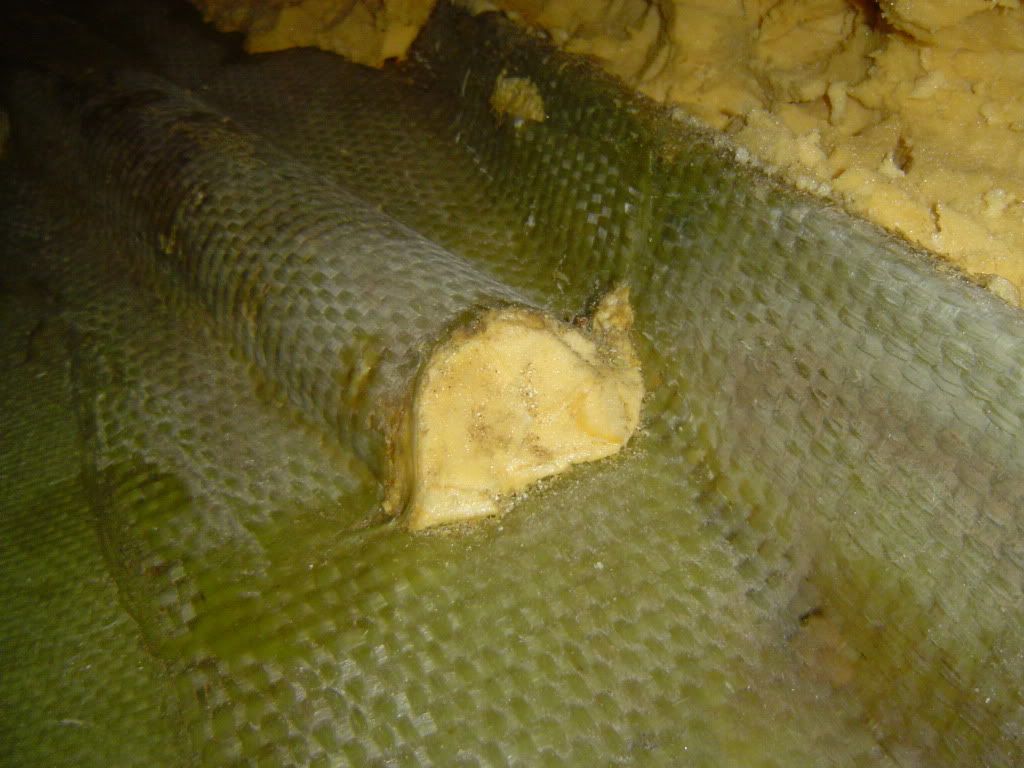
The problem is standing water, lack of drainage , foam.
A lot of us are using PL premium construction adhesive to bed the stringers to the hull, stringers should not touch the glass, they need to be spaced 1/4 inch off the glass. Then resin and glass over the stringer to the hull, themselves could be composite foam., stringers But those tend to be expensive, wood is fine if its PT and sealed properly with proper drainage.[


see pic, the strength comes from the glass over the stringer
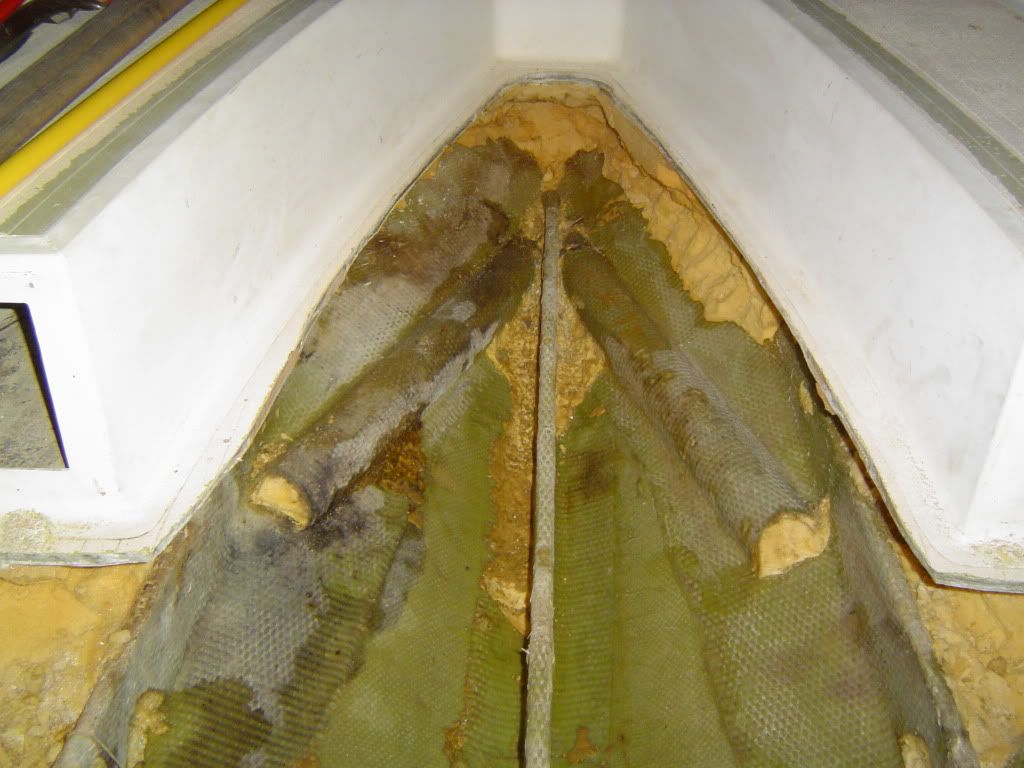
This is a bad install without bedding.

bad.jpg


Below is a good installation where the stringer is spaced away from the glass hull, this prevents spider cracks in the outter hull gelcoat.

good.jpg


On mine, I trial fitted the stringers then pre-glassed them outside the boat for convenience with unwaxed poly resin, then I only had to tab them to the hull after bedding with the PL, I find it quicker and easier to glass a stringer on 2 trashcans compared to working on my knees inside the hull.
The PL allows 30 minutes work time so it makes positioning easier, after it cures for an hr just finish glassing stringer to hull.

Knee braces are a good way to transmit loads at the stringer to transom joint, I did mine similar to this,
DSCN6459.jpg


They need limber holes to allow drainage between compartments, its easier if done first before install and seal the wood real good with resin, multiple apps until the wood grain is drenched and saturated with resin because thats the likely point of entry.
 

fishKILLER1987

Petty Officer 3rd Class
Joined
Mar 22, 2010
Messages
86
Re: Finally began my summer project and I am already confused...

Gotcha. I have heard of people bedding down the stringers with epoxy resin that resembles peanut butter. Would this be better to use instead of the PL? Or is PL just as good?

Also, So the only way to attach the stringers to the transom is with knee braces? Would I need to wait until the nida core transom cured before I attach the stringers?
 

jonesg

Admiral
Joined
Feb 22, 2008
Messages
7,198
Re: Finally began my summer project and I am already confused...

Gotcha. I have heard of people bedding down the stringers with epoxy resin that resembles peanut butter. Would this be better to use instead of the PL? Or is PL just as good?

Also, So the only way to attach the stringers to the transom is with knee braces? Would I need to wait until the nida core transom cured before I attach the stringers?

Using epoxy for bedding is a waste of money, its only there as a spacer because all the strength comes from the glass you put over the stringer.
PL is ready to use right from the tube.
I would do the transom first, then stringers. Then bilgecoat paint the lot.

You don't have to make knee braces, they're just good practice.
Get to work.:D
 

fishKILLER1987

Petty Officer 3rd Class
Joined
Mar 22, 2010
Messages
86
Re: Finally began my summer project and I am already confused...

Haha...I know man. I cant wait to get started.

I spent the last two nights after work cleaning up the gas tank compartment and picking up my tools from the boat to get her ready for the knife.

I made the first cut into the deck late last night. However, it gave me a ton of trouble when I tried to pry it up so I just gave up and Im going get back at it today after work. Hopefully, I can get it off by the end of the day. I cant wait to see what the stringers look like. Ive been taking pics all along the way and I'll post them as soon as I get a chance.

Hey Jones,

So if knee braces are not used to attach the stringers to the transom, then how else would you attach the stringers?
 

jonesg

Admiral
Joined
Feb 22, 2008
Messages
7,198
Re: Finally began my summer project and I am already confused...

How are the stringers tied into the transom now?
Can't go too far wrong following the original design.
 

fishKILLER1987

Petty Officer 3rd Class
Joined
Mar 22, 2010
Messages
86
Re: Finally began my summer project and I am already confused...

Good idea. The only problem is I havent gotten that far yet.

Today was a day from hell it seemed like. As soon as I got home from work I went to work ripping the deck up. I had cut a rectangular pattern into the deck in order to remove the biggest section of the deck while keeping the gas tank compartment intact. I knew the deck was going to give me trouble but I had no idea how much work it was gonna take to get that thing up. When I attempted to raise the rectangular cut-out deck piece it did not budge an inch. I used more force and still not an inch. Thats when it dawned on me that the deck must have been atached to something underneath that could not be seen.

I then cut my rectangular deck piece into smaller sections in order to see what was holding me up under the deck. After cutting and removing a smaller piece of the deck I could see that the remaining section of the deck was epoxied to this fiberglass enclosure that was used as a sleeve to house the wires. Knowing this I then began to pry the rest of the deck up and away from the wiring sleeve. That was a nightmare, but never the less I got it up. So after about 5 hours of chipping, cutting, and prying, this is what I ended up with:

boatandtv004.jpg


This is an overview of what was accomplished today. You can see the rectangular section surrounding the gas tank compartment that I originally intended to remove and the smaller piece on the right is what actually was removed.

boatandtv006.jpg


This is the wire sleeve that housed all my wires. I removed all the wiring after the small portion of the deck was removed. But every wire ran from under the console to the back of the boat inside this fiberglass casing.

boatandtv005.jpg


This is the opening under the center console where the wires ran under the deck.

boatandtv008.jpg


This is a close up of the area where the piece of deck that was actually removed today. I took me at least 2 hours to remove all the foam in there. This boat is packed with foam. This stuff is unbelievably hard to remove. You can see the bottom of the hull in this pic.

boatandtv007.jpg


And here is the glory shot! After about an hour of digging I finally found a stringer. It looks to be in decent shape but there are sections of it where the wood has seemed to swell within the fiberglass casing. The only thing I cant seem to figure out is that nothing is resting on the stringer. It was my understanding that the deck was suppose to rest directly on the stringer. Well, as you can see, the deck is probably about 1 foot above the stringer. What gives???

Any opinions or suggestions...please share.

Thank You.
 

Dick Sorensen

Petty Officer 2nd Class
Joined
Feb 5, 2008
Messages
189
Re: Finally began my summer project and I am already confused...

You had asked about the condition of the gas tank. My experience is that if the former owner(s) didn't take care of the boat they didn't take care of the tank.....most of the problems that we encounter when operating a boat is either fuel or electrical related. When I redid my Rinker 205 cuddy I just replaced the tank completely after checking with three local radiator shops regarding 'boiling/cleaning' the existing.....one guy finally came clean and indicated that after 30 years in the business he has never boiled one clean....seeing how the tank is going to be sealed below decks you really need to be confident that it's clean.....once the tank is ready to be reinstalled I put mine in with fibreglass strips 'bands' being 5 inches wide and the necessary length.....I started at the stringers ...down to the bilge....across the bilge and then up and over the tank and repeated on the other side.....that was three seasons ago.....since then I've never had a problem...just yesterday...I put the boat in water for the first time this year...been 6 months....after the third crank it caught...no problem with the gas system...it was worth the money and effort! good luck with your boat...it really is a great learning experience...and you'll know every nook and cranny in her.
 

jonesg

Admiral
Joined
Feb 22, 2008
Messages
7,198
Re: Finally began my summer project and I am already confused...

Nice, I see its a plywood deck, you can leave the foam out if you want.
If you encounter dry foam you could leave it be as long as its not touching the stringers and not in the way.

My deck has no ply, its just a glass liner sitting on the foam so I had to leave some foam in place.

The quality of the robalo build is obvious, it makes for a solid hull.
 

fishKILLER1987

Petty Officer 3rd Class
Joined
Mar 22, 2010
Messages
86
Re: Finally began my summer project and I am already confused...

Jones,

So are you saying that I dont need to put foam back in the hull before I lay the deck back down??

Also, any thoughts on the deck not laying on the stringers?

Only reason I ask is because in the midst of ripping up the deck piece by piece I figure it would probably be easier if I replace what I removed with new wood rather than trying to piece together these random pieces of deck that I removed.

Thanks.
 

jonesg

Admiral
Joined
Feb 22, 2008
Messages
7,198
Re: Finally began my summer project and I am already confused...

The deck just needs support, you said its glued to something, thats the support for th deck.
My (wood free) deck just sits on foam so my foam is structural, yours isn't.
I would leave some foam in there to deaden noise. Just remove the wet stuff and preferably keep it away from stringers.
Water has to be allowed to drain to the bilge, lack of drainage is the problem.
I'm off to bed, been working all niter.;)
 

fishKILLER1987

Petty Officer 3rd Class
Joined
Mar 22, 2010
Messages
86
Re: Finally began my summer project and I am already confused...

Ok I see what ur saying. And I think I understand now why there was so much standing water in the hull. The drain pipe going from the bow to the stern was completely blocked on both ends with foam. The foam was actually inside the drain pipe about 6 inches or so. I dont know if this was how the boat was made from Robalo or if someone has been under the deck before and re-foamed the entire boat. In any case, the hull is packed full of foam everywhere. It is unbelievable how much foam was in the hull.

I got alot accomplished today with the help of my father and brother. We started by removing the rest of the deck and then spent the majority of the day removing all the soaked foam. We filled 16 contractor garbage bags, the biggest ones that home depot carries, and there is still a ton of foam to remove. I have no idea what Im going to do about re-foaming the boat because it would cost a fortune to replace all that was removed.

Here are some pics of the destruction process:

boat001.jpg


This is the section of the deck connected to the gas tank compartment. All the foam that is in the compartment came from a tiny section of foam that I had removed in order to get the final piece of deck to come up.

trisbed.jpg


This is what we have accomplished so far. Like I mentioned before, the majority of the day was spent removing all the wet foam.

In the pictures you can see that the stringers sit alot lower than the deck. After removing a large portion of the deck today I now realize that the deck was entirely supported by foam. I would imagine that the boat was extremely solid with the amount of foam inside the hull. Also, the stringers seem to be solid as a rock. Completely encased in fiberglass. However, I know that in a situation like this, looks can be decieving.

So I am wondering now if I should replace the stringers with taller boards in order to lay the deck flat on the stringers or should I go back with the original design and use the same size stringers and just re-foam the boat exactly how it was??
 

jonesg

Admiral
Joined
Feb 22, 2008
Messages
7,198
Re: Finally began my summer project and I am already confused...

Drill some 1/4 inch holes in the stringers to examine the drill chips for wet wood. Toward the rear and lower down is where I'd expect water damage.
Fill holes with sealant if the wood is ok.

Clear the rest of the foam from the bow area on the keel and call it a draw.
At the bilge end there should be limber holes to allow any water to find its way into the bilge and out.

You can extend the stringers to the deck for support, if the originals are good then sister onto them. 5/8th PT plywood, pre-glassed with polyester/10oz cloth is very strong. You'll be relying on stringlines to establish the deck height, run string from one side to the other and measure down from string to hull, test fitting with cardboard isn't a bad idea for stringer deck support templates either.

The cross brace looks bad, the one that is located fwd of the console area.

You said the drain pipe is clogged, can't see any drain in the pics.
 

fishKILLER1987

Petty Officer 3rd Class
Joined
Mar 22, 2010
Messages
86
Re: Finally began my summer project and I am already confused...

Oh ok. I never considered building onto the existing stringers. That would save the hassle of replacing them. I am amazed at how good everything looks down there as far as the stringers though. But I'm thinking that I will run into some rot towards the transom. For some crazy reason the boards that run perpindicuoar to the stringers were never covored with fiberglass. I couldn't believe it. They are soaked with water and soft. So those will certanly need replacing. Towards the bow of the boat there is a third stringer that runs from the very front of the boat down the middle to that first board that is infrojt of the console.

The drain pipe I was refering to is in the center of the boat between the stringers. It may be hard to see in the picture but it is packed with foam on both ends. I will try to take some better pics and have them posted by this evening.

So are there any structural benefits of having the stringers run up to the deck? I just can't helpbut wonder why this wasn't done when the boat was made. The way I plan to rebuild the boat, it will be much easier to have the stringers meet the deck so it will give the deck support.

Also, do many ppl make some kind of access way to thier gas tank aside from an inspection hole? Like a large cut-out section in the plywood that can be removed incase the gas tank needs to be removed for whatever reason.
 

tinkeringwackyone

Chief Petty Officer
Joined
May 2, 2008
Messages
415
Re: Finally began my summer project and I am already confused...

my boat had/has part of the deck that is removable by unscrewing it, and lifting it out. walla, access to the whole tank compartment, hope this helps.
 

jonesg

Admiral
Joined
Feb 22, 2008
Messages
7,198
Re: Finally began my summer project and I am already confused...

my boat had/has part of the deck that is removable by unscrewing it, and lifting it out. walla, access to the whole tank compartment, hope this helps.

Same here, a full size hatch for tank removal.
Although I notice since installing my new tank,.. its bigger than the hatch.
oops!:D
 

fishKILLER1987

Petty Officer 3rd Class
Joined
Mar 22, 2010
Messages
86
Re: Finally began my summer project and I am already confused...

Thats how my boat was originally designed. But the tank compartment did not have a drain hole and was completely encased in foam. But Im thinking about building a new deck and making some changes to the old style. Im debating on not having a tank acsess hatch and instead just having a couple small access holes to get to the fuel lines and what not.

What do ya think?

Also, are there any structural benefits to having the stringers run all the way up to the deck??

It seems to me that it would provide more structural support than just the foam by itself.
 

jonesg

Admiral
Joined
Feb 22, 2008
Messages
7,198
Re: Finally began my summer project and I am already confused...

The problem is if you have any fuel line issues you will need to cut the deck open to get at it. Those little hatches are too small if you need to change out the fill hose. The little hatches tend to develop leaks after being walked on too. Read up on it all.
http://www.yachtsurvey.com/sinking.htm

Full height stringers will add a lot of rigidity to prevent the deck from feeling like a trampoline.
 

fishKILLER1987

Petty Officer 3rd Class
Joined
Mar 22, 2010
Messages
86
Re: Finally began my summer project and I am already confused...

Awesome. Thats exactly what I was hoping to hear because I plan on installing full height stringers and more perindicular compartments to add more strength.

Regarding the fuel tank, I think I will create some kind of large hatch like what was originally in the boat just in case I have a problem with the fuel lines even though the tank and every connecting hose will be brand new.

After work today I had to attend to some long neglected yard work but as soon as that was completed I started on the boat. I chipped away alot more of the foam but it still feels like I havent made much headway. In any case, here are some pics of what got done:

boatgutted001.jpg


Here is just an overview of the boat after a few hours of foam removal.

boatgutted002.jpg


This is what I suspect to be a drain tube to drain water from the bow to the stern. However it is stuffed with foam on both ends so I cant see how that would be a very effective drainage system. My father is convinced it is something structural, but Im always 100% convinced it is suppose to be a drain tube. Any thoughts??

boatgutted003.jpg


Here is the beginning of that same drain tube that starts at the bow. You can see here that the opening of the tube is divided in two by the middle stringer. You can also see the foam that is stuffed in the mouth of this tube.

boatgutted004.jpg


This is anothe pic of the same drain tube taken from the front. You can see the stringer that divides it in the middle and the foam blocking any possible water drainage.

boatgutted005.jpg


This is a close up of the hull at the tip of the bow. There are two more tubes that I suspect to be drainage tubes as well but I cant see how they would possibly drain anything the way they are facing. Seems to me like they would trap water more than they would move it.

boatgutted006.jpg


This is the end of one of the above mentioned "drainage" tubes. You can clearly see that it is stuffed with foam.

Any opinions or suggestions??...I just cant seem to wrap my head around these "drainage" tubes.

Thanks.
 
Top