Re: Finally began my summer project and I am already confused...
Alright guys, long time no talk I know...but I wont get much done sitting here on the computer. Just have to get out there and get it done. So for the past week or so I have been relentless on this thing. However, for the amount of work done I still feel like I did not get much accomplished.
I did run into a few snags which slowed the process down quite a bit. But never the less I got what needed to be done accomplished.
Progress Report:
Picking up where I left off, I had ground down the remainder of the old fiber glass that held the old stringers to the hull and began the start of the new fiberglass work. By the way, fiberglass work is no fun. What a mess!! I had cut out pieces of 1708 and laid them down on the hull where I had ground down the old fiberglass. This added alot of strength to the hull and helped prevent it from bowing when laying down the first stringer. However, I dont think I will do this to the other side because it was very time consuming and used up a large portion of materials. I try to keep in mind that this is a learning process and I am learning as I go.
I then began the process of cutting out the new stringer. I used the old stringer to trace a pattern onto the wood to cut out the new stringer. This is where I ran into a few problems. Because the original stringer was two pieces of thin plywood fiberglassed together, I had to significantly modify the new stringer to fit to the shape of the hull. I went with one solid piece of wood to make the new stringer, which I feel can only improve on the structural integrity of the boat. After the stringer was cut to the correct deminsions, I used a grinder with a coarse sanding disk to grind the wood down to match the shape of the hull. This was a very handy tool because I could almost mold the wood into any shape.
After a long period of taking the stringer in and out of the boat for frequent test-fits, I finally found a good fit and went with it. I mixed up a batch of epoxy resin and cabosil to bed the stringer down to the hull. I made a very thick mixture like peanut butter which made it very easy to work with. I was very concerned with the weight of the stringer pushing through the epoxy and eventually resting on the hull bottom, so with the help of my father, we constructed a few jigs that insured the stringer would stay at least 1/4" off the hull bottom to prevent any hard spots.
We then laid down a very thick strip of epoxy onto the hull bottom then placed the stringer down into the epoxy. We then gathered up what epoxy had oozed out from underneath the stringer and forced it back under the stringer to prevent to possibility of voids forming within the epoxy. After the epoxy was packed in we then cleaned up the edge where the epoxy met the hull bottom let it cure. We also used a level to insure the board was relatively straight and secured it with a "quick-fix" piece of 1X4 board that was attached to the adjacent old stringer to keep the new stringer from moving during the cureing process. After the epoxy cured I then removed the jigs that kept the stringer off the hull bottom and packed more epoxy into the open area where the jigs had been. Overall I would say the first stringer came out good.
So thats as far as I have gotten. My next step is to begin glassing the stinger to the hull. This process is taking a little bit longer than I had originally anticipated, but I think the next two stringers will go much faster because I now know what to expect.
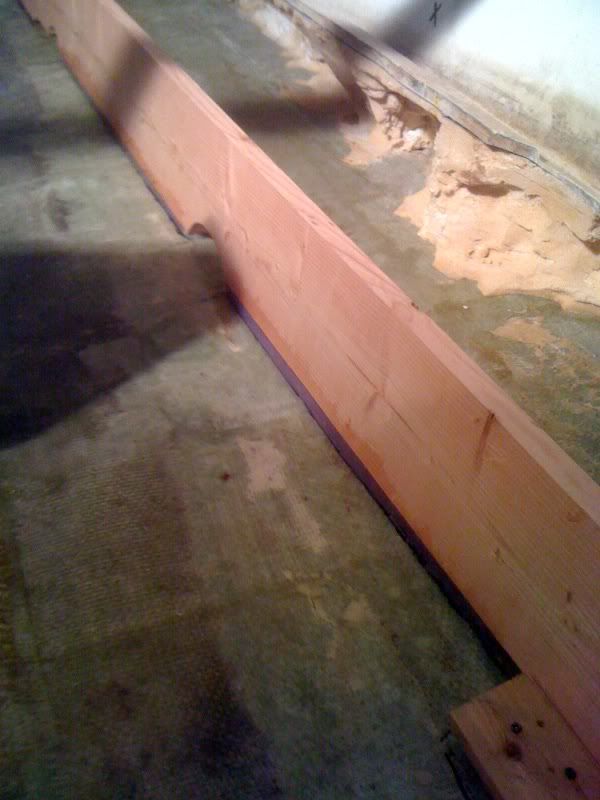
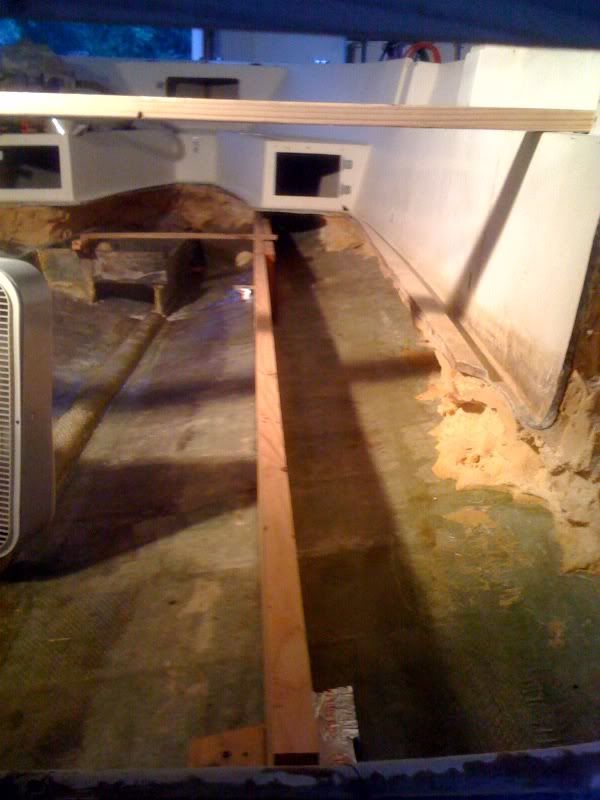
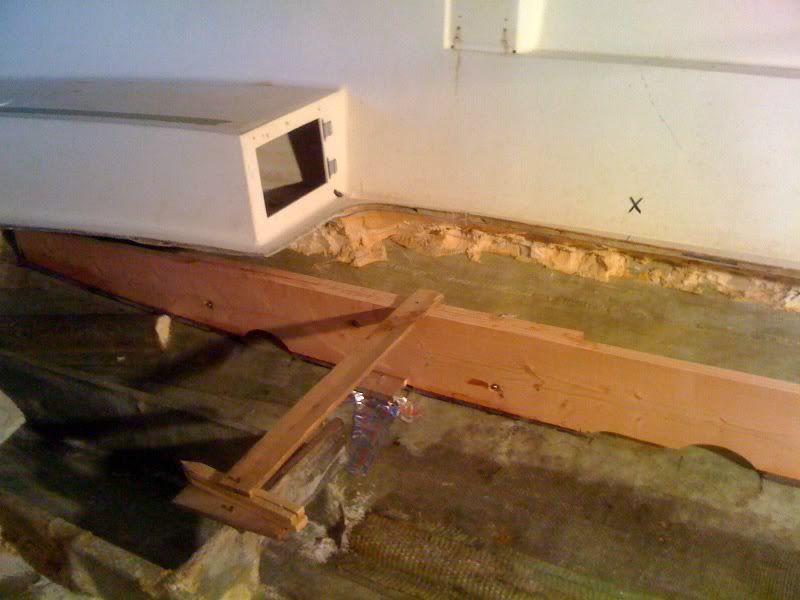
Unfortuneately, I have no pics of the stringer cutting process...just the finished product:
You can see here the epoxy between the stringer and the hull bottom. In some places it is up to an inch thick. I hope this isnt a problem. Any thoughts???
Here you can see the "quick fix" board we used to secure the stringer while the epoxy cured. It looks terrible but it did the job. You can also see one of the jigs that was used to keep the stringer off the hull bottom.
Tell me what you think.
Thanks.


