O'Day Mariner Sailboat Restoration

tpenfield

Moderator
Staff member
Joined
Jul 18, 2011
Messages
18,137
Love that Keel Look! Good luck with this project. I'm tagging along. I don't know a sheet from a sail but new is always good. that whale dorsal fin is looking real nice!

Glad to have you along.

My 11 year old Ford Explorer is also benefiting from my boat's rust removal project, as I have been filling time in between the keel treatments working on the vehicle's chassis and suspension, which has accumulated its fair share of rust over the years. I went through the front end, taking care of all sorts of rust, even replaced a broken sway bar ink. :eek: Now I am working on the running boards (steps) and some of the rust further back. :thumb:

This will be my winter car, since it is AWD.
 
Last edited:

tpenfield

Moderator
Staff member
Joined
Jul 18, 2011
Messages
18,137
Update:

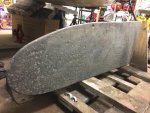
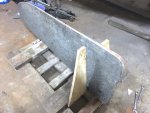
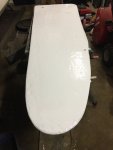
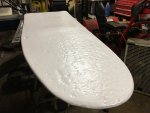
I have the keel down to bare metal. Here are a couple of pictures.

IMG_7127.jpg

IMG_7128.jpg

Not a lot of metal loss, so it should be pretty straight forward to get it faired and smooth. I am thinking about putting a layer of light glass just to give the coating some strength. There is one area on what would be the starboard side of the keel that has an imperfection. . . there is about a 6" round 'mound' on the surface (so a little extra material). I think I will just deal with it rather than try to eliminate it. Seems to be an imperfection in the casting when the keel was made.

Next steps are to paint it with 2-part epoxy barrier coat.
 

tpenfield

Moderator
Staff member
Joined
Jul 18, 2011
Messages
18,137
Quick Update:

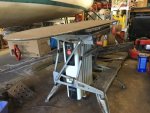
I moved the keel from the dolly up onto my workmate so that I could put a heater below it and keep it warm(er) in my garage.

IMG_7137.jpg

One of the sides of the keel has a 'bulge in it as you can see in the picture below. The other side is flat.

IMG_7135.jpg

It is about 1/4" and there is not too much that I can really do about it, so I will just deal with it when I add the epoxy fairing. I do not think it will effect the sailing performance too much. If I was planning on racing, it would be a different story.

I did a bit more grinding with some fine point tools and got some pockets of rust down to bare metal. So, I am almost ready to give it a barrier coat of epoxy paint (2-part interlux)

IMG_7139.jpg

So far the winter has been mild, which has helped working in the garage, but January will probably bring some single digit temps. My plan is to have the heater keep the keel a bit warmer than the garage so that the paint can cure.
 

tpenfield

Moderator
Staff member
Joined
Jul 18, 2011
Messages
18,137
I applied the first coat of epoxy paint to one side of the keel.

IMG_7142.jpg

The paint is Interlux Interprotect 2000E, which a 2-part epoxy paint and is commonly used as a barrier coat for fiberglass hulls below the water line. It also is advertised as an excellent bare metal primer, and I can attest to that fact based on my experience painting the fuel tank of my Formula 330SS.

Anyway, the first coat is on there. It went on pretty thick, so I'll see how it looks after it is cured.
 

alldodge

Moderator
Staff member
Joined
Mar 8, 2009
Messages
42,542
Looking real good, you going to sand and repaint until it has no bumps :rolleyes:
 

tpenfield

Moderator
Staff member
Joined
Jul 18, 2011
Messages
18,137
Looking real good, you going to sand and repaint until it has no bumps :rolleyes:

I haven't decided if I will go with an additional coat of epoxy paint or just got with thickened epoxy and a layer of light fiberglass cloth. The epoxy paint went on fairly thick and I was thinking that I could level out the bumps using just the paint. My plan is to use West System #406 filler with epoxy and a 4 oz. layer of cloth to give the coating some durability.

The holidays will slow the progress down a bit, so I did want to get a coating on the keel to prevent any surface rust from appearing.
 

Scott Danforth

Grumpy Vintage Moderator still playing with boats
Staff member
Joined
Jul 23, 2011
Messages
50,233
surface imperfections are actually slightly more hydrodynamic than a smooth surface
 

tpenfield

Moderator
Staff member
Joined
Jul 18, 2011
Messages
18,137
surface imperfections are actually slightly more hydrodynamic than a smooth surface

OK, you made me Google hydrodynamic :) . . . I think you are referring to less drag versus a purely laminar flow around the keel :noidea:
 

alldodge

Moderator
Staff member
Joined
Mar 8, 2009
Messages
42,542
I was just kidding about getting rid of the bumps, you always do such nice work was a little poke at the bear so to speak. :D
 

tpenfield

Moderator
Staff member
Joined
Jul 18, 2011
Messages
18,137
I was just kidding about getting rid of the bumps, you always do such nice work was a little poke at the bear so to speak. :D

Yes, I noticed the poke :) . The picture makes it look better than it actually is. Not quite as smooth this AM now that it has hardened up. I plan to do the flip side tonight. Then we shall see how it looks. The barrier coat leaves a dull surface once dry so that it can readily accept a new layer of paint, etc. I should probably check the specs to see if I should even bother sanding.

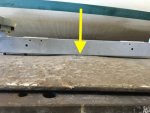
I am thinking about what to do with the beveled hole that the keel lifting cable attaches to. . . It holds approximately 100 lbs when lifting the keel and while holding it in its raised position. So, the cable with a SS thimble loops through the hole that is along the upper edge of the keel. After a while, I am sure it will wear through any paint or epoxy and become a source of rust. I am thinking about inserting a nylon bushing of some sort in the hole to provide a better load bearing surface.

Thoughts or ideas? :noidea:
 

alldodge

Moderator
Staff member
Joined
Mar 8, 2009
Messages
42,542
Aluminum tube would be easiest to find, but stainless would last longer. Don't think nylon would last very long, but it might take a long time to wear through even if it did start to rust again, maybe
 

tpenfield

Moderator
Staff member
Joined
Jul 18, 2011
Messages
18,137
I may be able to get a stainless spacer to act as a small tube. Probably will check out what the local hardware store has next week. Gonna be out of town for the Christmas holiday.
 

Scott Danforth

Grumpy Vintage Moderator still playing with boats
Staff member
Joined
Jul 23, 2011
Messages
50,233
an aluminum tube in contact with the stainless cable would disappear in about a week in salt water. nylon or delrin may not have enough compressive strength. maybe a garlite tube.
 

tpenfield

Moderator
Staff member
Joined
Jul 18, 2011
Messages
18,137
I'm going to see what I can find at the hardware store to use as a bushing. If I did go with nylon and it wore out, at leat I could replace it fairly easily without removing the keel, etc.
IMG_7145A.jpg

I coated the other side with the Interprotect 2000E last night and kept the heater going all night. Sort of looks like a lunar landscape once it has dried/hardened. The thickened epoxy should fill in the pits and make it all smooth.

I plan of using West System 406 Adhesive Filler to thicken the epoxy. (not sure I mentioned that previously :noidea: ) I would like to put down a single layer of light fiberglass cloth as the epoxy is curing and then finish that off with some more thickened epoxy to seal it up and be able to sand it smooth. I was thinking about 4oz cloth for the fiberglass . . . I wonder if that is going to be about right ??? The cloths that I have worked with have been the 1708, 2 oz CSM and 24 oz WR, so I don't have a good reference point as to the lighter cloths and if it will be thin enough, yet strong enough. Thoughts?
 
Last edited:

Scott Danforth

Grumpy Vintage Moderator still playing with boats
Staff member
Joined
Jul 23, 2011
Messages
50,233
I simply order from McMaster Carr (mcmaster.com)
 

tpenfield

Moderator
Staff member
Joined
Jul 18, 2011
Messages
18,137
Keel Restoration Update:

I ordered some epoxy and fiberglass supplies last week. . .

'Thin' epoxy w/ 'fast' hardener (for working in cold weather)
West 406 Adhesive Filler
4 oz fiberglass cloth

I was hopeful that the supplies would be here by today (Friday), so I could do the epoxy fairing of the keel this weekend, but it looks like the shipment will not arrive until Monday.

The game plan for the keel restoration is to make it smooth with thickened epoxy (using the 406 filler), add the fiberglass layer while the epoxy is still early in the curing stages. Once the epoxy & glass are cured, do a light sanding to smooth out any imperfections. Then an outer layer of Interprotect barrier coat and then a finishing layer of anti-fouling paint (ePaint EP-2000 - white).

So the keel protection layers, top to bottom, will be:

Anti-fouling Paint
Barrier Coat
4 oz Fiberglass/ semi-thickened Epoxy
Thickened Epoxy w/ 406
Barrier Coat
Iron Keel

I am hoping that with the epoxy and multiple layers of barrier coat, that the keel will stay pristine for a long time. We shall see. . . I have not found too much on the Internet about how long similar keel restorations have lasted until needing a re-do. I would hope 10+ years.

Anyway, I'll probably be doing the epoxy & fiberglass work next week, so I'll post some pics then.
 

alldodge

Moderator
Staff member
Joined
Mar 8, 2009
Messages
42,542
Sounds like a great plan. Shipping time has held me up a few times
 

Scott Danforth

Grumpy Vintage Moderator still playing with boats
Staff member
Joined
Jul 23, 2011
Messages
50,233
I found if you need it on Friday, pay for two day shipping and have come in on Thursday.
 

tpenfield

Moderator
Staff member
Joined
Jul 18, 2011
Messages
18,137
I found if you need it on Friday, pay for two day shipping and have come in on Thursday.

Very true. The issue was that the retailer was closed over the holiday week between Christmas and New Years. So, they probably had some backlog come Monday morning when they re-opened. It looks like my order did not ship until Wednesday via std ground, as requested.

No big deal, I was hopeful, but just missed getting it by 1 day.
 
Last edited:

Woodonglass

Supreme Mariner
Joined
Dec 29, 2009
Messages
25,929
Are you planning on stripping the paint off prior to applying the resin and fabric?? My neighbor has over 30 years experience as a AutoBody Repairman. He swears that this stuff...
611.jpg
is the best body filler for aluminum and metal he's seen. If you thin it with Acetone to make it a bit more creamier he says it spreads like a dream and sands really well too. Something to consider prior to the overlay of resin and glass.
 
Last edited:
Top