Restoring my MFG

*EdC*

Senior Chief Petty Officer
Joined
Oct 31, 2007
Messages
661
Re: Restoring my MFG

Hi Bob,
Good to Hear from you again To answer your questions.... A flapper wheel is a drum with pieces of sandpaper stacked on end around the drum's circumference.
It's like a roto-strip (remember those foolish tv commercials?)Instead of wire prongs, it has strips of sand paper. I got my 1" one at True Valve. It chucks up nicely in the drill extension too.

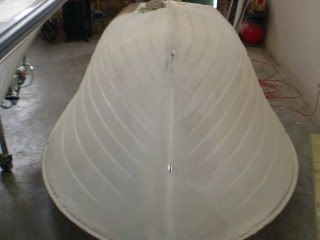
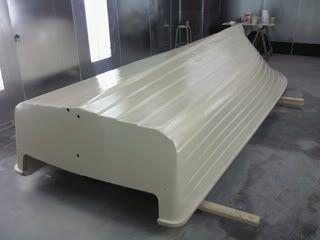
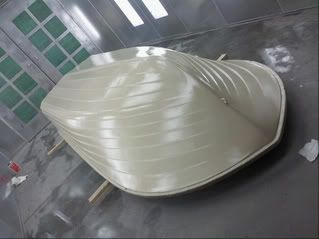
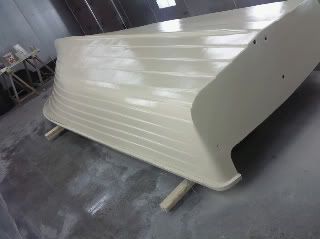
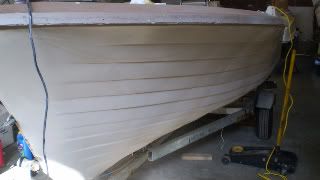
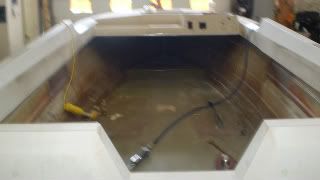
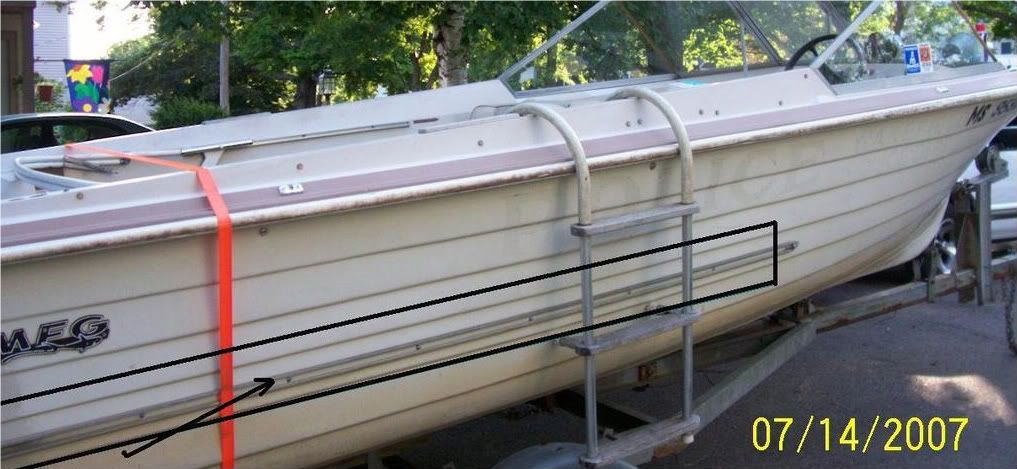
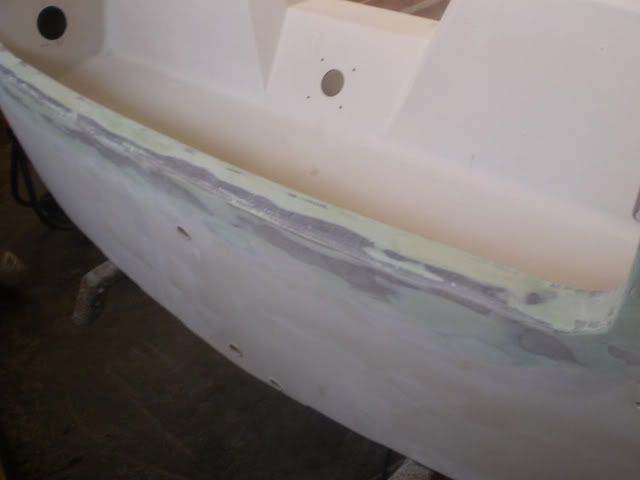
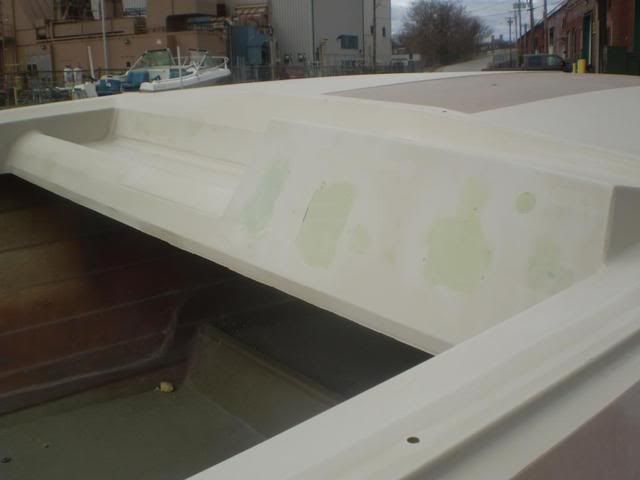
As far as the transom goes, I had always wanted to use Seacast. But I'm leaning to Nida-Core. On Seacast's website, there is an article on how to make "dams" for the upper sides. The Nida-core is a lot less expensive. It's much easier to use too. The only issue I have is it's viscosity, much thinner than Seacast. I'm afraid it might be too thin even with the dams. I have contacted Nida core about this, and waiting to hear back. I'll let you know. In the meantime, here is a pic of my hull getting a good going over.
Ed

PA010467.jpg
 

*EdC*

Senior Chief Petty Officer
Joined
Oct 31, 2007
Messages
661
Re: Restoring my MFG

More on my restoration,

As mentioned, Cold temperatures and snow had moved in on my transom work. Kinda thought this was going to be it until spring. Alas! I got lucky. A nice warm place to get my boat painted. The boat shop owner was very agreeable to letting me do some of the work. I liked that! Keeps the cost down. After a few nights and weekends, I had her all striped down and turned over.
PA010467-1.jpg


We spent quite a bit of time on this part. Hope never to have to do it again :rolleyes: 
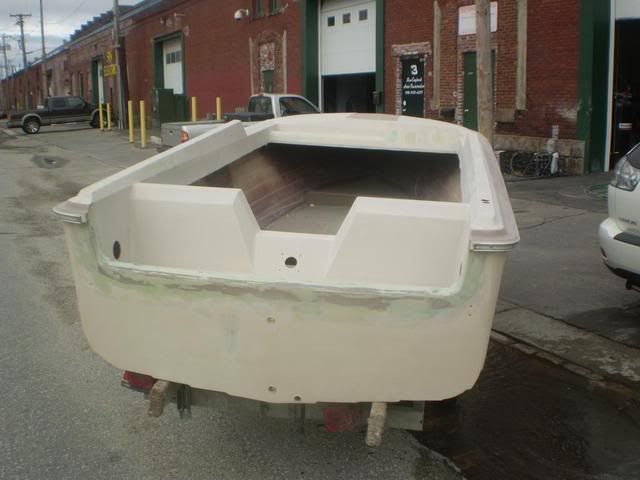
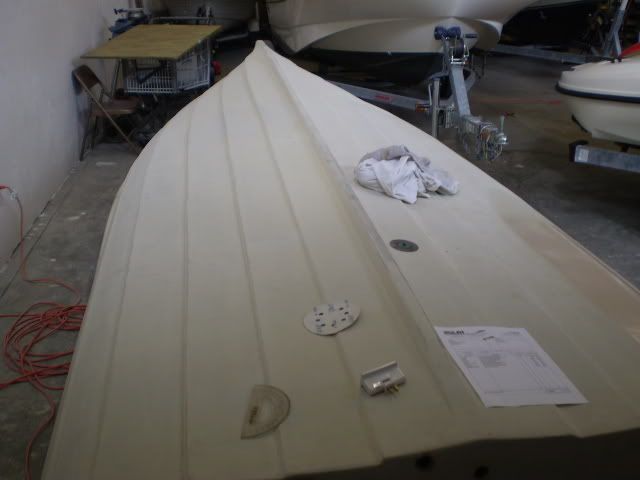
It's a whole different "ball game" when you see your boat like this. Lots of dings and scratches. I also discovered the previous owner like to beach her a lot. The glass at the bow was real thin. So, more patching and sanding and sanding, oh yes, more sanding. Getting the blisters off was key!
As much as I love a Lapstrake.... It was a pain in the a#@!!! to sand.

PA010468.jpg

There is much discussion on boat finishes. And I spent a great deal of time looking into what I thought would be best. I finally settled on new Gel coat. It would stand up well and was what the boat had originally.
Getting someone to do gel coat is a different matter.... I once again got lucky... A custom auto body shop a few doors down from the boat shop agreed to do it. Total cost to spray it....... $200.00 and a gallon of acetone.
Photo0020.jpg

Gel coat costs more. But is tough as nails. Also, It can be easily tinted. One big factor in my decision to use gel coat was the on and off the trailer routine. I don't moor mine for the season. It's only in the water weekends. Lots of in and out of the water. I wasn't convinced paint wouldn't wear off.
Photo0019-1.jpg

Here is another photo in the paint booth.

Photo0021-1-1.jpg

There is more sanding to do... Argh!! Gel coat is thick and requires alot of wet sanding to get it nice and level. Oh well, more sanding, and sanding.

Stay tuned more to come!

Ed
 

*EdC*

Senior Chief Petty Officer
Joined
Oct 31, 2007
Messages
661
Re: Restoring my MFG

Making progress......

Here it is, just about ready for final wet sanding and buffing.

P2160687-1.jpg


Now that I have the outer hull pretty much set, I thought I'd turn my attention to the topside and cockpit areas.

P2160686-1.jpg


Once again, It was a battle between what I wanted, and what I needed! One quick look, and I realised I had better tackle the dashboard.

Over the winter, I restored a 1969 Mercury 80 H.P. With so much time and energy into it, I thought it best, to be able to watch it's performance.
That meant I had to add gauges to the dash that weren't original. Most 60's era MFG's had little or no gauges at all.
I would venture to guess, MFG shipped their boats to dealers without gauges at all. Depending on the motor ordered, the Dealership would add a gauge or two. Like the one below, which is set up for a Johnnyrude. Two gauges to port were additional also.

53d8_3-1.jpg


MFGs which were set up for Mercs only had an Airguide speedo like this one.

10798713_2thumb_550x410-1.jpg


Here is how I did mine.. First I started with a paper template of my dash.
P3040697-1.jpg


Then I roughed out what I wanted on the dash.
cid_222-1.jpg


Well.......... It seems the fourm will only allow 6 pics. So, I'll have to continue this in a new post! Stay tuned

Ed
 

*EdC*

Senior Chief Petty Officer
Joined
Oct 31, 2007
Messages
661
Re: Restoring my MFG

carrying on .....

After roughing out what I wanted. I transferred it to a piece of Pegboard. I like the holes in Pegboard, they act as a "grid" which helps in the alignment.

P3040698-1.jpg


Lastly, I did a "full" mock up. I found this to be very helpful. It is important to have the full depth of the dash mocked up as well. Mine is 3/4". There is a lot going on behind the dash. Wiring, gauge depth and the helm all need room back there.
P3040699-1.jpg


Although this is nowhere near original, I wanted it to look "period correct"

The gauges are all NOS early Mercury with the sixties style sunshades. I think the look fits.. How about you? I'll have more on my project soon.

Stay tuned!

Ed
 

woosterken

Lieutenant
Joined
May 18, 2005
Messages
1,431
Re: Restoring my MFG

Ed,
looks good here is a picture of my dash ('74gypsy)

IM000008-1.jpg


woosterken
 

*EdC*

Senior Chief Petty Officer
Joined
Oct 31, 2007
Messages
661
Re: Restoring my MFG

Ken.
Gotta love those gauges! :p I guess I should have mentioned, my post was centered around 60's era outboards. I don't always remember the MFG inboard/outboards like yours. I've seen pictures of your boat. It's a beauty! :DThanks for sharing!

Regards,
Ed
 

Landscaping Wiz 808

Chief Petty Officer
Joined
Jun 29, 2008
Messages
498
Re: Restoring my MFG

WOW!! That hull looks sweet Ed!:D I was just going to patch the gelcoat in needed areas on my boat, but if I can find a place to do it for $200 I'll do the whole thing. Keep it up - BOB
 

*EdC*

Senior Chief Petty Officer
Joined
Oct 31, 2007
Messages
661
Re: Restoring my MFG

Hi Bob,
Thanks for your kind words.... I should mention that, I did the majority of the prep work. Sanding seemed to go on forever :eek: I also bought all the materials. Heck, I even bought the acetone for the body guy to clean up his equipment! The $200 was for his services and the spray booth. Still a good deal.. At least I think so. If I totaled it all up....sandpaper, gelcote and assorted resins and glass, I got somewhere around $600 into the hull. I still have to do the topside and cockpit. I expect to spend about the same there.
So, I'm looking at about $1200 for a complete job. That's more than I paid for the boat:rolleyes: That's ok... It's a cool boat and I'm gonna keep her!

Regards

Ed
 

*EdC*

Senior Chief Petty Officer
Joined
Oct 31, 2007
Messages
661
Re: Restoring my MFG

Hi Guys
The weather here in New England was splendid today! So, I decided to move the wood shop outdoors! :D
I was happy to start a project I have been wanting to do for some time.

My Edinboro and many others, have side compartments either side of the cockpit. MFG called them "ski racks" They lie behind the fiberglass side panels. They are a simple arrangement of plywood and a pine support rail. Mine were covered with a vinyl upholstery.
I pulled my fiberglass sides off for painting and noticed some dry rot. Although not real bad, I just couldn't bring myself to put them back in. :rolleyes:
So, today was perfect to get new ones made. I got some Mahogany and went at it.

P3150709-1.jpg


P3150710.jpg


A simple matter of copying the original.


P3150713.jpg


The narrow rail was a bit trickier to make. I made both sides using the same setups for each. My router table and a Dado blade in the table saw made easier work of it.

P3150712.jpg


The port side is ready for varnish.

I'll be happy to help anyone wishing to do theirs.

Regards, Ed
 

pduquette

Ensign
Joined
Jun 22, 2007
Messages
999
Re: Restoring my MFG

WOW ! Solid mahogany ?!?!? are they still hiring where you work??:D:D
Great looking work Ed . Gonna be rock solid and beautyfull when done . pete
 

matt9923

Chief Petty Officer
Joined
Sep 6, 2008
Messages
421
Re: Restoring my MFG

I need to build some ski racks. I have none/nothing to work with and not much idea on how to do it. I just sold my router and table so no nice edging but i'm thinking something like yours but how do you attach it to the hull?
Matt
 

*EdC*

Senior Chief Petty Officer
Joined
Oct 31, 2007
Messages
661
Re: Restoring my MFG

Hi Matt
Good to see you made it over here to the MFG site.
I too, have been watching your thread on the main board. From what I've read, those guys are giving you great advice. :p
You may not find that level of expertise here but, on this site you will find a passion for MFG boats that is unlike anything else on the Internet! We all take great pride in our little boats.:rolleyes:
As far as my ski racks go, I just copied the original ones that were on my Edinboro. I'm not sure if the '64 Niagara had them or not. Even if it didn't, they would be easy to make. Along the aft sides, There is usually a lower rub rail.


modified1-1-1.jpg


All the factory did, was to through bolt these rails to a "L" bracket on the inside. The bottom of the ski racks were bolted on to them.
I image, a wood "cleat " could do the same thing.


P3250729-1-1.jpg


MFG used these brackets for years on many different boats to do many different things


Hope that helps
Regards,
Ed
 

matt9923

Chief Petty Officer
Joined
Sep 6, 2008
Messages
421
Re: Restoring my MFG

Cool that's what i was thinking since i already had holes in the hull form the lower rub rail why not use them.
I can make a dozen of them in no time. Thanks for the advice.
What would you recommend using for the actual box part. I'm thinking just stained plywood. I just need more storage. I'm thinning of putting 2 captain swivel chairs up front and the 2 fishing seats on a raised platform in the back for fishing. Just like 6" rise but who knows its just a relaxing boat that i got for cheep.... "rite a cheep boat" ahha already $2000 in.
Matt
 

pduquette

Ensign
Joined
Jun 22, 2007
Messages
999
Re: Restoring my MFG

Welcome matt , Been checking your project , keep at it these are fun boats!!
And you 've already found out there are no cheap boats....I got mine for free and still have never added up all the recipts i kept in a couple of shoe boxes !:D
my oxford is 14'10" - I'll add a picture of my seat setup for ideas for you .
peter
 

Attachments

  • 07-30-06_0655.jpg
    07-30-06_0655.jpg
    29.4 KB · Views: 0

matt9923

Chief Petty Officer
Joined
Sep 6, 2008
Messages
421
Re: Restoring my MFG

Ya that's what i have been thinking of for seats in the boat but am not sure yet. I like the double backed seats but are a little to much $$ rite now maybe find some CL or eBay ones.
What really makes me like having a boat is the space. I can bring a cooler and fishing gear and not worry to much about space. On the jet ski you have 2 compartments to stuff everything in. Im getting the motor on Saturday and am exited to be on the water soon. It will probably take a few hours to get everything set up an installed but plan on trying it, Sunday i see rain :mad:

But i am going to make some "ski racks" and brackets as well as re stain the rub rail while i am at it. All i have is some OSB in the barn so i will make some boxes out of it for now. I will stain it for now just so it lasts longer then a week. I made trailer sides and a year later they are still fine with stain on them. Thanks for all the suggestions.
Matt
 

matt9923

Chief Petty Officer
Joined
Sep 6, 2008
Messages
421
Re: Restoring my MFG

I started my ski rack and got one done except for paint.

CIMG0697-1.jpg
 

*EdC*

Senior Chief Petty Officer
Joined
Oct 31, 2007
Messages
661
Re: Restoring my MFG

Now Yr' Cookin':D:D Keep at it! You will soon find it all comes together!

Ed
 

matt9923

Chief Petty Officer
Joined
Sep 6, 2008
Messages
421
Re: Restoring my MFG

Here are some easy to make brackets. Made out of some old angle iron.
Cut them 1"wide and they are plenty strong. With some nice red paint...
CIMG0710.jpg
 

*EdC*

Senior Chief Petty Officer
Joined
Oct 31, 2007
Messages
661
Re: Restoring my MFG

Hi Guys
I know it's been a few weeks since I last posted about my project. I have been very busy. Finally got my transom done!! For those interested, The Seacast was a non-event. It was easy. Sorry for the lack of photos on the process, I was busy mixing and pouring!!
Below, I have it glassed over and spot puttied .


P4040730-1.jpg


Here's another photo of the transom. It's going back in the shop for some Gelcote touch up.


P4040733.jpg


I also got the dash area all glassed in. Replaced all the plywood behind the dash and glassed in too.

P4040731.jpg


Thought I'd post what I started with.


cid_222-2-1.jpg


Lastly, I did a full size mock-up of all the new gauges that will be going in

P3040699.jpg


More to come Stay tuned :cool:

Regards,

Ed
 

matt9923

Chief Petty Officer
Joined
Sep 6, 2008
Messages
421
Re: Restoring my MFG

Looks great. I'm looking forward to more pics.
Matt
 
Top