seven_magnum's 76 Starcraft Islander 221 rebuild

seven_magnum

Petty Officer 2nd Class
Joined
Oct 4, 2011
Messages
127
Re: Well, I did it!

Re: Well, I did it!

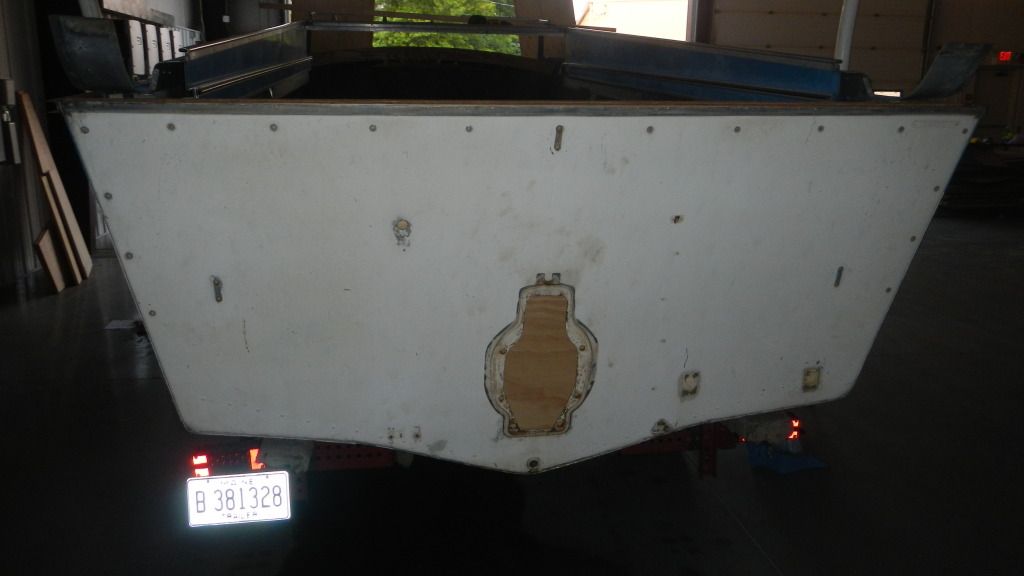
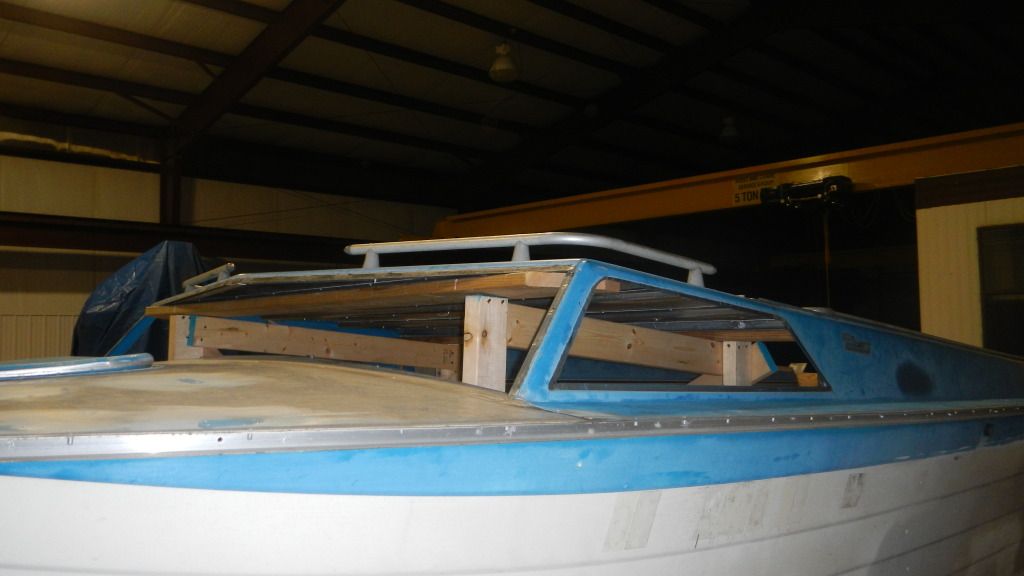
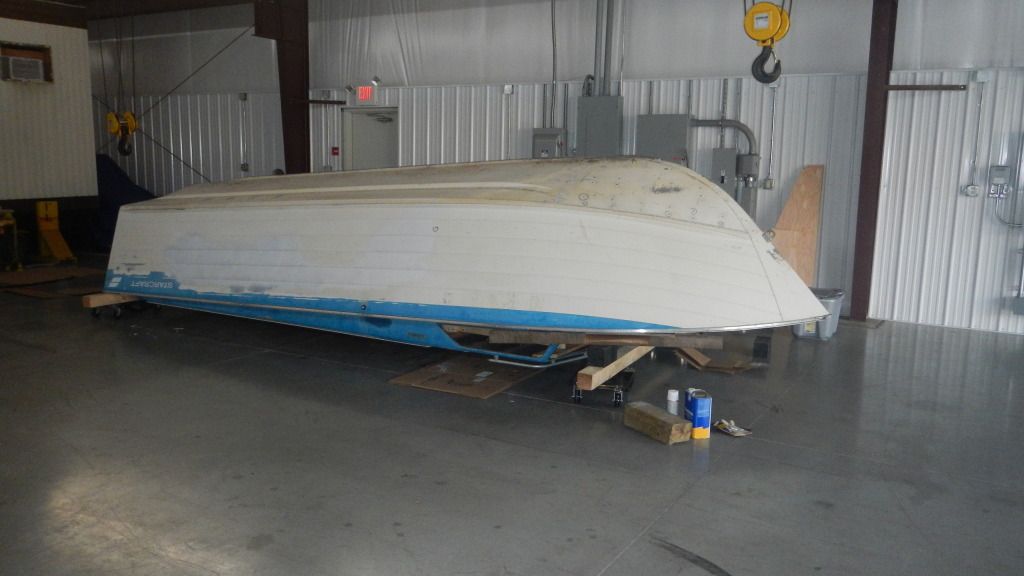
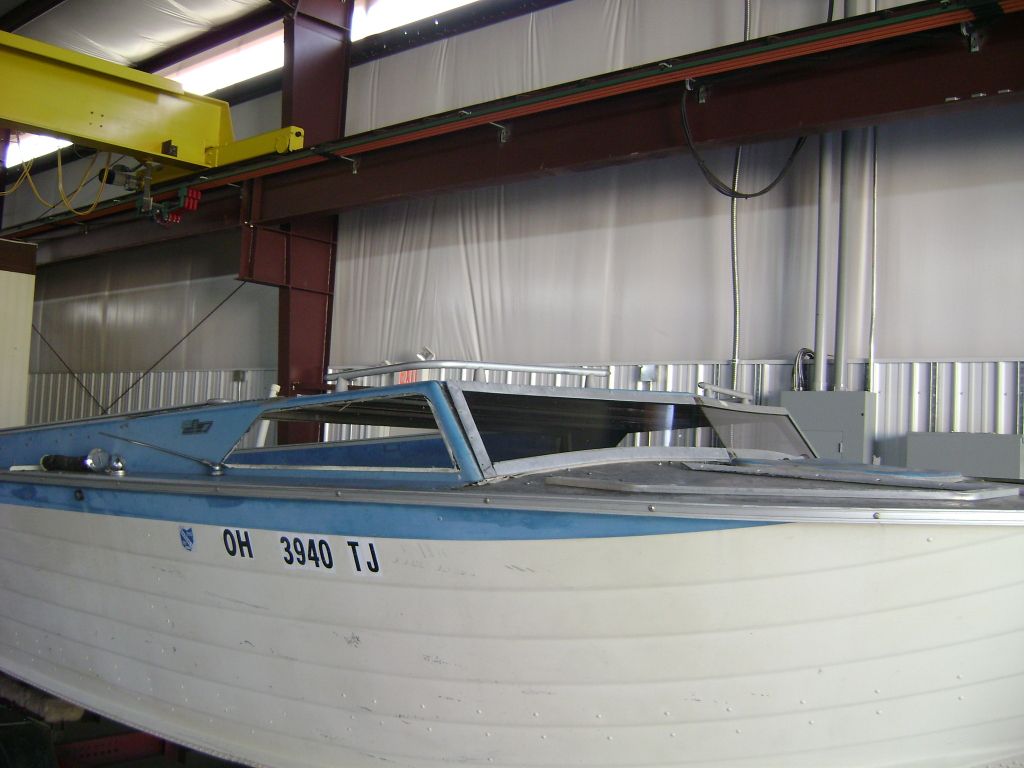
I have been making progress towards getting this thing painted. I did hit a little road block recently... oh wait, I ment a tree when riding my mountain bike! :facepalm: I need to stop watching deer and watch where I am going. Im fine, but my leg hasn't been up to snuff lately. That said, I did manage to test fit my new windshield (It fits perfectly!) and I have begun sanding the hull for paint.
DSC01152.jpg

DSC01149.jpg


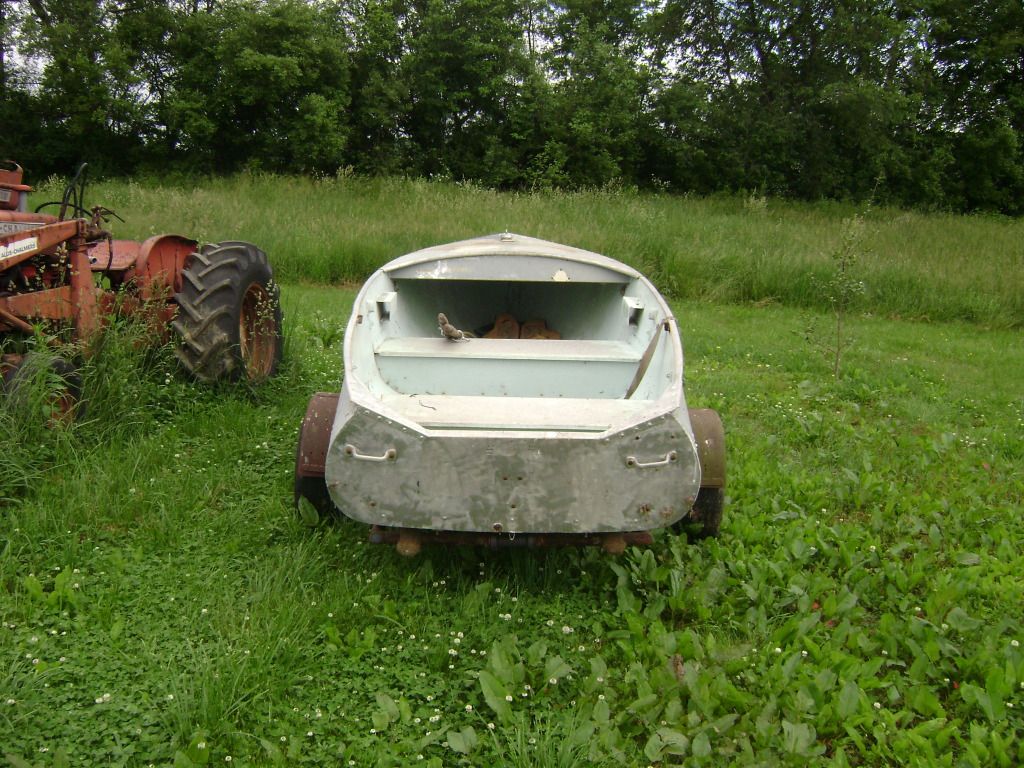
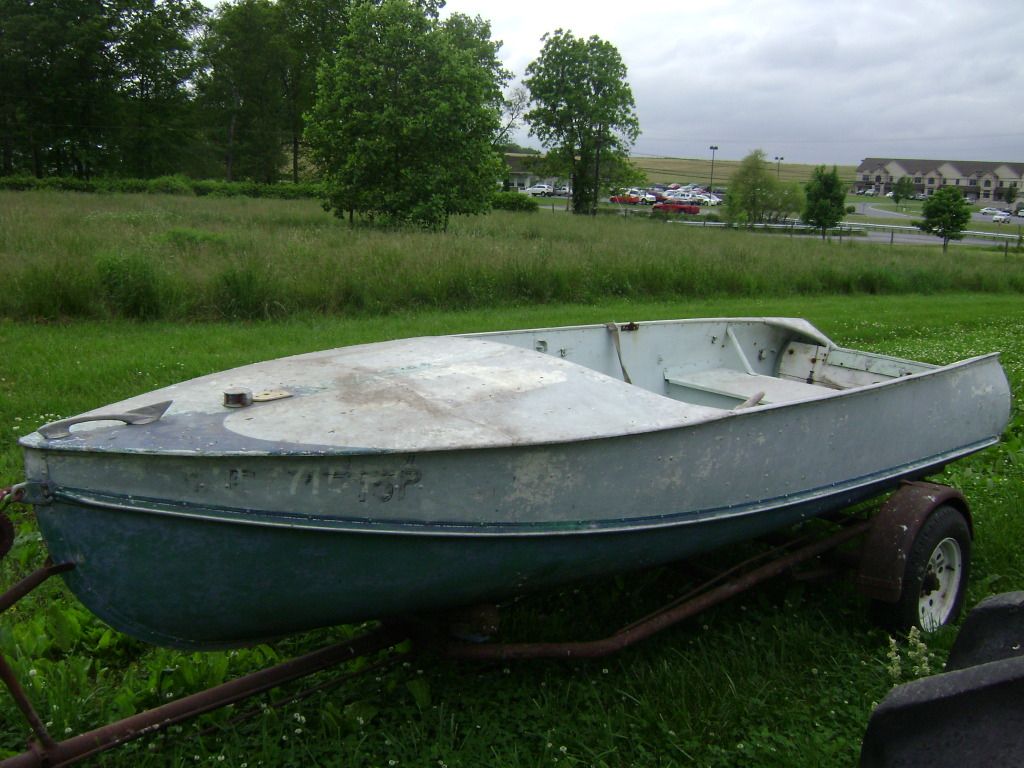
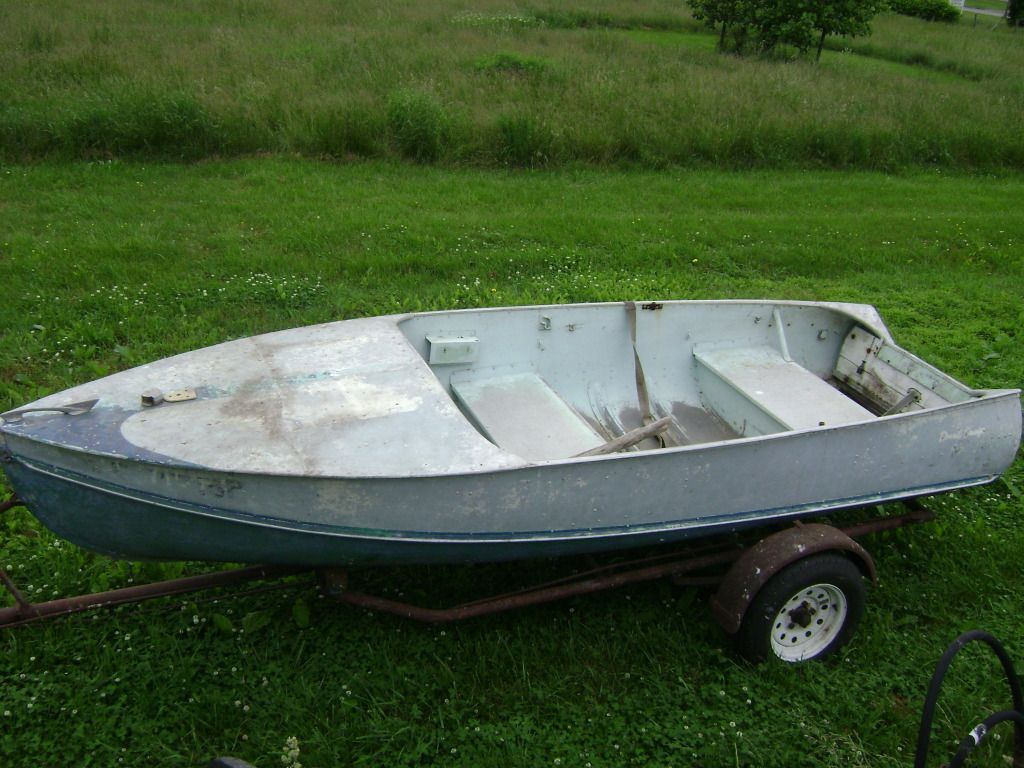
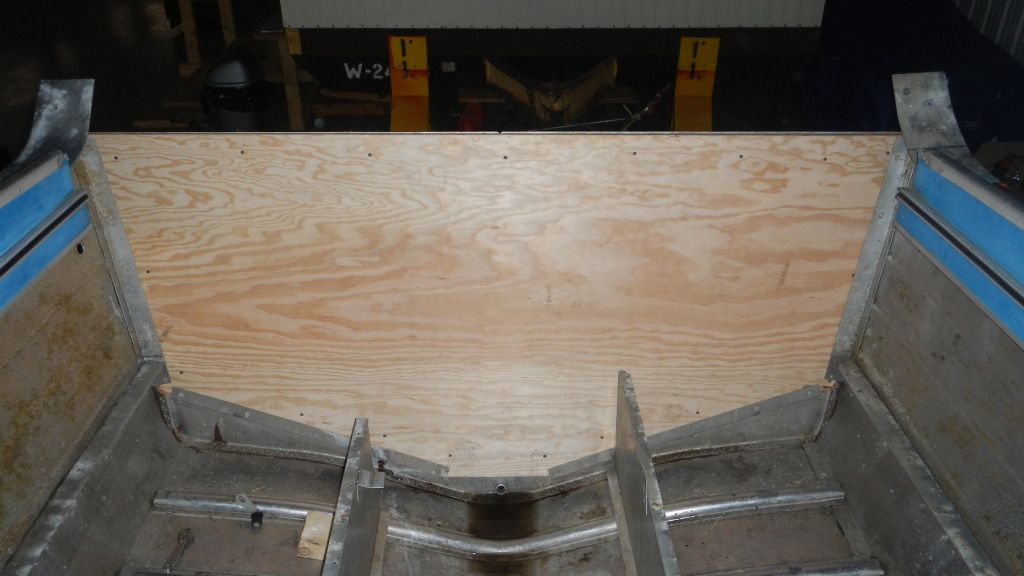
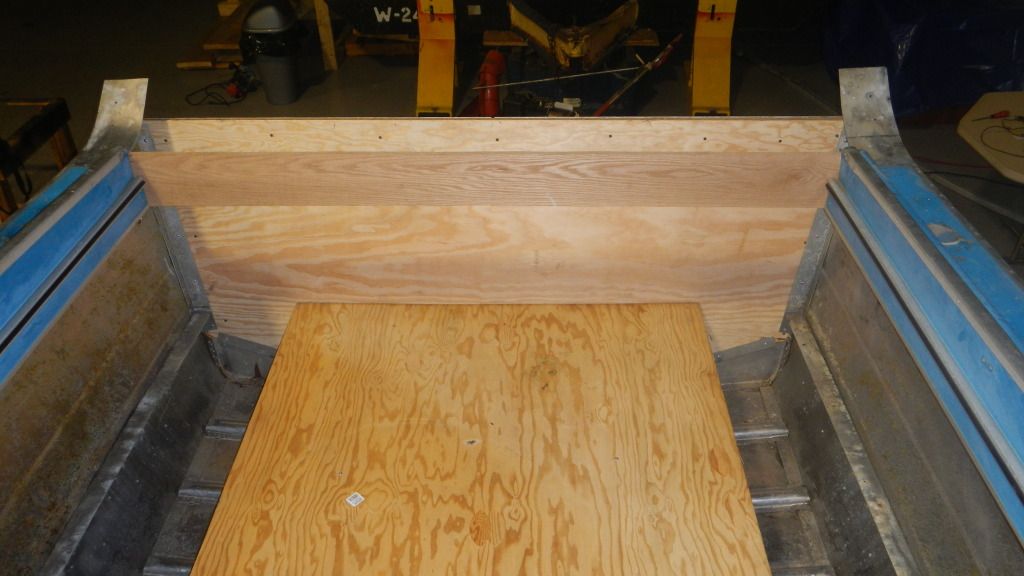
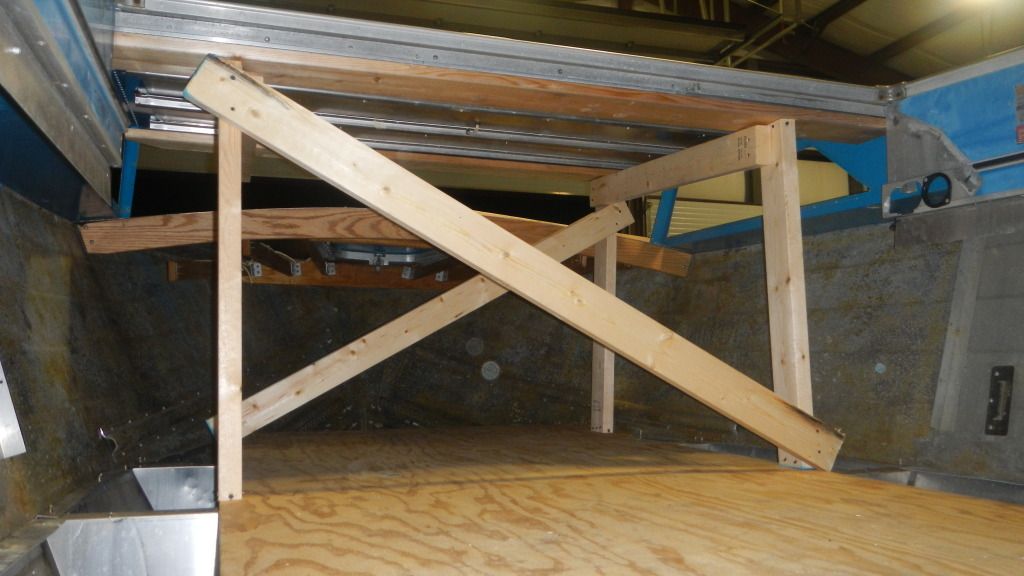
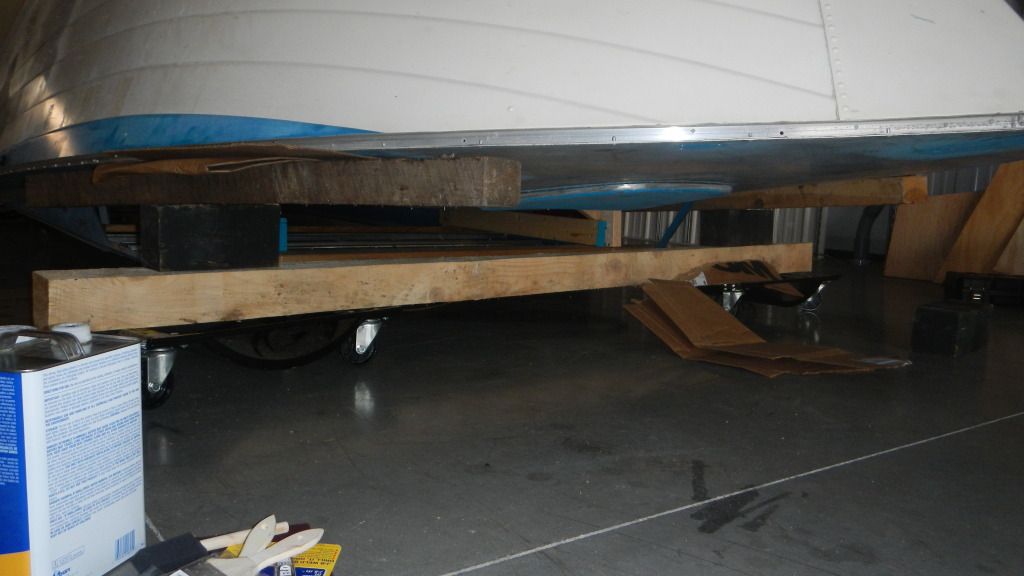
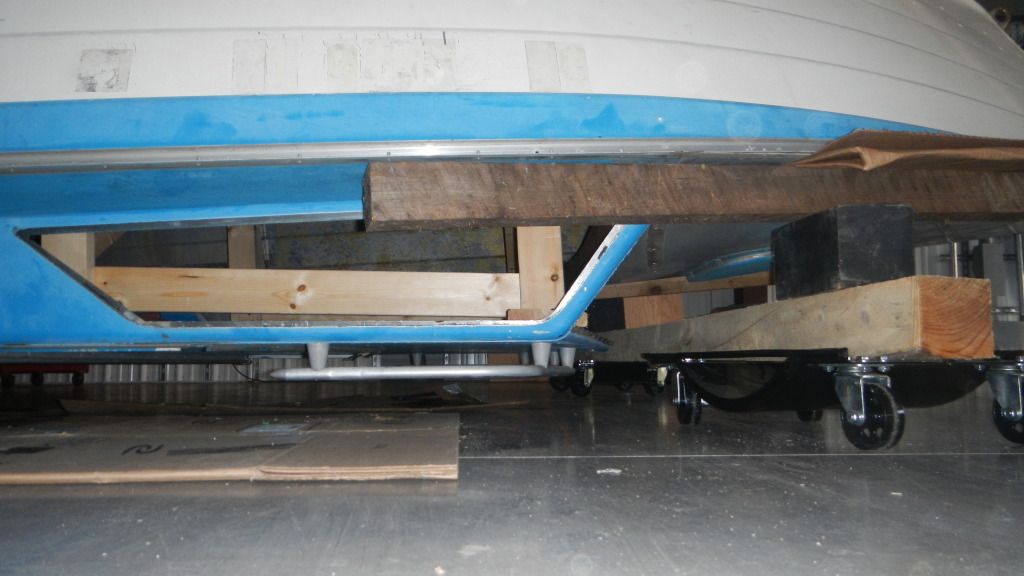
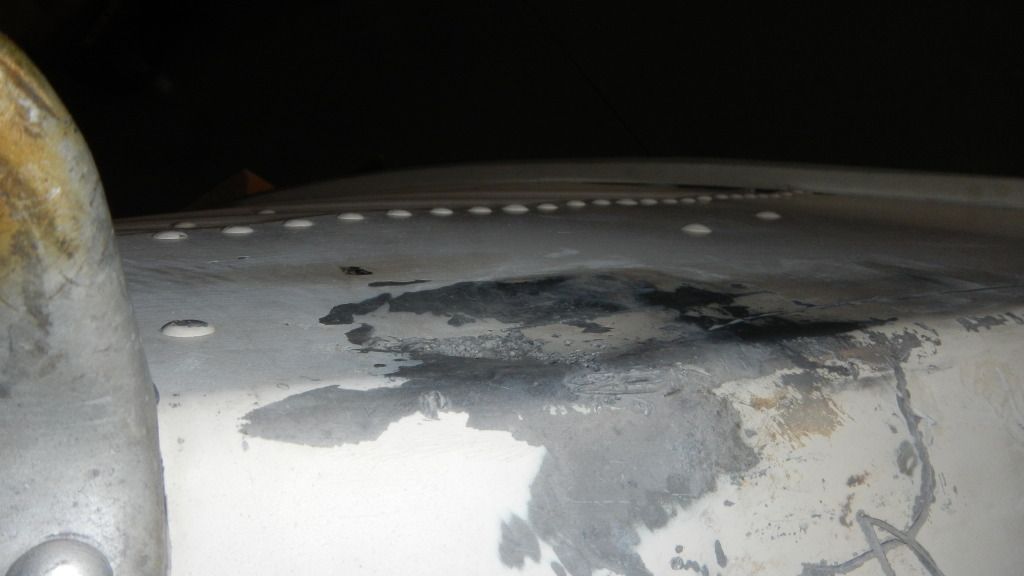
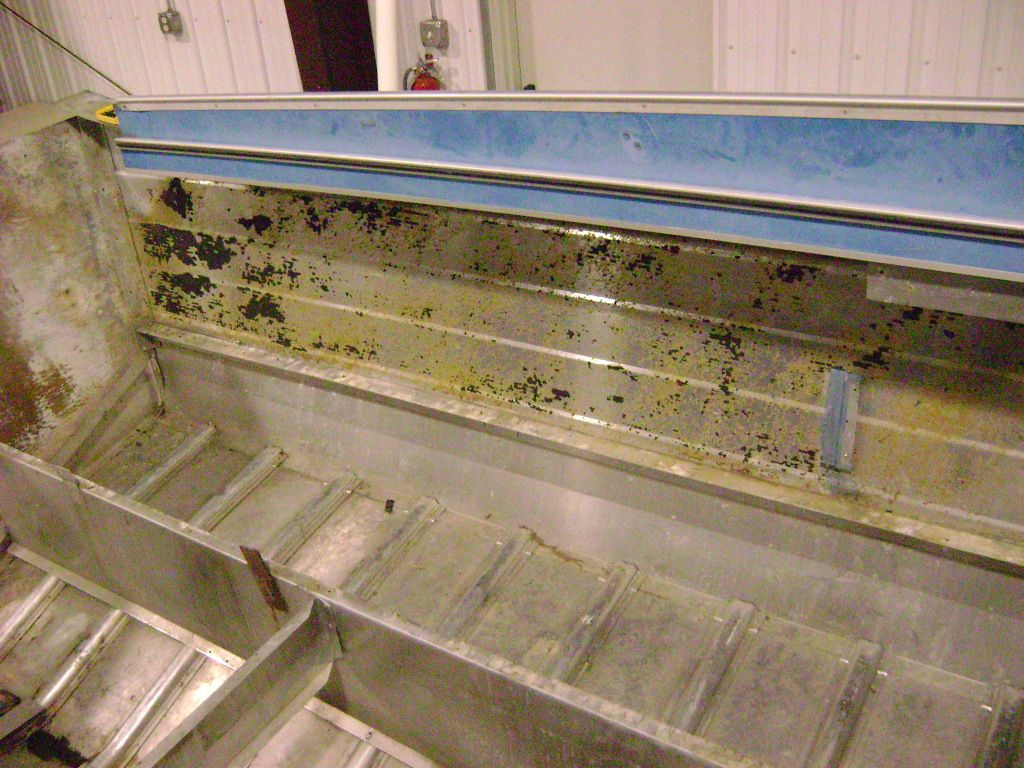
I have a long way to go on getting the glue out of the boat. How clean do I need to get this area? I want carpet in the cuddy again, and possibly the sides too. I am going vinyl on the floor and I don't think that would look right under the gunnels, but I don't know. I am thinking if I get the worst of it off so it is a fairly smooth surface I should be set to glue the new on?

DSC01153.jpg

DSC01157.jpg


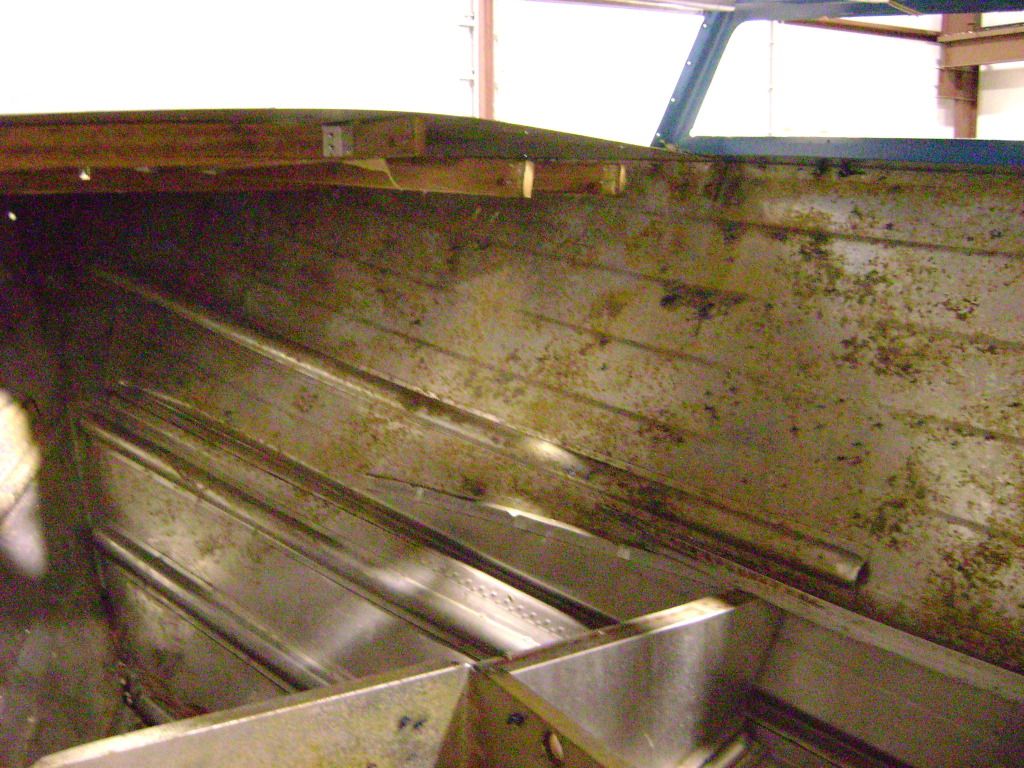
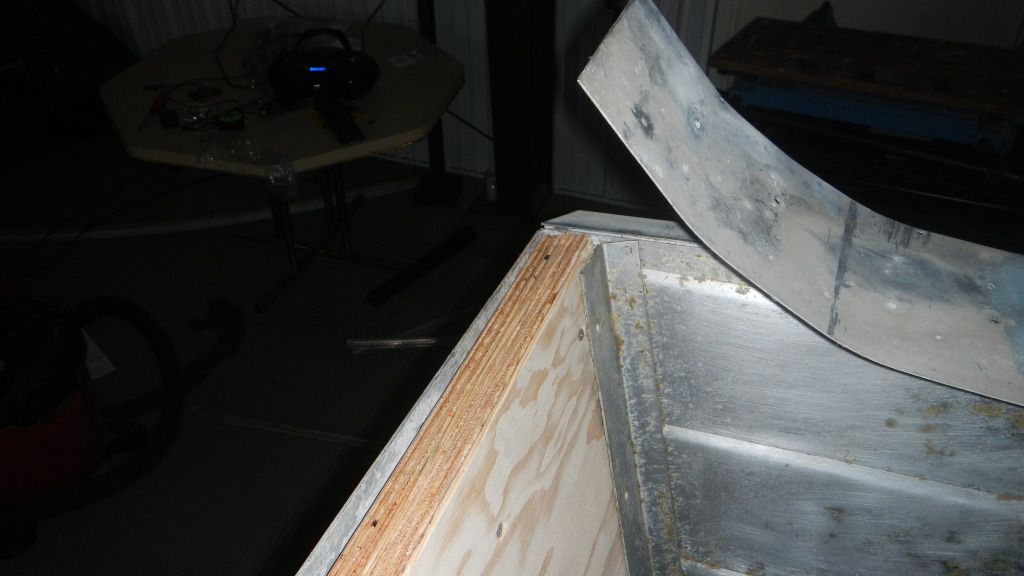
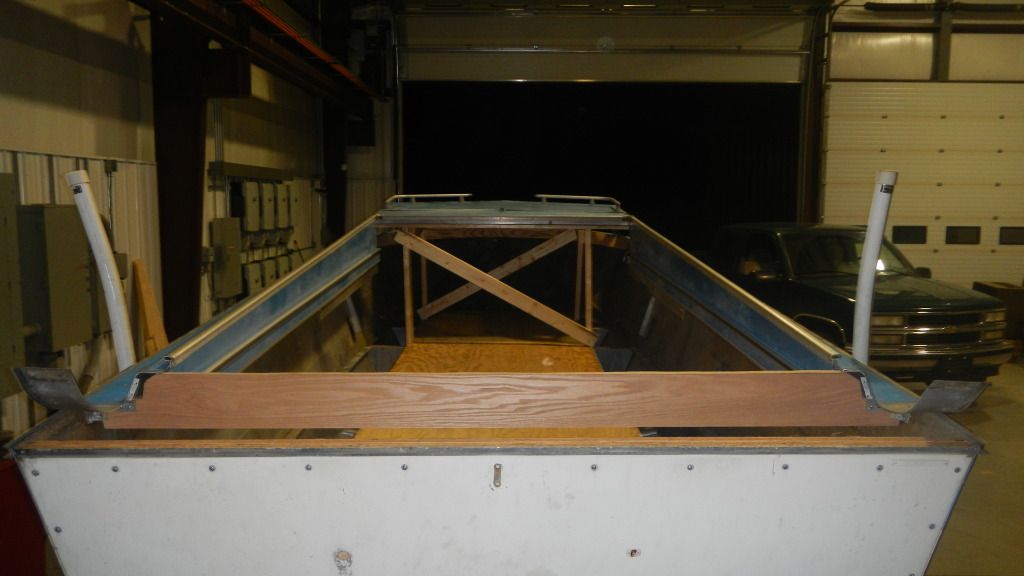
They are cleaner now than what the picture shows, but still a long way from nothing but bright aluminum.

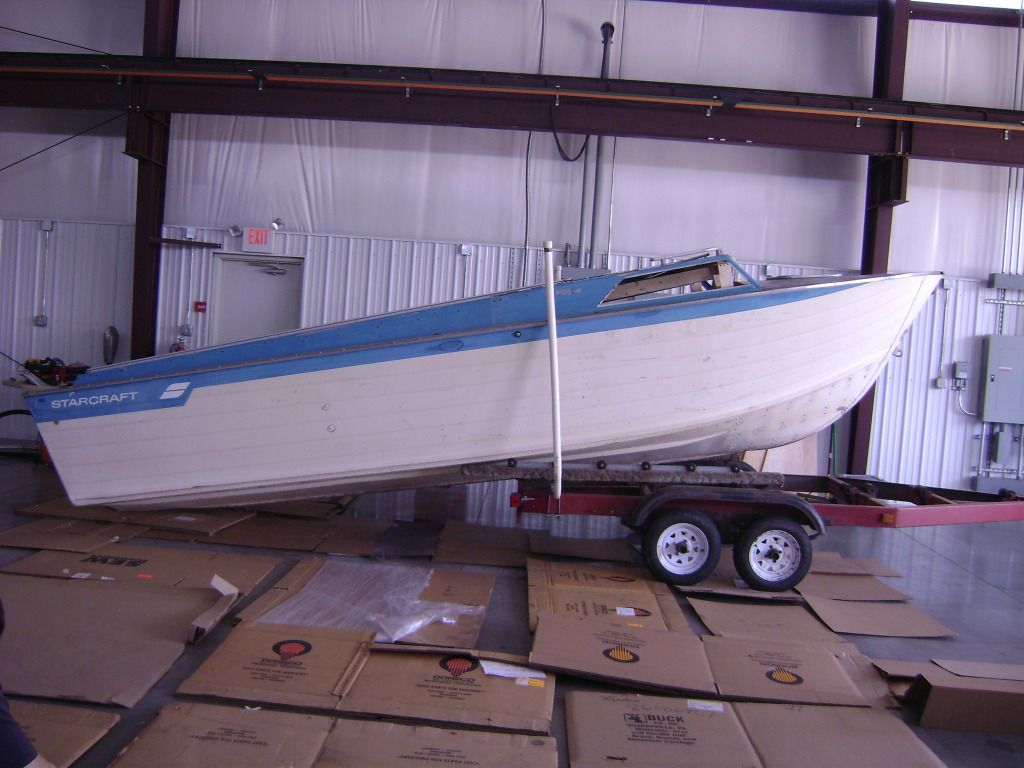
I am also picking up the side windows this week, also done in a smoked glass. Hopefully I'm not hobbling around as much tomorrow and can get some work done. I usually bounce pretty well, but my leg has been hurting more and more each day! I wrecked Friday night and was fine. Now I am hobbling around? I don't know whats going on!
 

seven_magnum

Petty Officer 2nd Class
Joined
Oct 4, 2011
Messages
127
Re: Well, I did it!

Re: Well, I did it!

I am all but done with the rivets now! I had the cracked rib welded back together and it seems bomber strong. I riveted it into place now and she's tight! I did run into a few problems with the heat warping the rib a bit. I used rivets everywhere I could, but some area's the rib was sprung away from the hull too much. The rivets were not working well at all there. They would get tight but you could see a 1/16 gap or so between the back of the rib and the hull. I think the shank of the rivet was expanding as well and that is why it got stuck like that. The rivets I ran into like this I took back out and replaced them with a stainless steel machine screw gooped up really well with 5200. I am going to gluv-it these like crazy to prevent any corrosion on both sides of the hull. I did see on a few other threads where this seemed to work. Plus, It has to work better than the zinc self tappers I found here and there from the previous owner! :facepalm:

I also decided to replace all the rivets in the fron of the boat where it was breaking through chop. Many were visibly loose, and just about all of them had a trail of black coming from them toward's the bildge. I can only assume this is a sign that it was leaking. I have all the rivets in the port side done now, and if I can find a helper tonight I will get the entire starboard side done as well! If not, I will recruit my usual help tomorrow and finish it then.

After that, I am dragging it back home from work, pressure washing it one last time (Hopefully!) and going to town with the Gluv-it. Most of the paint prep outside is done already. When I flip it over, I will need to do a little more work to make sure it's right.

I have one question- to fill small gouges in the hull (I have two, they are above the waterline and are just indentations) can I use a product like marine-tex epoxy putty to fill the indentation, and then sand it flush for paint? It seems like this is just the ticket, but I want to be sure before I order it. I thank you for your time!

Foster
 

seven_magnum

Petty Officer 2nd Class
Joined
Oct 4, 2011
Messages
127
Re: Well, I did it!

Re: Well, I did it!

Oh, and about the glue problem above- I bought one of those razor blade paint scrapers and chiseled away with that. It worked like a charm!
 

seven_magnum

Petty Officer 2nd Class
Joined
Oct 4, 2011
Messages
127
Re: Well, I did it!

Re: Well, I did it!

I didn't make too much progress the last two nights. My helper was not available. Tonight will be a different story though- We are going to finish all the rivets and be done with them forever!! :rolleyes:

I did make a little progress- I scored a set of submersible led trailer lights at harbor freight for $15. They are long and rectangular so they didn't fit my mounting brackets. The old ones were square and there is not enough clearance with the frame right there. I took the brackets off and mounted them 3" farther back so they are flush with the rear of the frame. This will let the light overlap the frame a bit. I have to solder the wires together yet, but other than that it's done!

I have been thinking about something lately. How long should I wait to pressure wash the inside of the boat after installing solid rivets with 5200? The stuff seems to cure pretty well in 24 hours, but I know it doesn't fully cure for a week. I don't want to wait that long! I would like to put Gluvit down this weekend and a coat of zc on top if I can! I thank you for your time.

Foster
 

ezmobee

Supreme Mariner
Joined
Mar 26, 2007
Messages
23,767
Re: Well, I did it!

Re: Well, I did it!

I'd wait. My experience with 5200 has been that it take many days to cure.
 

jasoutside

Supreme Mariner
Joined
Dec 20, 2009
Messages
13,269
Re: Well, I did it!

Re: Well, I did it!

Agreed, one full week is about good for 5200 to cure.

I can always find a thousand other jobs that need attention in the meantime.:)
 

GA_Boater

Honorary Moderator Emeritus
Joined
May 24, 2011
Messages
49,038
Re: Well, I did it!

Re: Well, I did it!

Hey Seven. You got a least a week to wait for that 5200 to cure, but a pressure washer may still play havoc with it for a while. Hope the leg is doing better. Stop watching Bambi.
 

seven_magnum

Petty Officer 2nd Class
Joined
Oct 4, 2011
Messages
127
Re: Well, I did it!

Re: Well, I did it!

Aww man, a week! Oh well, I want to make sure it's done right. I guess I will work on top side paint and fabbing the transom. I have the marine grade for it, and I will order the epoxy today. It seems US Composites is the place to go?

I will just have to be really careful when I flip the thing so I don't mess the top side paint up too much. Im sure I will have some touch up, and I could probably scuff and coat it one last time when I flip it right side up. It kills me not being able to work on this because of the need of a helper to do rivets. Once that is done, and the 5200 is dry I want to burn through this project! The river is calling my name!

Oh, and more good news. I sold my 14 food sea king this week. (Go Craigslist!) That money is going straight toward the new motor for this tub! I have one more boat to sell in the near future that is also going to help the islander fund.
 

seven_magnum

Petty Officer 2nd Class
Joined
Oct 4, 2011
Messages
127
Re: Well, I did it!

Re: Well, I did it!

This week has been busy! I have been trying to get boats out of the yard, and I was doing well. I sold one and have another to sell shortly. Wouldn't you know it, My dad calls me and says there is an old duracraft for sale near our old house. Long story short, I drove home with it for a song. I don't know the year yet, and the trailer is pretty much a loss. It did come with a nice little 10hp evinrude though. I guess it will have to be a project for some time. The islander is getting finished first!
DSC01190.jpg

DSC01195.jpg

DSC01196.jpg

DSC01199.jpg


Back to the program!
I decided not to through paint on the top side until the bottom is complete. Flipping the islander became my #1 mission. To start, I made a transom out of the marine grade ply I had. I cut the shape, but no keyhole or bolt holes yet. I plunked it in place with a little help from a router on the corners and some selective sanding. It's a really tight fit!
DSCN1026.jpg

DSCN1027.jpg
 

seven_magnum

Petty Officer 2nd Class
Joined
Oct 4, 2011
Messages
127
Re: seven_magnum's 76 Starcraft Islander 221 rebuild

DSCN1028.jpg

Then I added some quick flooring for support for the cuddy roof and the gunwales when I flip it.
DSCN1035.jpg

DSCN1034.jpg

I am going to lay the boat on 6x6's for the hull painting, and have those on dollys. I want the rear one right at the transom, and the front one just ahead of the bow hatch where the support is. I re-enforced the cuddy roof just incase it gets some pressure in the flipping.
DSCN1037.jpg

DSCN1039.jpg

I also installed the rear gunwale support.
DSCN1040.jpg
 

seven_magnum

Petty Officer 2nd Class
Joined
Oct 4, 2011
Messages
127
Re: seven_magnum's 76 Starcraft Islander 221 rebuild

Tomorrow before work I am going to add another brace just ahead of the rear fuel tank mounts. I want it to come up to the gunwales to keep them from flexing when I flip it, and I will have a cross brace there to help support the sides of the hull as well. I am going to use a whole pile of people, the fork truck and cranes as needed! Wish me luck!
 

jasoutside

Supreme Mariner
Joined
Dec 20, 2009
Messages
13,269
Re: seven_magnum's 76 Starcraft Islander 221 rebuild

Good progress there, enjoy the flip:)

That lil boat is cool, looks like a racer:D
 

seven_magnum

Petty Officer 2nd Class
Joined
Oct 4, 2011
Messages
127
Re: Well, I did it!

Re: Well, I did it!

We tried to flip her at lunch, but it didn't go so well. We got it stood up on it's side, and a few rivets that held the roof for the cuddy on broke! No damage was done, and it was ready to go the other way. The problem? My coworkers decided they didn't feel comfortable anymore flipping it when the rivets let go. (2 Pop rivets where the roof of the cuddy joins to the rub rail channel.) We let it back down then. They said they didn't want it flopping over on top of me- I was on the other side ready to support it until they could come over and help lower it down.

Time for Plan B

I put an eye bolt through the transom at the top of the keyhole (Plywood isn't cut out of there yet!) and managed to get the crane operator over. We hooked up to the bow eye and the eye bolt at the keyhole and lifted. She slowly turned right over and held upside down! I dropped it onto some dolly's with lumber for support and there she sits! Im going to strip off the paint at the rivets and try and get gluv-it down tonight. I am ready to shoot some paint! I will post some pictures in a bit.
 

seven_magnum

Petty Officer 2nd Class
Joined
Oct 4, 2011
Messages
127
Re: Well, I did it!

Re: Well, I did it!

Here are some pictures of me flipping it.
DSC01206.jpg

DSC01207.jpg

DSCN1043.jpg

DSCN1044.jpg

DSCN1046.jpg

DSCN1048.jpg
 

seven_magnum

Petty Officer 2nd Class
Joined
Oct 4, 2011
Messages
127
Re: seven_magnum's 76 Starcraft Islander 221 rebuild

The last picture shows a big indentation right above the bow eye from the bow stop. I am going to fill it with JB weld and sand it flat Im thinking. Other than that, the hull is in great shape! I got most of the 5200 from the P.O. dug out and some stripper on stubborn spots. Tomorrow Im going to hit it one last time then through the gluv-it to it!
 

jasoutside

Supreme Mariner
Joined
Dec 20, 2009
Messages
13,269
Re: seven_magnum's 76 Starcraft Islander 221 rebuild

Wow, you seriously flipped an Islander, wough!

You'll have to be uber careful when you flip her back after paint:eek:

Nice:)
 

dozerII

Admiral
Joined
Oct 25, 2009
Messages
6,527
Re: seven_magnum's 76 Starcraft Islander 221 rebuild

That is one big flip, good job. Are you planning on using the gluvit on the outside of the hull? Or did I miss something, it does not leave a real nice finish for painting over, so most put it on the inside where it is never gets seen. Just asking.
Glen
 

seven_magnum

Petty Officer 2nd Class
Joined
Oct 4, 2011
Messages
127
Re: seven_magnum's 76 Starcraft Islander 221 rebuild

Ha! I wish I could take the credit for flipping the islander. The crane guy here is awesome! He could spin that thing around in circles if he wanted too. He said it will be no problem at all to flip it back over- none! I wish the batteries in my camera held up enough to video tape the flipping. It was impressive! I will try and get the flipping back over part.

I am going to put gluv-it on the outside as well. I really want to go the extra mile now to ensure I don't have leak problems down the road. It bothered me that I can't get to the chine rivets on the inside, and the ribs? If you coat the outside of that rivet, how does it seal between the hull and rivet? It seems to me they could leak under the rib, leak down the center of the rib and then drain out of the limber hole. Gluv-it on the outside can't fix that. Plus, there are a few large gaps on the layup of sheet metal on the hull the P.O. 5200 like crazy. My helper looked at it and said "looks like a tsunami of 5200 happened under there!" Im cleaning it all off now, but man, that stuff is a pain!

As far as the finish, I am going to play with that a bit first. I'm concentrating below the water line, so if it doesn't look 100% there only the fish and I will know! I plan on tipping it with a foam brush then hitting it pretty good with 80 grit or so (Like the directions on it say) and Im hoping for the best! Does this sound ok to you guys?

One other question. I am getting the self etching primer on monday morning and plan on shooting it shortly there after. The Sherwin Williams has a 2 gallon kit, but the kid on the phone doesn't know much about it?? (One gallon of paint, one gallon of the catalist or whatever it is) If it doesn't work out, I have two back up options. One is the rustolem professional aluminum primer
http://rustoleum.com/CBGProduct.asp?pid=523
This is about $5 a can at the local home depot. Is this any good? The other option would be the $5 can of self etching primer they sell at pep boys. This seems to be a safe bet, I belive Ez used this on his Starcraft?

Now I just need to get the Magnumdeke crew over here and we can get this thing done! It goes slow now that it's just me working on it. I think those boys will finish their project in a week or two at that rate!!
 
Top