seven_magnum's 76 Starcraft Islander 221 rebuild

seven_magnum

Petty Officer 2nd Class
Joined
Oct 4, 2011
Messages
127
Re: Well, I did it!

Re: Well, I did it!

Progress has been going pretty well on the islander. I made peace with the fact I won't get to sea trial it this year. I had a few setbacks and fought with the paint for longer than I should have. All the flooring is cut now, the transom is cut and being covered with epoxy. Hopefully it will be back in the boat and the rear piece of metal back over it. Once that piece is back in I will shoot the topside paint and that job will be finished!

But I have big news too!

25' of big news. My next project boat is being picked up shortly! I found a guy with a 25' chieftain and he needs it gone asap. I will pick her up and park her in the yard under a tarp until I finish the islander! The boat has a transom assembly but was set up for a v8. it doesn't have an outdrive or motor. How would one of these chevy 250's push it? I see that engine was available in them. I have a total of 3 250's right now and two outdrives. I am putting the islander together with all the parts from the doner and have been thinking about using another motor and the other outdrive on the Chieftain when it's time. Does this sound like a plan or should I just pony up for a crate 350 and SEI outdrive for it? I don't think I will do much to it in the next 6 months but I like having a plan!
 

jasoutside

Supreme Mariner
Joined
Dec 20, 2009
Messages
13,269
Re: Well, I did it!

Re: Well, I did it!

25 footer, yah baby!!!:D:D

I'd bet a big ol V8 would be a super match on that hull:cool:

Looking forward to checking that out!
 

Stevens520

Petty Officer 1st Class
Joined
Jul 26, 2011
Messages
250
Re: Well, I did it!

Re: Well, I did it!

Congrats on the 25'! Mine has an 888 (Ford 302) in it, and currently tops out at 29 mph on the GPS; but can probably do better with more pitch on the prop.Nice job so far on the Islander; I have no idea how I missed this thread.:)
 

seven_magnum

Petty Officer 2nd Class
Joined
Oct 4, 2011
Messages
127
Re: Well, I did it!

Re: Well, I did it!

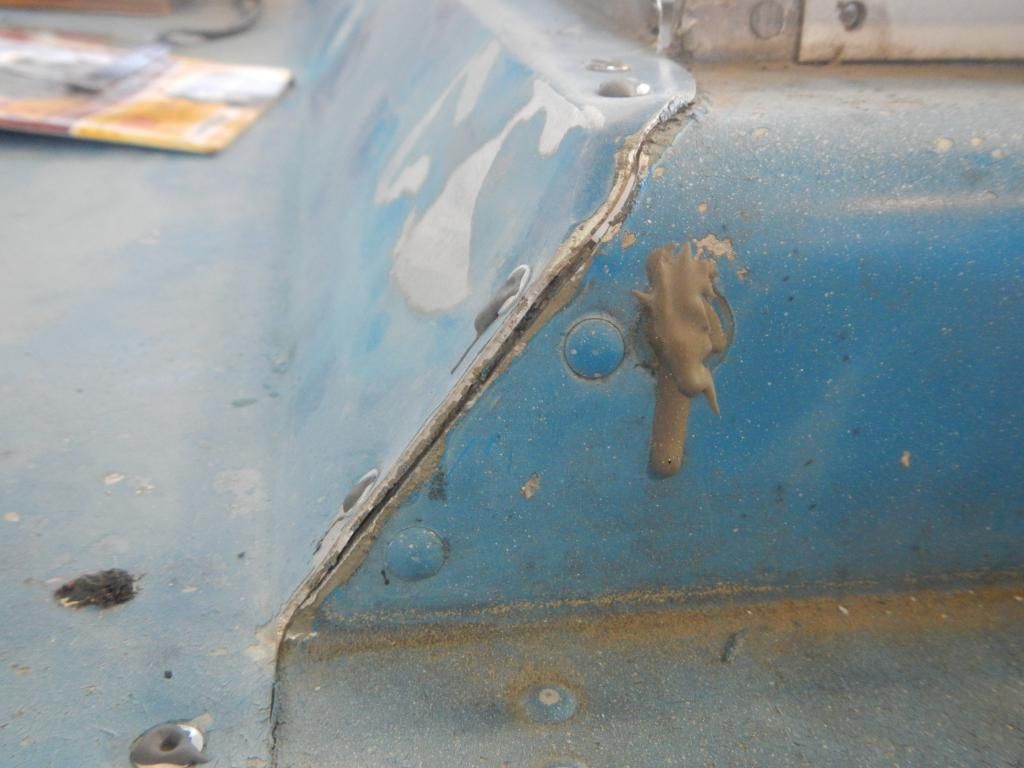
Wow, it's been a while since I updated this thread hasn't it! I have been so busy with life the last few months the boat didn't get a whole lot of attention. But the good news is I'm back at it full swing again! I quit with the cheap paint guns, I tried to finish the job so many times and all I get is headaches. I ordered a binks 2100 pressure feed gun, pressure pot, and am going to do this paint the right way! The gun should be here Wednesday and I hope to have the prep finished by then. I have a few areas of concern that will need some creativity, but nothing I don't have a plan for. The worst is where the front lower windshield connects at the corners, these areas are both cracked out. I am going to drill the crack at the end, bend the one side back to normal shape, and cover the area with JB weld and sand smooth. The cracks aren't big, but I wan to catch them now before they turn into a problem. I also have about 1000 small holes in the top from the assortment of bells and whistles PO's have installed over the years. I have my engine problems resolved, but the out drive is going to need attention. I know the upper input seal is leaking, and who knows what else it may need. It did work on the muff's, so hopefully it's just a re-seal, water pump, gimble bearing and gear lube job.

Anyhow, I am going to push HARD to get this thing out on the water. I'm done making boat noises sitting inside the old girl, I'm ready to make them a reality!
 

seven_magnum

Petty Officer 2nd Class
Joined
Oct 4, 2011
Messages
127
Re: Well, I did it!

Re: Well, I did it!

It doesn't look like I said anything about it before, but I fixed the fuel tank issue as well. I had a custom 55 gallon aluminum tank welded up. I plan on painting it for the corrosion resistance, then dropping it in place down in the belly. All in all it cost about $450, but it's exactly the tank I wanted, and the extra capacity will give me some peace of mind.
 

magnumdeke

Chief Petty Officer
Joined
Apr 13, 2010
Messages
626
Re: Well, I did it!

Re: Well, I did it!

Nice to see ya back. one mag to another, good plan on the fuel tank!
 
Last edited:

GA_Boater

Honorary Moderator Emeritus
Joined
May 24, 2011
Messages
49,038
Re: seven_magnum's 76 Starcraft Islander 221 rebuild

Good to see ya back at it, seven-m.

Where the cracks are, could you JB an AL backing plate under them. Maybe make the area a little stiffer and more crack resistant. Just a thought.
 

seven_magnum

Petty Officer 2nd Class
Joined
Oct 4, 2011
Messages
127
Re: seven_magnum's 76 Starcraft Islander 221 rebuild

Good to see ya back at it, seven-m.

Where the cracks are, could you JB an AL backing plate under them. Maybe make the area a little stiffer and more crack resistant. Just a thought.

Yeah, I need to cut a piece of aluminum for a backer, it seems the area is really prone to cracking. I took pictures of it today, I will post them tomorrow when I'm back on my computer. I'm probably 90% done with prep work for paint right now, I can't wait for this new gun to come in! I don't know if I will get to shoot much this week due to a crazy work schedule and a busy weekend, but next week should be all out. I want to have the paint finished and drying by next weekend!

On a side note, I can't seem to find how thick the transom needs to be for the gimble assembly? I recall the old transom was 2 pieces of 3/4 ply and then a 1/2 scab on top of that just for the transom plate. Is this correct? I want to start coating the transom with epoxy as well as the floor this week, but I only want to do it once!

Many thanks for the help!

Foster
 

GA_Boater

Honorary Moderator Emeritus
Joined
May 24, 2011
Messages
49,038
Re: seven_magnum's 76 Starcraft Islander 221 rebuild

Mercruiser right? 2"-2 1/8" thick and flat and parallel. That includes the transom AL skin, too. Thickness is critical for sealing up.
 

seven_magnum

Petty Officer 2nd Class
Joined
Oct 4, 2011
Messages
127
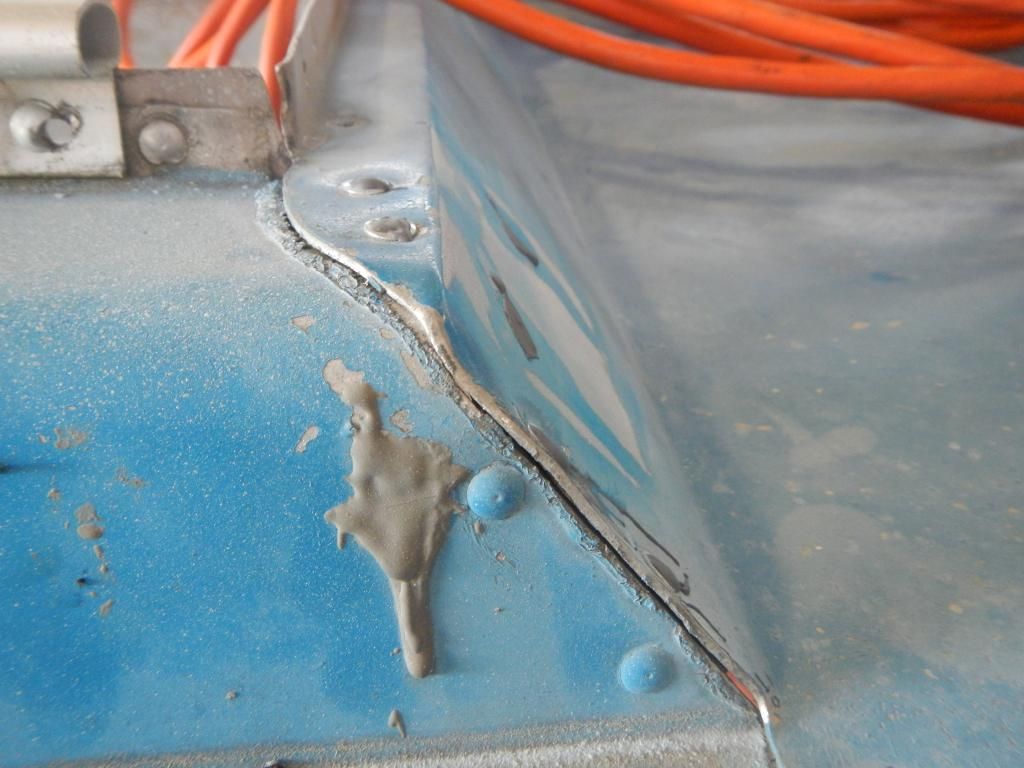
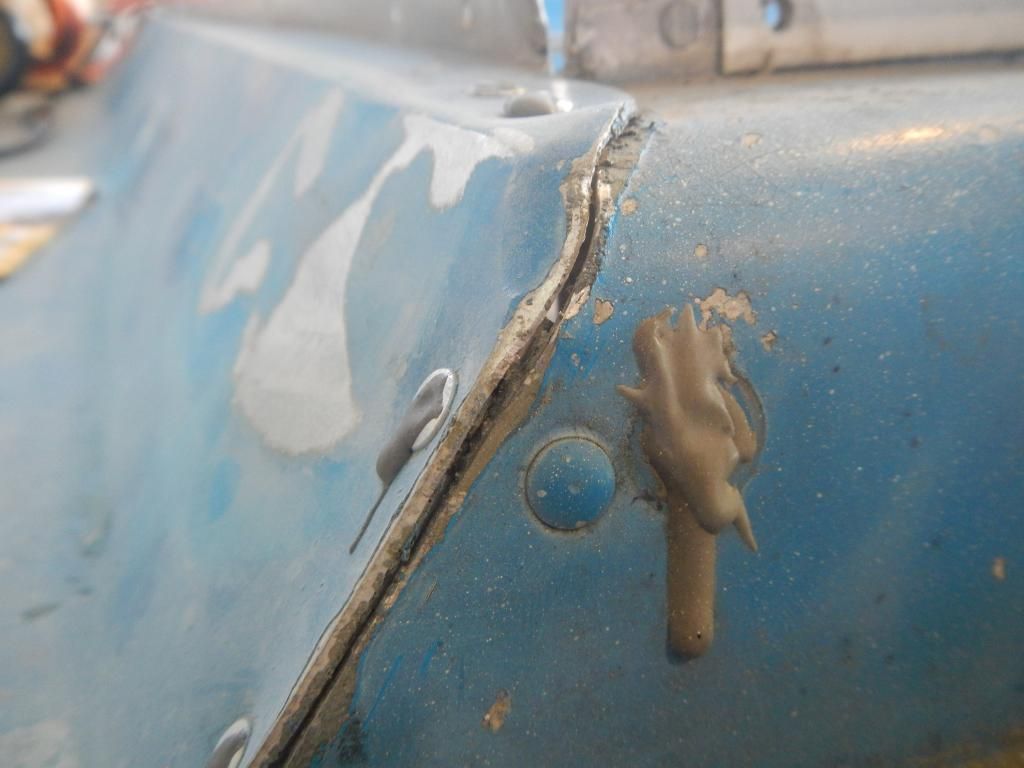
I'm back! I really need to keep this updated. Unfortunately the boat is still in dry dock, but she is getting closer. The floor and transom are all epoxied, transom is painted and installed in the boat. I had a glitch with that process, but more on that in a later post. I am hoping to get topside paint completed this weekend and have a quick question. When I peeled the metal off the top of the transom, it was sealed with some sort of putty. Since I put it back together I have a little crack where the seam is, about 1/16" wide. My first instinct was to JB the crack shut and never worry about it again, but then I was thinking that would make it a royal pain if I ever need to take the transom out again. Is JB the best way to go, or is there something else I should use? (I hope it never has to come back out, the whole transom is coated with epoxy. I really hope it outlasts me!)

The other question I had was about the rub rail. It seems that was installed and sealed from the factory before it was painted as well. Right now my rub rail is off, and I figured that was the best way to paint the topside. Now I am having second thoughts. Should I install the rub rail, apply a thin strip of gluv-it around the edges and then paint, or am I being OCD about this?

My work schedule has been a bear, but there has been a ton of progress since the last post. I will get this thread caught up...
 

GA_Boater

Honorary Moderator Emeritus
Joined
May 24, 2011
Messages
49,038
Who is this new guy? :D Glad you kept working on the lady, Mag.
I can't visualize the gap - I'll wait for the update pics. The rub rail - I noticed the same painting method on my 10 year older SC. All the trim has the slightest over spray, both inside and out. I think just paint with the RR's off since you have them off. I don't think you need to go the Gluvit route.
I've forgotten how far along you are with the rebuild. Can't wait to see the update pics.
 

GA_Boater

Honorary Moderator Emeritus
Joined
May 24, 2011
Messages
49,038
Will the gap pull down when you re-rivet? Maybe some 3M 4200 to seal and it's made for removing in the future.
 

jasoutside

Supreme Mariner
Joined
Dec 20, 2009
Messages
13,269
The trick there is that the two pieces of alum will move. So, 4200 would be good stuff as it will move with the alum. But, paint doesn't stick to 4200 very well so that will likely peel off. Now, JB would be good there but it will likely find a hairline crack eventually. But, it takes paint well eh:thumb:
 

seven_magnum

Petty Officer 2nd Class
Joined
Oct 4, 2011
Messages
127
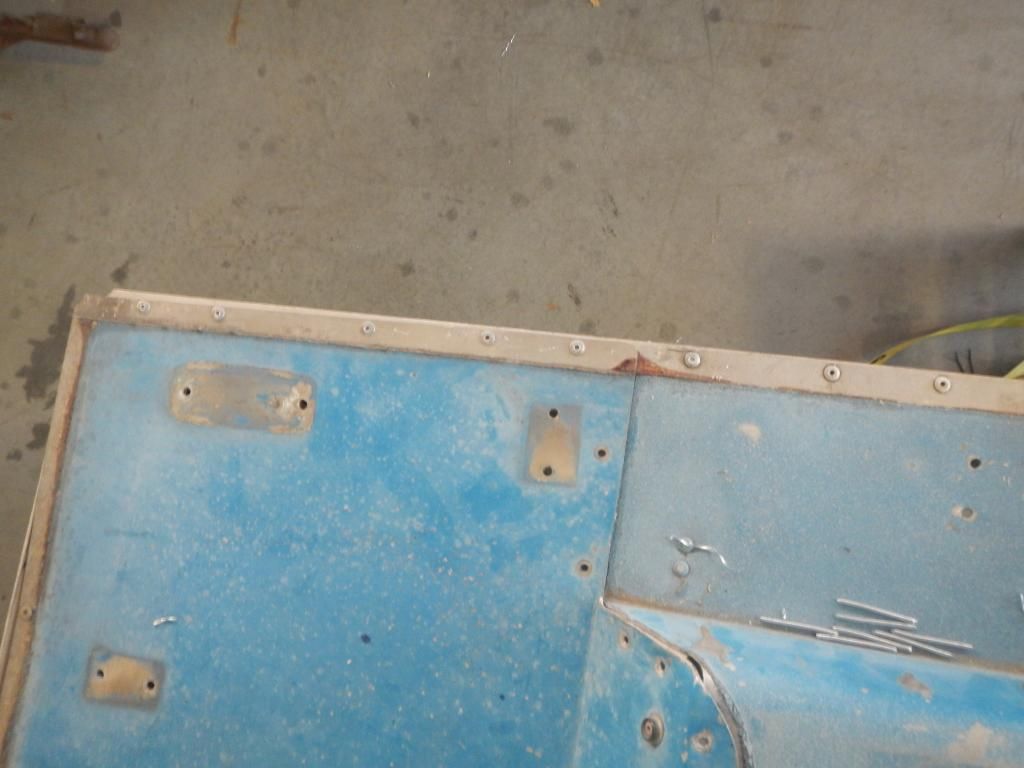
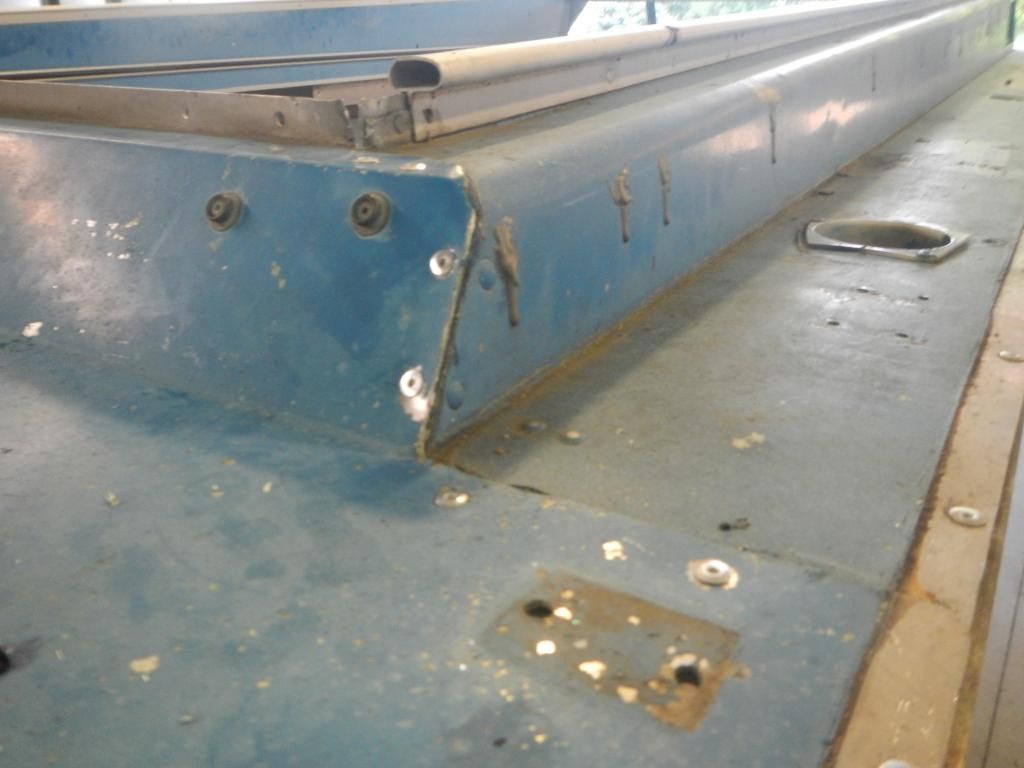
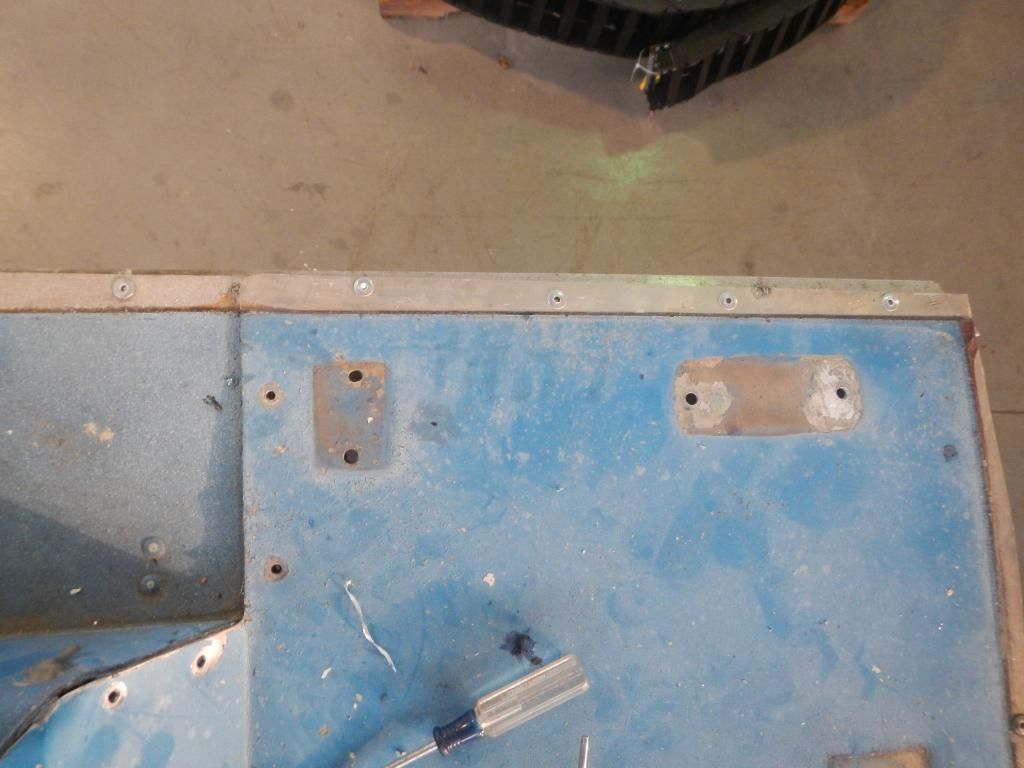
I guess 4200 is the key then! I am going to pick some of this up and see what happens. I painted over some 5200 already on the bottom and I had no problems with adhesion. I don't know if 4200 is much different but it's worth a shot. The macropoxy seems to stick to everything. Here are pictures of the cracks riveted closed the best I could manage.


GA_Boater

Honorary Moderator Emeritus
Joined
May 24, 2011
Messages
49,038
You might be able to tap the gap closed a little and use the macropoxy after some sanding to bare tin. It looks like it's sticking pretty good in the pics.
 

seven_magnum

Petty Officer 2nd Class
Joined
Oct 4, 2011
Messages
127
I figure I might as well add some progress info to the thread while I grab a bit to eat.

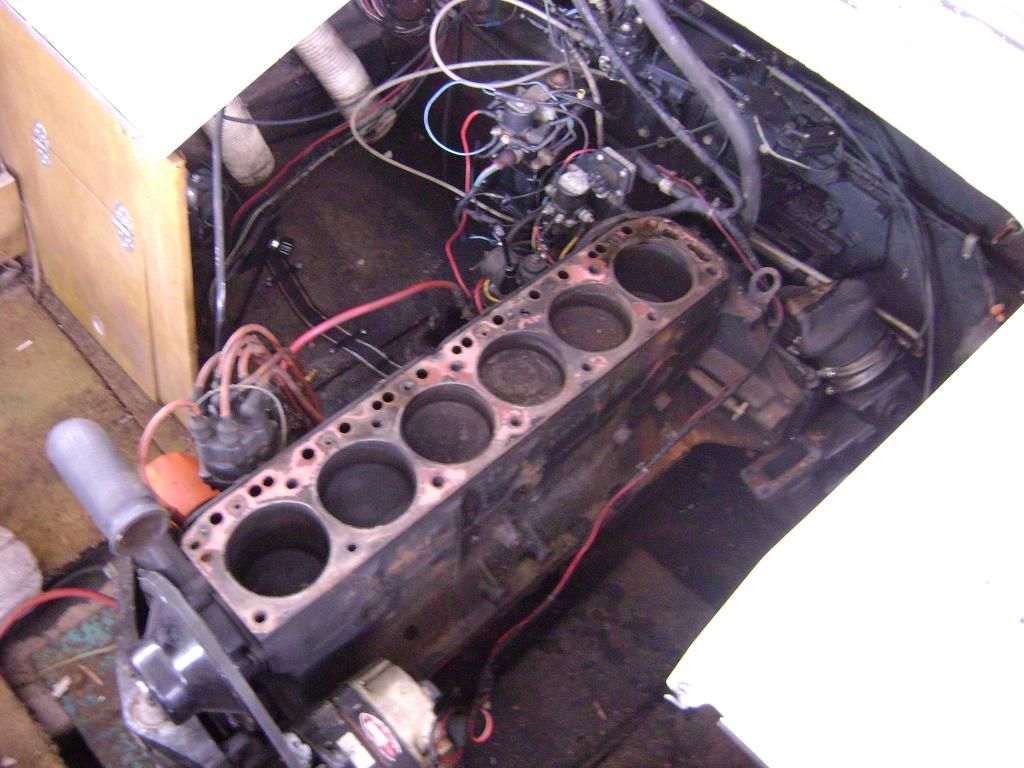
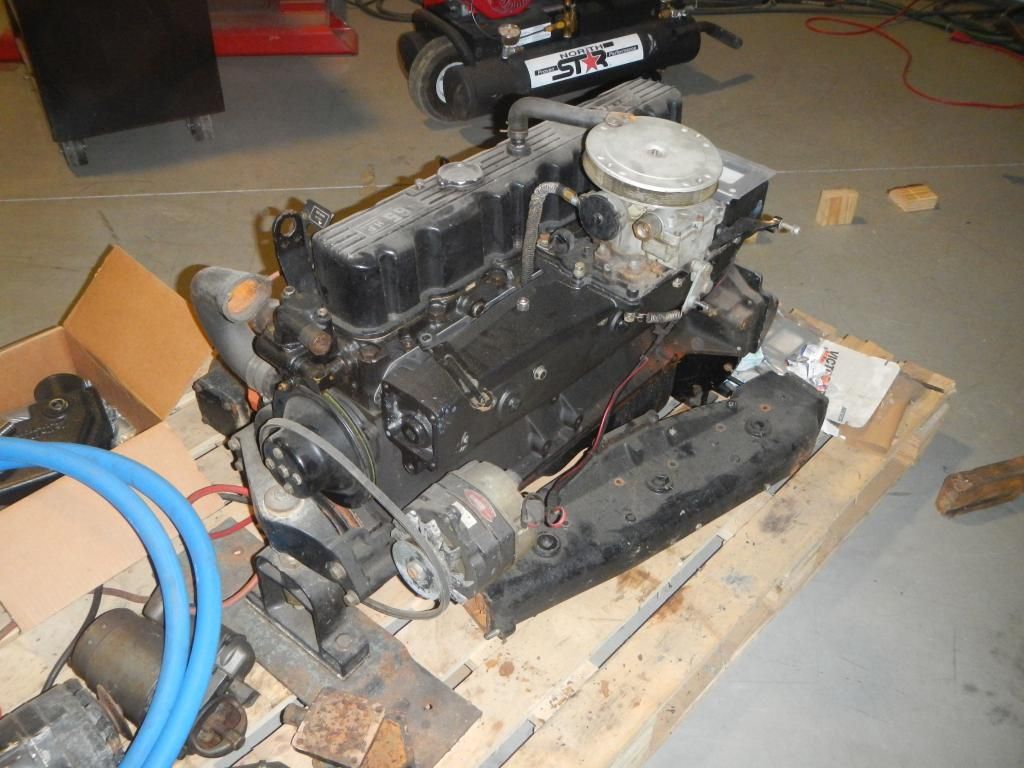
So the doner boat turned out to be a pretty good score for me. I pulled every usable part and piece off her before sending her to the dump. The engine ran really well, sounded excellent and didn't even smoke. I ran it for about 5 minutes and then shut it off because the oil was getting milky. I ended up tearing it open to see what was wrong, and it was simply a rusted through manifold. The block and head turned out to be fine, and after a quick clean I re-assembled them.

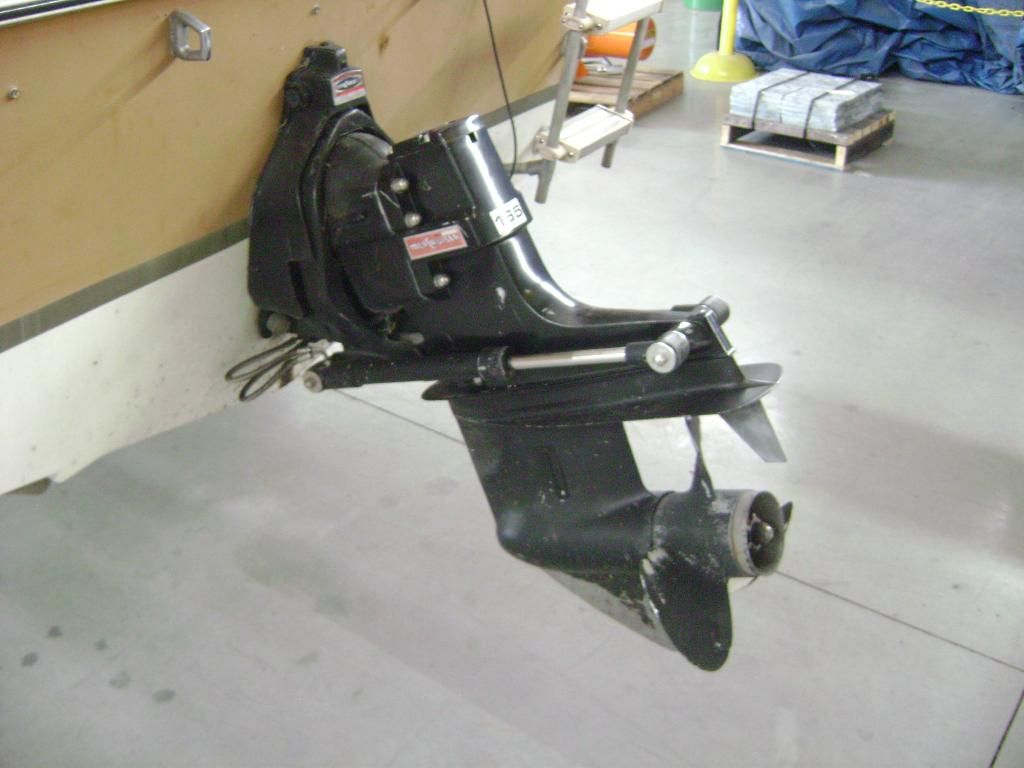
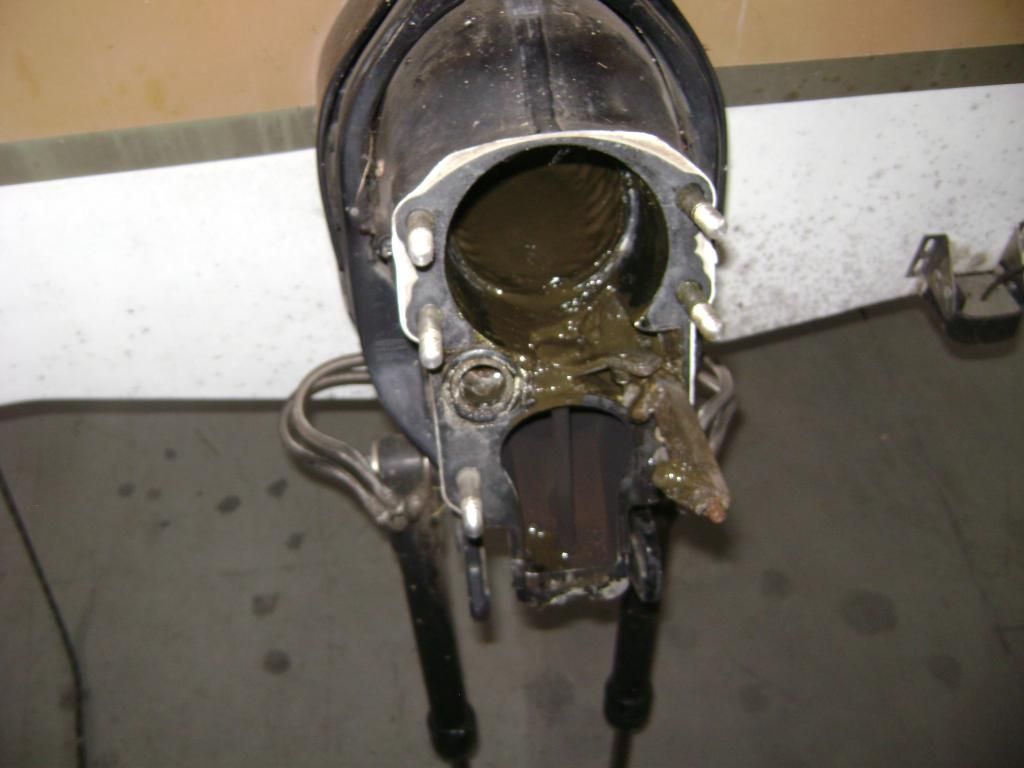
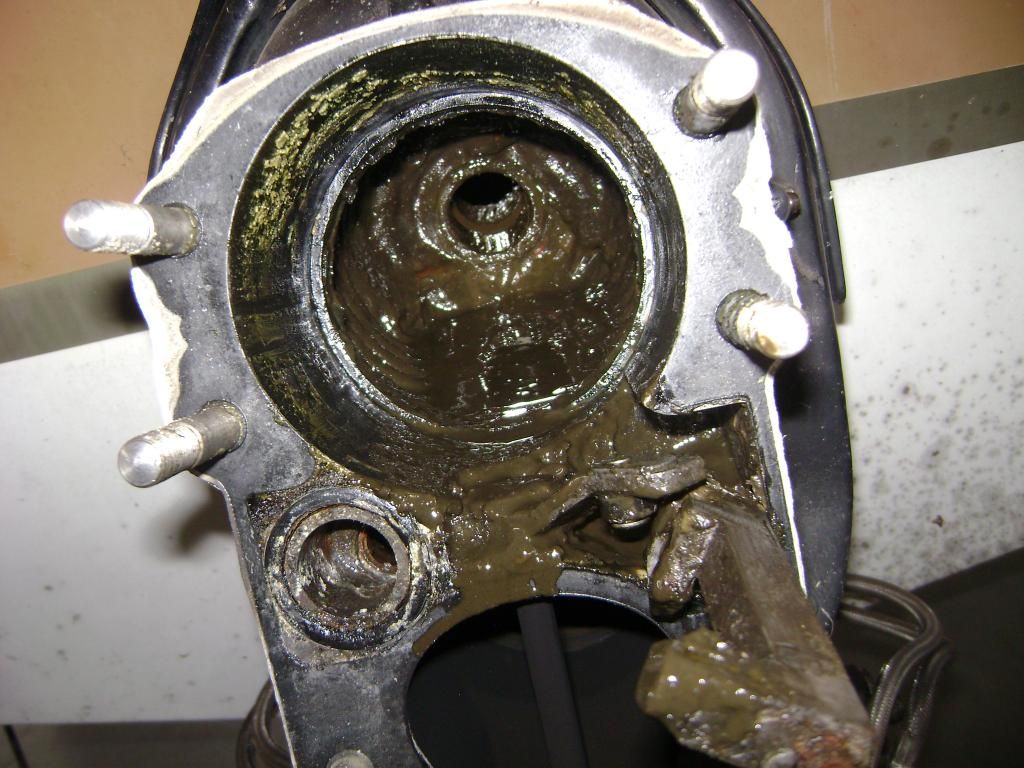
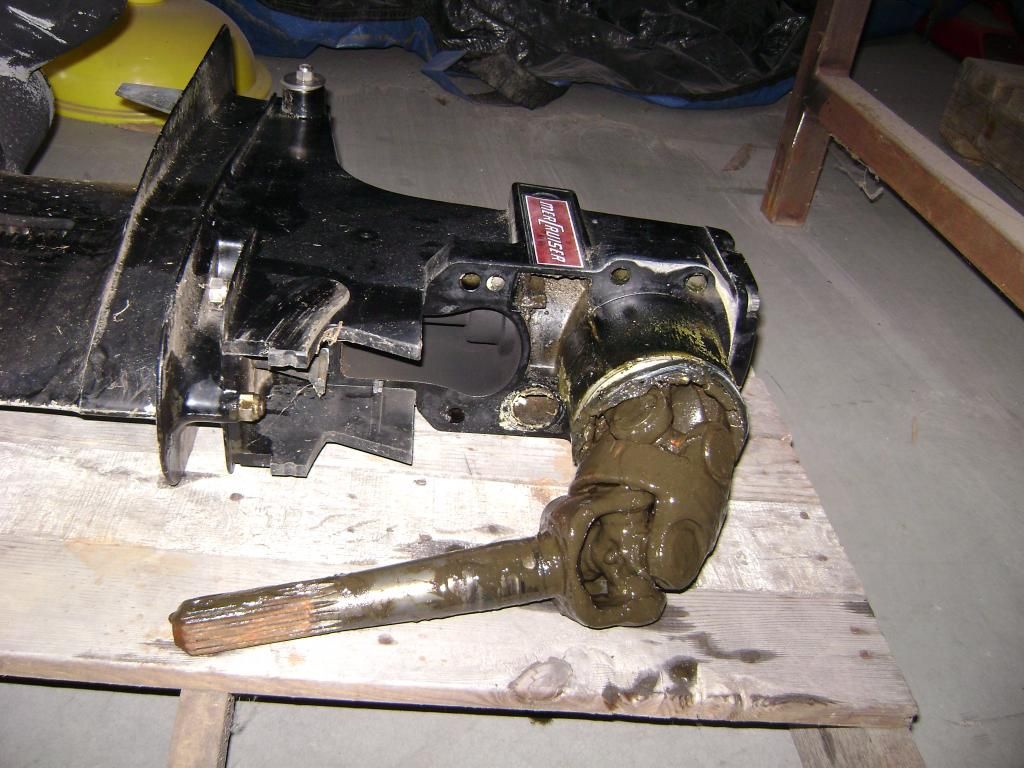
The outdrive shifted forward and reverse properly. It sounded normal but it began to loose oil. When I pulled it, there was no mistake the input shaft seal was shot. I have not touched the out drive or gimbal assembly yet, but that is getting closer on the list.


seven_magnum

Petty Officer 2nd Class
Joined
Oct 4, 2011
Messages
127
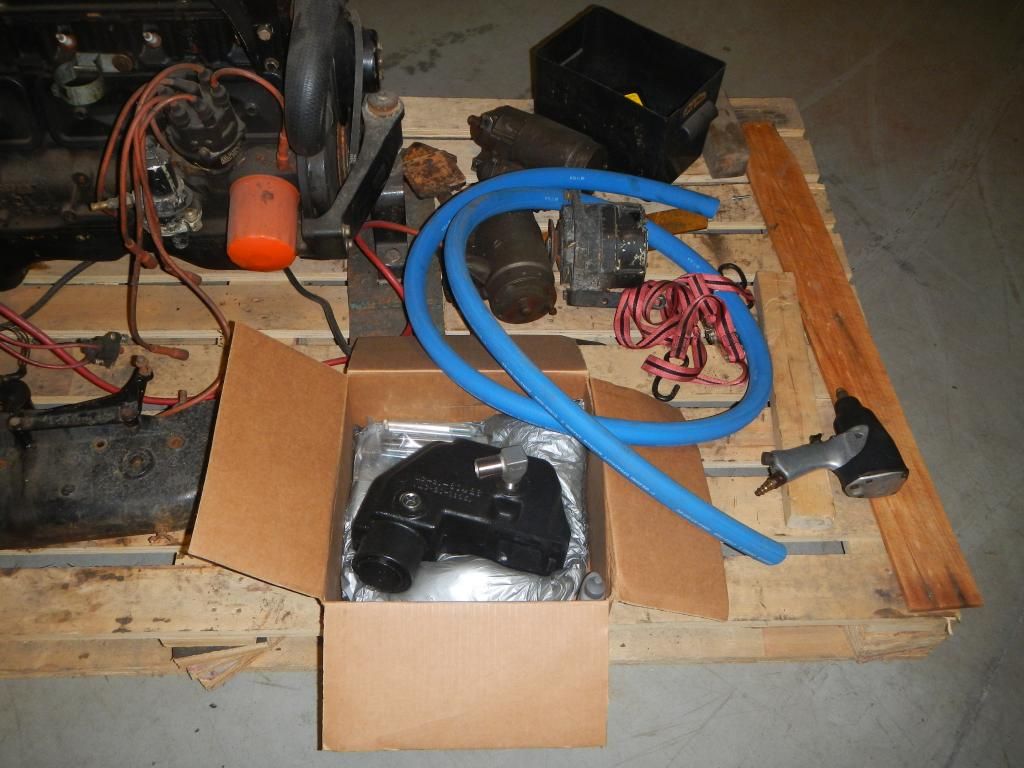
I have also purchased a new Barr manifold and riser for the engine. I read that a possible reason all the inline 6 manifolds are cracking is the tilting of the manifold when the boat is coming on plane. Apparently the cooling water runs away from the front of the engine and out the riser due to the angle of the boat allowing hot spots to form while the motor is working hard to get on plane. When it's finally up, the water fills the empty cavity at the front and that sudden cooling effect can crack the manifold. When I bought the parts, I got the gasket set that is made for boats with cabin heaters. The difference is that it comes with a stainless block off plate where the manifold and riser join. It has a 1/8 hole to allow coolant through and to blead out and air. The coolant flow will be re-routed, coming from the engine to a manifold cap with a barb at the rear of the manifold. Then at the front of the manifold another cap with a barb directs the flow to a barb on the side of the riser. Hopefully this works well and I don't have problems!

I have not hooked anything up yet, but it's all there. Even the carb isn't mounted, it's just laying on the manifold right now.


Top