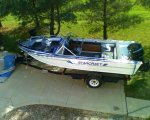
Starcraft SS Specific Transom Replacement Questions: My Rebuild Project

sje0123

Petty Officer 2nd Class
Joined
Jul 12, 2011
Messages
146
Re: Starcraft SS Specific Transom Replacement Questions: My Rebuild Project

Well some good news and some bad news.

Good news is the epoxy set very well and everything is tight. The bad news is my clamp idea had a major flaw. The 2x4's also laminated to the transom board. When removing them they pulled big chunks out of the top layer of the plywood on one side. I am not starting this over and feel this is nothing more than a cosmetic issue. I plan on running a barrier around the edge of the board and filling the holes with epoxy to level them out. Then I will sand and paint the epoxy. I had to paint it anyway as it will be exposed to the sun. More than likely I will not have enough epoxy now though. I'll have to order another batch.

If I were to do it again I'd run a sheet of foil along the 2x4's between them and the transom wood. Oh well. You live and you learn. Everything was going so smoothly up to this point I had to hit a snag somewhere.

Just going to do some odds and end thru the week until my epoxy gets here. I may get around to drilling the transom holes today. We'll see how it goes.
 

sje0123

Petty Officer 2nd Class
Joined
Jul 12, 2011
Messages
146
Re: Starcraft SS Specific Transom Replacement Questions: My Rebuild Project

Worked slow throughout the week. This getting dark early thing is killer. Only gives me about 2hrs to work when I get home. :(

The second Qt of epoxy came in yesterday. I got one coat on last night and another today. It's curing right now and by morning the transom will be ready to bolt back in.

img6990c.jpg


I got the motivation to start the paint process. The topside was pretty easy to sand but below the chines had some thick gunk there. I'm assuming the boat sat in the water at some point in it's life. I should pick up 1-2mph by getting that crap off. :D I still need to remove my boat numbers and registration stickers so I painted around them for the time being. This is just primer so I will tackle the stickers tomorrow. I am hoping I can get the reg stickers off in one piece since they are good thru the end of nxt yr. If not I'll just grab some replacements "at a reduced fee". :rolleyes: The main goal for painting today was to cover the red paint. I havent begun the starboard side yet but The primer covered the red very well. I should only need one coat of white.

img6987k.jpg


Gunk:
img6988g.jpg


I've been contemplating the best way to paint the bottom of the boat while on the trailer and I think I found it. My plan is to situate the engine hoist at the transom and hoist the whole rear thru the transom eyes. It'll lift it off the trailer enough for me to sand/paint/prime. Let it hang for a day of two then move the hoist to the front and lift the boat by the keel hook and do the same as the back. It will make life easier as I won't need to set the boat on blocks and worry about painting around the blocks. The trailer is galvanized so I won't be painting that. The only thing on it that needs painting is the fenders and Those I can do w/ the boat on.


I didnt snag pics of the splashwell back together but I replaced all but about 6 rivets on it and resealed the seams. I am running very low in rivets but should have just enough to wrap up the important stuff. I used a bunch to fill snap holes on the port gunwale and am holding off on the starboard so i can get the important stuff done first. I'm def going to need to put another order in. I tried Fastenal but they don't sell anything less than a 500 count box. That's just too many extras for me. I'd be tempted to replace every rivet.
 

GA_Boater

Honorary Moderator Emeritus
Joined
May 24, 2011
Messages
49,038
Re: Starcraft SS Specific Transom Replacement Questions: My Rebuild Project

sje - I don't know how I missed this thread but I found it now. You are doing some good work. I think the knee braces start to break when the transom gets mulchy. All the forces end up right on the flanges and sometimes the splash well cracks too. You did what the rest have done to fix them, should be ok with the new transom.

I think your hoisting idea to paint should work ok. I would place a couple of 2X4s across the trailer just in case.

Keep at it, I'll be looking for more progress reports. I know you are trying to get as much done as you can with the short days and Old Man Winter around the corner.
 

Starman8

Chief Petty Officer
Joined
Sep 17, 2010
Messages
630
Re: Starcraft SS Specific Transom Replacement Questions: My Rebuild Project

It is possible a simple blow dryer and a plastic putty knife will remove the stickers.
 

sje0123

Petty Officer 2nd Class
Joined
Jul 12, 2011
Messages
146
Re: Starcraft SS Specific Transom Replacement Questions: My Rebuild Project

Thanks. This will probably be my last week I am able to get the painting done so I may have to stop mid way thru and wait until early spring to finish it off. I've been lucky with good weather so far so I cannot complain. I have a paint scheme in mind that should look pretty nice. Just ordered some new registration numbers as well.

Once the splash well goes back in I am also thinking I should float her at the ramp just to be sure I sealed everything up well. Better to find it now then after the motor is back on.

Starman,

there are stickers under my registration stickers from the late 80's Those things are a mess. Tomorrow will be filled with lots of sanding to get those things off I'm sure. Then again I could step it up from the hair dryer to the heat gun and just burn them off. I'll figure it out.
 

bunker108

Chief Petty Officer
Joined
Jun 26, 2011
Messages
482
Just pull the boat off the trailer for paint. The hull is super light with the engine off. It isnt hard to do with a floor jack and some jack stands. There are many threads on how to do it. You are moving right along... Keep it up!

I have to remove my engine to add power tilt and trim. Maybe I should tackle my transom while it's off.
 

sje0123

Petty Officer 2nd Class
Joined
Jul 12, 2011
Messages
146
Re: Starcraft SS Specific Transom Replacement Questions: My Rebuild Project

I would. The hardest part is waiting. The resin takes a bit to set. Once you get the first piece cut to size it's easy. I used a router and a flush cut bit and the second piece was an exact replica.

The problem with pulling it off the trailer is I will need to go out and get blocks and more wood then I'd have to paint around the wood/blocks and figure a way to paint where the boat is in contact with them. If I use the hoist and suspend it nothing is in the way.

I forgot to take a pic of the other side of the transom too. I triple layered the transom where the transom eyes are. I'll grab a pic of that tomorrow. Should add a bit more reinforcement there for strapping to trailer and skiing/tubing/etc.
 

Starman8

Chief Petty Officer
Joined
Sep 17, 2010
Messages
630
Re: Starcraft SS Specific Transom Replacement Questions: My Rebuild Project

I forgot to take a pic of the other side of the transom too. I triple layered the transom where the transom eyes are. I'll grab a pic of that tomorrow. Should add a bit more reinforcement there for strapping to trailer and skiing/tubing/etc.

Maybe consider pulling skiers a different way. Using the entire boat versus pulling on the transom has many benefits other than reducing stress on the transom, more to do with getting on plane and up to ski speed quicker without playing constant trim adjustments.

1. Ski Tow tripod version(Swivel-eze)
2. Lateral support for the main post in the floor
3. Vertical support for the two back leg pressure points.

What I did works for me, so this is not advice, just what I did.

I bridged the stringers with aluminum framing in the floor where the main post base attaches creating an additional subfloor of 2.25" of marine grade ply epoxied and sealed. The longnitudinal framing extended well past this point riding along like a double stringer. In other words, spread the load.

Since I built an Aft Deck, the two supports legs attach to pins at a Star and Port location, and are bolted thru wood framing and 3/16" SS plating. When the boat gets loaded with a skier, or two, the hull is now pulling the skiers and the resistance is being forced downward, not outward.
 

sje0123

Petty Officer 2nd Class
Joined
Jul 12, 2011
Messages
146
Re: Starcraft SS Specific Transom Replacement Questions: My Rebuild Project

This is our first boat and nobody has skied/tubed/boarded before. So for me, at this point, I'm just going to stick with the transom eyes. Who knows if we will ever even do it? Either way, anything worth doing is worth overdoing. :) More support is always better. Thanks for the heads up. If we really get into it more I'll look into those alternatives.

Come on sun! Warm it up. I'm ready to start painting!
 

Pugetsound

Lieutenant Commander
Joined
Apr 5, 2009
Messages
1,824
Re: Starcraft SS Specific Transom Replacement Questions: My Rebuild Project

Stickers Use a heat gun or a propane torch get it warm but do not burn them they should come off real easy and use a plastoh scraper on them. Worth a try Then clean up where they were with Acitone.
 
Last edited by a moderator:

sje0123

Petty Officer 2nd Class
Joined
Jul 12, 2011
Messages
146
Re: Starcraft SS Specific Transom Replacement Questions: My Rebuild Project

Stickers Use a heat gun or a propane torch get it warm but do not burn them they should come off real easy and use a plastoh scraper on them. Worth a try Then clean up where they were with Acitone.

That's what I did with my heat gun. Came off just fine. The big issue was the grip tape stuff someone put on there. That crap SUCKS. I had to burn it, scrape it, then rub the crap out of it with goof off.

Today's Update:
I got the new transom in and a coat of primer on it. This thing is 100x more rigid then the last. It's amazing how soft the old one was compared to this. There is no flex at all now.

You can see the extra reinforcement for the transom eyes.
img6993e.jpg


img6994d.jpg


The boat is primed from the chines above.

Blank Slate:
img6996ps.jpg
 

Starman8

Chief Petty Officer
Joined
Sep 17, 2010
Messages
630
Re: Starcraft SS Specific Transom Replacement Questions: My Rebuild Project

You can get the 48" Starcraft LOGO decal on EBAY for a great price if you are adding them. We also made our own SuperSport logo decals from scratch.
 

sje0123

Petty Officer 2nd Class
Joined
Jul 12, 2011
Messages
146
Re: Starcraft SS Specific Transom Replacement Questions: My Rebuild Project

You can get the 48" Starcraft LOGO decal on EBAY for a great price if you are adding them. We also made our own SuperSport logo decals from scratch.

Way ahead of ya. The decals are sitting on the table in front of me.

This is my overall plan. It may change between now and when it's done..

unled6c.jpg
 

Pugetsound

Lieutenant Commander
Joined
Apr 5, 2009
Messages
1,824
Re: Starcraft SS Specific Transom Replacement Questions: My Rebuild Project

Looks good -but -the size of the lettering seems to distract from the great work you have done. IMHO lookin good tho great so far.
 

Starman8

Chief Petty Officer
Joined
Sep 17, 2010
Messages
630
Re: Starcraft SS Specific Transom Replacement Questions: My Rebuild Project

Nice rendering.
Maybe some accent striping to pull it all together?


Puget, the graphics aren't really that imposing. Placement is a matter of choice as we know, as well as colors. I kept mine white and borrowed the design of mid-90's models.

Whats funny is my 79SS is the same red and gray/white factory original which the PO then caked on silver metallic barn paint everywhere. I was able to sand off down to factory prime. There is no Red anywhere anymore. Not that I don't like red, just not as a primary color scheme on a boat.
 

Attachments

  • viewdown1a.jpg
    viewdown1a.jpg
    65.2 KB · Views: 2

sje0123

Petty Officer 2nd Class
Joined
Jul 12, 2011
Messages
146
Re: Starcraft SS Specific Transom Replacement Questions: My Rebuild Project

Yeah, I'm still on the fence w/ the whole paint scheme. I want something unique yet simple. I'm not looking to spend hours lining tape up and getting all fancy. I think I'm going to do the white today (1st coat on now) and wait until spring to ponder the red. I'd like to do 2-3 coats of the white and it is going to rain tonight then who knows what the weather will bring with temps for the rest of the season. I may only get this one white coat on then wrap it up for the season.

Obviously, I'm stuck w/ the registration numbers. I ordered them in white so I have to do something with red at the top or order new reg numbers.

This was another option i came up with. Boat numbers under side triangle of windshield. Like I said, i don't have my mind made up yet.

unled4s.jpg
 

sje0123

Petty Officer 2nd Class
Joined
Jul 12, 2011
Messages
146
Re: Starcraft SS Specific Transom Replacement Questions: My Rebuild Project

Then again, I could always do this and just name her Peppermint Pattie. :p

unled5s.jpg
 

Starman8

Chief Petty Officer
Joined
Sep 17, 2010
Messages
630
Re: Starcraft SS Specific Transom Replacement Questions: My Rebuild Project

Your boat, your choices, that is what makes em all unique.

Suggest maybe edit the pic and removing REG numbers from public display.

If I do another restore, going to use the scheme you see on some LUND Pro V in white with the copperish tan colored hull
 

sje0123

Petty Officer 2nd Class
Joined
Jul 12, 2011
Messages
146
Re: Starcraft SS Specific Transom Replacement Questions: My Rebuild Project

Well my seats are the Red/Whitish gray color scheme and the whole inside is gray. I went w/ white for ease of not having to mix and i didn't like the gray choices Rustoleum has. I wanted to keep the red for that reason.

Might even end up leaving it all white and just calling it a day. I'll figure it out eventually. Might even change the color scheme once a yr. :p
 

Starman8

Chief Petty Officer
Joined
Sep 17, 2010
Messages
630
Re: Starcraft SS Specific Transom Replacement Questions: My Rebuild Project

I think this is classy. Just substitute the tan for gray?
 

Attachments

  • 18__Lund_Pro_Vpaint.jpg
    18__Lund_Pro_Vpaint.jpg
    41.3 KB · Views: 1
Top