Stuck garboard plug, took off flange and I can see wood, what next?

USA_boater

Petty Officer 1st Class
Joined
Jul 31, 2018
Messages
275
2004 Four Winns Horizon 180

Previous owner never removed plug in years of use because boat was stored inside and has an auto sump pump. As a result, the plug was corroded so bad that it wouldn't budge so I need to replace the whole flange. moisture and trash was accumulated in the tunnel when I took off the old flange. I cleaned it up with freshwater, scraped off the old sealant from the hull and used compressed air to dry the inside of the hole. I don't think any wood is rotten but not for certain. I'd like to clean up the tunnel and seal off the wood before I install new garboard flange. I am going to use 4200 on flange and screw holes in case I mess up and have to re-do it later.

- Should there have been a sleeve or something protecting the wood originally of do they build them with exposed wood like that?

- the tunnel seems at a downward angle and not straight through like a hole saw cut for a plywood door; there are "ridges" but nothing feels soft just moist. How can I clean it up before taking the next step or do i "really" need to on a boat this old that isn't obviously leaking or soft wood? The higher point of the ridges are firm but not sure in between them.
- Are there any aftermarket sleeves I can use or do I just need to seal the wood up once it is dry enough to do so before I install the new flange?
- Can I do everything from outside or will I need to access the bilge side?
- I do not have the expertise to redo a whole transom and would like to know how to tell it is dry enough to seal up the wood and just hope for the best; boat in great shape otherwise.
- If/when I seal the wood (whether using a sleeve or not) can I use 4200 for that too, or do I need some putty or epoxy? I am looking for the best easier solution since I can't dig out wood with fingernails and think it is good enough to cleanup, seal and move on with my life

Thanks, pics will follow as soon as I can. Should the wood have had some sealant on it from the factory? I can't believe they build them like this if not...but then again most people know to remove the plug after each use!
 

chevymaher

Commander
Joined
Mar 29, 2017
Messages
2,934
Yes it is bare wood in there. You may have got lucky on the rot if it was indeed always stored indoors.

To check for rot Drill from the inside and check the shavings. Most here put CSM and glass in the hole to seal the wood.

Just put it back on from the outside if your not going to do a good check for rot. Use the GM 4200.
 

Scott Danforth

Grumpy Vintage Moderator still playing with boats
Staff member
Joined
Jul 23, 2011
Messages
50,295
- Should there have been a sleeve or something protecting the wood originally of do they build them with exposed wood like that?

nearly every boat is built like this.

remember, boats are designed to last 15 years

if your transom is dry and rot free, then I suggest sealing the wood with some epoxy prior to reinstalling the garboard plug
 

kcassells

Fleet Admiral
Joined
Oct 16, 2012
Messages
8,738
Hopefully the wood was coated in resin. Like Chev said most of us fill the opening front to back with "peanut Butter." It's a combination of resin, poly or EEEppppoooxxy and cabosil for thickening. Poly will need to add glass fibers for strength.
So then the hole is drilled out in that way so there is no wood exposed. Then install garboard drain. Make sure your screws for the garboard are dipped in 5200 to assure those areas cannot get wet.
Google garboard drains there are a bunch of styles out there.
 

USA_boater

Petty Officer 1st Class
Joined
Jul 31, 2018
Messages
275
how can I "clean up" the tunnel to see fresher wood and also have a better surface to coat with whatever sealant I choose? Can I dremel it or hole saw it slightly larger or something to remove a thin layer of the dirty, ridgy wood?
 

kcassells

Fleet Admiral
Joined
Oct 16, 2012
Messages
8,738
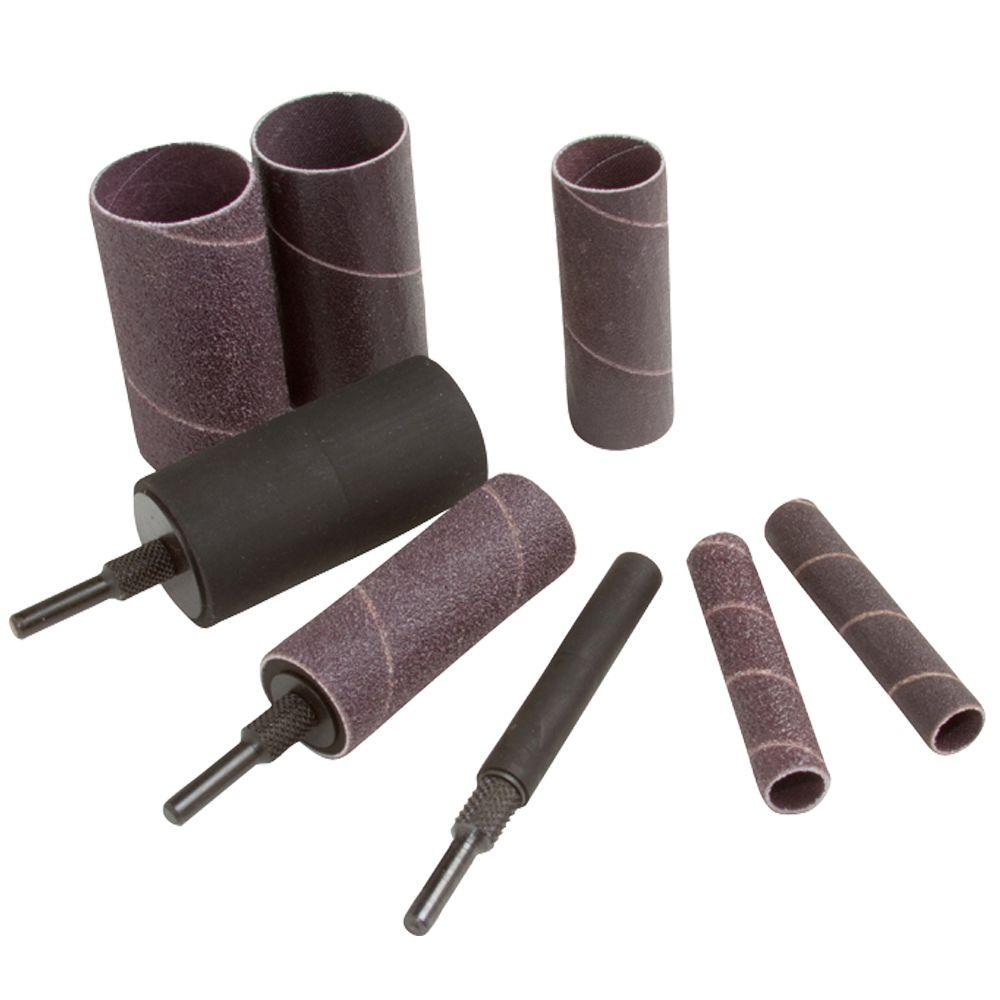
C'mon man get into it! This should do it. Harbor freight or local home deblow.
https://www.homedepot.com/p/Clesco-...PIPHorizontal2_rr-_-203930647-_-203930643-_-N
clesco-rotary-tool-wheels-bands-drum-kit-qlk-3-64_1000.jpg
 

USA_boater

Petty Officer 1st Class
Joined
Jul 31, 2018
Messages
275
Well my MAIN concern right now since the hole isn't obviously filled with rot is how to dry it out good enough before taking action to seal the wood. I'll be running the boat on the trailer some for winterization and other maintenance and with no garboard flange installed in the hole, it will just get wet again when the exhaust water is dripping out. I might be able to put something in it temporarily but again, how long will it take to dry between being wet? Also, how cold can it be when I am doing the sealing? This boat now lives outside with a cover on it up beside the house. I have to work on it outside.
 

Scott Danforth

Grumpy Vintage Moderator still playing with boats
Staff member
Joined
Jul 23, 2011
Messages
50,295
if its wet, I suggest a few test drills

wet transom will not dry out.
 

USA_boater

Petty Officer 1st Class
Joined
Jul 31, 2018
Messages
275
Okay, well it is at the very least wet from me filling the bilge with water and draining it out the hole to wash the trash out of the hole. Of course after water drained out the hole, the wood was wet. Since all boats apparently are made this way, then wouldn't ALL transoms get wet to some degree? I need the surface of the wood to be dry enough to use epoxy or some sealant...perhaps a marine sealant or putty would be better that is designed to cure with moisture present???

Also, on the test holes...where would I drill them? What size bit? How many? What would I fill the test holes with?

Thanks Scott...I bought this boat as my first boat in July and now I've already added an aluminum bass boat to my family too...I am just so far behind you guys on this forum who've owned boats for years so I appreciate your patience with me. I'm somewhat technically inclined as do my own maintenance and work on cars some but I only have some much time & confidence so I am learning to go with the 80% solution as I've gotten over 40 so I can still enjoy life, kids, etc. rather than always have projects I can't complete because of the need for it to be perfect.
 

Woodonglass

Supreme Mariner
Joined
Dec 29, 2009
Messages
25,929
Just use a 1/4" bit, put some tape on it at the 1" mark and drill as low down on the transom as you can and then about 3" above the low part. Shavings should be Light Colored and Dry. If Dark and Damp then you have some issues. If dry then fill the holes with either 3M 5200 Quick Cure Sealant or PC-11 epoxy or Marine Tex epoxy. For the Drain I'd drill an over sized hole and then totally sleeve it with PVC and Epoxy. That way You're ensured it Won't get wet again. To dry the wood, believe it or not use some antifreeze in a spray bottle. The ethanol will KILL the mildew and mold spores and the alcohol will remove the water. Spray it down really well and let it set for 3-4 days. This Is ONLY if the wetness is localized around the hole. If the drilled core samples are wet then the transom will need to be replaced. If not NOw in the near future.
 

USA_boater

Petty Officer 1st Class
Joined
Jul 31, 2018
Messages
275
Okay great info...is the anti-freeze you are referring to auto-motive or the rv-stuff winterization pink stuff? If auto, then assume you mean just CLASSIC green 1985 chevy pickup style antifreeze and not any of the newer fancy dexcool type?

Also, I've seen some refer to using bleach to kill the mold?

The hole isn't straight through like a door knob hole...it goes in at a slight angle then appears to then go up at a steeper angle...almost like it was routed our with a bit at the factory instead of a hole saw? As a result I have no idea how a straight PVC pipe could fit through.

I plan to file off the top-most layer of the wood (it is darker from the trash & dirt and rusty screws that were trapped in it) and then take some good pictures for you guys to analyze but I won't have the time until this weekend. I'll report back but I did a 1 minute initial filing of part of the hole tonight and the dark layer came off and it was yellow underneath from what I saw.
 

USA_boater

Petty Officer 1st Class
Joined
Jul 31, 2018
Messages
275
Alright, full strength in a spray bottle?

I will determine if I need to use it once I shave down the dark layer of the wood in the hole...last night the hole was almost dry so I am thinking I am going to be able to just fix it and use the boat (optimistic).

Oh and to clarify, you mean the test holes would NOT penetrate the hull completely? just drill in from the inside of the bilge out but not all the way through? Can I use 4200 to fill the test holes since that is what I will have on hand? I have read that 4200 is half the psi strength of the 5200 but I can't see those holes being subjected to a lot of pressure?
 

USA_boater

Petty Officer 1st Class
Joined
Jul 31, 2018
Messages
275
I got the 4200 to seal the flange/screws and some JB marine weld epoxy to seal the wood up (unless the 4200 will work?)...but the flange I bought was 2" and mine is 2.25" so I'll have to order the right size since the local store doesn't carry it.
 

chevymaher

Commander
Joined
Mar 29, 2017
Messages
2,934
To seal the hole I would CSM and resin it. They sell it at auto parts joint. It is the same glass just waxed for bodywork. Once it is glassed round file and smooth it out in there.
 

USA_boater

Petty Officer 1st Class
Joined
Jul 31, 2018
Messages
275
Thanks, I've just never done glass work before...I'd not know how many layers and all that. Without knowing much, I'd guess you resin the hole, lay some mat, more resin, more mat, more resin, more mat, then more resin? Then clean excess with acetone? I'll watch some online vids and see if I think I could do it without screwing it up.
 

chevymaher

Commander
Joined
Mar 29, 2017
Messages
2,934
No just a layer of the csm and dab the resin on with a paint brush till it is clear. It dont take much to waterproof it. Once it is hardened 3 hours or so file away anything in the way.
 

USA_boater

Petty Officer 1st Class
Joined
Jul 31, 2018
Messages
275
Do they make 2.25" flange size garboard drains? I bought a replacement drain locally but although the plug and hole seem to be the same size, the flange is only 2" and my OEM flange was 2.25" by my calipers. A quick online search and I'm not seeing any 2.25" flange drains?
 
Top