The inevitable 1979 16? DeckCraft restoration!

Woodonglass

Supreme Mariner
Joined
Dec 29, 2009
Messages
25,929
Re: The inevitable 1979 16? DeckCraft restoration!

I can't believe you didn't re-use those Stringers!!! Looks like they were in GREAT condition to me...:D:faint2:

Very Nice fabrication work!!!! Yep, takes heat to make the resin kick, so temps will really effect it. Plastic tent will raise the outside ambient temp by about 10? F and sometimes that'll make a world of difference.
 

dOb

Petty Officer 1st Class
Joined
Jun 14, 2010
Messages
244
Re: The inevitable 1979 16? DeckCraft restoration!

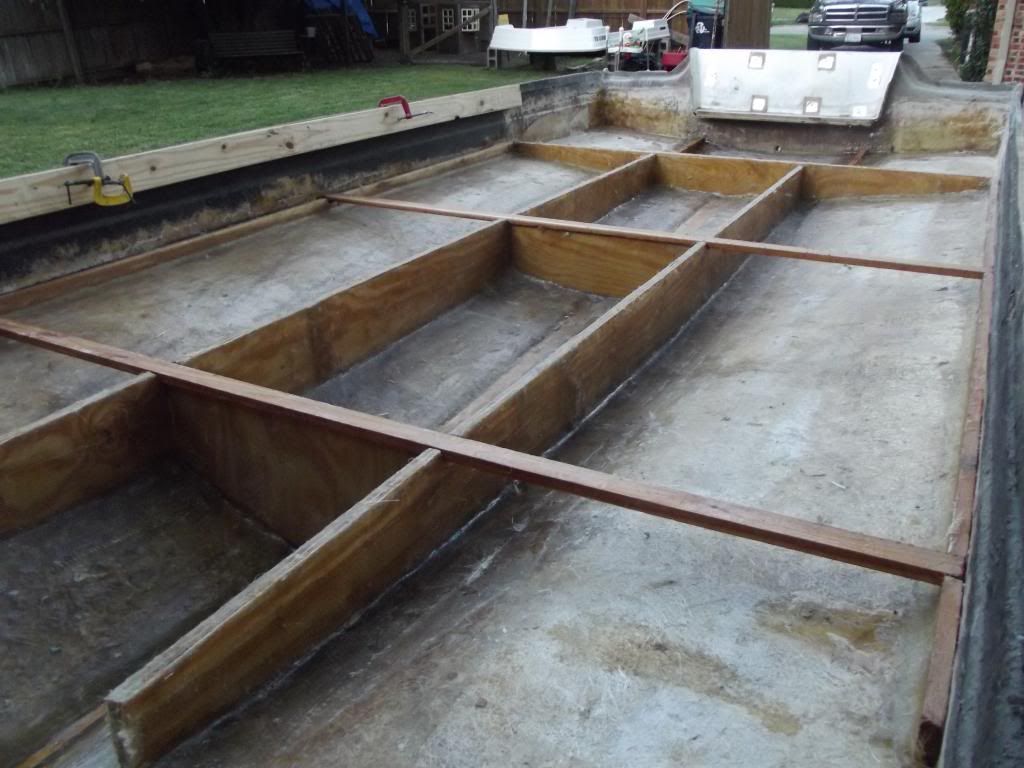
With the colder temps and busy schedule, I've spent less time working on the boat and more time staring at it. It occurred to me that something I've had in mind for the gas and battery placement maybe isn't the best idea. I’m probably over thinking this. Here are three ideas;
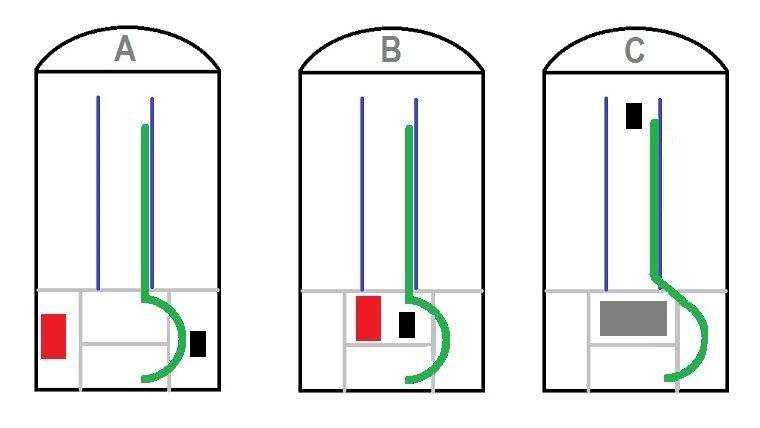
Red - Gas can
Black - Battery box
green - cables
Blue - stringers

gasbat2_zpsab78ae7e.jpg


A - Originally I thought that I would put the portable 6 gal. gas tank and the battery box in the storage areas in the back corners. The only problem is that they would be elevated on 10” blocks of foam (this boat has a lot of foam) and that might affect the way it handles. I think that it would be better to move that much weight closer to deck level.

B - So then I just assumed that I would put them side by side under the back seat. But I started thinking that having a self venting gas can next to a battery in a somewhat closed area was probably not a good idea. This would be the simplest in terms of routing cables, but maybe not the safest. I guess I could cut some vents, but it's still a lot of weight in the stern.

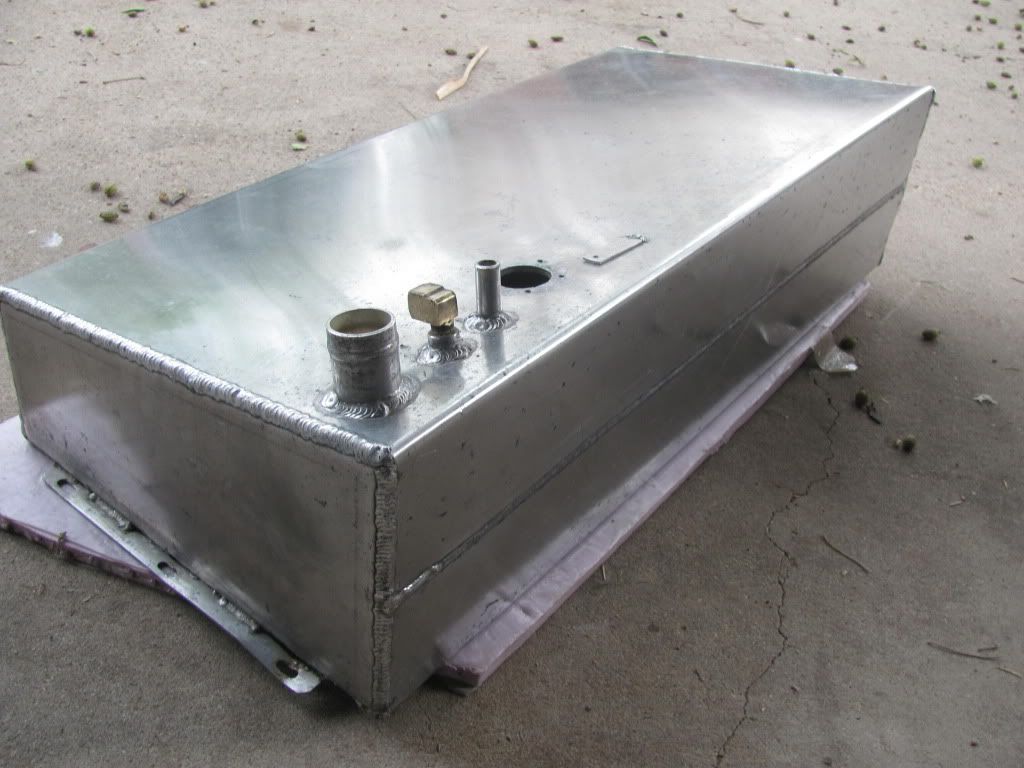
C – Then I saw the old gas tank from the last boat sitting up on a shelf. It’s a 16 gal. aluminum tank that I abandoned because it was dirty inside. I thought about putting the battery under the console and fitting the large tank under the back seat. The good thing is that the tank has a vent. But I would need to raise the back seat about 5 inches to fit everything in and I wouldn't have access to the bilge without removing the tank. I would also need to pass the conduit through the stringer at some point in order to get the cables around the gas tank.

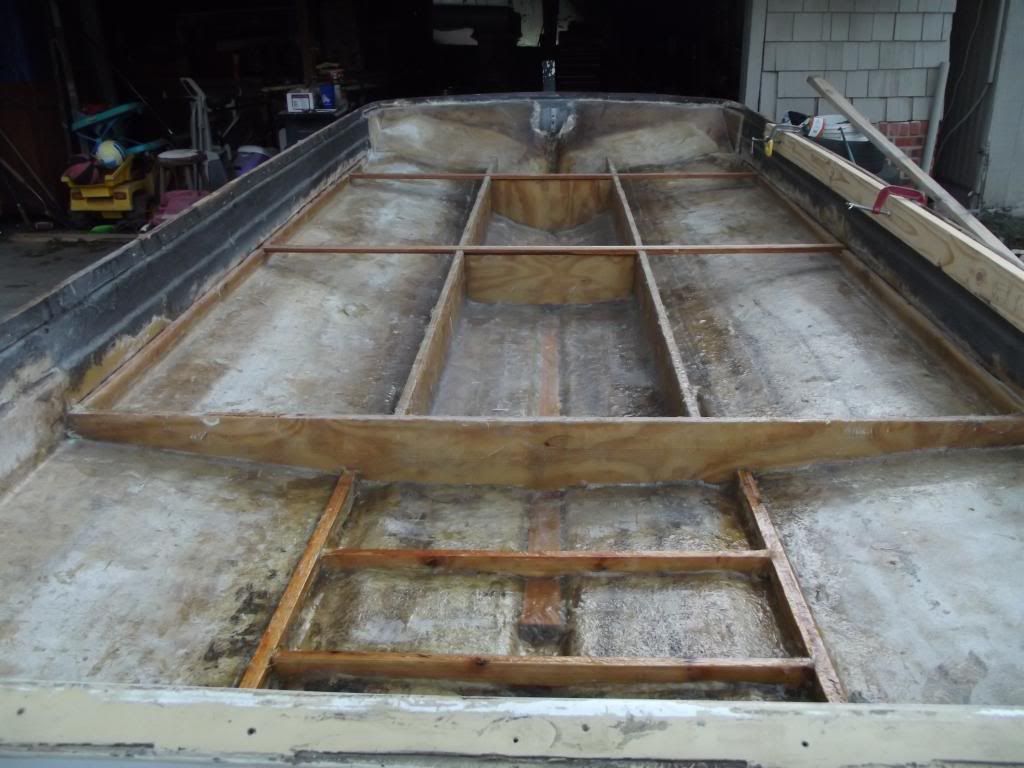
Here is the tank from the last project.

IMG_1020.jpg


Any thoughts or suggestions?
 
Last edited:

dOb

Petty Officer 1st Class
Joined
Jun 14, 2010
Messages
244
Re: The inevitable 1979 16? DeckCraft restoration!

I'm leaning towards option C. It will take more work, but I think I'll like the end result better.

I have read a lot about cleaning old aluminum tanks. People have suggested paint thinner or kerosene as well as using nuts and bolts. But I was wondering about using a can of chem-dip. What if I pour the can of chem-dip into the tank and slosh it around and let it sit overnight? It works great when I use it to soak old carburetors.
 

Woodonglass

Supreme Mariner
Joined
Dec 29, 2009
Messages
25,929
Re: The inevitable 1979 16? DeckCraft restoration!

Here's what I'd do. 2 Gallons of White vinegar, 2 Gallons of Boiling water, 5 Foot of Chain. pour the vinegar and water in the tank and slosh it around. It's an acidic solution that will disolve rust and corrosion. Feed the Chain in leaving the end out of the fill hole and continue to slosh everything around and the chain will help abrade stuck particles off the sides of the tank. Dump it all out. Feed the chain in by itself with the tank empty and rattle it around. Next put some more boiling water in with a tablespoon of DAWN dish soap it will really eat oily residue. Slosh this mix around and then dump it out and flush well. Do one more round with the vinegar, Chain and DAWN thin rinse really well with Clean Water and then blow out with air and let dry for a long time. I think that tank will be good to go.
 
Last edited:

dOb

Petty Officer 1st Class
Joined
Jun 14, 2010
Messages
244
Re: The inevitable 1979 16? DeckCraft restoration!

I'll give that a try. Thanks. Although I'm not really dealing with rust or corrosion. It's more the gas and oil that were left in there for who knows how long, and started turning back into a solid. I managed to get a good amount of the "chunks" out a few summers ago, but then changed gears and went with a portable tank. Th water and vinegar may just do the trick on whats left in there. I'll let you know how it turns out.
 

jigngrub

Fleet Admiral
Joined
Mar 19, 2011
Messages
8,155
Re: The inevitable 1979 16? DeckCraft restoration!

I'd also go with option C on the tank and battery installation, both centered over the keel will give you a good center of balance and will make it easier to manage the live load like people and supplies.
 

dOb

Petty Officer 1st Class
Joined
Jun 14, 2010
Messages
244
Re: The inevitable 1979 16? DeckCraft restoration!

The tank is clean! I can't take a picture of the inside of the tank, but it looks almost a nice as the outside. I followed Wood's recipe (just about) and it worked out great. Thanks Wood. I only made one change; instead of Dawn dish soap, I used whatever dish soap we had, and pored in a little degreaser. The liquids helped break it down, but the magic was in the labor. I sloshed that chain around so much that my arms hurt for two days after. Every conceivable angle. Back and forth, back and forth. But it worked. And now I have a nice clean permanent tank.

Right now it's too cold to do any fiberglass work, even with a tent. So I'm doing what I can until it warms up a little.
 

Woodonglass

Supreme Mariner
Joined
Dec 29, 2009
Messages
25,929
Re: The inevitable 1979 16? DeckCraft restoration!

Glad it worked out for you. Make sure to install an inline filter to catch any left over particles floating around. After a couple of tanks it'll clear up and be like new. Mine was!!!
 

dOb

Petty Officer 1st Class
Joined
Jun 14, 2010
Messages
244
Re: The inevitable 1979 16? DeckCraft restoration!

Here?s a progress update;

I used PL to bed the stringers ? inch off of the hull. Then I went back and used PB for the fillets. My cabosil hadn?t come in yet, but it was the first warm day in a while that I had to work on the boat, so I used what cabosil I had left and mixed it with wood flour and fibers. That?s the reason for the brown color. This is after one layer of CSM.

IMAG0463_zpsjdkvkers.jpg


I tabbed the stringers with two layers 1.5 oz CSM and one layer of 18 oz. roving. I had a lot of roving left over from the last project so I decided to use it instead of 1708. I had heard that it can be hard to work with, but it went relatively smooth. I went back and read Drewpster?s thread about using roving. He suggested wetting out a layer of CSM and then applying the roving on top while it is still wet. It worked like a charm. The CSM really helps hold the roving in place.

IMAG0468_zpsyogb8nfm.jpg


I also have the bulkheads cut and wet out. I hope to get them in this weekend. Once I get the framework done, I plan to flip her over and paint the hull and trailer.

The weather has been all over the place lately, but as long as the weekends are warm, I should be able to make some progress.
 

Woodonglass

Supreme Mariner
Joined
Dec 29, 2009
Messages
25,929
Re: The inevitable 1979 16? DeckCraft restoration!

I'd say that for a WR glassin' job that's a purdy darn nice lookin set of stringers!!!!!
mega-icon-smiley-thumbs-up.jpg
 
Last edited:

jigngrub

Fleet Admiral
Joined
Mar 19, 2011
Messages
8,155
Re: The inevitable 1979 16? DeckCraft restoration!

Yup! Looks good to me too.
 

dOb

Petty Officer 1st Class
Joined
Jun 14, 2010
Messages
244
Re: The inevitable 1979 16? DeckCraft restoration!

I can't believe that three months has gone by since my last post. It seems like every time I had a day off it was 40 and raining.
I have managed a little progress here and there. Here are some pics -

DSCF0347_zpse98104eb.jpg


DSCF0344_zps1129ad65.jpg


I lined the first six feet or so of the keel with two layers of 1708. Then I laid wood in resin that I thickened with cabosil and shredded CSM. Aside from the keel, this has all been done with CSM and roving.

I still need to go back and grind a few spots here and there. The plan is to finish all of the below deck frame work, and then remove the hull and flip it for paint. I'll also paint the trailer. I didn't do this last time I ended up painting upside down. That was miserable. This should be much easier. Hopefully we'll have some decent temps for a while and I can start making more progress.
 

jigngrub

Fleet Admiral
Joined
Mar 19, 2011
Messages
8,155
Re: The inevitable 1979 16? DeckCraft restoration!

Your work looks real good!

I don't think you'll have to worry about cold temps anymore 'cause it's fixin' to get hotter 'n a blistered pecker in a pepper patch.
 

dOb

Petty Officer 1st Class
Joined
Jun 14, 2010
Messages
244
I have a quick question.

I have been planning on using 3” PVC for the under deck cable conduit. For several reasons I am now considering using this 2 ½” electrical conduit. Is there a standard for this? I will be running steering cable, wiring harness, two battery cables (2 AWG), control cables and three or four sets of wires for lights and gas gauge and so on. I think it will fit, but I didn’t know if there was a standard rule of thumb for routing cables below deck. The original was just bridge of fiberglass that ran along the stringer about three inches wide. There may have been something like a cardboard tube at some point, but it was long gone when I got to it.
 

dOb

Petty Officer 1st Class
Joined
Jun 14, 2010
Messages
244
No Title

I've been working on trailer. I tore it apart, used a grinder on the heavy rust and roughed up the rest with a steel brush. I cleaned all of the hardware with the steel brush attachment on my grinder. I used a heavy rust primer and oil based Rustoleum paint. I also cleaned and painted the springs. It's not a mirror finish by any means, but it will help prevent rust in the future.

I just noticed that the new forum has a new way to post pictures. I hope this works. OK - it didn't work. So I'll try this:


New question:
I am painting the bottom half of the boat before I put it back on the trailer. It looks like it has been painted before. They did a good job. There is very little peeling or cracking. The new paint will just be a lighter shade of white than is already there. Should I sand the current paint to make it rough, one coat of primer, then two coats of new paint?
 
Last edited:

dOb

Petty Officer 1st Class
Joined
Jun 14, 2010
Messages
244
Last time I used Rustoleum oil based with hardener and a spray gun. It was the WOG paint recipe. I'll probably do the same this time.
 

dOb

Petty Officer 1st Class
Joined
Jun 14, 2010
Messages
244
After a little sanding, I realized that I'm getting down to gelcoat pretty quick. The original color was a nice 1970's yellow. I think my mom had a blender that color. I don't plan on removing all of the paint, so I will probably need two coats of primer to cover the yellow patches.
 

dOb

Petty Officer 1st Class
Joined
Jun 14, 2010
Messages
244
I recovered the trailer bunks. The original wood was in decent shape, so I just re-carpeted.


Let me start by saying that painting is not my thing. I’m sure with better tools and more practice I could get batter results, but I’m OK with it. It’s better than it was. For the bottom half of the boat, I ended up doing two coats of primer, and 4 top coats. It was actually 3 top coats, but the last coat I put on twice as thick, so technically it was 4 coats. I went thick on the last coat to smooth out the texture. I did manage one drip, so I know I was pushing the limit. It’s not glass. It’s got some orange peel to it. Some spots worse than others.


The bottom half is now back on the trailer. I hope to start on the sub-deck and foam soon.
 
Top