1964 Starcraft Jet - Rebuild

jbcurt00

Moderator
Staff member
Joined
Oct 25, 2011
Messages
25,129
Re: 1964 Starcraft Jet - Rebuild

Making your own transom cap out of wood, or making a wooden form to bend your own aluminum transom cap?

All those ^^^ wooden parts & pieces look great! Nice straight lines/curves :cool: merry xmas in May
 

InMotion

Commander
Joined
Nov 3, 2011
Messages
2,080
Re: 1964 Starcraft Jet - Rebuild

Making your own transom cap out of wood, or making a wooden form to bend your own aluminum transom cap?

All those ^^^ wooden parts & pieces look great! Nice straight lines/curves :cool: merry xmas in May

2 options ---- cut the Jup's old one so that I can use that on the straight part of the transom and then use the 2 pieces that came with the boat for the curved section. However, I am experimenting with actually creating a transom cap out of wood for the straight part... not so sure it's going to work... but fun to try nonetheless!!

J.
 

barato2

Commander
Joined
Dec 7, 2010
Messages
2,956
Re: 1964 Starcraft Jet - Rebuild

the whole purpose of the transcap is to keep water from getting into the end grain of transom, so i don't see why wood wouldn't work fine if you don't mind annual maint on it. most boat covers don't quite cover the whole transom all the way across but since you have indoor storage.....
 

InMotion

Commander
Joined
Nov 3, 2011
Messages
2,080
Re: 1964 Starcraft Jet - Rebuild

Went and hacked around a bit after getting the kiddies to bed... I was able to use Jup I's transom cap by cutting it into 3 pieces and using my push lawnmower's wheel to bend the corner pieces to fit the curve... the Jet's transom has a steeper curve than the Jupiters.

Overall it will work fine. There are 2 joints there (metal butt joints to clarify for some...)... but it looks better than the wood attempt.

I also got the crazy holes in the bottom of the splashwell fixed as well as the wierd hole that someone had patched sorta that I didn't notice until I removed the rubber tape used to seal the splashwell to the transom. Someone was determined to allow water to drain into the boat.

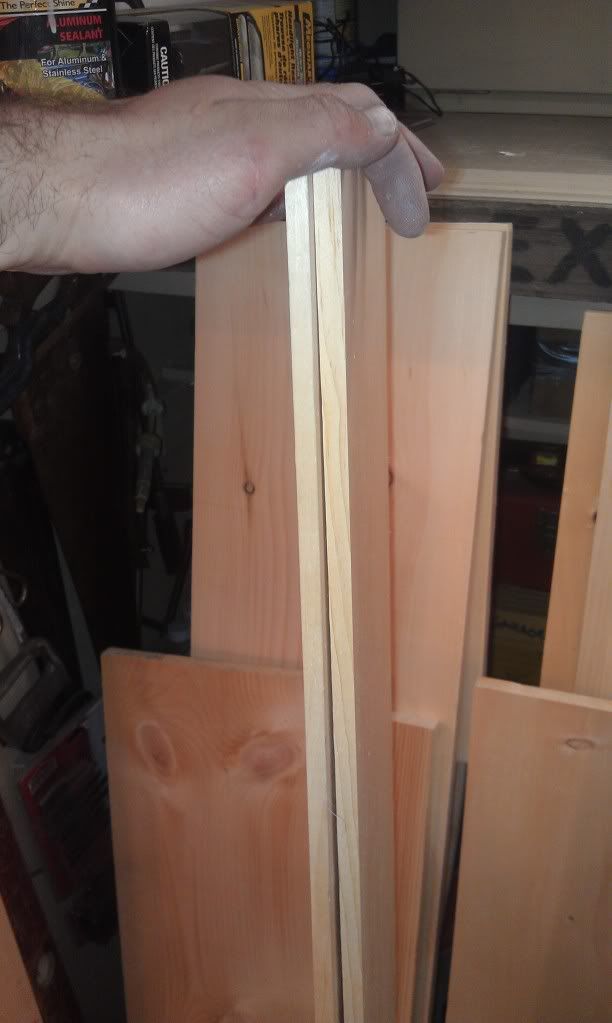
Tomorrow, I get the seat top and the dash pad planed down to 3/8" thick so that I can bend them over the curve of the bow and the seat top.

This weekend:

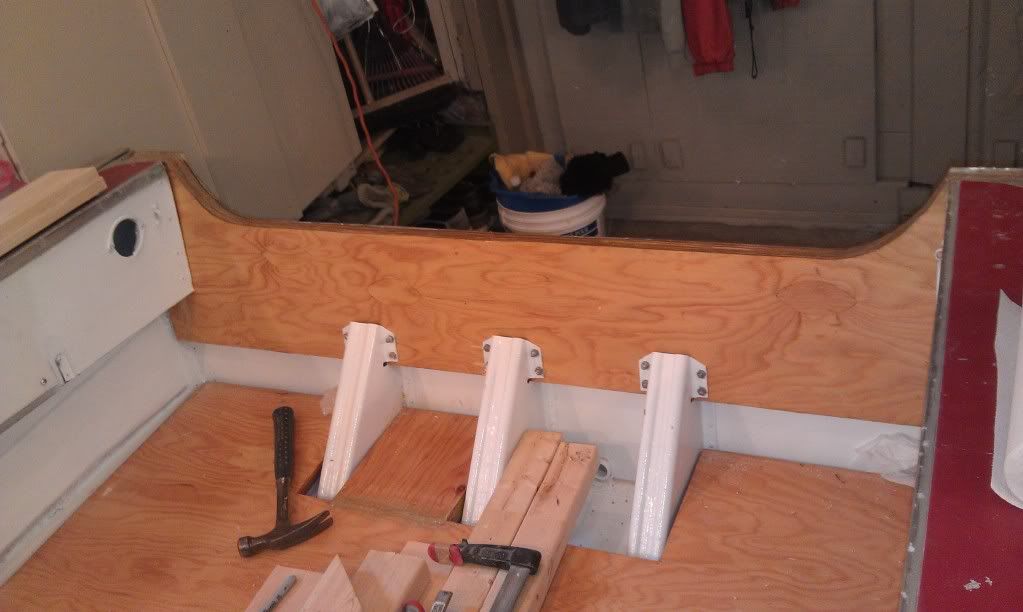
- Transom finally bolted back in place
- Drain holes drilled in the transom!
- Splashwell back in place
- Transom cap back in place and sealed
- Rest of the wood sanded.

With Mother's day being hosted out our place for two families... this might be a tad ambitiuous...we shall see. But this is the plan nonetheless.

Also:

- Wiring
- Speedo cable run
- Steering cable run
- Side top boards temporarily affixed


Lots of little things to tend to!

Have a great evening fella's

Jim
 

classiccat

"Captain" + Starmada Splash Of The Year 2020
Joined
Dec 20, 2010
Messages
3,412
Re: 1964 Starcraft Jet - Rebuild

pretty impressive cuts to be making with a circular saw (at least to me!).

before you put the finishing touches on it, be sure that it doesn't interfere with the outboard mounting; the sidewalls are thicker than the aluminum cap.
 

InMotion

Commander
Joined
Nov 3, 2011
Messages
2,080
Re: 1964 Starcraft Jet - Rebuild

pretty impressive cuts to be making with a circular saw (at least to me!).

before you put the finishing touches on it, be sure that it doesn't interfere with the outboard mounting; the sidewalls are thicker than the aluminum cap.

Thanks BF... That was part of the issue... if I allowed for the OB mounting it really was going to weaken the top caps structure. The other thing is that it is thicker... which will change the motor mounting position a little as well.

Alum top cap is what I decided to go with.

J.
 

Bwana Don

Lieutenant Commander
Joined
Oct 20, 2009
Messages
1,951
Re: 1964 Starcraft Jet - Rebuild

I like your woodworking skills. Warm wood tones really make a boat into a classic. Two thumbs up my TinBro. Is that white oak??
 

GA_Boater

Honorary Moderator Emeritus
Joined
May 24, 2011
Messages
49,038
Re: 1964 Starcraft Jet - Rebuild

pretty impressive cuts to be making with a circular saw (at least to me!).

I keep saying these Northern Mobsters practice wood working skills all winter. IM passed the final exam. :D

JIM - As nice as that looks, deciding to go with AL transom trim is a better choice. Now there must be place you can use it in the Jet. :)
 

cpdchap

Petty Officer 2nd Class
Joined
Mar 2, 2013
Messages
162
Re: 1964 Starcraft Jet - Rebuild

Went and hacked around a bit after getting the kiddies to bed... I was able to use Jup I's transom cap by cutting it into 3 pieces and using my push lawnmower's wheel to bend the corner pieces to fit the curve... the Jet's transom has a steeper curve than the Jupiters.

Overall it will work fine. There are 2 joints there (metal butt joints to clarify for some...)... but it looks better than the wood attempt.

I also got the crazy holes in the bottom of the splashwell fixed as well as the wierd hole that someone had patched sorta that I didn't notice until I removed the rubber tape used to seal the splashwell to the transom. Someone was determined to allow water to drain into the boat.

Tomorrow, I get the seat top and the dash pad planed down to 3/8" thick so that I can bend them over the curve of the bow and the seat top.

This weekend:

- Transom finally bolted back in place
- Drain holes drilled in the transom!
- Splashwell back in place
- Transom cap back in place and sealed
- Rest of the wood sanded.

With Mother's day being hosted out our place for two families... this might be a tad ambitiuous...we shall see. But this is the plan nonetheless.

Also:

- Wiring
- Speedo cable run
- Steering cable run
- Side top boards temporarily affixed


Lots of little things to tend to!

Have a great evening fella's

Jim


Jim, you truly are my hero if you even get one of those items done on mothers day weekend......Beautiful work!!!
 

GA_Boater

Honorary Moderator Emeritus
Joined
May 24, 2011
Messages
49,038
Re: 1964 Starcraft Jet - Rebuild

With Mother's day being hosted out our place for two families... this might be a tad ambitiuous...we shall see. But this is the plan nonetheless. Jim

Didn't you guys have Mom's Day already. Your Thanksgiving is early, you even celebrate the the 4th of July on the 1st. :lol:
 

dozerII

Admiral
Joined
Oct 25, 2009
Messages
6,527
Re: 1964 Starcraft Jet - Rebuild

Good to see you back at it Jim. Some real nice looking pine you have manipulated into custom shapes. That is a very ambitious plan you have for Mother's Day weekend there.
 

Gibbles

Commander
Joined
Nov 14, 2009
Messages
2,027
Re: 1964 Starcraft Jet - Rebuild

I made a transom cap out of angle aluminum, my problem was since I was converting from a 15in transom to a 20in the orig cap was totally wrong.

It worked good, and I glued it on there with 5200, I have not had any problems with it.

however... the transom on my Jet is straight with 0 curves :watermelon:

Given your wood working skills, I would love to see what you come up with using wood :)
 

barato2

Commander
Joined
Dec 7, 2010
Messages
2,956
Re: 1964 Starcraft Jet - Rebuild

a better plan to do it in AL, i think. i didn't want to say anything to discourage your creative fervor. good luck on getting that stuff done ythis weekend.

you know how i feel about wood in the boat....i'm with Don 100%; wood cabin interior is part of what sold me on the Starchief originally. but it works better inside the hull.
 

InMotion

Commander
Joined
Nov 3, 2011
Messages
2,080
Re: 1964 Starcraft Jet - Rebuild

I like your woodworking skills. Warm wood tones really make a boat into a classic. Two thumbs up my TinBro. Is that white oak??

Thanks man... I like to think of my ww skills most of the time as slightly above hack... but I do like the wood inside the boat as well... makes feel retro to me anyways! Just tryin' to add a touch of class... maybe a the name I'll use for the Falcon if I can ever get this one finished!! As Dozer said... it's actually white pine... but when sanded down with 220 grit sandpaper it really comes out white.

GA_Boater --- I keep saying these Northern Mobsters practice wood working skills all winter. IM passed the final exam. JIM - As nice as that looks, deciding to go with AL transom trim is a better choice. Now there must be place you can use it in the Jet.

Thanks GA.... and ya... gotta do something up here with all this snow! Agreed on the AL transom.... I thought I'd experiment a bit anyways and see how it would look... and ya... it would have come out ok.. but not as good as AL does.

cpdchap --- Jim, you truly are my hero if you even get one of those items done on mothers day weekend......Beautiful work!!!

Thanks man... I figure I might be your hero... but for sure I won't be my wife's!! So... really good chance I won't get much more than half of that done at best if I know what's good for me!!!!

dozerII --- Good to see you back at it Jim. Some real nice looking pine you have manipulated into custom shapes. That is a very ambitious plan you have for Mother's Day weekend there.

Thanks Glen... Good to be back at it... Lots more shaping to do... but hey... I enjoy this part alot! Agreed on the ambition... I still have it... but my daughter suggested quietly that boat work Sunday morning would be a "poor choice".... mmmmm good news is that she listens to what I say here and there. Not so good news is that she listens! :)

GA_Boater --- Didn't you guys have Mom's Day already. Your Thanksgiving is early, you even celebrate the the 4th of July on the 1st.

Naaaah... your thinking of "lord simcoe day" in August or what we refer to as "the extra day we get off in the summer that no one else does in north america!"... :)

Gibbles --- I made a transom cap out of angle aluminum, my problem was since I was converting from a 15in transom to a 20in the orig cap was totally wrong.

It worked good, and I glued it on there with 5200, I have not had any problems with it.

however... the transom on my Jet is straight with 0 curves

Given your wood working skills, I would love to see what you come up with using wood

Thanks man! I would have loved to finished it off with wood... but as I mentioned AL is the better choise here.

barato2 - a better plan to do it in AL, i think. i didn't want to say anything to discourage your creative fervor. good luck on getting that stuff done ythis weekend.

you know how i feel about wood in the boat....i'm with Don 100%; wood cabin interior is part of what sold me on the Starchief originally. but it works better inside the hull.

Thanks B2 --- I agree with you there and thanks for not discouraging my creative side... but AL is the better choice for sure.


So... other good news is that I was able to get the dash pad and seat top pad planed down to 3/8" or there abouts at my buddies house. It was snowing pine flakes all over us and his back yard! Made good mulch for his gardens!

The saga continues with the vinyl floor --- last year I had some trouble ordering it but was able to get it. Now it turns out that the only way I can get it is to be 200-$250 in shipping from BC to get this stuff here. Ahhhh no way man. So I've got Peter at Home Hardware doing his darned best to figure out a way around this. Man... the lengths I've gone to try and buy this stuff... you'd figure these days that most companies would be glad and willing to sell you something. This company just does the opposite. Nuts... but whatchagonna do.

So... plan B is that if this doesn't pan out, the floor is going to be tongue and grove cedar (thin) glued and screwed to the sub floor and sealed with 3 coats of spar. Under the last piece at either side of the boat will be regular vinyl which will be glued to the floor and sides to help channel any water to the back and keep water from getting to the sub floor.

I would prefer the vinyl floor --- but I need a back up plan.

Have a great evening fellas...
Jim
 

GA_Boater

Honorary Moderator Emeritus
Joined
May 24, 2011
Messages
49,038
Re: 1964 Starcraft Jet - Rebuild

Is BC a foreign country? For you anyway. :) What do they do, cover the box with stamps?
 

Bwana Don

Lieutenant Commander
Joined
Oct 20, 2009
Messages
1,951
Re: 1964 Starcraft Jet - Rebuild

Tongue and groove cedar, woah. That will be sweet. 3 coats of spar varnish, can I talk you into two coats of epoxy first, then spar? That's how I did the Sea Scamp seats. Looked fantastic! Epoxy seals and spar gives UV protection.

This is going to be interesting.
 

InMotion

Commander
Joined
Nov 3, 2011
Messages
2,080
Re: 1964 Starcraft Jet - Rebuild

Is BC a foreign country? For you anyway. :) What do they do, cover the box with stamps?

Golden stamps I think... :) I should have hired a donkey to bring it back... it would have been quicker and cheaper.

J.
 

InMotion

Commander
Joined
Nov 3, 2011
Messages
2,080
Re: 1964 Starcraft Jet - Rebuild

Tongue and groove cedar, woah. That will be sweet. 3 coats of spar varnish, can I talk you into two coats of epoxy first, then spar? That's how I did the Sea Scamp seats. Looked fantastic! Epoxy seals and spar gives UV protection.

This is going to be interesting.

I hear ya BD! My boats are either covered or in use. What little water they do see in side just flows/runs to the back and is pumped out or drys up. I checked out the Jup a couple of weeks ago and it looks brand new. If it is exposed more often than not... fur sure epoxy/spar is the way to go. I just figure with 3 to 4 coats that gives a decent seal and a nice hard surface one it cures up. But this is a really debated topic I know!!! My preference for this boat is to got he vinyl... but hey if it is going to cost $500+ forgetaboutit! It'll be a cedar floor.

Now... the Falcon --- it's going to have a cedar strip bow and gunwale tops! I should note that the existing metal gunwales will be staying in place for structural reasons. I am looking forward to how that turns out as well!

J.
 

dozerII

Admiral
Joined
Oct 25, 2009
Messages
6,527
Re: 1964 Starcraft Jet - Rebuild

Jim give outdoorfabricscanada.com a try they have Nautalex for the same price and they are in your back yard.
 

InMotion

Commander
Joined
Nov 3, 2011
Messages
2,080
Re: 1964 Starcraft Jet - Rebuild

Thanks Glen! I completely forgot about those guys! I have given these guys until Monday morning --- so if there is no answer by Monday morning... then I will give these guys a call and pick it up on the weekend.

Progress this morn.:

3/8" give or take --- ready to roll... for the dash pad and seat top pad


Got all but 4 bolts of the transom in place...


Also cleanup the garage a bunch --- it was getting out of hand...

So... gotta do so work for work this morn... then got mother's day here this aft... so hmmmm thinkin' I prolly won't get back to it until a "little later"! Gotta take care of the mom's!!

We'll see if I can steal away for an hour or so to putter...

Have a great day fella's.

Jim
 
Top