1978 River Ox Restoration Project

saginawbayboater

Senior Chief Petty Officer
Joined
Mar 8, 2012
Messages
677
Re: Staring at this vessel in my yard... Is she worth fixing?

Re: Staring at this vessel in my yard... Is she worth fixing?

WoG,
Thats close to what I used, only not as much cabosil "fumed silica". And GT, Thanks for the praises! It honestly has turned out a lot better than I anticipated when I started.

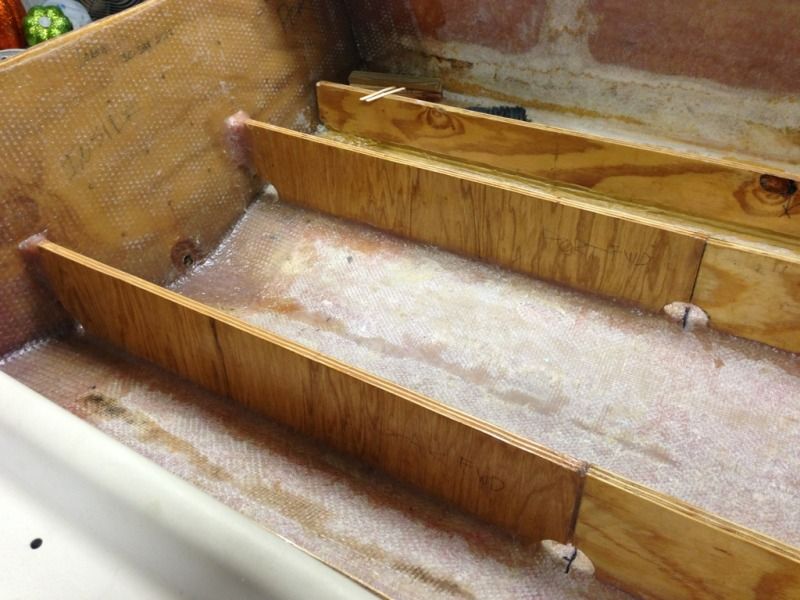
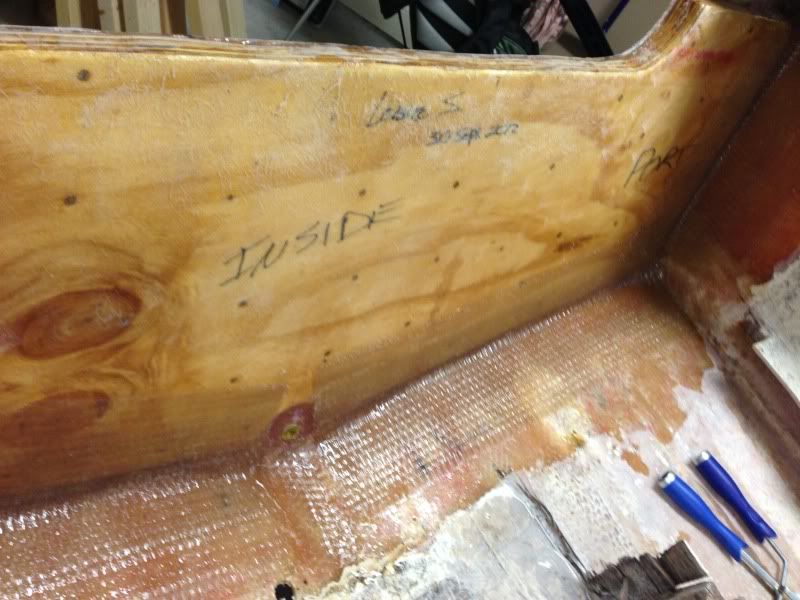
So last night I was able to get the transom tabbed in. It came out great! I used to layers of 24 oz. stitch mat with resin mixed at 1%. Gave me a decent working time and helped fight the cooler temps throughout the night. When I checked this morning, I was please with how much it had cured.
I am curious now... is it "absolutely" necessary to put an entire layer over the transom to skin it? Just curious, I didn't want to go through that much resin if not necessary. But I don't really want to undercut anything either... especially since I have put so much into it so far. Ehh... 98% sure I am just going to skin it, just still curious if it is absolutely necessary though...

Well here are a few pics after both layers of stitch mat were applied.

5A63B549-94FA-4DAF-B88E-6BEAA288AB6A-15876-000007CECA1DBC11.jpg


76386CB4-C150-4AED-8EA7-E644C9BB110D-15876-000007CED0D25D56.jpg


0066C1A9-00B1-4420-BD2E-0ED870A95891-15876-000007CED5F8013A.jpg


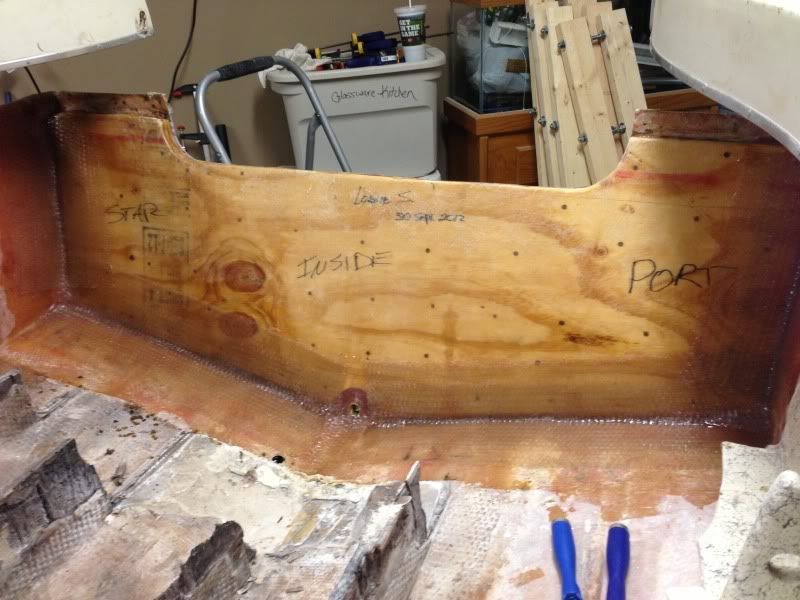
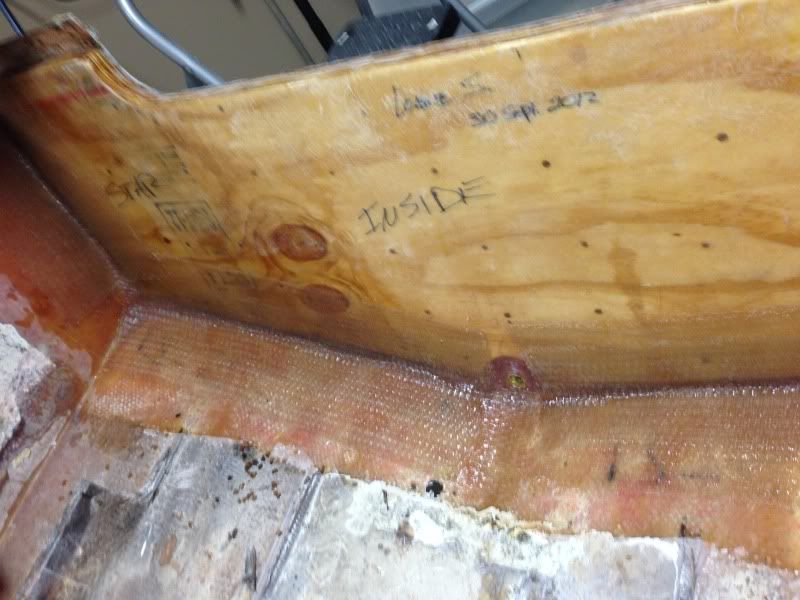
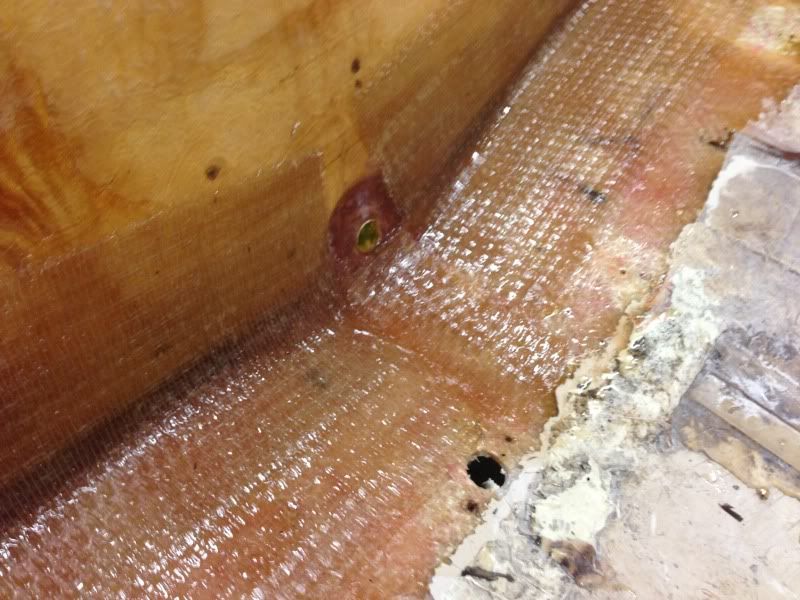
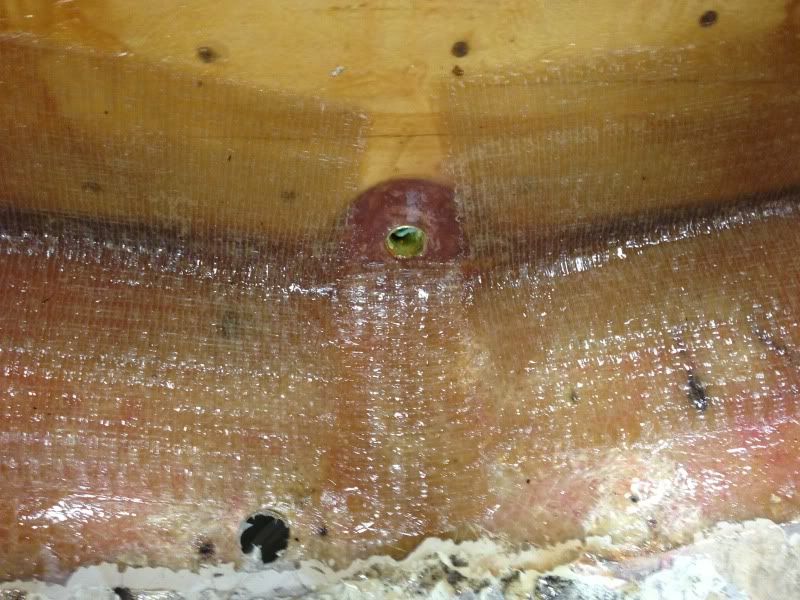
I cut out and applied a small strip of the stitch mat to strengthen the area underneath the drain plug a little. That area has worn quite extensively and I wanted to give it a little more thickness.

687335D3-F81F-4BD5-93F0-CB42C3F50456-15876-000007CEDA995103.jpg


BC57C0A7-B307-40B8-AE78-F4DE132DE9CE-15876-000007CEE1236743.jpg


So I finally feel that I have made outstanding progress, and am really motivated to get more done before the weather cools off too much this year.

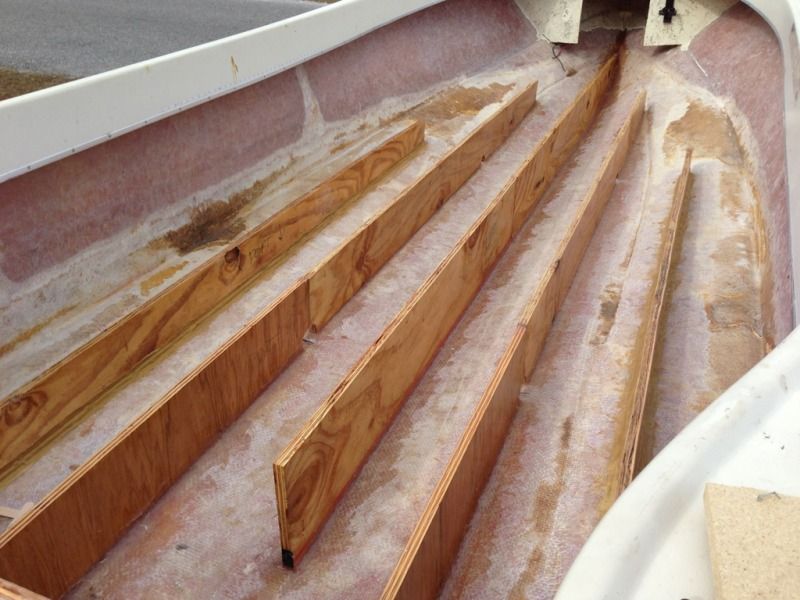
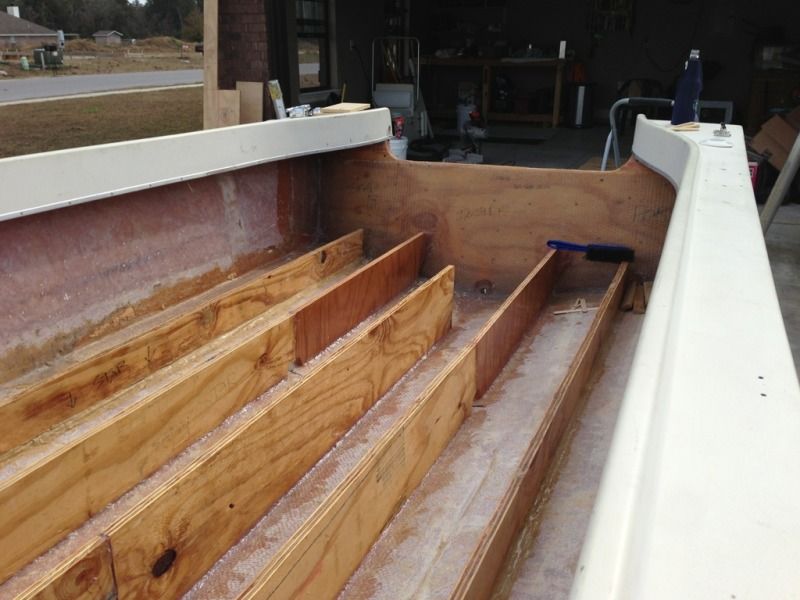
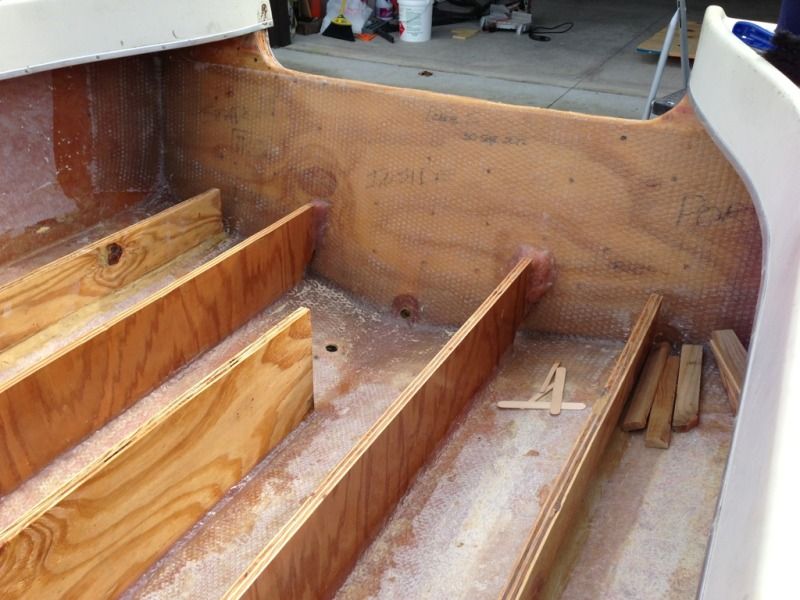
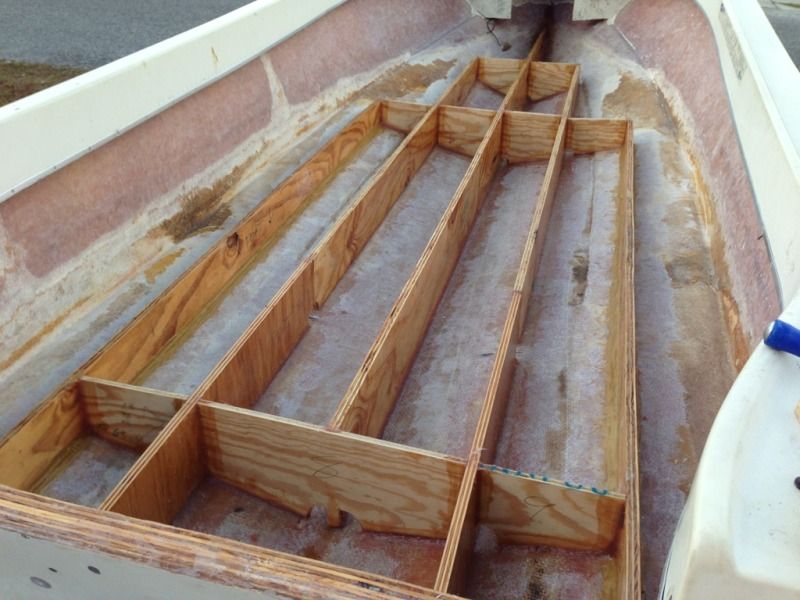
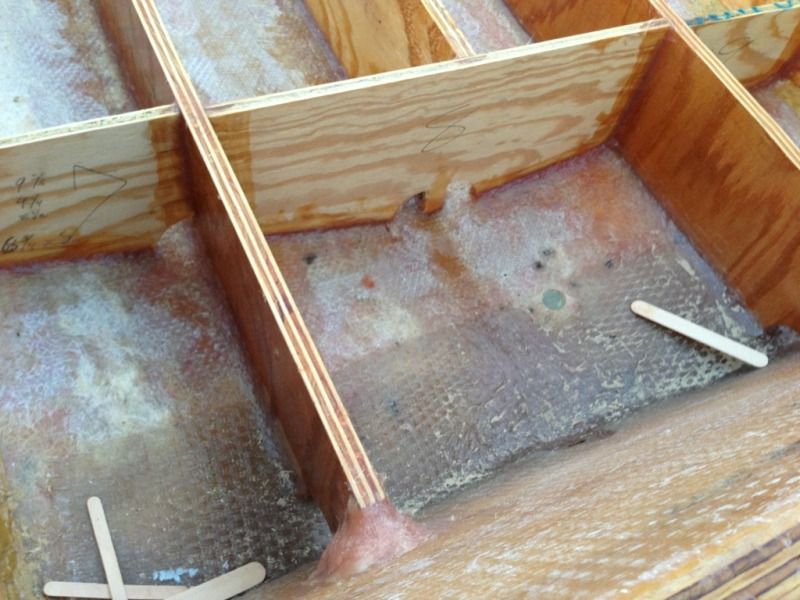
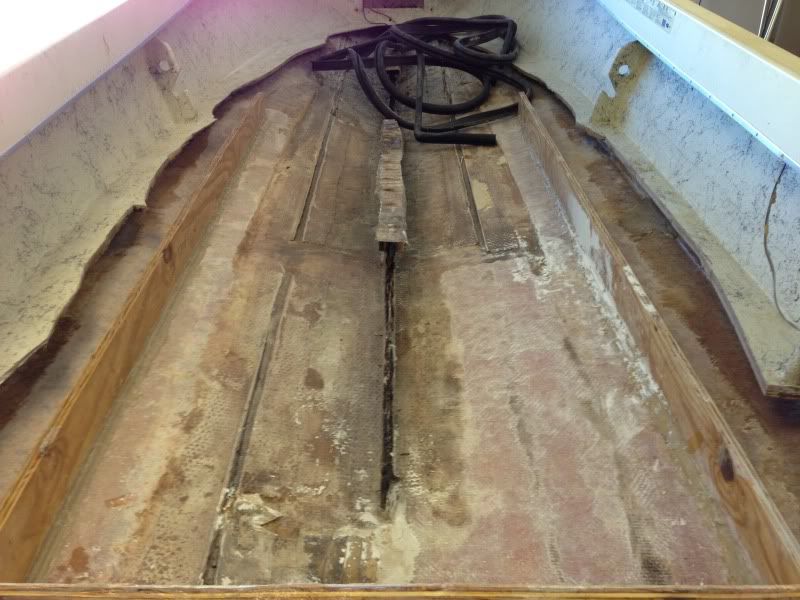
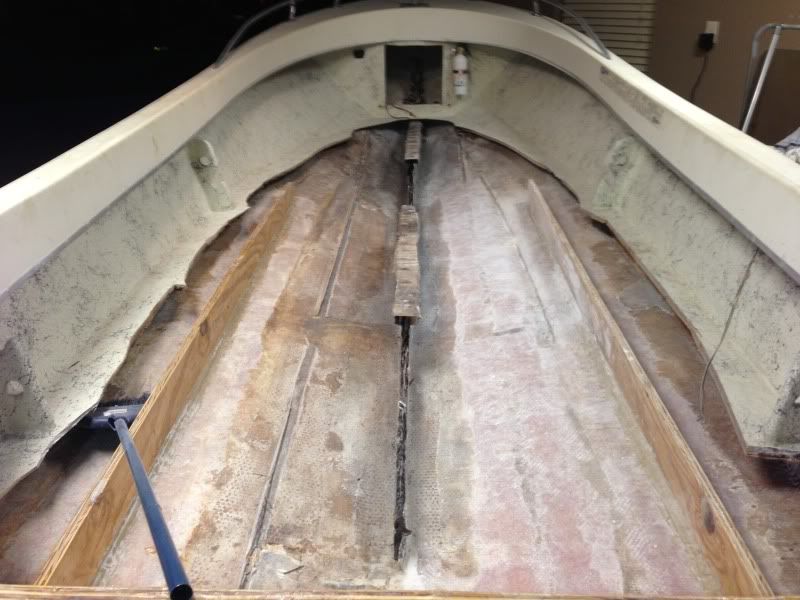
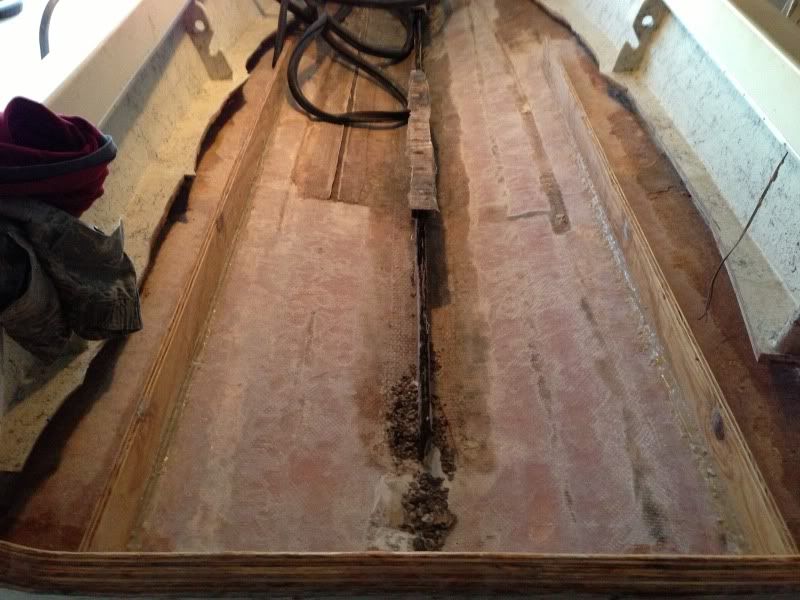
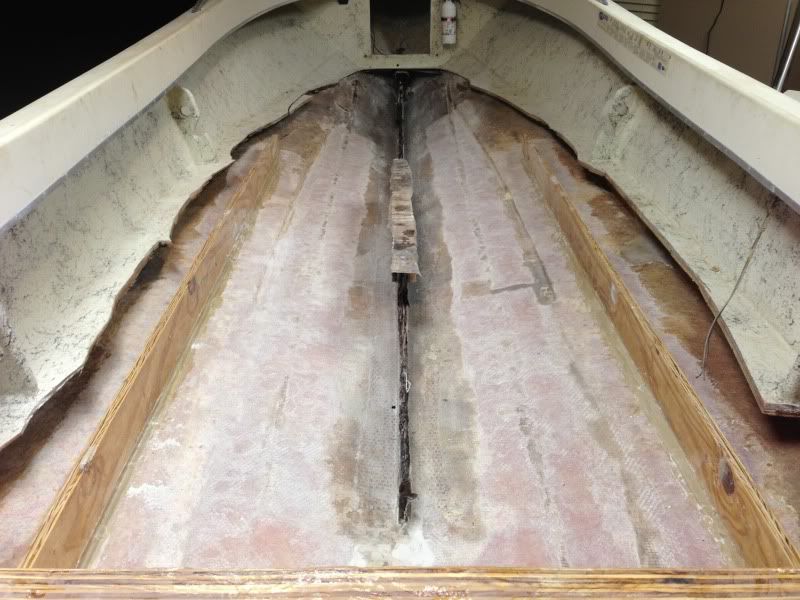
I have thought a little more about the stringers and I am going to go with 3/4 inch exterior grade plywood... it seems as though that is what was in there, even though I thought it was 1/2 inch at first. Is it possible that it was 1/2" and just swelled excessively from the water saturation? If so, is it a good idea to go back to 1/2" ply? Also, I cannot purchase a plywood sheet long enough to run the length of the boat, so what would the experts prefer the method be to connect two pieces together to form the full length stringer? I don't have any specialized wood working tools, so the simplest of methods are preferred in this situation... Thanks for the input!

Looking good GF!
 

gatorfan6908

Petty Officer 2nd Class
Joined
May 17, 2010
Messages
149
Re: Staring at this vessel in my yard... Is she worth fixing?

Re: Staring at this vessel in my yard... Is she worth fixing?

WoG,
Two layers of the 1708 tabbing. Overlapping by 4 inches. Plan on putting a full layer of CSM on here soon. What do you think?
 

gatorfan6908

Petty Officer 2nd Class
Joined
May 17, 2010
Messages
149
Re: 1978 River Ox Restoration Project

Just a few more grinding pics... Lemme know what you think...

9A01DA3D-4092-4620-BA05-B680D71DD731-1779-00000090963E22F4.jpg


88FC6112-BC37-495A-A7FA-1A9C3223698E-1779-00000090A63DFB84.jpg


322EE58D-76B6-4396-BD18-2F9BEBE36F91-1779-00000090C26C1AFD.jpg


89FE239C-9F00-4E7C-89E6-B9671EF64EAF-1779-00000090C8218D03.jpg
 

saginawbayboater

Senior Chief Petty Officer
Joined
Mar 8, 2012
Messages
677
Re: 1978 River Ox Restoration Project

GF the grinding looks great! The outer stringers look super. Keep up the good work.
 

nrasnake

Seaman
Joined
Aug 13, 2012
Messages
62
Re: 1978 River Ox Restoration Project

Looking great! On my stringer sections I cut down halfway, then cut along the stringer length for several inches, and then cut straight down the rest of the way ( like a stair step). This increases your surface area when gluing the new piece in. On top of that you can make cross cuts on the edges to further increase the surface area and give the glue a place to go when you mate the two pieces together. One step further would be to also drill holes in the step surfaces for 1/8" wood dowles, but that gets tricky and may be overkill. That may work for joining your stringer sections.
Good luck!
 

gatorfan6908

Petty Officer 2nd Class
Joined
May 17, 2010
Messages
149
Re: 1978 River Ox Restoration Project

Thanks man! Still have a lot of grinding left to do. The stringers in there now are just glued in, no glass yet. That will be coming later. After I get these three stringers in, I am going to grind out the rest of the lip for the deck. Still have a LOOOOOOONNNNNNGGG way to go... but I am trying to stay motivated!
 

Woodonglass

Supreme Mariner
Joined
Dec 29, 2009
Messages
25,929
Re: Staring at this vessel in my yard... Is she worth fixing?

Re: Staring at this vessel in my yard... Is she worth fixing?

WoG,
Two layers of the 1708 tabbing. Overlapping by 4 inches. Plan on putting a full layer of CSM on here soon. What do you think?
It needs one full layer of 1708 and then it's up to you if you want to use a final layer of CSM to hide the texture of the 1708. The layer of CSM will add a little extra strength but not much. You DO need the layer of 1708 for strength.
 

gatorfan6908

Petty Officer 2nd Class
Joined
May 17, 2010
Messages
149
Re: 1978 River Ox Restoration Project

WoG,
I was wondering, is this full layer going to overlap the transom tabbing and lay up directly on the hull? Or should I just have it go 3-4 inches over the tabbing on the transom itself? I have close to 50oz of tabbing on the transom so far and I don't assume I will need more, just curious though. Thanks for the help!!
 

Woodonglass

Supreme Mariner
Joined
Dec 29, 2009
Messages
25,929
Re: 1978 River Ox Restoration Project

It should extend about 3" past the tabbing.
 

gatorfan6908

Petty Officer 2nd Class
Joined
May 17, 2010
Messages
149
Re: 1978 River Ox Restoration Project

sooooo... been a while since I have posted on my progress. I have officially gotten all of the grinding done and nearly all of the stringers installed with PB. No pics but I will post some soon. Now I have to make all of the bulkheads to run in between the stringers and get them installed with PB as well. I started on a list finally, since I feel that I am close enough now to start checking things off. I am now trying to figure out my foam plan... I really can't seem to get my head around what to buy. Such a big purchase, I really don't want to make a mistake and waste some money...

Does anyone have a recommendation for brands of foam and/or merchants to purchase from? West Marine and the other shops around here don't offer it without giving up your first born... Any input is appreciated!!! Same goes for Gel coat as well if anyone has any input.

Thanks!
 

jigngrub

Fleet Admiral
Joined
Mar 19, 2011
Messages
8,155
Re: 1978 River Ox Restoration Project

USComposites has good prices and service, and they're in Fla.

Urethane Foam , Expanding Marine Polyurethane Foam

They also have everything else you may need.

What is the max weight capacity for your boat? It's a good way to judge how much you'll need.

16 cubic feet of 2 pound density foam will float about 960 lbs. if you install it at optimum temps for expansion.

About $160 with shipping included.
 

chriscraft254

Commander
Joined
Jun 4, 2011
Messages
2,445
Re: 1978 River Ox Restoration Project

Hey man, just got through reading through your thread. Transom looks great. Being the former owner of a few center consoles and offshore riggs, I can say, you have a lot to think about before you get into foam.

Fuel tank location.
Splash well or no splash well.
Battery locations.
Live well in deck or no live wells in deck.
Location of wiring channel and cable channel.

The pvc you saw beneath the deck is a normal application for center consoles. The one thing I would change for sure is not too run the cables out to a splash well like it was before. I would run a 5 inch pvc pipe with a 90 degree return up to where it will be under the center console. If you angle the pipe to the starboard side it well give you good access for cables to the motor. It really depends on the layout you plan for the stern. Any storage boxes or platform going in the stern?

You should start planning your plumbing route before you put in any more stringers. Anyway, if you run the pvc it can be cut through the stringers but then has to be beded in to the stringers with pb and fiberglass. Fiberglass adheres very well to pvc. I would atleast tab the pipe in in multiple locations and get all your plumbing and the above stuff decided on before foam goes in.
 

chriscraft254

Commander
Joined
Jun 4, 2011
Messages
2,445
Re: 1978 River Ox Restoration Project

One last thing, question, when you had this boat in the water, how and where did it self bail? What I mean by that is how well did it self bail. If it had problems before with self bailing quikly, change that by adding larger drains during you rebuild and some even raise the stringers or shim the deck as to provide a little more drainage height and angle. Also its a good idea to put a drainage channel under the foam that leads to a bilge box in the stern where you can mount 1 or 2 bilge pumps. Just a thought. Nice boat by the way. :)
 

ahmincha

Lieutenant Commander
Joined
Jul 21, 2012
Messages
1,512
Re: 1978 River Ox Restoration Project

Nice work gatorfan6908 also nice boat. On my cc there were 2 4" pvc pipes from console to rear of boat Under the console they used 45s
 

gatorfan6908

Petty Officer 2nd Class
Joined
May 17, 2010
Messages
149
Re: 1978 River Ox Restoration Project

Jigngrub,
I placed the order this week. Foam and Gelcoat should be in on Thursday since I am here in Florida. Total came out to be $427 after an $80 shipping charge… two cases; one with 5 gal of gelcoat and the other with 4 gal of foam. The gelcoat had a $25 hazmat charge since it was 5 gal. Your estimate for the foam price was right on though. Hated to place that order, but now I feel better that I have it out of the way. Not so sure exactly what the weight capacity is of the boat, but I want to say somewhere around 850lbs. The tag is 35 years old and most of the ink has been faded/worn off. Something about 850 rings a bell though.
Chriscraft254,
Thanks for the compliments. Thanks for the pointers you provided… those types of thoughts always help jog your memory and maybe notice something you forgot. As far as your points, here are my responses:
Fuel tank location- This will be under the console. I have the above deck tank that was on the boat before I started the rebuild. I don’t have much space to work with below, so I am going to leave this as is.
Splash well- I am assuming by this you mean the bilge in the stern of the boat by the drain plug and where the bilge and livewell pump will be located. I have this framed out now, as all of the stringers/bulkheads have been installed with PB resin and ready to be glassed.
The battery location will be on the deck close to the port/stern. This is another location where it was prior to the rebuild, and I see no different way of putting it there now.
The livewell is actually doubling as the seat. The lid on the seat opens up to the livewell, and that seems like the best place to keep it.
The wiring channel will be two separate PVC conduits running from under the console straight to the stern part of the deck between the bilge and the livewell. One will be for electronics and the other will be for the fuel, steering, and throttle/shifter cables. I will have the electronics coming up through an elbow underneath the console, similar to a kitchen sink configuration only upside down. The steering and fuel lines will not use this configuration, as the Teleflex cable will not bend like that. They will run straight through the back to the stern part of the deck. I will be figuring out the exact measurements and runs after I rough out the deck. I am thinking that once the pipe and deck have been installed, the foam itself will hold it in place under the deck and I will not require any bedding with PB.
For self-bailing, I have weep holes at multiple points throughout the stringers/bulkheads to allow water to drain down to the keel stringer and go straight back to the bilge to be bailed out by the pump. For the drainage channel, I am looking to do something similar to Fricoboater’s and use some old wrapping paper cardboard glued down to give the right shape for adequate drainage. I have a 600gph bilge pump I will be installing to assist with the bailing.
I have a lot of photos to upload which will give a better idea of what I am working with so far. You can look for them either today or tonight. I am going to do a float test to make sure that there are no leaks in the hull… as before the rebuild, there were ample amounts of water draining to the bilge constantly. Hopefully I will not find any leaks, but who knows! Anyways, thanks for all of the great tips everyone! Thanks ahmincha, I am going to do something similar for my configuration.
My biggest question at this point is what thickness to use for the deck plywood. I am thinking ?” will be sufficient after all of the fiberglass layers are added. If anyone has any input on that, I would appreciate it. I am just looking to save a little bit of weight wherever I can, I’m not exactly sure if I am going to be heavy or not, but I have only added back in what was taken out.
 

jigngrub

Fleet Admiral
Joined
Mar 19, 2011
Messages
8,155
Re: 1978 River Ox Restoration Project

My biggest question at this point is what thickness to use for the deck plywood. I am thinking ?? will be sufficient after all of the fiberglass layers are added. If anyone has any input on that, I would appreciate it. I am just looking to save a little bit of weight wherever I can, I?m not exactly sure if I am going to be heavy or not, but I have only added back in what was taken out.

3/4" decking will be your best bet. Anything that needs to be bolted or screwed to the deck will be more secure fastening it to 3/4" rather than 1/2". Your boat will also be stronger overall.

The weight difference between a sheet of 3/4" and 1/2" is 25 lbs.. Plywood is 25 lbs. per 1/4" thickness for a 4x8 sheet.

The amount of waterlogged foam and wood you removed from your boat will more than make up for the additional weight of the 3/4" plywood, your boat will still be lighter with the 3/4" ply than it was with the wet foam and wood.
 

gatorfan6908

Petty Officer 2nd Class
Joined
May 17, 2010
Messages
149
Re: 1978 River Ox Restoration Project

Well that is an awesome piece of information to have. I truly appreciate that! At least now my worries can be gone and I will just go with 3/4 ply. Going to be a little bit more pricey, but at this point I am not going to skimp on anything.

Here are a few pics of what is done so far.
BBB30894-D6AE-4550-B916-B7E5A25AD930-7679-0000041F56BB3DC1.jpg


67B4AFAD-0DF4-4271-945A-EE2E3F672DEE-10375-000005506269E104.jpg


B5AEB34B-C8CD-4771-AE7F-AEB67340BEAB-10375-000005506E3E7B19.jpg


ACAABCFE-C891-4888-AAEB-C91AD10C4195-10375-00000550764F7999.jpg


4E77BD95-DCFB-430E-A320-069229799444-10375-0000055085AA9AFD.jpg


532B66E0-2677-40A6-8289-87B68F734D85-10375-00000550A8934663.jpg
 

jigngrub

Fleet Admiral
Joined
Mar 19, 2011
Messages
8,155
Re: 1978 River Ox Restoration Project

Lookin' real good!

You are going to glass those stringers and bulkheads in, aren't you?
 

gatorfan6908

Petty Officer 2nd Class
Joined
May 17, 2010
Messages
149
Re: 1978 River Ox Restoration Project

Oh yea.. .definitely. This was just my progress as of Saturday. I have another 5 gal of resin and the glass to make sure they don't ever come out of this boat. Thanks for the compliments!
 

jigngrub

Fleet Admiral
Joined
Mar 19, 2011
Messages
8,155
Re: 1978 River Ox Restoration Project

Sounds good.

Here's Woodonglass' detail for stringers if you aren't already familiar with it:
Stringers_zps840bac88.jpg

This is a minimum and you can add more plies if you want and have the time and material.
 
Top