1979 Champion Bass Boat - Tear Down and Restoration -- with PICS

Woodonglass

Supreme Mariner
Joined
Dec 29, 2009
Messages
25,929
Re: 1979 Champion Bass Boat - Tear Down and Restoration -- with PICS

I think you need to investigate what a "composed core" means. It's not "Composite" core. It is not what you defined.

This will give you the information. http://www.potlatchcorp.com/files/Downloads/Plywood/Potlatch_PrecisionCore.pdf
Just trying to make sure you have the right info. Composed core means that all the veneers are solid and not strips of wood with voids. If you want your Treated wood to be effective and not have the glass delam from it I'd really advise getting a moisture meter and not trusting to chance. The chemicals in that stuff and the moisture levels are extremely high. And it will warp a lot. Warping is mostly caused to an imbalance of moisture levels in the various laminations of the wood. During your drying process you should be continually flipping the ply to try to ensure it drys at a consistent level on both sides. Been dealing with plywood for a long time. But it's your boat and your project. Just giving my point of view based on experience. Not trying to be argumentative.
 

GT1000000

Rear Admiral
Joined
Jul 13, 2011
Messages
4,916
Re: 1979 Champion Bass Boat - Tear Down and Restoration -- with PICS

Howdy DHag,

Had been sort of perusing your thread and finally read it all the way through...

First off, Kudos on reviving an old Basser, very cool looking hull design...kinda reminds me somewhat of my Glasstream..."boat-tail" transom and all...

Second, doing a great job so far

Third, thanks for sharing...I'll be tagging along to watch, learn and cheer...

Best Regards,
GT1M
 

DHag

Petty Officer 2nd Class
Joined
May 29, 2007
Messages
166
Re: 1979 Champion Bass Boat - Tear Down and Restoration -- with PICS

But that's not AP. It's "Potlatch." Same thing, different company?
During your drying process you should be continually flipping the ply to try to ensure it drys at a consistent level on both sides. Been dealing with plywood for a long time. But it's your boat and your project. Just giving my point of view based on experience. Not trying to be argumentative.
And I appreciate 'cha.

In my drying process, I am keeping the sheet under constant pressure on top of a flat steel grate.Every 12 hours I am inspecting the corners for bend, and I lay a straightedge across it at multiple angles to check for warp. If I detect any (haven't yet), I will reset it and weight/clamp it as needed. Otherwise, I flip it over and rotate it 1/4 turn every 12 hours, and weigh it every 24 hours.

I've been messing with plywood pretty much my whole life, although primarily in construction and cabinetry. My grandfather was a carpenter and cabinet maker who started me young. I have to admit, though, that for boats it's a new world.

I don't know anybody with a moisture meter for wood, and they are definitely outside of my budget for single project use. So I'm working with the weight. I got information directly from APA, "The Engineered Wood Association" as to the specs for the "dry" version of the plywood I bought. They specify that the weight at 16% moisture should be 2.2 pounds per square foot for this 3/4" CCX plywood. That's 35.2 pounds for the half sheet. I'm following an adaptation of drying procedures that I learned in taking my Chemistry degree. Using weight measurement, and trusting that this plywood (from a major US supplier) is made to APA specs, I can calculate the moisture content of the wood.

Moisture level between 16% and 19% are "acceptable" according to the APA documentation, which calculates to 5.63-6.69 pounds of water. That makes my "ideal target weight" for drying is 35.2-36.3 pounds. I had stated that I would be happy at 40 pounds, but I'll probably revise that goal to 36 pounds. I want to be sure that the resin and adhesive both will penetrate and seal properly.
 

DHag

Petty Officer 2nd Class
Joined
May 29, 2007
Messages
166
Re: 1979 Champion Bass Boat - Tear Down and Restoration -- with PICS

Howdy DHag,
Kudos on reviving an old Basser, very cool looking hull design...kinda reminds me somewhat of my Glasstream..."boat-tail" transom and all...
Howdy back! I hope to do a good job. I'll share success and failure alike, though I hope to avoid failures from all the good stuff that's already on these forums. Learn from the other guys' mistakes.

I didn't realize when I bought this boat that it was somehow something special, being a first-generation Champion. I've had other bassers come up to me and ask about it, and tell me what great boats they are. I've had others who never heard of them, too. Anyway, I got into the history of them on Bass Boat Magazine's forums. There's a guy on there who's father and grandfather both worked for Champion boats in the beginning.

Showed me video of something they call a "breach stop," and they claim that very few boats can do it. Some claim only a Champion can do it, but I don't know for sure. Anyway, it's a hard left-turn maneuver that takes the boat from 50 mph to dead stop in about three boat lengths. He told me that it's a blast when you're driving, and scares the livin' crap outta ya when you're the passenger. There's an old Champion marketing video he pointed me at, "Champions Running Wild:" http://video.google.com/videoplay?docid=7936934448712280602. They show the breach stop at the 1:30 time mark.

Anyway, the best thing he told me was this boat should be good for 63 mph minimum with the 150 Mercury that I have, especially since mine will be lighter than original. I'm going to use foam for my stringer cores instead of wood. Good enough for new boats. Good enough for my rebuild.
 

GT1000000

Rear Admiral
Joined
Jul 13, 2011
Messages
4,916
Re: 1979 Champion Bass Boat - Tear Down and Restoration -- with PICS

That's one cool video on the Champion...love the "Breach Stop"...although I don't think I currently would have the cohonees to try it...LOL...mine used to do 'bout 50 MPH, with soft transom, rotted stringers, waterlogged foam, and and a Merc Tower of Power running at about 60-70 % of its potential...while mine ain't gonna be that much lighter, maybe a 100-200 pounds less than before, and the engine is getting a fresh overhaul with rebuilt carbs, so I'm hoping to at least break 55 MPH...good enough for the Florida Canals that I usually run in...

Have Fun!
GT
 

vcaptain

Petty Officer 1st Class
Joined
Jan 15, 2012
Messages
263
Re: 1979 Champion Bass Boat - Tear Down and Restoration -- with PICS

"Champions Running Wild:" http://video.google.com/videoplay?docid=7936934448712280602. They show the breach stop at the 1:30 time mark.

Anyway, the best thing he told me was this boat should be good for 63 mph minimum with the 150 Mercury that I have, especially since mine will be lighter than original. I'm going to use foam for my stringer cores instead of wood. Good enough for new boats. Good enough for my rebuild.

Awesome video! What kind of foam do you use for stringers? All I read is wood.wood.wood.
 

DHag

Petty Officer 2nd Class
Joined
May 29, 2007
Messages
166
Re: 1979 Champion Bass Boat - Tear Down and Restoration -- with PICS

...mine used to do 'bout 50 MPH, with soft transom, rotted stringers, waterlogged foam, and and a Merc Tower of Power running at about 60-70 % of its potential...
My motor is the V-1500 V6 Mercury. When I bought mine, the motor was basically strong, though I had to have the prop shaft straightened. So I rebuilt the whole bottom end, new pump impeller. I ended up replacing the ignition boxes and rebuilding the carbs trying to get it to idle right. (Now I know it needs new reeds.) Thermostats were shot. I put new head gaskets on it just for good measure.

The best speed I got out of it with the damaged Hoss prop was 51 mph on GPS. I didn't realize it was slowly gaining weight from its slow leaks and with the tired flotation and rotted stringers. I just know its speed gradually went down month by month, though the motor was running strong as ever.
 

DHag

Petty Officer 2nd Class
Joined
May 29, 2007
Messages
166
Re: 1979 Champion Bass Boat - Tear Down and Restoration -- with PICS

Awesome video! What kind of foam do you use for stringers? All I read is wood.wood.wood.
Urethane/Polyurethane foam, or any closed-cell foam that will not melt when exposed to fiberglass resin.

I did a lot of studying up on what wood to use for the stringers. Then I read about using balsa wood. Balsa? Not much strength there. Then I found a video on "how to rebuild boat stringers" from a boat builder in Florida somewhere. They were using pre-fab foam stringers from "Creative Foam Products." (http://boatstringers.net/). When I saw how those were made, I knew I could do the same from scratch.

Research showed me that the strength of the stringer has nothing to do with the core material, and everything to do with the quality of your workmanship with the fiberglass. All the strength of the stringer is in the glass. The wood/foam/whatever you use for the cores is just to act as a mold for the glass.

"Woodonglass" has a great instruction on how to lay up the fiberglass the right way. He and I have just disagreed some on the wood to use, but I guarantee I will follow his fiberglass layup instructions to the letter! (http://forums.iboats.com/showthread.php?t=384982&page=25&p=3586813#post3586813)
 

vcaptain

Petty Officer 1st Class
Joined
Jan 15, 2012
Messages
263
Re: 1979 Champion Bass Boat - Tear Down and Restoration -- with PICS

Urethane/Polyurethane foam, or any closed-cell foam that will not melt when exposed to fiberglass resin.

I did a lot of studying up on what wood to use for the stringers. Then I read about using balsa wood. Balsa? Not much strength there. Then I found a video on "how to rebuild boat stringers" from a boat builder in Florida somewhere. They were using pre-fab foam stringers from "Creative Foam Products." (http://boatstringers.net/). When I saw how those were made, I knew I could do the same from scratch.

Research showed me that the strength of the stringer has nothing to do with the core material, and everything to do with the quality of your workmanship with the fiberglass. All the strength of the stringer is in the glass. The wood/foam/whatever you use for the cores is just to act as a mold for the glass.

"Woodonglass" has a great instruction on how to lay up the fiberglass the right way. He and I have just disagreed some on the wood to use, but I guarantee I will follow his fiberglass layup instructions to the letter! (http://forums.iboats.com/showthread.php?t=384982&page=25&p=3586813#post3586813)

I printed those stringer and transom diagrams and taped them up day 1, great information on his thread.
 

DHag

Petty Officer 2nd Class
Joined
May 29, 2007
Messages
166
Re: 1979 Champion Bass Boat - Tear Down and Restoration -- with PICS

Wood drying progress:

Day 2 - 40 pounds!


That's a total weight loss of 9 pounds. 1.1 gallons of water.

I had left the garage door closed today because it was windy. Well, apparently leaving the garage door closed keeps the wood warmer overall. Just 4 or 5 more pounds, and we're ready to do the next step.

It may actually be possible to get it down to the APA "standard" dry weight of 2.2 pounds per square inch, or 35.2 pounds for this half-sheet.
 

Woodonglass

Supreme Mariner
Joined
Dec 29, 2009
Messages
25,929
Re: 1979 Champion Bass Boat - Tear Down and Restoration -- with PICS

But that's not AP. It's "Potlatch." Same thing, different company?


Yep I was just using this site to explain and show you what "Composed Core" means. It is Nothing like particle board. Its the best method for making quality plywood.
 

Seasonally.boating.jon

Petty Officer 1st Class
Joined
Jul 10, 2011
Messages
283
Re: 1979 Champion Bass Boat - Tear Down and Restoration -- with PICS

Sweet video Dhag.
About the wood issue, that is what this forum is for. People have done all kinds of rebuilds with different methods. Your going about your build the right way. Do some research on wood or what have ya, then make decisions. If you think it will work then go for it. (aslong as it isn't ridiculous like some have posted, like running stringers acrossed like beams:eek: and it has been posted with pics)LMAO

If you want to save money, the rustoleum paint job from Woodonglass is a must read. I'm going that route.
 

DHag

Petty Officer 2nd Class
Joined
May 29, 2007
Messages
166
Re: 1979 Champion Bass Boat - Tear Down and Restoration -- with PICS

Wood Drying COMPLETED, Day 4:

36.25 pounds


Since it's now Sunday afternoon and I have more time than I will any evening after work this week, it's now time to cut it in half and glue the two halves together to make a 1-1/2" transom piece.
 

vcaptain

Petty Officer 1st Class
Joined
Jan 15, 2012
Messages
263
Re: 1979 Champion Bass Boat - Tear Down and Restoration -- with PICS

Wood Drying COMPLETED, Day 4:

36.25 pounds


Since it's now Sunday afternoon and I have more time than I will any evening after work this week, it's now time to cut it in half and glue the two halves together to make a 1-1/2" transom piece.

YES, lets see some pics!
 

DHag

Petty Officer 2nd Class
Joined
May 29, 2007
Messages
166
Re: 1979 Champion Bass Boat - Tear Down and Restoration -- with PICS

I'll probably put more detail in the transom stuff than is necessary, but I'll not assume that all my readers are familiar with any step.

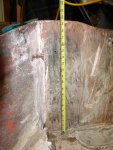
The transom space in the hull is 19-1/2" inches high. There may still be some material to clean out at the bottom, but my plywood will be 24" inches wide after first cut. Plenty to play with.

01-DSC05819.JPG

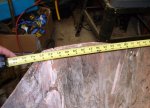
The transom space is 43 inches wide. Note that the 43 inch mark on the tape is not lined up with the corner. That's because the rear of this boat is tapered, and the transom is actually wider at the front than at the the back. This 43 inches is measured 1-1/2 inches out from the back shell of the transom.

02-DSC05820.JPG

Again, the plywood is 48 inches wide, so I will have plenty of material to play with as I fit the plywood for a good, close fit in the hull shell.
 

DHag

Petty Officer 2nd Class
Joined
May 29, 2007
Messages
166
Re: 1979 Champion Bass Boat - Tear Down and Restoration -- with PICS

Cutting the sheet into two.

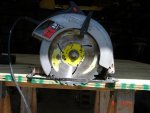
There are different ways I could cut this. I could use my table saw if I needed a really precise cut. Or I could clamp a guide bar on the plywood and slide my circular saw along it. But this cut need not be really precise, as it's just for gluing the two halves together. So I just went for the "measure half the width, draw a line, and follow the line best you can" method with the circular saw.

I'm laying the plywood on a pair of wood saw horses, and cutting perpendicular to the horses' crossbars. I don't want to cut the saw horses. So I set the blade depth on the saw to just clear the thickness of the plywood.

03-DSC05821.JPG

Then it's just a matter of following the line. To match the two halves as closely as possible, I'm centering the blade right down the middle of the cut line.

04-DSC05822.JPG
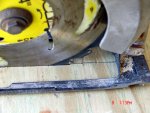
To cut straight, don't try to watch the blade following the line. You'll go crooked every time. Instead, use the cutting guide on the front of the saw's foot plate.

Sorry this picture's out of focus. To cut down the center of the line, line it up with the "0" mark on the plate, as in this photo. To go down the left edge of the line, line up with the edge of the notch. To go down the right edge, line up with the mark next to the "0."

1-DSC05823.JPG
 

DHag

Petty Officer 2nd Class
Joined
May 29, 2007
Messages
166
Re: 1979 Champion Bass Boat - Tear Down and Restoration -- with PICS

Choosing the working sides

Here are the two halves of the plywood, with the "bad" sides up. They are "bad" because all those big knots are actually voids in the surface. The other sides look similar, but the knots are all intact, and there are no real voids on that sides. These are the surfaces that will be mated together.

05-DSC05824.JPG

Here are the two pieces laid on top of each other, "bad" sides up. As you can see, I did end up with a slight warp. Fortunately, they are warped apart at the edges. When the top piece is flipped over, the gap will be in the center. When glued and clamped, the whole faces of the boards will be pressed together. If clamped flat, the result will be a single piece that is perfectly flat.

06-DSC05825.JPG
 

DHag

Petty Officer 2nd Class
Joined
May 29, 2007
Messages
166
Re: 1979 Champion Bass Boat - Tear Down and Restoration -- with PICS

First thing to do is take care of those surface voids.

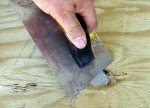
For adhesive, I'm using Loctite PL Premium Advanced Construction Adhesive. Instructions say that it can fill a gap up to 3/8" thick. These surface voids are only about 1/16" deep, so they're not a problem.

First, squeeze a goodly amount of the adhesive into the void.

07-DSC05826.JPG

I'm using a 3/16" notched trowel to spread the adhesive. The main thing here is to fill the void full of adhesive and level it off flat.

08-DSC05827.JPG

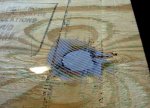
The finished patch. I did this on all the voids on the "bad" side of both pieces of plywood.

09-DSC05828.JPG
 

DHag

Petty Officer 2nd Class
Joined
May 29, 2007
Messages
166
Re: 1979 Champion Bass Boat - Tear Down and Restoration -- with PICS

Spreading the adhesive

The biggest mistake most people make with construction adhesive is using too much.

In construction for instance, when gluing foam insulation on a concrete basement wall, you just draw a series of S-curves with the glue on the insulation sheet, then press it into place. Using too much in one spot and none in another won't affect the job.

However, for this, the adhesive must be thin and even. The best tool to accomplish this is a notched trowel. I used a trowel with 3/16-inch notches. Why 3/16? 'Cuz that's what I had in my toolbox after using it to glue down some vinyl flooring in our bathroom a few months back.

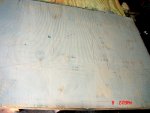
Here's my first guess at how much adhesive to apply. Obviously not enough once I started to spread it.

10-DSC05829.JPG

Here's the final result. This adhesive is real thick. Even at 70 degrees temperature, it was tough to spread. To get it done, I actually had to apply too much, then spread it. As I did the final scrapes with the trowel to get the right thickness, I just had to scrape the excess off on a scrap board, and throw it away. Overall, it took about 1-1/2 tubes of adhesive to cover this 1/4 sheet of plywood. Judging from how much I had to throw away, it actually took about 1-1/4 tubes, so I would have had to buy two tubes of adhesive, anyway.

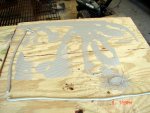
The adhesive is properly applied when the tips of the notches scrape the wood, leaving lines of adhesive in between. You should be able to see the wood surface, with definite lines of adhesive, like in this picture. See how the voids are filled, and flat as the rest of the board's surface.

11-DSC05830.JPG
 
Top