Michael.bovine
Seaman
- Joined
- Apr 26, 2015
- Messages
- 63
Thanks Tpenfield I'll look for a 3" cresent wrench. Think I'll be relplacing most all of the bellows since the boat was sitting for a long time.


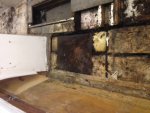
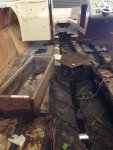
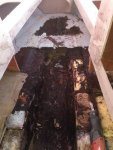
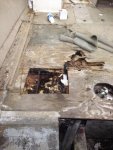
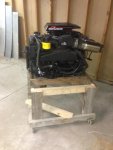
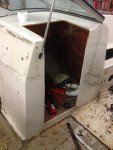
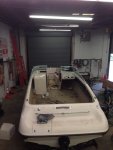
Here are some pics of where I am to date. Just have to remove the gimbal housing and start wood demo. Just have to decide about the motor mounts. They sound solid but I will be drilling holes I guess to test them. Transom also feels solid now that I can get to some exposed wood so I will be cutting the skin off it to give it a thorough check.
That is one rotted boat . . .
How does the fuel tank look in terms of pits or corrosion? Seems like it was sitting in water along the keel . . .
WOW!! It's almost like the boat ws submergerd for a long time. You have made very good progress.:thumb:

")