1999 Celebrity 190 - Engine Mount and Stringer Repair

GT1000000

Rear Admiral
Joined
Jul 13, 2011
Messages
4,916
Re: 1999 Celebrity 190 - Engine Mount and Stringer Repair

Just to clarify something...a question...???

Sanding the previous layer of gel is necessary only if it has cured ???...

Or, if it is applied as several coats all at once, while it is still wet/tacky... be OK???:confused:
 

glnbnz

Chief Petty Officer
Joined
Oct 4, 2011
Messages
458
Re: 1999 Celebrity 190 - Engine Mount and Stringer Repair

Yes definitely outstanding work done on your project!! Your glassing looks very Professional!! :)
 

Woodonglass

Supreme Mariner
Joined
Dec 29, 2009
Messages
25,929
Re: 1999 Celebrity 190 - Engine Mount and Stringer Repair

If you're going to be gelcoating over fresh resin there is NO need to apply wax to the final coat. It's preferred that you don't. Gelcoat is almost nothing more than heavily tinted polyester resin with some additional additives. Just like it's preferred to do wet on wet layups with resin it's best to apply gelcoat to a tacky resin layer with no wax additive. The Final Layer of gelcoat would get the wax or PVA to get the cured non tack surface.
 

bvetter

Petty Officer 1st Class
Joined
Jun 2, 2013
Messages
263
Re: 1999 Celebrity 190 - Engine Mount and Stringer Repair

10-4.

Thanks guys.
 

Decker83

Commander
Joined
Apr 5, 2011
Messages
2,593
Re: 1999 Celebrity 190 - Engine Mount and Stringer Repair

Just to clarify something...a question...???

Sanding the previous layer of gel is necessary only if it has cured ???...

Or, if it is applied as several coats all at once, while it is still wet/tacky... be OK???:confused:

GT1M, the only reason to sand between gel coat layers.. You have used wax in the gel and let it kick.. It would be the same as using poly resin with wax.. Always need to remove the wax before applying the next layer..
 

bvetter

Petty Officer 1st Class
Joined
Jun 2, 2013
Messages
263
Re: 1999 Celebrity 190 - Engine Mount and Stringer Repair

Fabricating the engine mounts and bilge stringers is proving a lot more challenging then I had hoped. There is a set of original stringers in the aft section of the boat that I had left in place because they were still in good shape, but in doing some measurements tonight I'm finding they don't run perfectly parallel to the centerline of the boat. :frusty: I was hoping to use them as reference marks for the new engine mounts, but that's now out the window. So, I spent a few hours today just marking up the transom and aft bulkhead with level and plumb marks for reference. Also started laminating plywood for the engine mounts. It's a slow process, will post pics tomorrow when I have something to show for it. ;)
 

glnbnz

Chief Petty Officer
Joined
Oct 4, 2011
Messages
458
Re: 1999 Celebrity 190 - Engine Mount and Stringer Repair

Oh yeah and one more thing...wax additive comes in a glass bottle for a reason LOL. It melts plastic!
 

bvetter

Petty Officer 1st Class
Joined
Jun 2, 2013
Messages
263
Re: 1999 Celebrity 190 - Engine Mount and Stringer Repair

Spent the whole afternoon today fabricating the engine mounts. It was a slow process with all the gluing/clamping/curing, had to bust out the heavy artillery for the first time on this project for the compound mitre cuts. I'll post some pics tomorrow after the clamps are removed. Hoping to get them bedded in tomorrow with any luck.

On another note, I'm getting ready to place my third, and hopefully final order of materials, and I'm looking for some advice on ingredients to make fairing compound. When I was prying the transom wood, I must have put way too much pressure on the skin in places, I noticed after it was out that I had tons of spider cracks in the gelcoat on the outside of the skin. They're only visible when light hits them a certain way, but I figure they might as well get repaired while the outdrive is off. In essence, the 2'x2' section where the outdrive is mounted will have to be sanded down to glass, then re-gelcoated. Also, while I'm at it, I might as well make the outside of the skin true and flat (if you'll remember, I had at worst a 1/16" deviation in flatness along the keyhole after the new transom was put in, it's within Mercruiser spec but none the less not perfect, and I'm a little OCD so I won't be able to sleep at night :facepalm:). So I plan on doing a little sanding, and a little filling with fairing compound.

Question:

From what I've read, fairing compound would be a mixture of resin, microballoons, and some cabosil. What I need to know is the ratios, give or take, so I can plan for my materials order this week. For example, lets say I'm using 1L or resin, would I use 1L of microballoons, and 250ml of cabosil to get the mayo consistency? It's likely a trial and error thing, but I'm looking for a rough idea so I can plan for my order.


Thanks for the help guys.
 

Woodonglass

Supreme Mariner
Joined
Dec 29, 2009
Messages
25,929
Re: 1999 Celebrity 190 - Engine Mount and Stringer Repair

If you're using Poly then you don't use Micro Ballons. Use Glass bubbles. You're ratio is pretty much correct. I'd order a bit more of the bubbles than you think you'll need. 5 qts is only $10 bucks. What Gelcoat are you using?
 

bvetter

Petty Officer 1st Class
Joined
Jun 2, 2013
Messages
263
Re: 1999 Celebrity 190 - Engine Mount and Stringer Repair

For glass bubbles, does Siscor Spheres sound right?

Siscor Spheres

I can also buy 3M K20 Microballoons (so they're called on the Composites Canada site), on the 3M site they're called glass bubbles.

http://www.compositescanada.com/product-catalog/resins/product/251-3m-microballoons-k20

Here's the link to the 3M site.

http://products3.3m.com/catalog/us/en001/mining/specialty_materials/node_VV616ZFF8Jbe/root_2WVWSHRWN8gv/vroot_XZCW0L1D4Qge/gvel_GSLG21C33Qgl/theme_us_mining_3_0/command_AbcPageHandler/output_html

Also, the gelcoat is an isophthalic type. Not sure if that was what you were wondering WOG. It is a waxed gelcoat, spraying type. Here is the link if that helps:

Gelcoat 822-Series
 
Last edited:

rwelts

Seaman Apprentice
Joined
Jun 21, 2010
Messages
34
Re: 1999 Celebrity 190 - Engine Mount and Stringer Repair

that section was totally gone on my celebrity 210. what i found was the drain on the locker (in my case a live well - but same concept) went about half way into the fuel bilge and stopped. so water pushed back and stayed near the tank and rotted out that section (in my case much much more but..). something to look for.
 

bvetter

Petty Officer 1st Class
Joined
Jun 2, 2013
Messages
263
Re: 1999 Celebrity 190 - Engine Mount and Stringer Repair

that section was totally gone on my celebrity 210. what i found was the drain on the locker (in my case a live well - but same concept) went about half way into the fuel bilge and stopped. so water pushed back and stayed near the tank and rotted out that section (in my case much much more but..). something to look for.

If I had to guess, 15% of my wood structure was rotten, 50% was wet or damp, and 90% is being replaced. 0% of the deck was compromised, but it's being replaced anyways. What the heck eh?
 

bvetter

Petty Officer 1st Class
Joined
Jun 2, 2013
Messages
263
Re: 1999 Celebrity 190 - Engine Mount and Stringer Repair

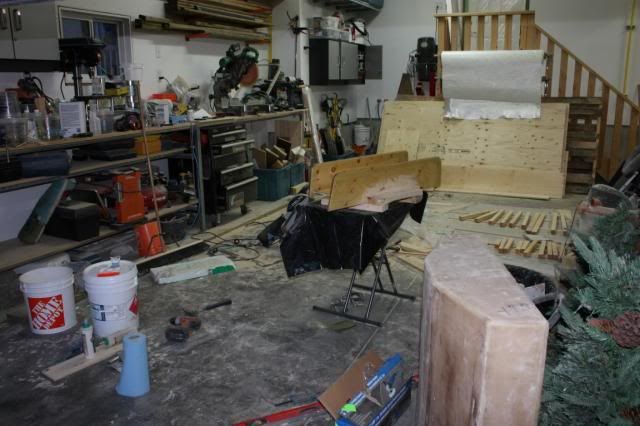
Well, it's been a little too long since a progress update, so here we go. Things have been moving slower lately, I have been pleasantly preoccupied with other things in the last week. Not to mention the ultimately crappy weather we had lately (until today :biggrin1:), and this mess that I see every time I step into the garage. Ugh.

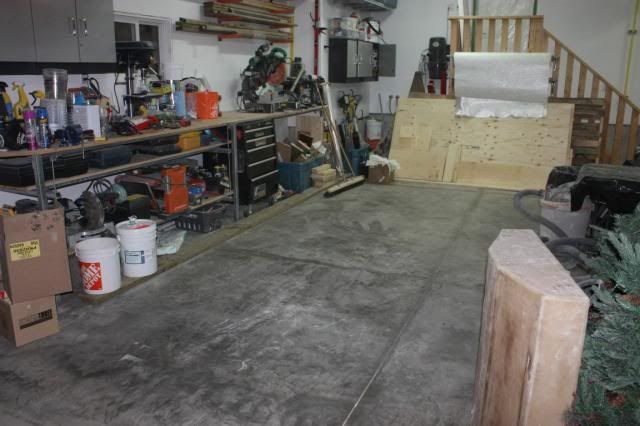
Time for a clean up!


Thats better....


Let's get some work done!!!

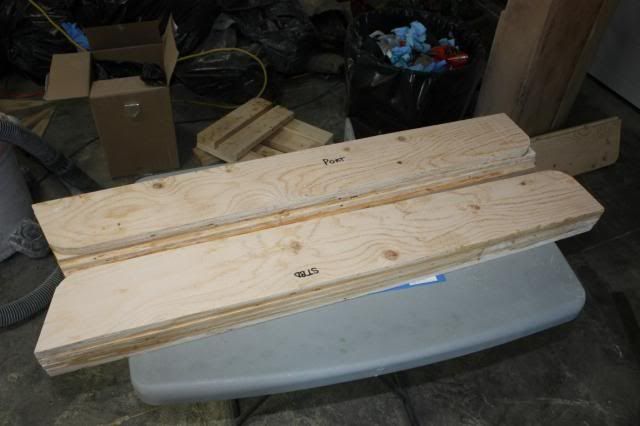
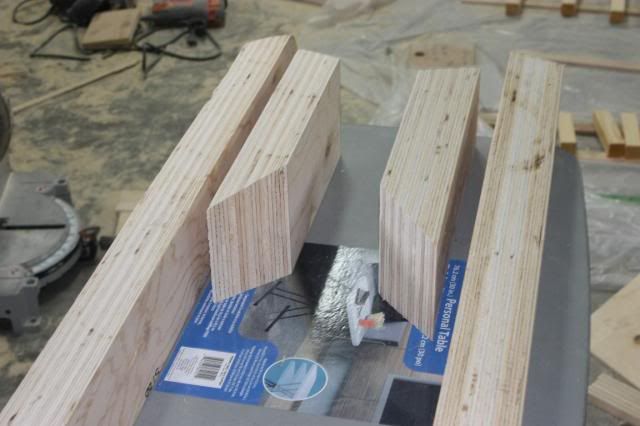
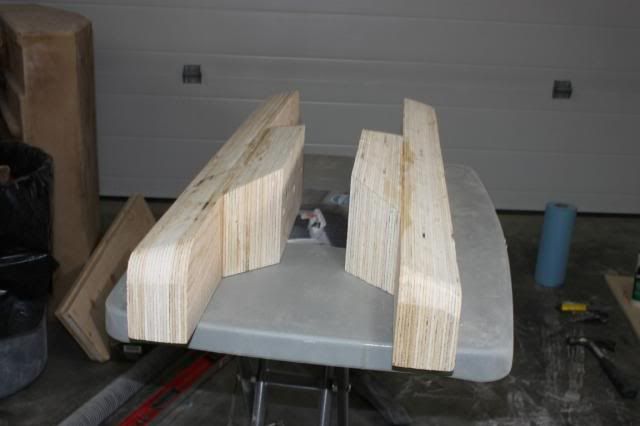
Over the last week I have been fabricating what will eventually be the engine mounts, the lower half anyways. Started by laminating rough cut plywood (two 1/2" plys sandwiched in between two 3/4" plys), overall thickness of 2.5".


Then profiled to the hull and transom angles (in the picture these are upside down to how they will actually go in).

 
Last edited:

bvetter

Petty Officer 1st Class
Joined
Jun 2, 2013
Messages
263
Re: 1999 Celebrity 190 - Engine Mount and Stringer Repair

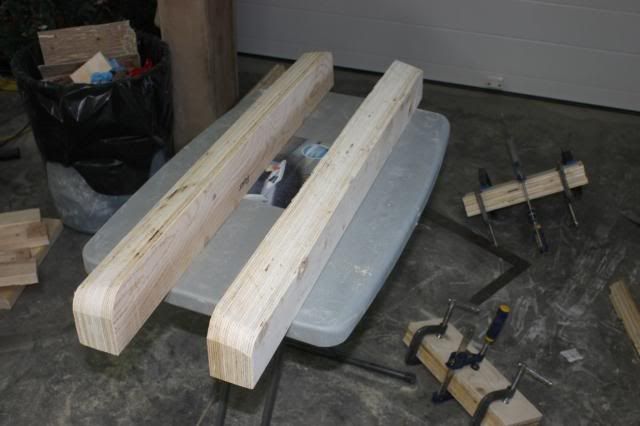
Then also cut out the jut-outs (I believe jut-out IS the actual technical term :laugh:).


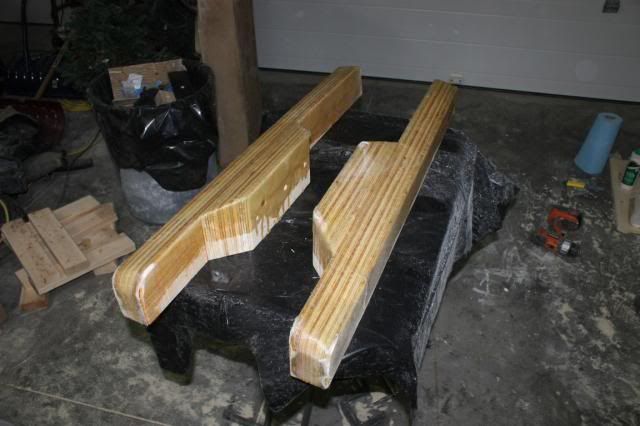
Laminated the two together, and voila, engine mounts.


Wrapped a layer of CSM on the bottom side.


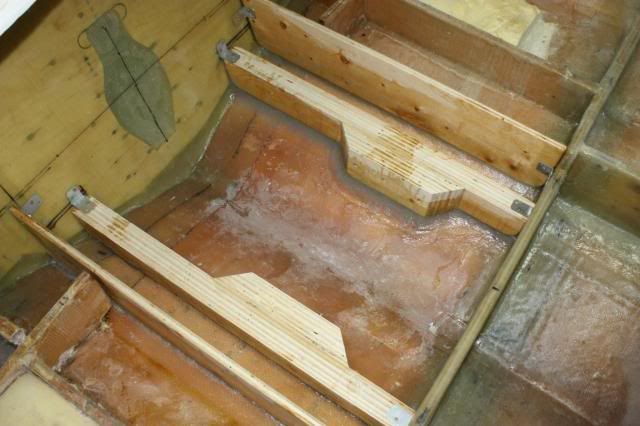
Tonight (after the shop cleanup), I went ahead and PB'd them into place.


Unfortunately, ran out of resin so the fillets are not done. I plan on ordering more stuff this week.
 

JASinIL2006

Vice Admiral
Joined
Feb 10, 2012
Messages
5,714
Re: 1999 Celebrity 190 - Engine Mount and Stringer Repair

Those mounts look heavy duty!
 

bvetter

Petty Officer 1st Class
Joined
Jun 2, 2013
Messages
263
Re: 1999 Celebrity 190 - Engine Mount and Stringer Repair

I just placed my third, and hopefully final order of materials.

-10 gallons of resin
-13 yards of 1.5oz 50" CSM
-10 yards of 1708
-5kg of cabosil
-1 gallon of 3M glass bubbles
-few more mixing pails

I am very interested in knowing what this beast is gonna weight all said and done....
 

bvetter

Petty Officer 1st Class
Joined
Jun 2, 2013
Messages
263
Re: 1999 Celebrity 190 - Engine Mount and Stringer Repair

I just remembered I wanted to ask something.

I am trying to figure out how the deck cleats are going to go in. I had cut up lengths of 2x2's for screwing the deck to (rather than screwing into the stringers) and was planning to wrap them in CSM for waterproofing, but I can't decide what would be easiest, wrapping them before or after they go in. Do I PB them into place, screw, or a combination of both? Any help with with what has worked and not worked for other people would be greatly appreciated.

Thanks.
 

bvetter

Petty Officer 1st Class
Joined
Jun 2, 2013
Messages
263
Re: 1999 Celebrity 190 - Engine Mount and Stringer Repair

I ran into a bit of an issue last night. I was taking measurements in order to finalize the height of the engine mounts after I cap them with a few layers of plywood. I found a cut sheet from Mercruisers website that details the mounting locations and dimensions for the 5.0L alpha one combo. Problem is, based in the mercruiser instructions, my original motor mounts were at least 1" to 1.5" to high. Can't be!!! So now all of my reference measurements for the motor mounts are in question. My solution is to install the gimble housing and inner plate, then lower the engine into place, and do a rough alignment in order to properly determine the overall engine mount height. Bummer.
 

bvetter

Petty Officer 1st Class
Joined
Jun 2, 2013
Messages
263
Re: 1999 Celebrity 190 - Engine Mount and Stringer Repair

I (temporarily) installed the transom and inner plate yesterday, tightened everything down, then re-took the measurements for the engine mount heights. I'm pretty sure where they need to be, so I'm going to go ahead and finish them off. Hoping the latest order of materials gets here soon! This nice weather has kicked me back into high gear!
 
Top