3.7L 180HP rebuild with pics!

Status
Not open for further replies.

solar7647

Lieutenant Junior Grade
Joined
Apr 23, 2009
Messages
1,218
Re: 3.7L 180HP rebuild with pics!

Got every thing together. Started up and set the timing, gap and dwell. No needs some carb adjustment. I may just take the carb to a shop and have it rebuilt just to start fresh. I haven't really decided but it does need some tuning to get the idle right. If you bring up the throttle though it runs great.
 

natemoore

Master Chief Petty Officer
Joined
Jun 13, 2009
Messages
844
Re: 3.7L 180HP rebuild with pics!

When the distributor in re-installed the alignment of the oil pump will need checked. If the pump is not aligned it will cause binding and break the oil pump drive shaft off the distributor.

How did you align the distributor shaft with the oil pump? I couldn't find that NLA alignment tool anywhere, locally or on the internet. I had to improvise a method.

http://forums.iboats.com/showthread.php?t=353035

Just curious how you did it.
 

solar7647

Lieutenant Junior Grade
Joined
Apr 23, 2009
Messages
1,218
Re: 3.7L 180HP rebuild with pics!

How did you align the distributor shaft with the oil pump? I couldn't find that NLA alignment tool anywhere, locally or on the internet. I had to improvise a method.

http://forums.iboats.com/showthread.php?t=353035

Just curious how you did it.

I used the distributor it self. I loosely installed the oil pump and then put in the distributor, I then lined the oil pump up with the drive shaft and torqued it down. It worked great, every thing fits together smoothly, the distributor drops into the pump very easily.

The one mistake I did make was not changing the original distributor cam gear. The original gear was worn and when I started the new engine it broke a few teeth since they were so warn down. I just pulled the distributor and installed the new gear then re-dropped it now every thing is good. I also replaced the points while I was working on it and reset the gap and dwell.
 

solar7647

Lieutenant Junior Grade
Joined
Apr 23, 2009
Messages
1,218
Re: 3.7L 180HP rebuild with pics!

Well considering all the work i just did on my distributor i decided to go to electronic ignition. I ordered the parts from Iboat and they just showed up. I will include the install in this thread so others can see how its done,
 

solar7647

Lieutenant Junior Grade
Joined
Apr 23, 2009
Messages
1,218
Re: 3.7L 180HP rebuild with pics!

Installing an a Mallory E-spark electronic ignition 9-26900 .

Remove wires from coil, distributor cap and rotor
IMG00552-20100716-1119.jpg


IMG00553-20100716-1119.jpg


Remove the two screws that hold mounting plate to distributor and remove plate and points.

keep them in a water tight bag and keep on boat in case ignition module fails

IMG00554-20100716-1120.jpg


Install ignition module and mounting plate useing the two screws that where removed

IMG00556-20100716-1123.jpg


Install rotor that came with kit. The module has a sensor in it that notices the gaps in the new rotor and triggers the spark so the old rotor will not work with the kit.

IMG00558-20100716-1124.jpg


IMG00559-20100716-1125.jpg
 

solar7647

Lieutenant Junior Grade
Joined
Apr 23, 2009
Messages
1,218
Re: 3.7L 180HP rebuild with pics!

The wires will need to be installed into the white clip. They only need pushed into the clip but make sure that the color codes match when the plug is together.

IMG00555-20100716-1122.jpg


The cap can now be installed.

IMG00561-20100716-1140.jpg


Connect the green wire to neg (-) of the coil and red to the pos (+) side of the coil. The brown wire needs put and a good ground. The red wire needs to go after the resitor no matter what kind you nave. A full 12 VDC will kill the module.

IMG00562-20100716-1141.jpg


IMG00563-20100716-1141.jpg


Once done start the engine and check the timing.
 

solar7647

Lieutenant Junior Grade
Joined
Apr 23, 2009
Messages
1,218
Re: 3.7L 180HP rebuild with pics!

I just picked up an Elgin cam kit for the 3.7L with a full set of Elgin/Melling lifters for $185 from that link compared to the $300 that all the other places want for just the cam!

The block came with an Elgin cam but cheap Johnson lifters.

oh Yea.........I have to replace the cam and and lifters in the rebuild because the machine shop didnt put the molly lube on it and I lost three lobes and three lifter in it. It ran great during the cam break in but after it went down hill.

I should have checked it but I put to much faith in the idea they would do it right. I found the cam and lifter investigating why it wasnt running very well and whent through my photos for this thread and when I saw the oil pump photos you can see the cam and the extreme lack of molly.

It is what it is and I have to eat the cost. At least I will know it is done the right way now.

I will add the install of the cam to the thread.
 

solar7647

Lieutenant Junior Grade
Joined
Apr 23, 2009
Messages
1,218
Re: 3.7L 180HP rebuild with pics!

Ok....how to install a new cam ...with engine in boat. Sorry forgot to get photos as I was doing it, but earlyer photos in this thread can be used if needed.

The intake and valve cover need removed. Once that is done remove the rockers and push rods, make sure they are kept in order, each rod and lifter must go back in the same spot it was removed from.

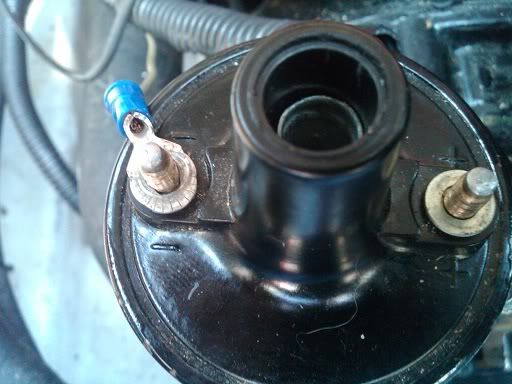
Rotate the engine until its at TDC and remove the harmonic balencer, stator, coolant pump cover, coolant pump, timining cover, lifter cover, fuel pump and all the lifter. With a new cam the lifters should also be changed since the lod ones are "married" to the old cam and will not function corectly with the new cam.

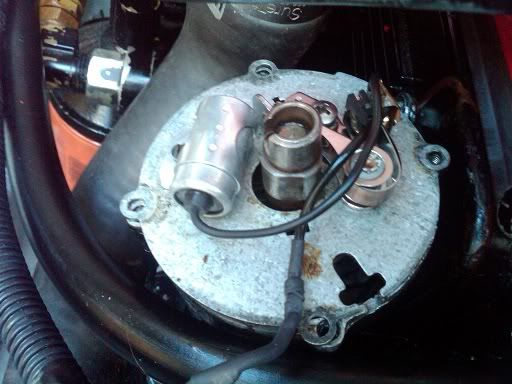
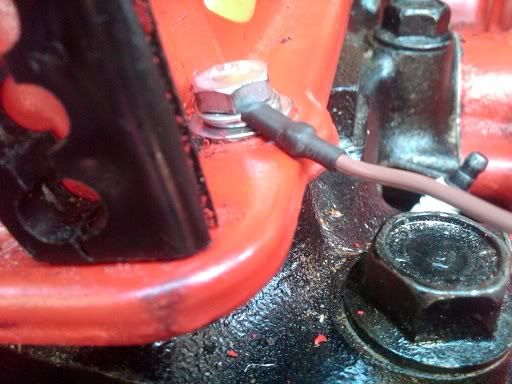
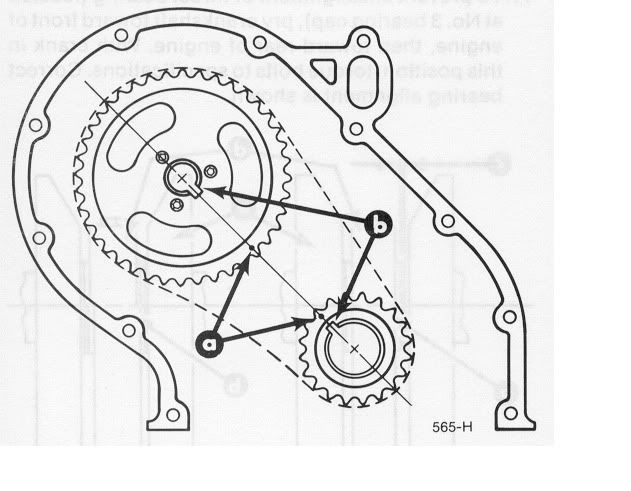
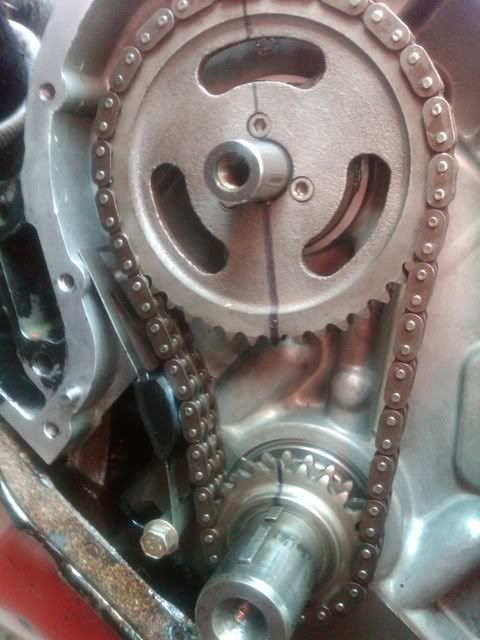
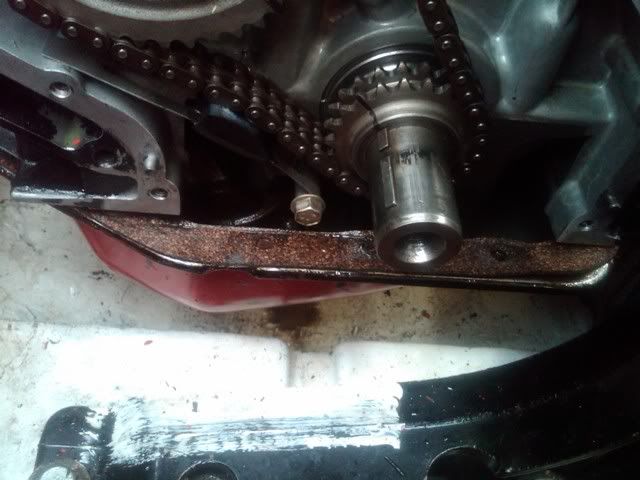
Once the timing chain is reached, the three bolts that hold the spocket to the cam need removed. Then pull both gears off at the same time, be careful the key in the cam is loose and may fall out, it should look like the photo when the engine is at TDC.

timingchain.jpg


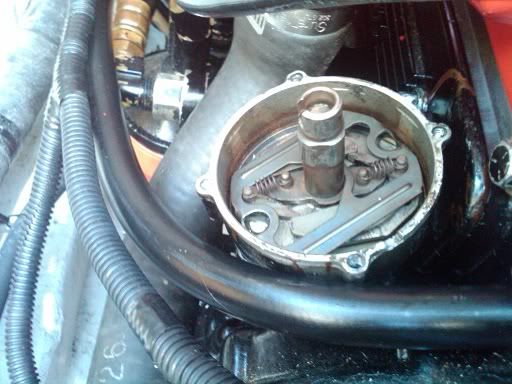
Once the sproket is removed, remove the race thet holds the cam in. It has two bolts that hold it to the block.

Now the cam can be removed, as long as the cam bores have not been machined, there are no bearings. The cam rides directly in the block. If the cam bores have been machined take extra caution not to knock the bearings out as the cam is pulled from the block.

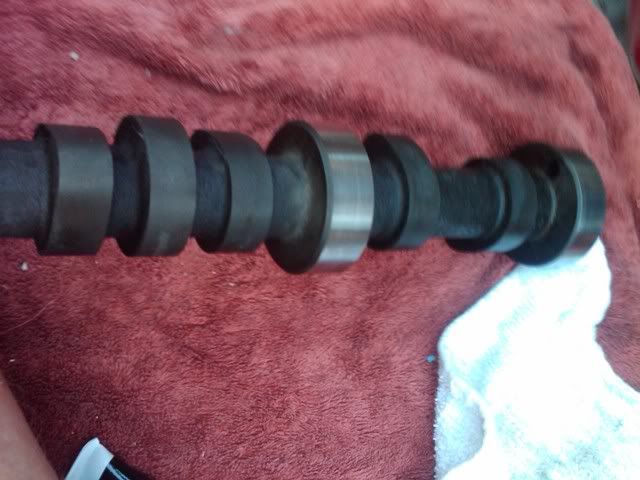
After inspecting the bores to make sure there is no damage the new cam can be install.

Clean the cam with parts cleaner or carb cleaner.

IMG00571-20100727-1132.jpg


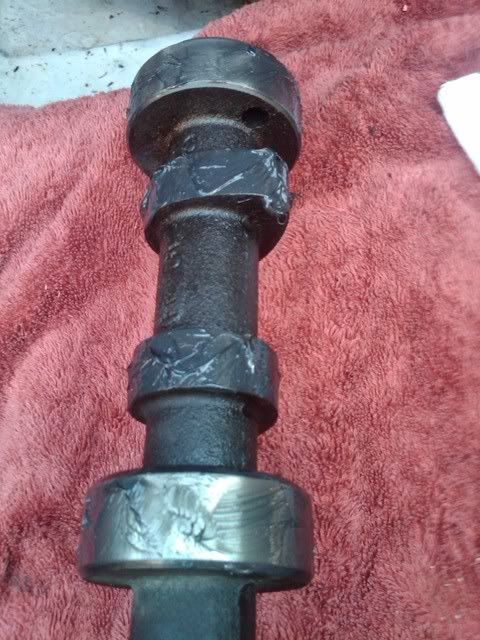
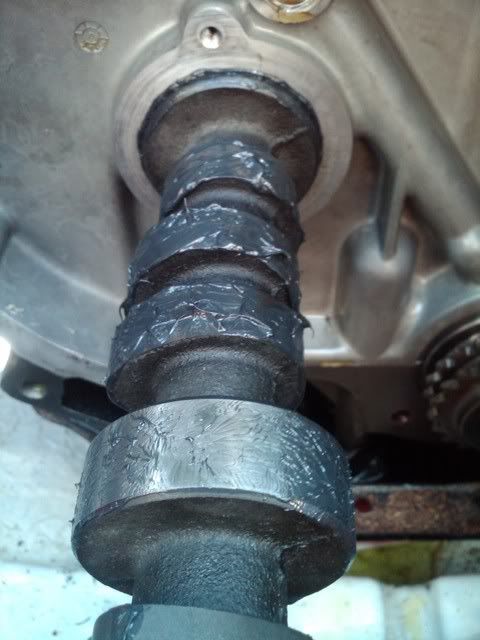
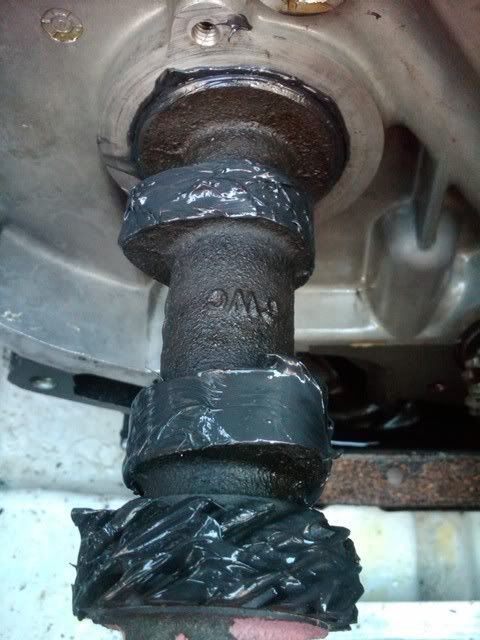
Once the cam is clean, apply any kind of assembly lude that is formulated for Flat Tappet cams and lifter, to the #4 lifter lobes and the two lobes that ride in the block on eather side of the lifter lobes. I used a molly based lube that also has graphite in it, that way it sticks to the surface better and dosent run off before the cam is broke in.

IMG00572-20100727-1136.jpg


Slide the cam into the block carefully, once the first two bearing lobes are in and are holding the cam in the block, apply lube to the next set of lobes. Then slide the cam in so that set of lobes are in the block. Continue this until the very last set of lobes is left to go in.

IMG00573-20100727-1138.jpg


Once the cam is in so there is only one set of lobes left to slide in apply the lube to the lobes and the cam gear the drives the Distributor.

IMG00574-20100727-1142.jpg


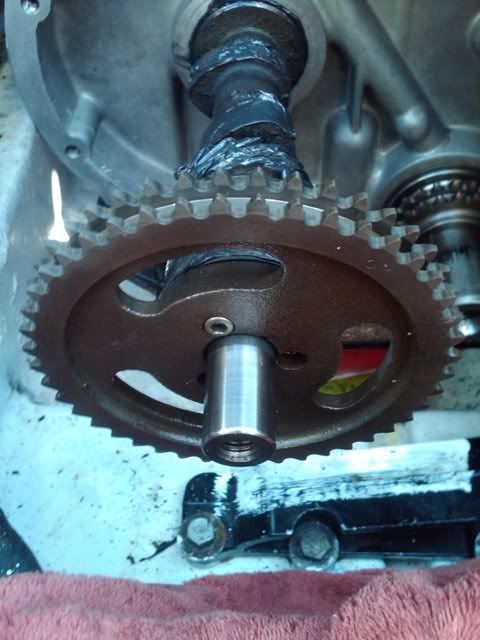
After the lube is applied, use one bolt to hold the sproket on the end. The sproket will be used to hold onto and slid the cam the rest of the way in untill it is fully seated.

IMG00576-20100727-1143.jpg


Installing the cam this way will keep the mess down and the lube from covering your hands. Also since the only way the cam can be reached in the engine once installed is through the crank case the sproket will allow you to be able to guid the cam into the last seat in the rear of the engine.

.
 

solar7647

Lieutenant Junior Grade
Joined
Apr 23, 2009
Messages
1,218
Re: 3.7L 180HP rebuild with pics!

Once the cam is fully seated, give it a test spin to make sure it moves with no binding. The next step is to re-install the race that holds cam in keeping it from sliding out.

Then install the key in the key way.

Once the key is in, the sprockets and chain can be installed. Rotate the cam untill its keyway is facing the crankshafts keyway. I drew a line through the center of my sprokets to make it easyer to see if they are lined up.

Put the chain around both sprockets and align the timing dots on the sprocket so that they are lined up together facing each other.

Then slide both sprockets on at the same time. Be carefull not to knock the key out of the cam as the sproket in slide on. The timing markes should line up like the photo if done correctly.

timingchain.jpg


If the timing marks are correct the bolts can go in for the sprocket and the tensioner can go back on.

IMG00578-20100728-1131.jpg
.

Then every thing esle can be reinstalled. A few tips:

Use new gaskets.

Apply lube to the bottom surface of the lifters.

If done with oil pan on, loosen the bolts on the pan to allow it to drop as seen in the photo. This will make re-installing the front cover easy with out damaging the gasket for the oil pan.

IMG00579-20100728-1131.jpg


Try not to spin the cam shaft once lifter are installed. This will ensure that the lube is not removed before the breakin is done. With out proper lube during break in the cam may loose a lobe (reason for the post). The lube that was added during assemble keeps the cam lubed until oil pressure builds up and the oil is lubeing it.
 

Bri7070

Cadet
Joined
Sep 19, 2009
Messages
19
Re: 3.7L 180HP rebuild with pics!

Great write up!!!!

I just lost the dist. drive gear and cam gear on my 87' Searay. I am now looking to tear it down and see the extent of the damage.

Do you still have your old cam? Do you have any plans for it?
I am wondering if a ford 460 cam would work in the 3.7. I have emailed Comp Cams and I am waiting for a reply from them.

It would be nice to be able to use a 460 cam, this would open up a lot of choices.
 

solar7647

Lieutenant Junior Grade
Joined
Apr 23, 2009
Messages
1,218
Re: 3.7L 180HP rebuild with pics!

A 460 cam has to much lift, its almost twice as much and it has tomany lobes. I know Elgin and Federal Mogul both make cams for the 3.7L. I went with an Elgin cam and lifter set. I got it for a great price at this link http://stores.ebay.com/Falcon-Sales-e-Store, less then the price of just the cam every place else.

My old cam is junk, its going to be turned into a lamp! Three lobes are gone.

You may just need a new distributer gear, they are designed to take most of the punishment and break down faster then the cam gear since they are easier to change, but still check the cam gear.

If you have a Marine junk yard around check there for the dist gear, they are $90 new!
 

Bri7070

Cadet
Joined
Sep 19, 2009
Messages
19
Re: 3.7L 180HP rebuild with pics!

Solar,
Do you know what the stock compression ratio is?
 

solar7647

Lieutenant Junior Grade
Joined
Apr 23, 2009
Messages
1,218
Re: 3.7L 180HP rebuild with pics!

Solar,
Do you know what the stock compression ratio is?

Not 100% sure its been a long time since math class, but my math tells me 10:1

You can double check.
3afd933b679b7b20f1561c841867f901.png


May I ask why you need to know?
 

Bri7070

Cadet
Joined
Sep 19, 2009
Messages
19
Re: 3.7L 180HP rebuild with pics!

Well,
When I tear down my engine to see the extent of the damage from the metal shavings when the dist drive gear on the cam and the on the dist decieded to eat each other, I was thinking if a rebuild would be needed I might as well increase the power a little. Bump up the compression, port the head, look into custom cam, roller rockers, Holley carb.ect

I need to first find out the stock specs, compression, head cc's, bore and stroke. ect...

I would like to see 200 hp out of this gem. If I need to rebuild.

Any input???????
Brian
 

solar7647

Lieutenant Junior Grade
Joined
Apr 23, 2009
Messages
1,218
Re: 3.7L 180HP rebuild with pics!

Well,
When I tear down my engine to see the extent of the damage from the metal shavings when the dist drive gear on the cam and the on the dist decieded to eat each other, I was thinking if a rebuild would be needed I might as well increase the power a little. Bump up the compression, port the head, look into custom cam, roller rockers, Holley carb.ect

I need to first find out the stock specs, compression, head cc's, bore and stroke. ect...

I would like to see 200 hp out of this gem. If I need to rebuild.

Any input???????
Brian

Look into the Alu head. That alone will do it. Its said it will get 20 extra Hp with it. Check your PM.
 

guyaverage

Petty Officer 2nd Class
Joined
Aug 4, 2008
Messages
101
Re: 3.7L 180HP rebuild with pics!

Compression ratio is 8.8:1, bore is 4.36, 3.75 stroke.

Swapping to a 4 bbl (if you can find a manifold, they get gobbled up as soon as they appear it seems), Ford 460 roller rockers, and an aluminum head will easily get you past your 200 hp goal. I can think of cheaper and more reliable ways to get 200 hp into a boat... <cough>4.3<cough>...By the time you rebuild the bottom, add the aluminum head, rockers, carb, manifold, etc you are going to be ~$2000 deep into this all for a couple mph gain in top speed and a sizeable increase in fuel consumption. If you dont have the later style aluminum exhaust manifold with matching riser, add another 200-500 into the equation, you dont want to bolt the garbage crack-prone cast iron manifold to that aluminum head.

I have spent many warm nights in the garage after a few more than necessary cold ones contemplating the same project. Lucky for my wallet I metabolize alcohol quickly. :D If you want to dig further, go to the breezeworks forum and search on a user "rhino", he did a similar project a few years back, there is some good info in his posts.
 

Bri7070

Cadet
Joined
Sep 19, 2009
Messages
19
Re: 3.7L 180HP rebuild with pics!

Compression ratio is 8.8:1, bore is 4.36, 3.75 stroke.

Swapping to a 4 bbl (if you can find a manifold, they get gobbled up as soon as they appear it seems), Ford 460 roller rockers, and an aluminum head will easily get you past your 200 hp goal. I can think of cheaper and more reliable ways to get 200 hp into a boat... <cough>4.3<cough>...By the time you rebuild the bottom, add the aluminum head, rockers, carb, manifold, etc you are going to be ~$2000 deep into this all for a couple mph gain in top speed and a sizeable increase in fuel consumption. If you dont have the later style aluminum exhaust manifold with matching riser, add another 200-500 into the equation, you dont want to bolt the garbage crack-prone cast iron manifold to that aluminum head.

I have spent many warm nights in the garage after a few more than necessary cold ones contemplating the same project. Lucky for my wallet I metabolize alcohol quickly. :D If you want to dig further, go to the breezeworks forum and search on a user "rhino", he did a similar project a few years back, there is some good info in his posts.

I was thinking of the 500 CFM Holley 2bbl carb and keeping the iron head, Aluminum head would cost to much, do a little port and polish, gasket match the intake, head and exhuast. I would like to find a little hotter cam, not much I am not looking to build a motor that I would have to rev to 6,000 rpm, keep the duration on the low side just add some HP and TQ. Bump the compresion to about 9.5:1. Just some mild upgrades.

I will look into rhino
Thank you
brian
 

85imperial

Cadet
Joined
Mar 2, 2010
Messages
11
Re: 3.7L 180HP rebuild with pics!

great post been following along. I just finished rebuild, engine on pallet in the garauge. Filled fluids, runnig long fuel line from gas can, battey hooked up, mech oil guage installed in line with elect sensor. Crank engine over and but engine won't run. I did get a puff at the carb one time but will not run. I have spark at points and at plug. I'm jumping #6 & #7 on wiring harnes plug to get engine to crank. Am I missing something? What would cause the puff at the carb? Does the fuel pump need to be primed? I filled the hose with gas and then inserted it into the gas can. Cranks over fine but will not run. 170 hp 2 barrel merc carb. How did you start yours?
 
Status
Not open for further replies.
Top