77 Starcraft Holiday 18 i/o - rebuild with pics galore

sprintst

Commander
Joined
Apr 18, 2009
Messages
2,066
Re: 77 Starcraft Holiday 18 i/o - rebuild with pics galore

Hey Vegas...long time no see. I mught be back the end of Feb/early Mar for work. We'll have to do another stogie :)

The wife made the super egg muffins again the other day...even better than the first. I showed her the post and she was laughing at why I'd post them. In the end she thought it was cool though. Give them a whirl as they are incredible.

I'm looking for deals now for some of the other stuff. I moved some stereo stuff in the house and pulled some ft4 speaker wire so I have enough now to do the boat. I took back my old speaker cable I bought earlier and saved 40 bucks.
 

djpeters

Lieutenant Commander
Joined
Jun 9, 2010
Messages
1,824
Re: 77 Starcraft Holiday 18 i/o - rebuild with pics galore

You have a PM.
 

sprintst

Commander
Joined
Apr 18, 2009
Messages
2,066
Re: 77 Starcraft Holiday 18 i/o - rebuild with pics galore

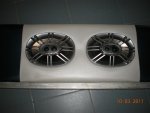
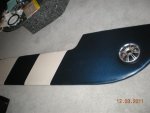
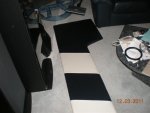
Here are some pics of some parts I picked up from the upholsterer. The gunwale supports and lounge seats pics will get posted later this weekend as I'd like to get some stuff bolted in if it ever warms up here.

It's some progress I guess. Damn winter.

The speakers are mounted on a backing plate that I may remove for the speaker covers to sit flush againt the upholstery.
 

Attachments

  • DSCN3076 (Medium).jpg
    DSCN3076 (Medium).jpg
    54.8 KB · Views: 0
  • DSCN3075 (Medium).jpg
    DSCN3075 (Medium).jpg
    37.5 KB · Views: 0
  • DSCN3077 (Medium).jpg
    DSCN3077 (Medium).jpg
    42.3 KB · Views: 0

Triton II

Commander
Joined
Nov 23, 2004
Messages
2,479
Re: 77 Starcraft Holiday 18 i/o - rebuild with pics galore

Welcome back to your thread Sprinter! Sorry to hear it's still very cold up your way... not long now to Spring though. :)

TII
 

jasoutside

Supreme Mariner
Joined
Dec 20, 2009
Messages
13,269
Re: 77 Starcraft Holiday 18 i/o - rebuild with pics galore

Great to see an update on this project sprint!
 

djpeters

Lieutenant Commander
Joined
Jun 9, 2010
Messages
1,824
Re: 77 Starcraft Holiday 18 i/o - rebuild with pics galore

Those panels look very nice, can't wait to see the seats...
 

sprintst

Commander
Joined
Apr 18, 2009
Messages
2,066
Re: 77 Starcraft Holiday 18 i/o - rebuild with pics galore

I brought the gunwale support in the house. I'll take pics of those with the speakers in them when I screw them in tomorrow.

I'll pics the seats up on Monday as I'll need to take my third row seats out of the Yukon to pick them up.
 

sprintst

Commander
Joined
Apr 18, 2009
Messages
2,066
Re: 77 Starcraft Holiday 18 i/o - rebuild with pics galore

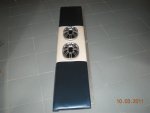
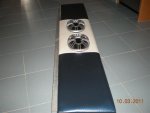
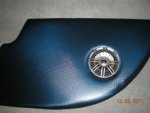
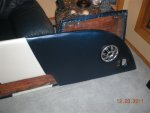
Here are the gunwale supports with speakers installed. The material is super tough...hopefully with uv exposure it doesn't become brittle like the old stuff. Almost impossible to tear as I cut out the speaker holes with a scalpel like tool and that stuff just doesn't want to rip due to a mesh like backing.

Hopefully it warms up in the next day or two enough to get these parts bolted into the boat and out of the living room. I've got a funny feeling the wife doesn't like seeing them there.
 

Attachments

  • DSCN3078 (Medium).jpg
    DSCN3078 (Medium).jpg
    78 KB · Views: 2
  • DSCN3080 (Medium).jpg
    DSCN3080 (Medium).jpg
    56.4 KB · Views: 2
  • DSCN3081 (Medium).jpg
    DSCN3081 (Medium).jpg
    52.7 KB · Views: 2
  • DSCN3079 (Medium).jpg
    DSCN3079 (Medium).jpg
    48.5 KB · Views: 2

jasoutside

Supreme Mariner
Joined
Dec 20, 2009
Messages
13,269
Re: 77 Starcraft Holiday 18 i/o - rebuild with pics galore

Yur Holiday is going to be one sweet ride sprint!
 

sprintst

Commander
Joined
Apr 18, 2009
Messages
2,066
Re: 77 Starcraft Holiday 18 i/o - rebuild with pics galore

Hopefully I can find the right wood profiles to trim the tops of the gunwale supports where it meets the hull. I'd like to give it a finished look if I can.

There will be a couple of pop rivets holding the gunwale supports in place on the very bottom. Just wondering if I should pickup some colored rivets and use a rubber washer or two so it doesn't cut into the fabric when it's compressed.

I'll be ordering to packard style waterproof quick connects today so I can finish the wiring of the blower, etc so this puppy will be ready to float at some point.

It will be nice to see the inside of the boat finally finished. Hopefully it doesn't turn out so nice that I don't want to use it :)
 

djpeters

Lieutenant Commander
Joined
Jun 9, 2010
Messages
1,824
Re: 77 Starcraft Holiday 18 i/o - rebuild with pics galore

Very nice. Hurry up and get that interior together so I can see it. I'm about to send some of my stuff out. Got my seats finished this weekend. (FINALLY!)
 

Triton II

Commander
Joined
Nov 23, 2004
Messages
2,479
Re: 77 Starcraft Holiday 18 i/o - rebuild with pics galore

Interior upholstery looks great Sprinter. Be good to see your baby on the water, won't be long now. :)

TII
 

sprintst

Commander
Joined
Apr 18, 2009
Messages
2,066
Re: 77 Starcraft Holiday 18 i/o - rebuild with pics galore

Thanks guys. Its warming up here so i'm hoping I can run some speaker wire and get some parts bolted in.
 

sprintst

Commander
Joined
Apr 18, 2009
Messages
2,066
Re: 77 Starcraft Holiday 18 i/o - rebuild with pics galore

Hopefully I'll be on the southside of town tomorrow so I can take pics of the seats or pick them up.

Very nice. Hurry up and get that interior together so I can see it. I'm about to send some of my stuff out. Got my seats finished this weekend. (FINALLY!)
 

CBGale2

Lieutenant Junior Grade
Joined
Apr 22, 2009
Messages
1,026
Re: 77 Starcraft Holiday 18 i/o - rebuild with pics galore

Man sprint those panels look sweet, cant wait to see the seats.
 

sprintst

Commander
Joined
Apr 18, 2009
Messages
2,066
Re: 77 Starcraft Holiday 18 i/o - rebuild with pics galore

I went out to freeze my a** off but the port side gunwale support is in. I soldered the blade connector onto the speakers/wires and bolted her up. What a difference it makes to see it in place. I'll post pics tomorrow as it was getting dark. I'll spend more time test fitting the other side as the shifter needs to get bolted on first etc.
 

wrmdunker

Petty Officer 2nd Class
Joined
Sep 17, 2010
Messages
170
Re: 77 Starcraft Holiday 18 i/o - rebuild with pics galore

Hello sprintst, I am planning a resto of my 1974 16' SS. I was refered to you by djpeters with my question about bottom paint. I plan to roll and tip.

I would appreciate a summary of what you did and products used if that's not too much to ask. I like your look and planned something similar. As much detail as you have time to spare would be appreciated (i.e. products, prep, coats, tools...)

If you want to see an ugly paint, look up my resto thread.

Thanks in advance.

WD
 

sprintst

Commander
Joined
Apr 18, 2009
Messages
2,066
Re: 77 Starcraft Holiday 18 i/o - rebuild with pics galore

No sweat man. I'll lookup what I did as it was a little while back.

For the most part I stripped down to the bare alum with a stripper, gave it a light sanding with a 100 grit sandpaper to give it a surface to bite to. I used a wire wheel/brush to get into the nooks and crannies.

I washed it down and then let it dry thoroughly in the sun. Wiped the whole boat down with Xylene so it doesn't leave a residue.

I rolled the Interlux Zinc Chromate primer with a low nap roller with a hard plastic core I believe...I didn`t want the roller to soak it all up if it was a thicker nap paper core roller. The stuff rolls like water as it is thin and I thinned it a percentage with the thinner for it to go a bit further. Here`s the link to the description of the product. I has to be applied and hit with a primer with 24 hours or it has to be sanded off and applied again.

http://ca.binnacle.com/m128/INTERLUX/p6627/INTERLUX-VINY-LUX-PRIMEWASH-QUART/product_info.html

Interlux 353/354 Viny-Lux Primewash is a self etching primer designed for use on properly prepared bare metal. It provides optimum adhesion of primers and finish paints.

Metal surfaces should be clean, bright, well abraded and free of rust, mill-scale, grease, oil and paint. Sandblasting, power wire brushing and grinding with medium grit emery cloth are the best methods of cleaning the metal.

Immediatly after the metal has been cleaned apply one thin wet coat of Interlux 353/354 Viny-Lux Primewash that has been thinned 25% with Interlux 355 Viny-Lux Solvent. The coating should be a translucent Yellow.

Allow the Interlux 353/354 Viny-Lux Primewash to dry a minimum of one hour but no more than 24 hours before the application of the next primer or finish coating. If allowed to dry more than 24 hours, it must be sanded completely off and a second coat applied. Never apply more than one thin coat. Multiple coats of 353/354 Viny-Lux Primewash will cause detachment from the metal surface. Do not apply product to painted surfaces, only on bare metal surfaces.

Theoretical coverage is 106 square feet per Quart Kit brushing or 80 square feet if spraying. Can be applied at temperatures above 40 degrees F (5 C) Mixes at a 7:1 ratio.

Must be thinned 25 - 30% by volume with Interlux 355 Viny-Lux Solvent.

I then rolled the two part Interlux NE2000 epoxy primer on within the 24 hours window from the time I applied the Vinyl-lux primer. The two part primer goes on thick as it is a high build primer and can be lightly sanded to get a smooth finish before applying the Interlux VC performance epoxy. You will want to use the low nap plastic core rollers as the typical paper roller wouldn`t last long at all. I tried to roll and tip the NE2000 but it was maybe too warm out for me to get it right. It was perhaps best to roll it on and just sand it to perfection. I should have spent more time sanding as it will show when you do your VC performance epoxy.

The VC performance epoxy stinks to high heaven so wear a mask that can filter VOC`s...and rolls like milk. I`d do some reading as it can be wet sanded as well but has to be done within a certain period or it will be too hard to sand :) You can probably roll and tip the VC performance epoxy but I just rolled it best I could. If I had it to do all over again and knew how to spray properly I would have rolled everything and sprayed the VC performance epoxy after some good sanding and prep on the primer.

The VC performance epoxy is as tough as nails as it`s make for trailered boats and I think I`d be hard pressed to even scratch it.
 

djpeters

Lieutenant Commander
Joined
Jun 9, 2010
Messages
1,824
Re: 77 Starcraft Holiday 18 i/o - rebuild with pics galore

Seats? Pics? Your killin' me here.....:D
 

sprintst

Commander
Joined
Apr 18, 2009
Messages
2,066
Re: 77 Starcraft Holiday 18 i/o - rebuild with pics galore

D'oh.

I'm in a course for the next week and can't get to the upholsterers to pick them up. I'd love to bolt them in and sit in them as he let me sit on the seats before they were all put together. He used a higher density foam so it's somewhere between mush and too firm.

I'll probably hook up the stereo at some point after the seats are bolted in and have a beer in the driveway working on odds and ends and really enjoy the seats listening to some tunes.
 
Top