'79 Venture Bass Boat - Complete Restoration

dillonheath08

Petty Officer 3rd Class
Joined
Jun 6, 2014
Messages
97
Okay, brief update on the Venture. Haven't been able to get much done. Rain is killing me this week. My borother is moving back to the house so he has asked me to wait a couple weeks until he is settled to move my boat in. I was hoping to have it in there this weekend. No big deal. I don't have anything in yet that can ruin.

I have managed to remove the piece of wood in the bottom of the boat. Underneath was more waterlogged flotation foam. I have over 50% of it removed. No pictures or video, sorry. My phone has been in the shop so that means no camera during that demo.

During the demo I have had my tools scattered all across our pool shed since I am working right next to it. I finally have gotten organized. I bought a Stanley Click and Connect Tool Box.


I also acquired a 230 PSi compressor for blowing the the boat out during the grinding process.
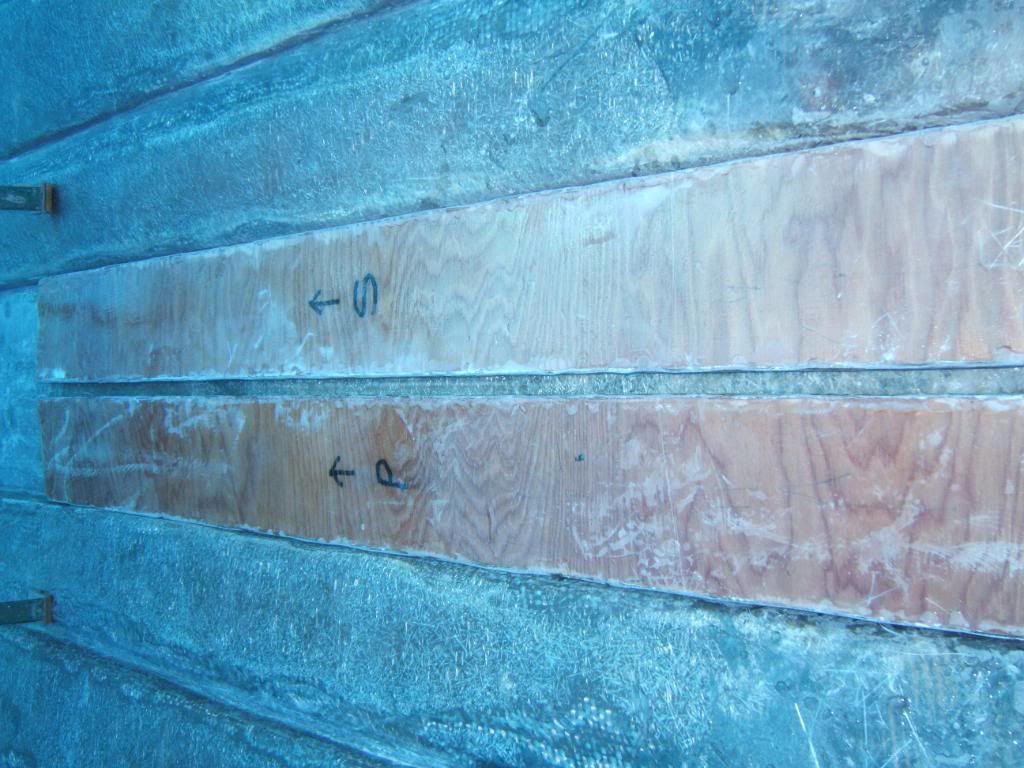
 

dillonheath08

Petty Officer 3rd Class
Joined
Jun 6, 2014
Messages
97
Feeling pretty good this evening. Got a lot done in the boat. And I am proud to announce there is no foam or wood left anywhere in the Venture. 109 inches of 1/2" ply. It's 10" strips.
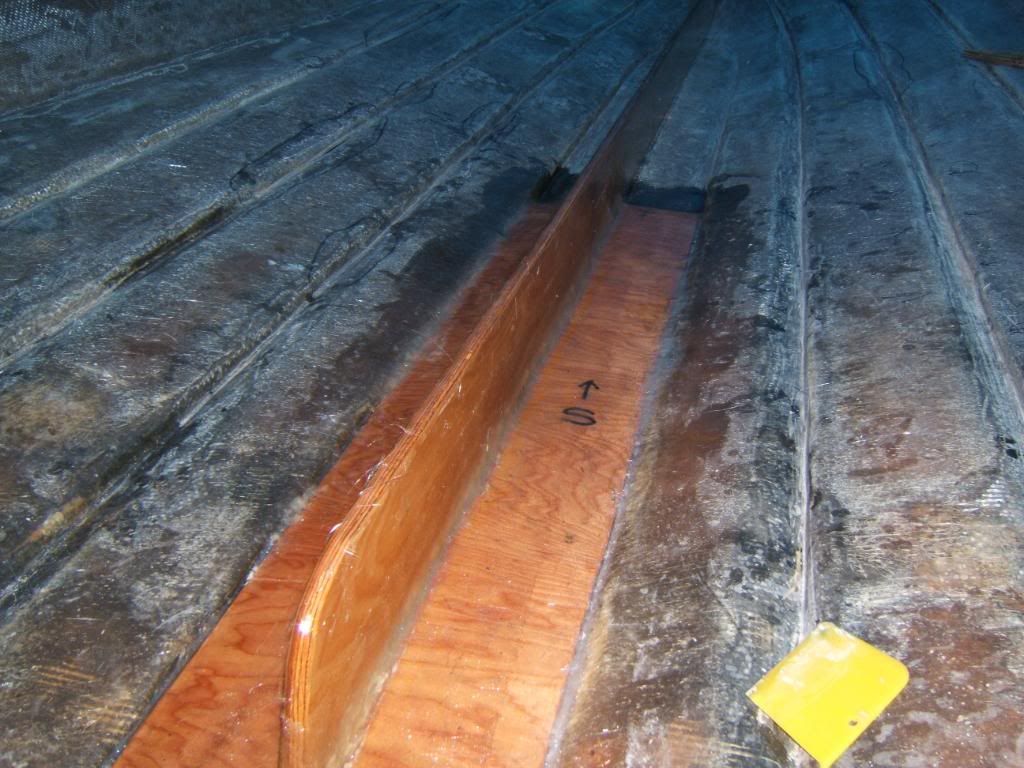
 One side left All done
 

GT1000000

Rear Admiral
Joined
Jul 13, 2011
Messages
4,916
Excellent progress!
Mine has a similar "backbone" installed...the originals were short compared to the ones I installed...I figured they would give the planing surface of the hull a little more "backbone" by being longer...
Yours seem to be just about the right length...
 

dillonheath08

Petty Officer 3rd Class
Joined
Jun 6, 2014
Messages
97
Did you install yours as one solid piece or in strips? I saved every strip on the port side since they were in better shape and I was considering tracing them out onto a sheet of 1/2" ply as one whole piece. But the more I think about their purpose I wonder if they're in strips to allow them to flex at those points in choppy water. I could be entirely wrong. My boat has 3 sets of those strips. One being the one shown in the pictures above, another residing underneath the flotation foam between the stringers and the deck. And one that the deck rests on.
 

GT1000000

Rear Admiral
Joined
Jul 13, 2011
Messages
4,916
Post # 514...


DSCF1708.jpg


And Post #549...

DSCF1715.jpg


I also used as a guide/slot for the center stringer...
 

dillonheath08

Petty Officer 3rd Class
Joined
Jun 6, 2014
Messages
97
Very nice work! I will just lay the strips I saved from that one side out on my wood and trace them out as a whole piece. As far as my stringers go my measurements go I am a little off thanks to the discovery of that wood in the very bottom. Just guessing it's a little over a 1/2" off. I measured them both before the removal. They were 5-1/2" high from that piece of wood in the center. I guessed them to be an even 6" piece with that wood down in the groove. Would it be an accurate measurement to lay a level from port to starboard and measure down to where the stringers were seated in the boat?
 

GT1000000

Rear Admiral
Joined
Jul 13, 2011
Messages
4,916
Level in boat is somewhat sketchy at best...even measurements from side to side and front to back, can be off by quite a bit...if you are going back to what was original, then you hopefully have at least a shadow line of where the original deck height used to be...then you can measure down from that dimension, subtracting the thickness of the deck, etc...
 

dillonheath08

Petty Officer 3rd Class
Joined
Jun 6, 2014
Messages
97
I know where the deck was. I was just gonna lay a straight edge across the boat from port to starboard and measure down to where stringers were originally. Letting the bottom of my straight edge act as the bottom of my deck. I had a measurement of 5-1/2 inches as a stringer height. I have an idea of what I need.
 

GT1000000

Rear Admiral
Joined
Jul 13, 2011
Messages
4,916
Yep, that'll work...also keep in mind to allow for about 1/8"-1/4" separation of the stringers from the hull so as not to create any hard spots...you can use Popsicle sticks or wooden dowels to keep them separated while you bed them in with PB, then just remove them as the PB hardens and you move along...
 

dillonheath08

Petty Officer 3rd Class
Joined
Jun 6, 2014
Messages
97
Took some time out from working on the boat this weekend to help my father-in-law to-be with some things on his to-do list. His tractor and its various attachments needed some shelter from the elements. Added metal roofing to the awning and also to the shed. Sure do wish there was room for my boat haha
 
Last edited:

sphelps

Supreme Mariner
Joined
Nov 16, 2011
Messages
11,475
Nice video ! Making good progress .. You should change your grinding disk to a flap disk or get the plastic backer disk so you can put a reg 24 grit or so sanding pad . The one you have on there looks to be the kind for grinding metal ..
Keep up the good work !
 

dillonheath08

Petty Officer 3rd Class
Joined
Jun 6, 2014
Messages
97
I think you are right but it was all the local NAPA had so I have been making do with it. It's doing a good job knocking it down in a hurry. I will run back over it lightly with a finer grit once all of my edges are smooth and the carpet glue is removed. They really laid it on thick from the manufacturer.
 

Woodonglass

Supreme Mariner
Joined
Dec 29, 2009
Messages
25,929
I'd recommend some Hearing protection, Long Sleeves, gloves, and goggles. This miniscule fiberglass particles are bad on everypart of your body. I'd try to keep them off of you in every way possible. Is that metal cutting wheel leaving swirls and wavy indentations in the glass? If so, that's actually not really good and will cause you some problems when it comes time to start laying fresh glass. You need to have as smooth and flat of a surface as possible. A bit grainy like 40 grit sand paper but still smooth and not wavy. Just a FYI for future reference;)
 
Last edited:

dillonheath08

Petty Officer 3rd Class
Joined
Jun 6, 2014
Messages
97
Once I've used it to cut down all of my thick pieces of fiberglass still left to be ground I am going to swap to a finer grit grinding wheel. Or smooth everything over with a the DA sander. I am not grinding very much off so there should be plenty left to go back over with using a finer wheel. This wheel does really well when grinding down the larger pieces of tabbing and the occasional PB blobs here and there.
 

dillonheath08

Petty Officer 3rd Class
Joined
Jun 6, 2014
Messages
97
I got pretty lucky today. I have a friend who let me borrow a textbook from him last semester and when I went to return it he said he had no use for it and that I could keep it if I wanted. I didn't really have a use for it since the semester was finished but didn't really see a point in throwing the book away since college textbooks are so ridiculously high. After checking around I got on Amazon and they are willing to pay me 120 bucks for the book upon inspection of it. With any added luck they'll like what they see and send me the money so I can buy some tools to be used on this restoration. I've had my eye on a 5" DeWalt orbital sander
 
Top