'89 Bayliner Avanti restoration - where to start?

jbcurt00

Moderator
Staff member
Joined
Oct 25, 2011
Messages
25,118
Re: '89 Avanti 170 DLI

Re: '89 Avanti 170 DLI

Yep ^^^

Have a few accessory projects waiting while you start the demo, repair & put back. Small & easier/quick projects along the way should help keep you moving forward during the 'Oh carp, what have I gotten into' moments. <<< There will be a few....

It looks & sounds like there is a 2nd overlay of gray carpet covered plywood ON TOP of the red 'original' carpet & plywood deck. Is that correct?

If so, generally, that's done to cover a deck that has become soft & has started to rot. If that is the case, it will need to come out. That means removing much of the interior, possibly the motor & outdrive. Wet & soft decks can lead to wet & rotten transoms & stringers.

This built in cooler has the bulkheads & stringers Scott mentioned:
attachment.php

You can take some core samples of all 4 wooden sides by drilling w/ a 3/8" bit. You can do the same from the inside of the engine bay on the transom. DO NOT THRU DRILL the transom, a 1.25" deep hole +/- only.

The bulkheads & stringers are WOOD only? Or are they encased in fiberglass? The transom should be too.

Any core sample shavings that are dark & wet are a sign that there is work to be done before putting the boat back in service. Dry light shavings are a good sign. Clean up & further inspections may mean there's less work ahead.

I've been on an Avanti F&S but it's been a very long time. And I wasn't available during a re-deck, so I have no idea about how it's actually constructed. But by '89 Avanti may also have been building wood-free stringers, the core samples should help determine that too. It'd indicate there's even less wood to rot below decks, which would be great.......
 

Scott Danforth

Grumpy Vintage Moderator still playing with boats
Staff member
Joined
Jul 23, 2011
Messages
50,295
Re: '89 Avanti 170 DLI

Re: '89 Avanti 170 DLI

100_0388.jpg100_0381.jpg

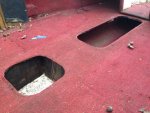
These should give you an idea of the structure underneath the carpet
 

89avanti

Petty Officer 2nd Class
Joined
Nov 25, 2012
Messages
137
Re: '89 Avanti 170 DLI

Re: '89 Avanti 170 DLI

Thanks guys. Once again lots of great info and pictures. Should I take the battery and solenoids out and try to clean up the engine compartment as much as possible? I'm running new wires to the console from the back due to some shorts. Also going to take this opportunity to out in a master fuse panel and fuse everything. I also believe the ignition switch is bad. I'll test that tonight.

That small square compartment that you said was a cooler ... It has four pieces of wood inside it just past the opening. It looks like to support it from collapsing in. Can't verify the rot around the opening but it appears like they customed it up some. I'm also wondering what the small plug like hole is inside the "cooler" area.

In reference to the seats and covers and all that. Nothing is in usable shape. I can get a pattern off of it tho. Can I make these pieces larger than they're now? Are there any kits for this or other similar boats that have foam replacements and all that or do I have to get foam and cut my own?

It sounds like I need to take everything out of the boat other than the engine and check it all before I do anything else. I don't mind replacing wood. I'm a pretty good woodworker and problem solver. I'm an IT manager so that's why I keep going back to gadgets. Lol.

When I have to replace the wood if I do, what should I use and how should I treat it? I have no idea on that.

Thanks guys. More pictures later.
 

89avanti

Petty Officer 2nd Class
Joined
Nov 25, 2012
Messages
137
Re: '89 Avanti 170 DLI

Re: '89 Avanti 170 DLI

I chemically cleaned my teak with deck wash, then I soaked it with teak oil

The plywood is not right, or original. you may have to pull the cap. The cap and bow area sits a bit proud of the soul. could be the PO did not like that and the plywood is innocuous and simply a filler piece.

Most of the 170's had the 3.0 liter engine in them post a pic

When I redid mine, the vinyl was good, the ply was bad. so I simply made new wood, using the rotting wood as a template. I also picked up new foam. I used monel staples as stainless staples will eventually rust.

that square hole is an in-floor cooler. there is a forward bulkhead, a rearward bulkhead and the two stringers on each side of teh cooler. the stringers run all the way forward. the forward bulkhead is what separates the cooler from the ski locker. the rearward bulkhead separates the cooler from the engine compartment. regarding you cover, I made a plywood cover for mine and covered in csm there should be 3 of those plastic covers on board. one under each bow seat, and the one on hinges as shown in your picture. before making covers out of ply I had played musical covers, however they all broke from the weight of people walking on them.

The horn cover is stainless, just polish it up. it is an Avanti only piece. rear bilge vents are attwoods, one facing forward, one facing aft. before any hi-tech stuff, you may want to simply get the boat on the water.

Is this how I should clean my teak as well? Deck wash? What exactly is that? Where would I find this method online so I can get a more educated idea on how to do it?

A noob questions - what is a stringer and where is it? Stringer to me is what we put fish we catch in the boat in. LOL. I'm a little weary about drilling anything.

Thanks.
 

89avanti

Petty Officer 2nd Class
Joined
Nov 25, 2012
Messages
137
Re: '89 Avanti 170 DLI

Re: '89 Avanti 170 DLI

IMG_1175.jpgIMG_1176.jpgIMG_1178.jpgIMG_1180.jpg

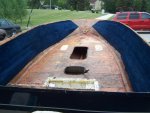
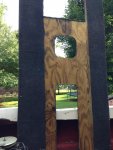
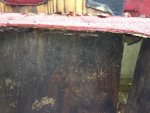
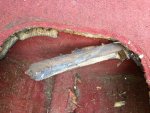
So about those oh crap moments. I took the gray carpeted wood out and sure enough, completely rotten under.

What now?
 

Scott Danforth

Grumpy Vintage Moderator still playing with boats
Staff member
Joined
Jul 23, 2011
Messages
50,295
Re: '89 Avanti 170 DLI

Re: '89 Avanti 170 DLI

the small plug like hole in the cooler is the drain to the bilge. when ice melts it has to go somewhere.

based on the pics it looks like you are going to be doing a floor and stringers, and possibly the transom.

so to answer your question on removing the battery, yes, your going to have to remove the battery. And the engine. I would also remove the cap. take the small stainless piece off the bow on the rub rail, then pull the rub rail rubber out. behind there, you will find the screws that hold on the rub rail channel and join the cap to the hull. there is a bit of silicone between the cap and hull that you may have to cut.

Scott
 

Bob_VT

Moderator & Unofficial iBoats Historian
Staff member
Joined
May 19, 2001
Messages
26,065
Re: '89 Bayliner Avanti restoration - where to start?

To the original poster...... your threads have been merged. ;)
 

ricohman

Lieutenant Commander
Joined
Jul 30, 2011
Messages
1,631
Re: '89 Avanti 170 DLI

Re: '89 Avanti 170 DLI

View attachment 196040View attachment 196041View attachment 196042View attachment 196043

So about those oh crap moments. I took the gray carpeted wood out and sure enough, completely rotten under.

What now?

Now you get to use your wood working and problem solving skills. And learn some new ones. I would bet the stringers and transom are as rotten as the floor.
I've only helped with one complete gut and redo. Now that I have seen it first hand, and what it can cost, I think one needs to put some serious thought before committing to take this on.
 

89avanti

Petty Officer 2nd Class
Joined
Nov 25, 2012
Messages
137
Re: '89 Avanti 170 DLI

Re: '89 Avanti 170 DLI

the small plug like hole in the cooler is the drain to the bilge. when ice melts it has to go somewhere.

based on the pics it looks like you are going to be doing a floor and stringers, and possibly the transom.

so to answer your question on removing the battery, yes, your going to have to remove the battery. And the engine. I would also remove the cap. take the small stainless piece off the bow on the rub rail, then pull the rub rail rubber out. behind there, you will find the screws that hold on the rub rail channel and join the cap to the hull. there is a bit of silicone between the cap and hull that you may have to cut.

Scott

Thanks Scott. I guess I never thought of that small area as a place I would dump ice since it's nasty at the moment. LOL.

I have inspected the transom and it's in great condition so I think I can avoid pulling the engine...thankfully.

In regards to replacing the floor and stringers. Are there any instructions on how to do that? Do I have to pull the cap in order to do it? Is there a way to do it without pulling the cap? I'm going to be replacing the carpeting as well so whichever way is the for doing both that and the flooring is the way I want to do it. nOOb question - what's a stringer and its purpose?

On a brighter note ... the engine purrs. Trim isn't working but engine sounds great.
 

89avanti

Petty Officer 2nd Class
Joined
Nov 25, 2012
Messages
137
Re: '89 Avanti 170 DLI

Re: '89 Avanti 170 DLI

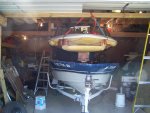
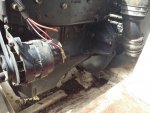
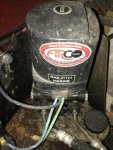
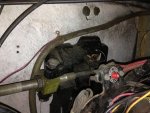
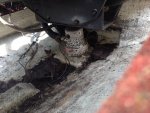
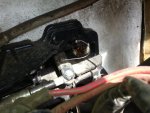
A few more pictures. The pump for the trim is super dirty. Should I take core samples of the transom all around it or just in once place?

IMG_1196.jpgIMG_1102.jpgIMG_1104.jpgIMG_1197.jpgIMG_1204.jpg
 

Scott Danforth

Grumpy Vintage Moderator still playing with boats
Staff member
Joined
Jul 23, 2011
Messages
50,295
Re: '89 Avanti 170 DLI

Re: '89 Avanti 170 DLI

I have inspected the transom and it's in great condition so I think I can avoid pulling the engine...thankfully.

In regards to replacing the floor and stringers. Are there any instructions on how to do that? Do I have to pull the cap in order to do it? Is there a way to do it without pulling the cap?

From having done less work on my boat than you are going to be doing

your going to have to pull the motor and drive to replace the floor and stringers.
your going to have to pull the cap to replace the floor and stringers, even the carpeting.

Note that the original carpeting goes under the bow area of the cap (see my pics)

While you technically could work around the engine, the amount of headache created by not pulling the motor is not worth it.

the good news, I pulled my cap in under an hour without any knowledge of how to do it, nor was I on sites like this. I then pulled the motor with the cap off (so much easier) You may want to kno when I did mine, I spent about $1500 on the fiberglass, resin, carpet, etc and two full weeks working on the boat to get it done.
 

Scott Danforth

Grumpy Vintage Moderator still playing with boats
Staff member
Joined
Jul 23, 2011
Messages
50,295
Re: '89 Avanti 170 DLI

Re: '89 Avanti 170 DLI

Instructions on pulling the stringers and floor:

0.) evaluate the list, discuss with your significant other because this is a decent sized project for both labor and time, not to mention a bit of cash.
1.) remove the cap
2.) remove the drive and motor
3.) make a cradle for the hull (I used my bunk trailer and a bunch of 2 x 4's)
4.) wear the right PPE
5) fire up the instruments of destruction and remove the floor (skill saw, sawsall, and multi-tool)
6.) spend many hours swearing alot, sweating alot, spending alot, and asking questions alot
7.) apply gelcoat to the bilge, cooler, and locker areas
8.) put down the carpet
9.) re-install engine and drive. Have drive aligned
10.) re-install cap
11.) re-install wiring
12.) re-install interior and trim
13.) wax and polish
14.) go boating

5.), 6.) and 7.) are the sections that your most interested in as a step by step. however without actually being there to assist, we can only give you guidance. There is a lot of knowledge in the repair section on this wonderful site. I have also been there with the exact same hull. so if needed, PM me and I can send you my cell #
 

jbcurt00

Moderator
Staff member
Joined
Oct 25, 2011
Messages
25,118
Re: '89 Avanti 170 DLI

Re: '89 Avanti 170 DLI

So about those oh crap moments. I took the gray carpeted wood out and sure enough, completely rotten under. What now?

Yep, welcome to the 'club'

Good news: No monetary dues :)

Bad news: The dues in time, effort & materials are higher then we'd like

Scott's been there & done it on the same boat. He'll help you out anyway he can. He offered his knowledge, take all you can get.

Best of luck on your continuing adventure.
 

89avanti

Petty Officer 2nd Class
Joined
Nov 25, 2012
Messages
137
Re: '89 Avanti 170 DLI

Re: '89 Avanti 170 DLI

From having done less work on my boat than you are going to be doing

your going to have to pull the motor and drive to replace the floor and stringers.
your going to have to pull the cap to replace the floor and stringers, even the carpeting.

Note that the original carpeting goes under the bow area of the cap (see my pics)

While you technically could work around the engine, the amount of headache created by not pulling the motor is not worth it.

the good news, I pulled my cap in under an hour without any knowledge of how to do it, nor was I on sites like this. I then pulled the motor with the cap off (so much easier) You may want to kno when I did mine, I spent about $1500 on the fiberglass, resin, carpet, etc and two full weeks working on the boat to get it done.

Scott...I dislike you...LOL not really, but I'm hating the fact that I have to pull the engine. Thanks for the valuable knowledge. I am putting it to good use.

I've already taken the rub bumper off. Had a few stripped screws I had to grind out. I'm trying to figure out a way to pull the cap without damaging the wiring and drive mechanism where the steering wheel connects. Am I going to have to pull all of the wires off the gauges in order to do this? I'll have to pull the wires eventually when I replace the console but it looks as though I'll have to take it all apart in order to get the cap off properly. Are there any other wiring gotchas I should worry about? Cap on the gas tank had to come off as well.

Ugh!! LOL.
 

89avanti

Petty Officer 2nd Class
Joined
Nov 25, 2012
Messages
137
Re: '89 Avanti 170 DLI

Re: '89 Avanti 170 DLI

Instructions on pulling the stringers and floor:

0.) evaluate the list, discuss with your significant other because this is a decent sized project for both labor and time, not to mention a bit of cash.
1.) remove the cap
2.) remove the drive and motor
3.) make a cradle for the hull (I used my bunk trailer and a bunch of 2 x 4's)
4.) wear the right PPE
5) fire up the instruments of destruction and remove the floor (skill saw, sawsall, and multi-tool)
6.) spend many hours swearing alot, sweating alot, spending alot, and asking questions alot
7.) apply gelcoat to the bilge, cooler, and locker areas
8.) put down the carpet
9.) re-install engine and drive. Have drive aligned
10.) re-install cap
11.) re-install wiring
12.) re-install interior and trim
13.) wax and polish
14.) go boating

5.), 6.) and 7.) are the sections that your most interested in as a step by step. however without actually being there to assist, we can only give you guidance. There is a lot of knowledge in the repair section on this wonderful site. I have also been there with the exact same hull. so if needed, PM me and I can send you my cell #

Awesome. Thanks for that.

1. - nearly done.

3. - do I need to make a cradle or can I just leave it in the trailer? I really don't have anywhere to "store" it for that long of a time. I'm pulling it in and out of my carport now when I need to get out of the rain or sun.

4. - PPE? Protection? What kind? Respirator?

5. - How do I avoid cutting through the hull? I assume the locker and cooler are built into the hull? I don't want to cut through any important parts.

6. - Got that covered. Sweating writing this. LOL.

7. - Can I get the gelcoat at any marine place? No Lowes I'm assuming? When I get to that point I'll ask more.

8. - Putting down the carpet seems easy enough. I was told to get outdoor/rubber backed carpet for this part. Is this correct?

Seems like there is a step in between 5 & 7 where I should be reinstalling wood in the place of what I cut out. What type of wood should I get and how should I treat it?

Thanks again...very helpful. Back to pulling the cap.
 

GT1000000

Rear Admiral
Joined
Jul 13, 2011
Messages
4,916
Re: '89 Avanti 170 DLI

Re: '89 Avanti 170 DLI

3. - do I need to make a cradle or can I just leave it in the trailer? I really don't have anywhere to "store" it for that long of a time. I'm pulling it in and out of my carport now when I need to get out of the rain or sun.

As long as you provide proper support to keep the hull from flexing out of shape while you work on...as you remove structure, it will become flimsy, if you do not support it, and put it back together that way, you will cause major problems...if you have a bunk type trailer, just add enough extra support to keep it in the same shape as BEFORE removing the cap...also take tons of pictures and measurements...very useful for the PUT Back...also, include the tape measure in some of your pics for reference...If it is on a roller trailer, you will have to sort of re build it with good support...

4. - PPE? Protection? What kind? Respirator?

Full Face respirator, talcum powder[to reduce itching], Tyvek Suit...grinding fiberglass will usually make you itch like crazy, it will destroy your lungs and eyeballs, unless properly protected...cold showers after grinding sessions help to remove dust from your skin without opening up your pores and allowing more in...

5. - How do I avoid cutting through the hull? I assume the locker and cooler are built into the hull? I don't want to cut through any important parts.
Set your circular saw depth to where it just barely cuts through ONLY the decking, but if you happen to cut through the hull, you will have joined a growing group of us who have been there and done that...me, I did it several times...no worries, easy to repair once you get the hang of glassing
6. - Got that covered. Sweating writing this. LOL.
Be prepared for MUCH more...:rolleyes:

7. - Can I get the gelcoat at any marine place? No Lowes I'm assuming? When I get to that point I'll ask more.

Much to do before you have to worry about that...HINT, places like US Composites will become your go to places...
8. - Putting down the carpet seems easy enough. I was told to get outdoor/rubber backed carpet for this part. Is this correct?
Just like above, many miles to travel before reaching that cross road...
Seems like there is a step in between 5 & 7 where I should be reinstalling wood in the place of what I cut out. What type of wood should I get and how should I treat it?
That's what Step 6 is...Many Questions will be coming up...Many choices for wood...mostly Plywood, Exterior Grade...MDO, Marine, Arauco, Underlayment...and others...Treatment comes from either fiberglass or epoxy resins and different fiberglass cloths and mat...

Great place to begin your studies is here...http://forums.iboats.com/boat-resto...r/how-tos-other-great-information-288451.html

Also, very important that you provide us with pictures, they help us see what you see and be better able to give good advice...plus it helps to document your trails and tribulations for others to learn from...

Best of luck and have fun!
 

89avanti

Petty Officer 2nd Class
Joined
Nov 25, 2012
Messages
137
Re: '89 Bayliner Avanti restoration - where to start?

We need an app for iboats.com
 

KING RAT

Seaman Apprentice
Joined
Nov 18, 2009
Messages
30
Re: '89 Bayliner Avanti restoration - where to start?

clean clean clean......
 

jbcurt00

Moderator
Staff member
Joined
Oct 25, 2011
Messages
25,118
Re: '89 Bayliner Avanti restoration - where to start?

I don't, but I've heard some use Tap-a-talk (sp?)

My smarter then me phone occasionally acts up when trying to load iboats, but generally, the smartphone browser does a pretty good job. PM's are nearly impossible though. When trying to send 1 by either clicking the user name at the top of a post, or to respond when I log on via my cell & have recieved 1. Doesn't work worth a damn.

But an iboats app... That'd be good. Send me the link when you get it setup & available on the android market :)

Free, of course, like the forum :watermelon:
 

KING RAT

Seaman Apprentice
Joined
Nov 18, 2009
Messages
30
Re: '89 Bayliner Avanti restoration - where to start?

clean then ,clean again..
 
Top