Bayliner Capri unintentional restoration project

jmmacky

Petty Officer 2nd Class
Joined
Jun 20, 2011
Messages
177
Re: Bayliner Capri unintentional restoration project

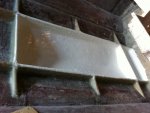
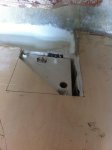
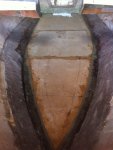
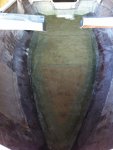
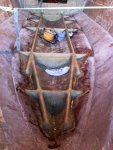
I have now completely glassed in the stringers and bulkheads. I first tabbed them in with 2 layers of my combi matt then capped them with 1 layer. As usual with this project this took me a lot longer than anticipated!

IMG_0029.jpg IMG_0027.jpg

I've decided not to create drainage all the way up the keel. From the bulkhead in front of the fuel tank forwards is going to remain sealed and I think I'll foam it. I've got a new transom plug to put in the bilge bulkhead so I can unscrew it and see if any water is in there periodically. Next I'm going to cover the fuel tank area and bilge area in bilge paint.
 

WILSONS88

Petty Officer 3rd Class
Joined
Jun 29, 2011
Messages
75
Re: Bayliner Capri unintentional restoration project

Looking real good. Great job on the transom. You will have it back in the water in short time.
 

ezmobee

Supreme Mariner
Joined
Mar 26, 2007
Messages
23,767
Re: Bayliner Capri unintentional restoration project

Very nice work.
 

jmmacky

Petty Officer 2nd Class
Joined
Jun 20, 2011
Messages
177
Re: Bayliner Capri unintentional restoration project

This is probably massive overkill but I have painted the new aluminium fuel tank with 4 coats of a special zinc based paint to preserve it then a coat of bilge paint over the top to protect it. This has slowed me down a bit now as I have to wait 24 hours for it to dry. I know its aluminium but the old one was as well and that was corroded beyond repair so I want to do whatever I can to make it last longer.
 

SDSeville

Lieutenant
Joined
Mar 19, 2010
Messages
1,481
Re: Bayliner Capri unintentional restoration project

TACH]

I've decided not to create drainage all the way up the keel. From the bulkhead in front of the fuel tank forwards is going to remain sealed and I think I'll foam it.

I would recommend that you create as much drainage as possible -- from everywhere (including the outsides of the stringers) back to the bilge. Inevitably, water will get in, so you may as well give it an opportunity to get out.
 

jmmacky

Petty Officer 2nd Class
Joined
Jun 20, 2011
Messages
177
Re: Bayliner Capri unintentional restoration project

I would recommend that you create as much drainage as possible -- from everywhere (including the outsides of the stringers) back to the bilge. Inevitably, water will get in, so you may as well give it an opportunity to get out.

The problem I have with that is that it would mean cutting drainage holes in the stringers and to me this would just provide a way for water to eventually get onto the wood and cause rot? I have been unsure of the best way to resolve this problem but had decided to foam with closed cell so there is no empty space and seal it all up as best as I possibly can. Bad idea?!
 

SDSeville

Lieutenant
Joined
Mar 19, 2010
Messages
1,481
Re: Bayliner Capri unintentional restoration project

I am no expert. I have only been through this restoration process one time. However, from what I have seen and what I have read here, water will find a way in eventually, so you might as well give it a way to get out. The waterproof foam can eventually end up completely waterlogged if water cannot get out. I have seen many people who have used the pour in foam drill holes and leave open spaces for water to drain away from the foam.

As far as adding another way for water to get into the wood -- You can seal the drainage holes up pretty easily with anything from the "peanut butter" mix everyone uses to epoxy to 5200 sealant. I inserted pieces of 1/2" pipe (cut to the thickness of the stringers) through the holes and sealed with peanut butter.
 

jmmacky

Petty Officer 2nd Class
Joined
Jun 20, 2011
Messages
177
Re: Bayliner Capri unintentional restoration project

I am no expert. I have only been through this restoration process one time. However, from what I have seen and what I have read here, water will find a way in eventually, so you might as well give it a way to get out. The waterproof foam can eventually end up completely waterlogged if water cannot get out. I have seen many people who have used the pour in foam drill holes and leave open spaces for water to drain away from the foam.

As far as adding another way for water to get into the wood -- You can seal the drainage holes up pretty easily with anything from the "peanut butter" mix everyone uses to epoxy to 5200 sealant. I inserted pieces of 1/2" pipe (cut to the thickness of the stringers) through the holes and sealed with peanut butter.

I'm really conflicted now because I had made my mind up to seal it and now am uncertain again! My main concerns with creating drainage:

1. If water can get through the peanut butter filleting in the deck eventually then surely it will get through the PB coating the hole in stringers/bulkheads eventually and into the wood.
2. By putting holes through bulkheads/stringers it creates a passage through which water definitely WILL be able to get up into the other compartments from the bilge and get foam etc wet.
3. If the boat is always kept under cover (as it will be now its owned by me) and not left moored for any lengths of time surely there will never be much standing water to seep through into the below deck area.
4. The only screws i'm going to put through the deck (and I might even glass on a 'sacrificial' bit of wood for this) will be for the ski pole which is over the fuel tank compartment and drained anyway.

I have read some threads where people have created drainage and others where they haven't. One notable one I use a lot for reference is Friscoboaters and he did not create drainage from the foamed compartments. The other thing that worried me about drainage (and I know it has been discussed extensively on these forums) is how to create it effectively without perforating the foam. The only idea I like really is the balloon one but reckon they would pop on the sharp bits of my fillets which I don't think I could ever sand effectively enough without doing it by hand because of the awkward angles and it taking days!

SD - I really appreciate your input and am not trying to ignore/contradict your advice but just voicing my concerns/thoughts!
 

SDSeville

Lieutenant
Joined
Mar 19, 2010
Messages
1,481
Re: Bayliner Capri unintentional restoration project

No problem jmmacky. As I said, I am certainly no expert. Sounds like you have done your homework. Lots of different ways to skin a cat. Personally, I would go with whatever friscoboater does.
 

jmmacky

Petty Officer 2nd Class
Joined
Jun 20, 2011
Messages
177
Re: Bayliner Capri unintentional restoration project

No problem jmmacky. As I said, I am certainly no expert. Sounds like you have done your homework. Lots of different ways to skin a cat. Personally, I would go with whatever friscoboater does.

Haha...thanks! I promise your knowledge will be superior to mine! I have decided to not put a ski locker in as well in order to try and prevent any leaks through the deck.
 

jmmacky

Petty Officer 2nd Class
Joined
Jun 20, 2011
Messages
177
Re: Bayliner Capri unintentional restoration project

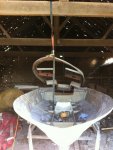
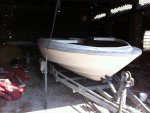
Here are a couple of photos of putting the cap back on by myself as I did it when I had a days holiday so had no one available to give me a hand! I've put it back on so that I know it will fit after the deck is glassed in place. The only problem is that the splashwell doesn't fit due to the ticker transom that is on it now so the whole thing is lifted up a bit at the back but that will be easily enough fixed later. I sanded all the paint off this while I had it off and it is now ready for filling, more sanding and painting.

IMG_0001.jpg IMG_0003.jpg

I have painted the fuel tank area compartment in a few coats of Teamac bilge paint for extra protection of the fibreglass and wood in an area where water will be getting to. I also have some neoprene to stick down to cushion the fuel tank. (I thought I had an original idea here where I could actually add something to iboats but then found other people have done it already)! The bilge area has been coated with 2 layers of gelcoat (never used this before - I really like the finish it gives and wish I had done it in the fuel tank area as well) and will get some bilge paint over the top. Thought I'd get this painting done before drilling the drainage hole to the bilge for maximum protection.

IMG_0008.jpg

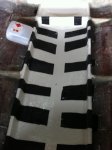
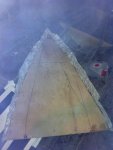
And here is my deck ply cut to size. I found this surprisingly easy actually and it didn't take long at all. The back section is pretty much straight so I just made a polystyrene template for the bow section. The bilge area has now been cut and the underside fibreglassed with csm. I have left tabs to help fix it to the hull with and for waterproofing. It was a relief to find my cutting of the stringers/bulkheads to deck height was correct and provided a nice stand for the deck.

IMG_0005.jpg
 

jmmacky

Petty Officer 2nd Class
Joined
Jun 20, 2011
Messages
177
Re: Bayliner Capri unintentional restoration project

I'm really sorry I haven't posted for ages! After my last post I had to work every hour possible to get the boat to a waterproof stage that I could leave it in. The reason for this was that I moved jobs to another part of the country so had to move house etc. Anyway, I've now finally got fully unpacked and furniture put together etc in the new house so thoughts are back to the boat! The only problem is that I haven't found a place to keep it yet so it is still in the barn with the covers on back at my old house.

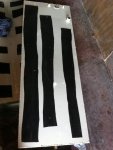
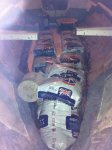
Here are the photos of the tank compartment and top of tank covered in rubber strips:

IMG_0011.jpg IMG_0012.jpg

I covered the bottom of the deck pieces with CSM but left tabs at the edge to help fix it to the hull:

IMG_0013.jpg

I decided to just rely on some waterproof 'seriously strong' glue to attach the deck pieces to the hull/bulkheads and stringers as I didn't want any screws that could potentially wick water. Each deck section I then weighted down using 25kg bags of sheep feed and other heavy objects I could find.

IMG_0015.jpg IMG_0018.jpg
 

jmmacky

Petty Officer 2nd Class
Joined
Jun 20, 2011
Messages
177
Re: Bayliner Capri unintentional restoration project

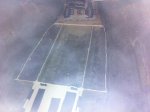
This is the deck all weighted down:

IMG_0026.jpg

I left a piece cut out at the back where the fuel pipes can get out. Later I'm going to make a raised bit here that funnels water to the bilge and hopefully prevents water getting under the deck (even though the fuel tank compartment should be waterproof).

IMG_0027.jpg

I then tabbed the deck in using 2 layers of my combi matt then put a layer down over the whole surface. Unfortunately, at this point I completely ran out of resin and time so had to leave it there. Ideally, I would have done another layer on top while it was fresh and then covered it in csm to get a smoother finish before the gelcoat.

IMG_0029.jpg IMG_0031.jpg

I'm looking for somewhere to keep the boat where I am now so I can continue with this project. I really want to have it done for next summer. But I won't have nearly as much time to work on it now as my work hours have increased a lot! Please check back for updates now and then!
 

oops!

Supreme Mariner
Joined
Oct 18, 2007
Messages
12,932
Re: Bayliner Capri unintentional restoration project

really, really, nice job

you are almost in the home stretch.

it is a real drag how work gets in the way of boat building.

the good news is that now that most of the major construction / glassing is done........the rest of the jobs are small 1-2 hour jobs....

cutting the holes for the foam only takes a hour or so.........foaming the hull takes an hour......replacing the foam cut outs takes an hour of glassing. ....so....just a little bit more when you can and you will be ready for the spring....if you have any interior repairs......send them out now....or do then on your kitchen table over the winter !

keep it up bud
 

jmmacky

Petty Officer 2nd Class
Joined
Jun 20, 2011
Messages
177
Re: Bayliner Capri unintentional restoration project

Thanks very much Oops - thats really motivational coming from you! Sorry...forgot to mention I have already done the foaming! I jacked the front of the boat up and drilled 2" diameter holes on the most bow part of each compartment to be foamed. I used a 2-part polyurethane boat buoyancy foam which I poured into the each compartment. I was quite worried about this step but it was actually quite easy. I did it after the deck had been tabbed in so it was strong. I replaced the wood plugs which I had drilled out afterwards and peanut buttered them back in. I then layed the glass on the deck over the top so there were no weak areas where water could get in.

Sorry no photos from this stage as I had to work quite quickly as was by myself. Tip - have plenty of mixing cups and sticks available for foaming!

The next big step is patching the holes on the outside and reinforcing the keel followed by painting it! Haven't worked out how to flip it/tilt it yet! Then I get to start the interior!
 

ezmobee

Supreme Mariner
Joined
Mar 26, 2007
Messages
23,767
Re: Bayliner Capri unintentional restoration project

Looking very solid. Nice work.
 

jmmacky

Petty Officer 2nd Class
Joined
Jun 20, 2011
Messages
177
Re: Bayliner Capri unintentional restoration project

i know you really want to paint it.......but i would seriously consider gellcoating it.

have a look at this

http://forums.iboats.com/showthread.php?t=465692

Thanks for the link - thats a really good thread...although I haven't managed to read it all yet! I'm seriously considering going for the gelcoat now. After putting in all the effort into the inside of the boat I want to make it look really good on the outside as well! Cheers
 

jmmacky

Petty Officer 2nd Class
Joined
Jun 20, 2011
Messages
177
Re: Bayliner Capri unintentional restoration project

Looking very solid. Nice work.

Thanks Ezombee! The comments help keep me motivated! I hope to get the boat to my new house and get new updates up here soon!
 

jmmacky

Petty Officer 2nd Class
Joined
Jun 20, 2011
Messages
177
Re: Bayliner Capri unintentional restoration project

Think I have found a new barn to keep the boat in today - so will hopefully get it across in the next couple of weeks and continue the rebuild...!
 
Top