can of worms?

sphelps

Supreme Mariner
Joined
Nov 16, 2011
Messages
11,475
You could have poured them and then drilled the drain holes if ya wanted ....
 

jrttoday

Lieutenant Junior Grade
Joined
Feb 8, 2010
Messages
1,081
yes and I considered that. However, they're in the corner on the bottom and don't have a right angle drill. And was difficult enough as it is... From what little I know and have seen, didn't want it solid right in that corner - creates a hard spot, prone to cracking or breaking. Gussets or not, there will be some flexing - though minimal - between the transom and hull - at least, in my line of thinking.
 

StarTed

Senior Chief Petty Officer
Joined
Jul 14, 2015
Messages
694
jrttoday - I wonder how you'd file a threaded pipe for that hole? :laugh::laugh::laugh:
 

jrttoday

Lieutenant Junior Grade
Joined
Feb 8, 2010
Messages
1,081
^^^ I'd use a Victor with a #10 Rosebud!!!

Phelps, I don't know much, really! Especially about fiberglass and this job, just making it up as I go. And I do really appreciate all the help I'm getting from you and the iboats crew - yeah I saw that video.
I have some tools but in the variety I'm needing for this, have to adapt. My bigger concern is the outside chance I'll be running light on Seacast - these two will be filled last. But my calculations were made before installing main gusset and trimming it back - and I had enough before that.
 

jrttoday

Lieutenant Junior Grade
Joined
Feb 8, 2010
Messages
1,081
That was a great intermission ! Life is too short ! this one has smoke coming out of grandpa's ears ! :lol:
https://www.youtube.com/watch?v=Wu3-QqQHK08
Happy Easter jr !
days later and am still laughing! Reminded me of one I'd seen of the Guess Who's lead singer/pianist what's his name doing "These Eyes" at 78 speed video and song - was a hoot, but couldn't find it in my Youtube history???
Anyway.... came across this.... for all dog lovers. If you've never seen this or it's been awhile, have a tissue handy, it'll make your heart sink
https://youtu.be/H17edn_RZoY
 

jrttoday

Lieutenant Junior Grade
Joined
Feb 8, 2010
Messages
1,081
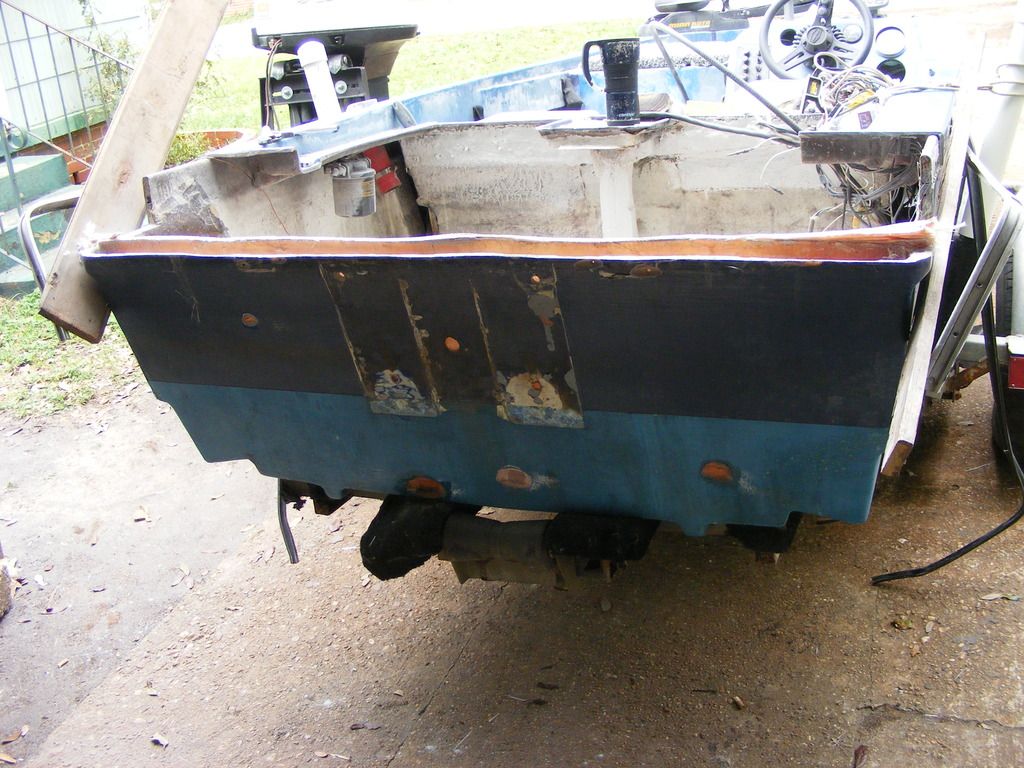
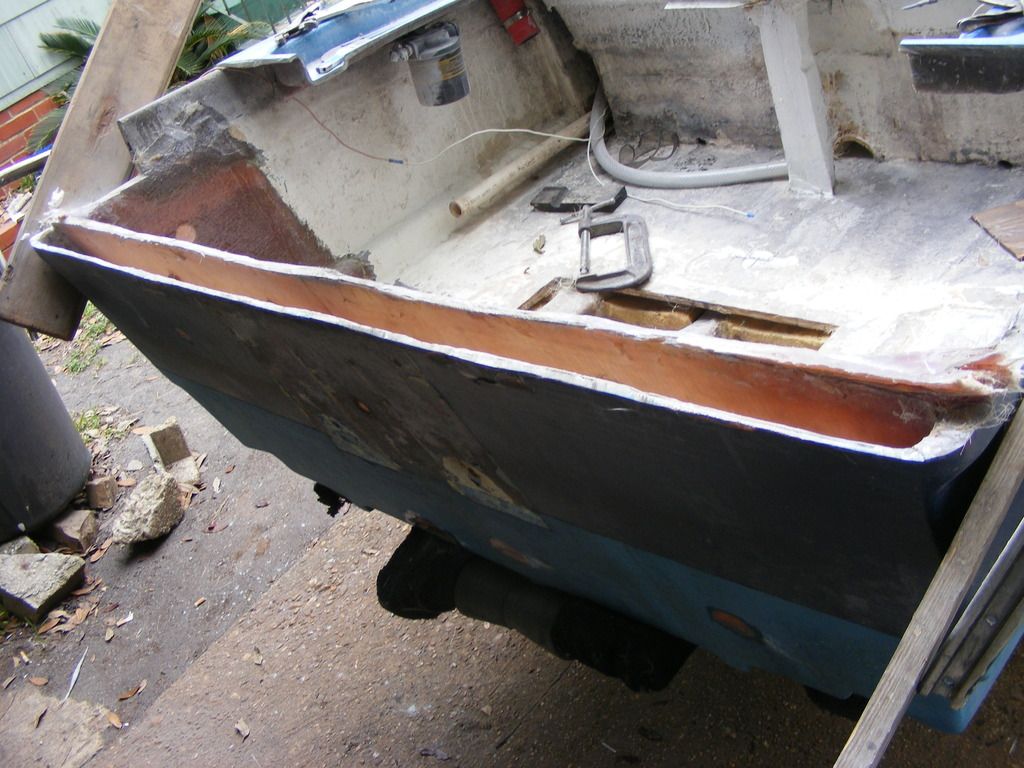
first cut, not too bad, not great lol, but for my old butt...
http://[URL=http://s173.photobucket.com/user/jrttoday/media/DSCF0008_zpsiimkyege.jpg.html]

I used circular saw with a fine tooth blade and "tried" going through both inner/outer - blade kept getting hot and warping. oh well...[/URL]
"IF" you're observant enough to notice - where I've cut back the top of gunwales is actually wood glassed over and they are not even on the bottom. This is where I repaired them last summer when I was supposed to be on bed rest. Unless I am absolutely dead, I cannot not do something. Even if it kills me :facepalm:


knock down the high spots, patch outside holes, install drains....... gettin there
 

jrttoday

Lieutenant Junior Grade
Joined
Feb 8, 2010
Messages
1,081
and another blinding flash of the obvious!! Doctor, my eyes!! Wasn't too concerned but did question the additional weight going from 100 horse to a 115. My 100esl72r weighs 252 pounds according to shop manual. Didn't you get a manual for the 115esl70d? :facepalm::facepalm::facepalm::facepalm: :lol:
It says 252 also.... makes me wonder
 

jrttoday

Lieutenant Junior Grade
Joined
Feb 8, 2010
Messages
1,081
that came out real well, but not going to picture ya'll to death. Too late to edit.. but top edge of inner skin is inconsistent in thickness because instead of patching around where clamps were, I put another csm/24/csm/24/ csm all the way across - not trying to do body work here. Besides, I KNOW I read somewhere that real strength is accomplished through imperfections, blemishes, irregularities and the like :rolleyes:
It was in the same thread where they said that air bubbles in fiberglass helped the floatation foam :lol:

As it is "right now", it's almost as solid as before I tore it down.... well, not quite lol

This project is taking longer than I thought, but am thoroughly enjoying the process...
and would recommend it highly to anyone, no matter their skill level
 

sphelps

Supreme Mariner
Joined
Nov 16, 2011
Messages
11,475
Looks like it's coming together ! Maybe to late but you could have screwed a strait edge on the transom to use as a guide for your skill saw ... Make sure ya take it down far enough to make room for the glass cap after the pour ...
Btw ,, I enjoyed the dog video ! :dog:
 

jrttoday

Lieutenant Junior Grade
Joined
Feb 8, 2010
Messages
1,081
thanks for being positive; a straight edge or guide might be a good suggestion for someone else, so it's never too late. I can follow a line, but like was explaining to WOG, the issues I'm having are with me :lol: In this instance, I got greedy and tried cutting through both skins - the blade got hot and warped. But did I stop? NOOOOOOO :facepalm:
They both look ragged, but look at the inner skin - way worse!!
Not gonna whine about it - just took extra time to straighten.... sigh

I was enjoying this until....... today! :lol: To do something different, started grinding the carpet backing off; got that "one" back deck done. Looks good but am now having problems with my modem - too slow to upload pics.
Glad you like the video es one of my faves.

Just thinking I'm going to redesign mixing blade - lay the paddles almost flat. Because of the sump for deck and below deck drainage, I might want to go ahead and finish all of that first. Kinda depends on the weather and if I can get/keep it outside long enough
 

jrttoday

Lieutenant Junior Grade
Joined
Feb 8, 2010
Messages
1,081
and thanks for the reminder on cap height. It isn't that big a concern, but is important. My motor fits on a CMC t/t unit; no brackets over transom. However, the last 4ish inches on sides will be glassed up to the top deck @about 90* from deck to transom. I'll need to be far enough along to put the deck in place for exact measurements - which I'm kinda there now...

Not sure what I'll do when I'm finished? probably go through withdrawal.... :sorrow:
 

jrttoday

Lieutenant Junior Grade
Joined
Feb 8, 2010
Messages
1,081
yea.. sometimes I forget why I'm doing this lol
New modem should be here early next week, no pics until then - not that I have anything to show
In hindsight, maybe should've done the bow in Seacast instead of the transom. I've never broken a transom in 51yrs of boating (started when I was 7). But I HAVE torn up the bow with my trolling motor!! :facepalm: On this boat; 24v 70lb MK running wide open crossing a point - more like a sandbar, was a 100 feet from shore.

going to "hopefully be wide open next week, good weather forecast!! I'm not there yet, but any suggestions/tips on painting the following
1) transom inside and below deck
2) livewell
3) rear casting deck and livewell lids
4) over top of Herculiner on deck

Will be brushed or rolled, no air here other than "hot air" :facepalm: :lol:
Still have a gallon of Killz - maybe 3oz gone. I bought dark green colorant, they were out of blue. Am thinking mixing it not so dark, and have plenty of sand. The deck won't need sand because of Herculiner
Hardener in Killz for livewell? Maybe elsewhere also?
If it isn't obvious by now.... aesthetics are not my concern, but don't want to look hideous either... too late!!
 

sphelps

Supreme Mariner
Joined
Nov 16, 2011
Messages
11,475
Hardener in Kilz ?
You mean enamel paint with hardener ? Maybe get a small can of gellcoat for inside the livewell ...
 

jrttoday

Lieutenant Junior Grade
Joined
Feb 8, 2010
Messages
1,081
no idea lol, my painting knowledge and skills are like this - I can get runs on a flat surface :facepalm: Painting and typing are at the top of my list for things I cannot do :lol: Fiberglass runs a close 2nd!!!! Internet is right behind :lol:
What can I say, stuff I never learned..... Guess I need give a shout out to AT&T - by the time I could get on my home page to get the number for support, it was 5pm CST, they overnighted a modem at 0$$. fedX didn't come around back, soooo I just got it. UPS guy knows me....

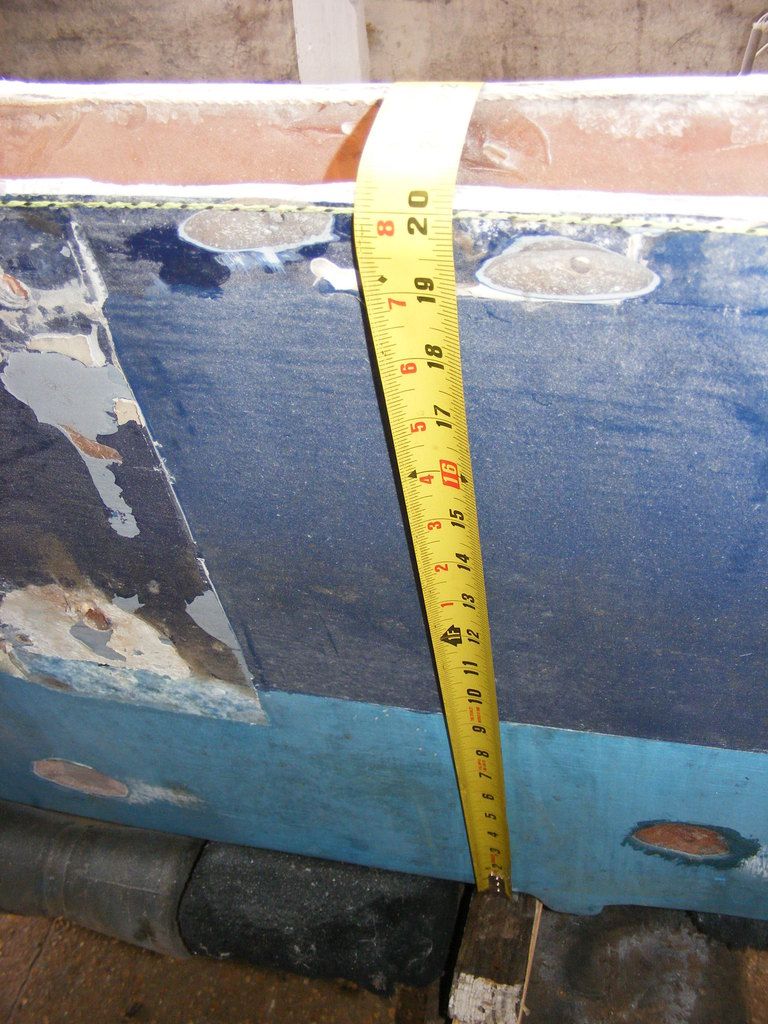
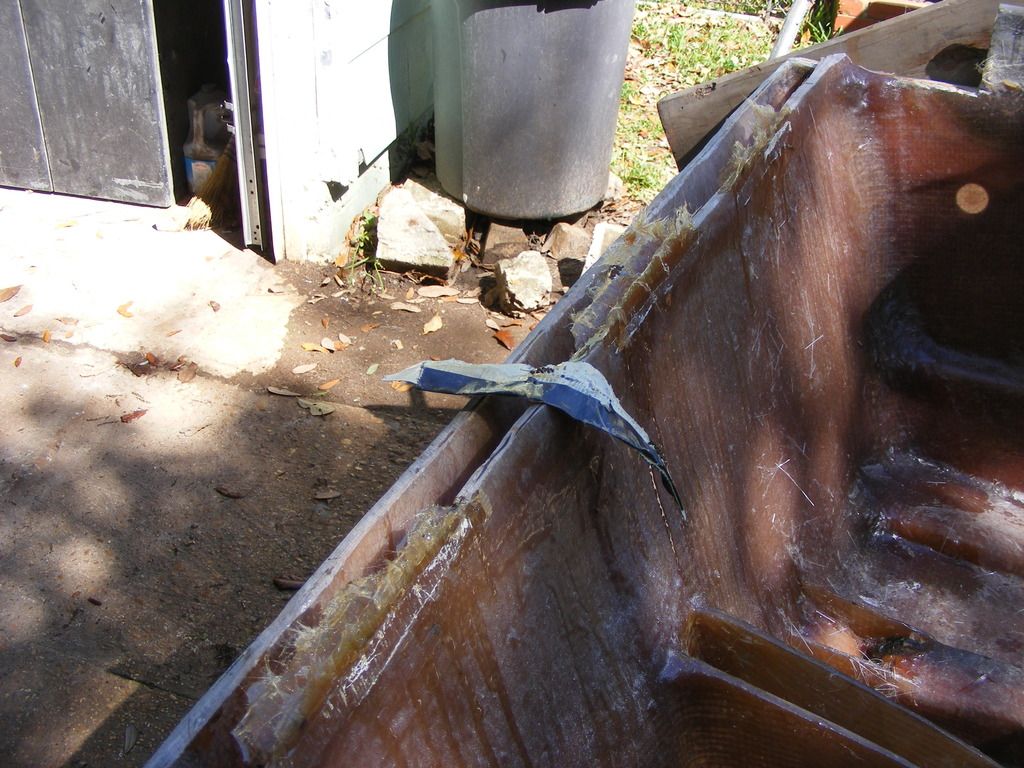
If anyone's like me and I hope you're not!!! This is the fix i came up with for where the blade was wobbling and made some low spots (rather "I" did lol). Folded over Duct tape to contain PB&J. The black lines mark the high spots
http://[URL=http://s173.photobucket.com/user/jrttoday/media/DSCF0002_zpsulroqud2.jpg.html]
Carpet on bottom of lids to protect 2"Styrofoam - two lids on right[/URL]
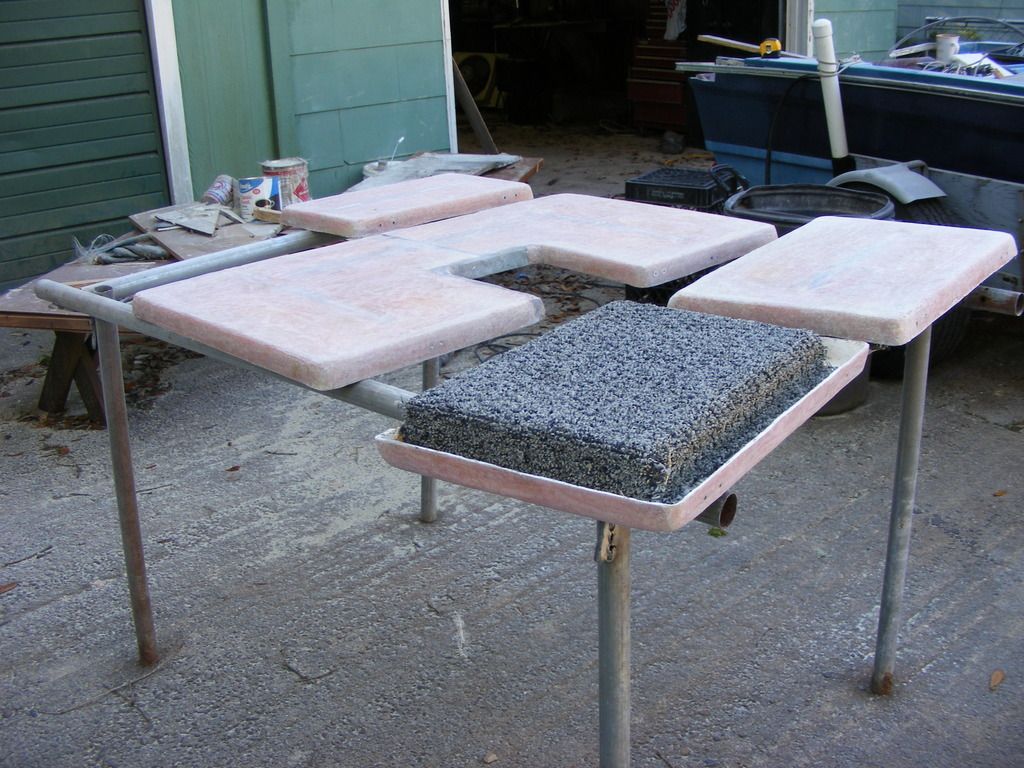


This is the second time all lids have been down to glass; have some delamination etc to repair. They're still thick and heavy, not needing an extra layer

Question I have concerns the sump; since below deck drainage and a low deck to begin with [[[ need to get exact measurements tomorrow ]]] Am looking at putting the box 14" forward bottom of transom. I have a piece of 1" id fiberglass pipe and running it level; as the boat is on trailer and at an incline. Giving clearance for water - if ever?
The pipe would be glassed over at connection to brass drain tube. Might could run it all the way out and forget the tube?
Anyway.... this kinda the route I'm headed in. This boat wasn't designed for below deck drainage

my POC table has taken a beating, had to weld some gussets on it :facepalm: Dragging it in and out, should put wheels on :lol:
 

jrttoday

Lieutenant Junior Grade
Joined
Feb 8, 2010
Messages
1,081
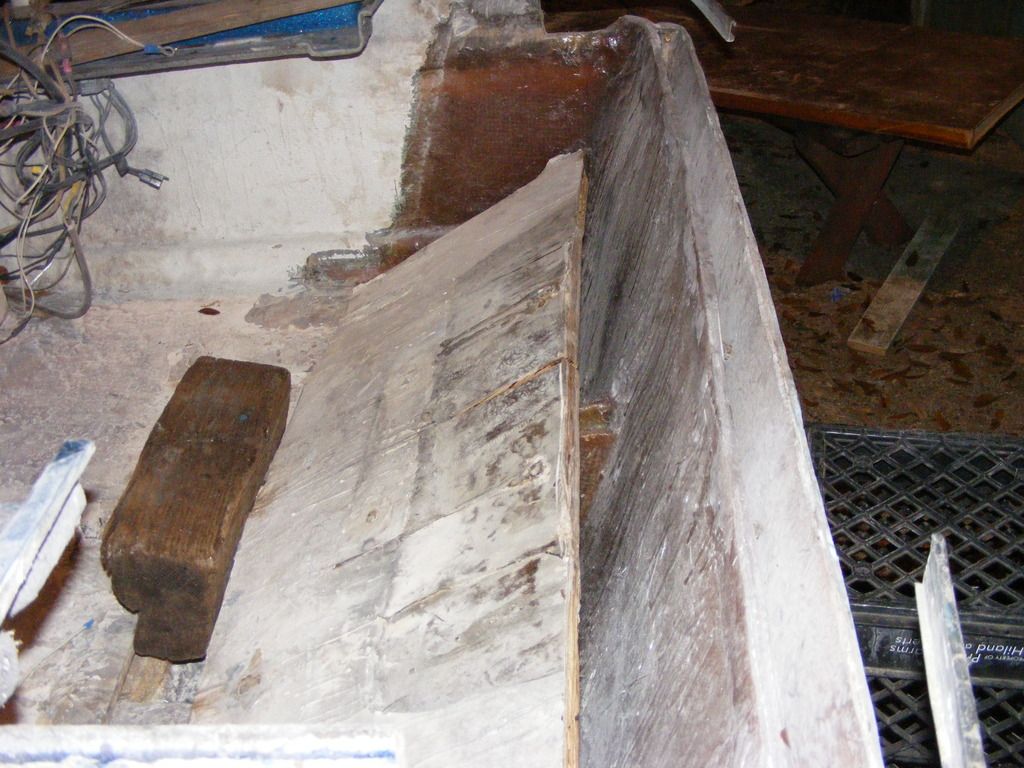
this was as far as I got, shown only to help with understanding the "why" of having the sump so far forward.
http://

it's already cut in half, but have to fit it the rest of the way. Plan on glassing it to the floor even with the front of the gusset. Tabbed to gusset on both sides at whatever angle tabbed to transom 2ish inches below top of gusset.
This board is the 1/2' piece I had reinforcing the transom, already has 1/8th" of glass. Will also make a bracket for t/t pump mounted to this piece on starboard side.
Gonna reduce the size of my trunk, but me no care... rarely ever carry that much anyway. Plenty of room topside
 

sphelps

Supreme Mariner
Joined
Nov 16, 2011
Messages
11,475
Never seen anyone do that before... ^^^ I guess extra transom support.. But will add a little extra weight ... Will you be able to access the bottom bolts on the jack plate ?
As far as the fix on the wobbley cut .... No biggie ... You could have just clamped a straight board across the top and used it for a screed if ya wanted ... By the time you glass over the top no one will ever have known ... :joyous:
 

jrttoday

Lieutenant Junior Grade
Joined
Feb 8, 2010
Messages
1,081
no weight that wasn't there before and a tad less because it'll be trimmed down - not trying for extra support (but will be there), extra floatation and water drainage above deck is the goal.
Used tape because this resin is really good - others I've used, runoff and droplets could easily be chiseled off. This stuff bonds!! Chisel it and it pulls up what's already down like a weld with good penetration rips out steel :)

"need to get exact - 2ish inches down from top of gusset" --- board is just laying there for reference, top of gusset is 8" down, bottom bolts are 9" down. It will all be cut to fit. But thanks for the reminder!! Knowing self I'd probably........ :facepalm: :lol::lol::lol: noodles have replaced brain cells

yea no one would ever know... but if I don't show the OOOOOPS!! and how fixed, what's the point? maybe help someone, doubt i ever do this again. Most seen on here is near perfect work, mine is what it is.
 
Top