fiberglass relic restoration

Scott Chinsota

Petty Officer 1st Class
Joined
Apr 18, 2011
Messages
216
Re: fiberglass relic restoration

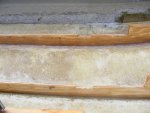
little by little... completed the bilge box assy, got the keel stringer and the crossmembers wrapped. got some clean up to do on the port and starboard stringer fillets then i can tab them in. after that the bilge assy and the keel stringer get pb'd in and tabbed. gotta install the drain tube and cut some foam and it's (finally) deck time!

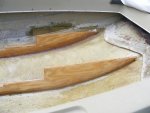
the bilge box has a drain tube in it too. got that one installed. it came out perfect. i made a flaring tool based on woodonglass's design but used a 5/8 short forged flare nut from the plumbing department instead of a nylon lock nut. the radius on the nut is perfect for a 1" drain tube. fyi-lowes part # a-338 made by watts. i had to look twice to tell which side was the factory flare. many thanks to woodonglass for the idea and the illustration.
 

Scott Chinsota

Petty Officer 1st Class
Joined
Apr 18, 2011
Messages
216
Re: fiberglass relic restoration

couple more pics...priming the crossmembers...looks like fun, huh?


2011_0806firstround0485.jpg2011_0806firstround0486.jpg
 

Scott Chinsota

Petty Officer 1st Class
Joined
Apr 18, 2011
Messages
216
question on coverage

question on coverage

i just sold a spare car engine so i have more money in the budget.
my plan was to wrap all of the new wood in 1 1/2 oz csm. wet up one layer on the set stringers, tab them twice, pb the deck in, tab it in once, add 2nd layer of csm, and tab it again. all 1 1/2 oz csm.
now i am considering a new approach using 1708 for the tabbing. from what i've read, 1 1/2 oz csm and 1708 biax have nearly the same coverage rate...4.2 sq yd csm and 4 sq yd for biax.
is this true? one gallon wets out approx 36 square feet of either material?
 

Scott Chinsota

Petty Officer 1st Class
Joined
Apr 18, 2011
Messages
216
new plan details

new plan details

assuming the coverage question yields the right answer, i now plan to tab the stringers (which are fully wrapped with csm) with 1708 flipped with csm side out.
this makes a csm sandwich...waterproof right? adequate?

deck gets csm both sides once, topside twice. no biax, maybe 6oz cloth finishing layer. adequate?

deck tabbing: 1st layer=csm, 2nd layer 1708, csm side out...sandwich...waterproof? adequate?

suggestions would be greatly appriciated. ready to tab on saturday.
 

Scott Chinsota

Petty Officer 1st Class
Joined
Apr 18, 2011
Messages
216
Re: fiberglass relic restoration

getting ancy. going to buy 1708 in the am. if i'm about to screw up...somebody please stop me
 

Woodonglass

Supreme Mariner
Joined
Dec 29, 2009
Messages
25,929
Re: fiberglass relic restoration

Here's How I recommend doing stringers and decks...
Don't lay the Biax with the CSM out. Lay it down as normal. Then lay a final layer of CSM on top.


Click the pics to enlarge

You can just use two layers of 1708 on the stringers and still be good.


34 Stringers.jpg


Decks.jpg
 

Scott Chinsota

Petty Officer 1st Class
Joined
Apr 18, 2011
Messages
216
thanks!

thanks!

the deck illustration is exactly what i had planned. the stringer tabbing is hitting the wallet really hard. oh well, "it is what it it is". gotta go shopping.
 

Scott Chinsota

Petty Officer 1st Class
Joined
Apr 18, 2011
Messages
216
biax it is...

biax it is...

got the port and starboard stringers tabbed in. 1708 then csm. running low on supplies. gotta go shopping again
keel stringer and bilge box assy go in next. pouring rain, ain't happening today.
why does everything take twice as long as i think it will. tired if grinding! one thing i've learned, bugers make bubbles... prep is truly key to a good layup. anything that sticks up must be ground off.

just to clarify. the stringers were wrapped with csm 360 degrees prior to install. this was done in two steps. first pass capping bottom going 2/3 height up. second pass capping top going 2/3 height down overlapping first pass by at least 1".
the fillets extend 1 inch up stringer and 1 inch onto the hull. maybe excessive but they spread the load and help alot with the tabbing application...large smooth curve. :D
1708 biax tabbing went on next, csm side to stringer, up to full height, 3" onto hull. then csm over biax, full height of stringer, 4" onto hull. results were nearly impeccable. :cool:
 

Scott Chinsota

Petty Officer 1st Class
Joined
Apr 18, 2011
Messages
216
stringer tabbing

stringer tabbing

things went well. very happy with results. I could have used wider strips, onto more of the hull but I went wider than the original tabbing. On the outside of the port and starboard stringers, any wider and I would've been going up the sides of the hull.

hoping to do keel stringer and bilge box assy this weekend.
 

Scott Chinsota

Petty Officer 1st Class
Joined
Apr 18, 2011
Messages
216
deck installation question

deck installation question

getting close to putting in the deck. wondering how to go about it. should i pb the top of the stringers and crossmembers then shoot screws about 6" apart? i hate the idea of putting screws in it at all. someone care to walk me through the proper way to do it, please?

trying to add pics but the software for the camera keeps copying all of the pictures even when i select only copy unsaved images. more will come when i figure it out.
 

Woodonglass

Supreme Mariner
Joined
Dec 29, 2009
Messages
25,929
Re: deck installation question

Re: deck installation question

Sounds like your making headway. I would just use PL on the stringers to secure the deck. No Screws. It'll be fine.
 

Scott Chinsota

Petty Officer 1st Class
Joined
Apr 18, 2011
Messages
216
thanks!

thanks!

setting the deck panels on a bead of pb would have been VERY difficult. I had a good plan but I'm relieved not to have to go that route.

i think i figured out how to save only new pics from the camera. there is 600 on it. i ended up with them saved in triplicate :facepalm:. had to delete them and re-save them.

trop depression in gulf directly west of me likely to delay my project. should ruin the entire weekend :(. water pump on my jeep is pouring out of the weephole :mad:. have to change it sat. cant drive the boat to work. if it ain't one thing, it's another.

I actually tried to pull an all-nighter last sat. quartz lights gave me plenty of light. about an hour later i was affixing a wide assortment of insect life to the stringer tabbing :eek:. being unsure of the effects of organic matter added to the resin, i figured it was time to call it a night :D.
 

Scott Chinsota

Petty Officer 1st Class
Joined
Apr 18, 2011
Messages
216
progress...

progress...

sat was spent fixing the jeep. by the time the water pump/tune-up was done, so was I. the heat just sucks the life out of ya.

sunday I got up early, had some coffee and I was "off like a herd of turtles". I just couldn't get my head straight. I had alot of loose ends to wrap up and the clock was not seeing things my way.

eventually, I got the bilge box assy to fit properly, the keel stringer ready to set, a new recipe sheet made up, a new measuring container made (graduated a peanut jar every 4 oz), the tabbing done on the transom, buttered in the bilge box assy, tabbed two layers across the side that ties to the keel stringer, and buttered in the keel stringer.

the keel stringer set was almost a catastrophy. first attempt, my pb was too thick to get a good fillet...a little too much fiberglass. had to lift the stringer, scrape it clean, get the pb back in the bucket and quickly mix more resin to add to the mix...tick-tock...
the second attempt went much better...pb was nearly perfect...got the channel filled, set the stringer, good squish, nice fillets ten feet long...one foot short :eek: . lift the stringer, scrape it clean, pb back in bucket, race to mixing table...tick-tock...resin, kicker, thickener, #%$@*! no fluff, grab the scissors, chop chop chop, tick-tock, chop chop chop, stir in chopped fiberglass, feel heat of bucket :facepalm: , race to boat, hoping for a miracle. fill channel, set stringer, squish, wiggle-wiggle, squish, grab fillet shaper (paint stir stick rounded with sander), rake rake rake, right side, left side, right side, left side, 3 feet, 6 feet, 9 feet, 11 feet, grab quartz light, inspect fillets, scrape up excess, apply to nose of stringer, and...bam! last two ounces rock up just as i smooth out the fillet around the nose of the stringer :cool: . my heart was pounding like i had ran the hundred yard dash. i thought for sure it would kick before i got it done and i'd be doin it twice but something finally went in my favor :D .
 

Scott Chinsota

Petty Officer 1st Class
Joined
Apr 18, 2011
Messages
216
more pics

more pics

some pics of the rot cut out. fog on the lens. i'll try again later. couple of the srtingers too.
2011_0907secondround0487.jpg2011_0907secondround0488.jpg2011_0907secondround0489.jpg
 

Attachments

  • 2011_0907secondround0491.jpg
    2011_0907secondround0491.jpg
    146.1 KB · Views: 0
  • 2011_0907secondround0490.jpg
    2011_0907secondround0490.jpg
    146.2 KB · Views: 0

Scott Chinsota

Petty Officer 1st Class
Joined
Apr 18, 2011
Messages
216
more pics

more pics

2011_0907secondround0496.jpg2011_0907secondround0492.jpg2011_0907secondround0493.jpg2011_0907secondround0494.jpg2011_0907secondround0495.jpgstringers in...the bilge was originally just a box. the drain holes in the port and starboard stringers were at the transom similar the cutaway at the end of the keel stringer. a i added the two partial bulkheads and re-located the cut outs to correct the poor drainage issue. there are two more little pieces that go in outside the stringers to stop water from going farther back than the cutouts. the four contained areas will be filled with foam...no more drainage issue :cool:.
 

Scott Chinsota

Petty Officer 1st Class
Joined
Apr 18, 2011
Messages
216
Re: more pics

Re: more pics

2011_0907secondround0501.jpg2011_0907secondround0497.jpg2011_0907secondround0498.jpg2011_0907secondround0499.jpg2011_0907secondround0500.jpgkeel stringer and bilge assy still needs tabbed in. got a couple more pieces to set that will need tabbed in too. drain tube should be done soon. fit in some foam, set the two crossmembers and i can get started on the deck.still have alot of work to do but i see light at the end of the tunnel! :D
 

Scott Chinsota

Petty Officer 1st Class
Joined
Apr 18, 2011
Messages
216
more progress...

more progress...

2 days of dry weather, got alot done. stringers and bilge assy fully tabbed and finally capped, the two crossmembers are ready for install after i cut the foam to fit, got the aft peice of the deck trimmed to fit this morning before work. deck is more important than the foam so that will wait the the decks is ready for install. primer coat on piece 1 tomorrow morning...trim piece two and three while it sets.

feels like the light at the end of the tunnel is getting brighter. :)
 

Scott Chinsota

Petty Officer 1st Class
Joined
Apr 18, 2011
Messages
216
Re: more progress...

Re: more progress...

two pieces trimmed to fit and primered..both sides

had some trouble on the first stringer with the wood sucking the resin out of the csm. kept making little bubbles. :facepalm: thought it was ready for layup but the wood was still thirsty. :( how many coats should bone dry wood require? should i be slathering it on or just wetting the surface completely, letting it set and applying additional coats? would really appreciate a little advice here...please...:)
 

Scott Chinsota

Petty Officer 1st Class
Joined
Apr 18, 2011
Messages
216
Re: more progress...

Re: more progress...

two coats both sides...gonna try layup in the morning...might prime rough side one more time. used bc plytanium. b side looks like wet glass...c side not so glossy.
 

Scott Chinsota

Petty Officer 1st Class
Joined
Apr 18, 2011
Messages
216
wow!

wow!

got a layer of csm on the c side of the first two deck panels. was gonna prime again but thought i'd give it a shot. i got discouraged at first cuz i got the little pinhead bubbles just like on the stringers but i grabbed the bubble buster and 60 seconds later i figured it out. if csm was meat, the roller would be the tenderizer mallet. wet out the mat, ignore the little bubbles, mash the application roller hard into the mat til its wet. grab the fibreglass roller and macerate the mat, lengthwise...widthwise and diagonally both ways. then get the application roller and apply more resin. mash it in good, like you're mad at it. then ease up on the pressure and add a final coat. 80 oz of resin over 40 sq ft...zero bubbles...flawless...impeccable...the result was stunning! you can see the texture of the mat through the resin. i can't find words to express how happy i am to finally have something turn out better than i expected.

special thanks to woodonglass for suggesting giving the roller another try. i used it on the stringers but it gave up on it because it seemed to make even more bubbles.
it wasn't that it didn't work i just didn't know how to use it.

more pics soon. the software keeps copying every pic from the camera instead of just the new ones. :facepalm: too busy on the boat to toy with the camera.
 
Top