Going foamless

logan944t

Petty Officer 2nd Class
Joined
Jun 26, 2010
Messages
155
Not sure where to post this question....


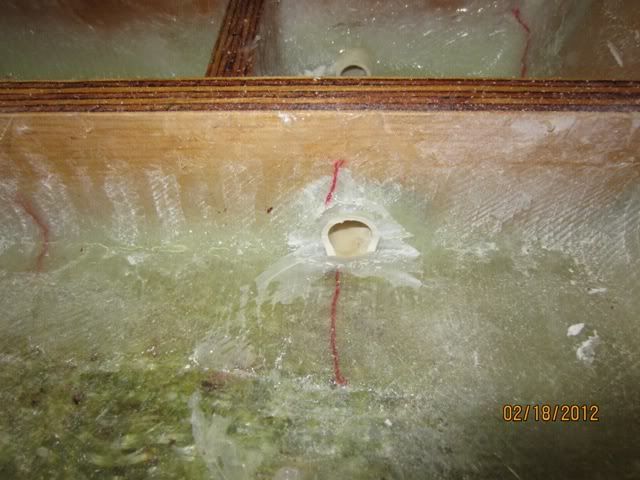
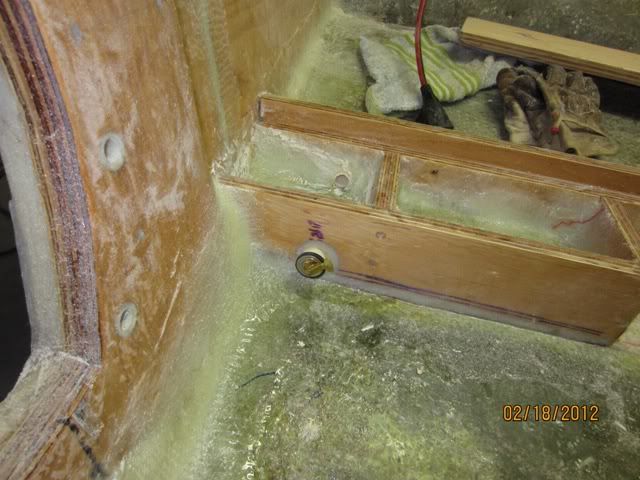
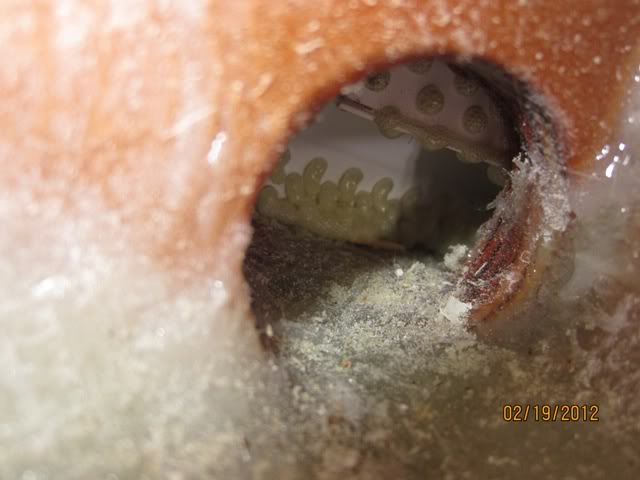
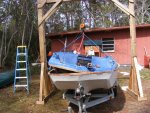
I recently bought another boat...project. Trihull, 15' with an outboard. It needs the usual--transom, deck and stringers. After removing the cap and some of the soaked foam Im seeing that altho there are 3 stringers ( 2 outboard --rotted wood and 1 keel which is 4" across and hollow.) the foam itself is structural. When there is no foam ( and at this point all the wood is gone from the outer stringers) there is no strength to the hull. It is 2 layers of roving.

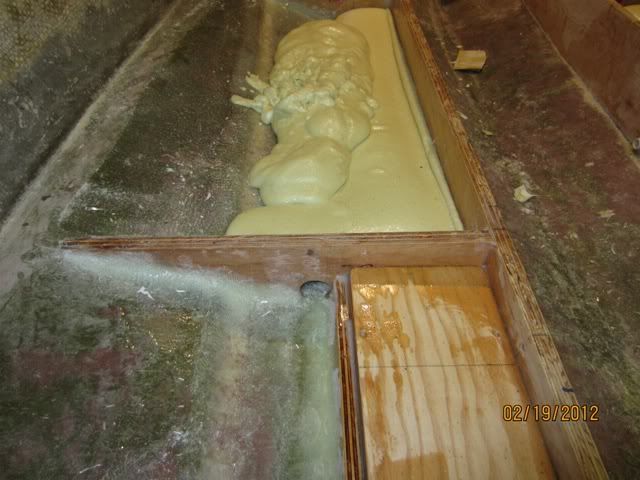
The goal was to rebuild the hull with no wood --except for the transom and leave only the foam in the sides and stringers--not the bilge--maybe put in pieces of EPS from lowes so that the foam doesnt get soaked again.

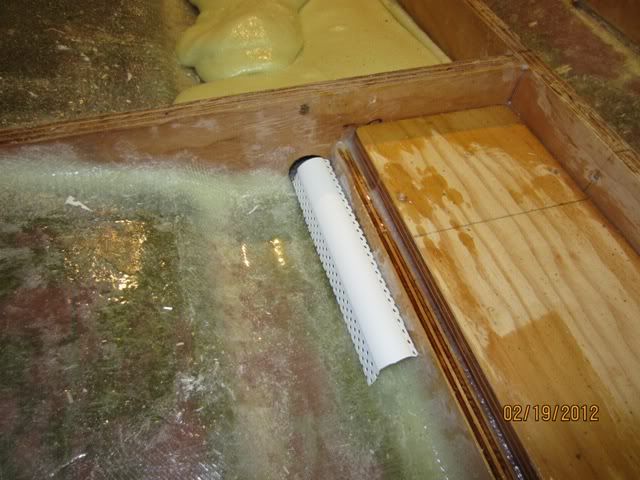
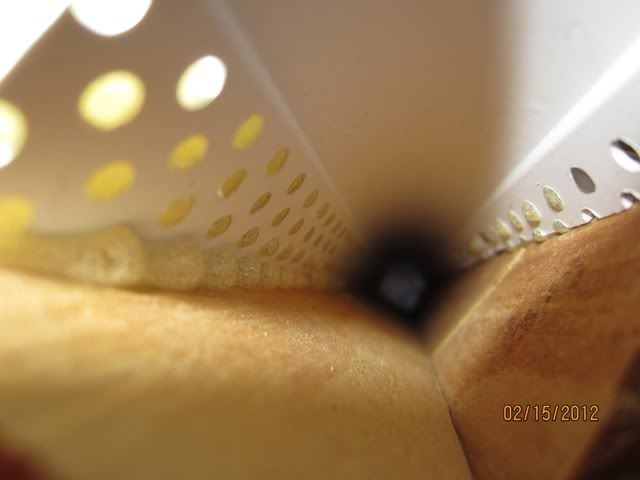
Is it possible to retrofit ribs/bulkheads to reinforce the hull ( 8 lb foam encased in glass with pvc tubes to allow the water to drain) and leave the space between the stringers and bulkheads free to drain?
 

Friscoboater

Captain
Joined
Jul 3, 2009
Messages
3,095
Re: Going foamless

If you are rebuilding with no wood, what are you worried about then? I also think you must use foam with your size boat per Coast Gaurd regulations. If you build it right, the foam will not get water logged at all.
 

Woodonglass

Supreme Mariner
Joined
Dec 29, 2009
Messages
25,929
Re: Going foamless

The glass of your hull was designed to have the foam to provide structural strength to the Overall hull. Modifying this design will jeopordize the overall structural integrity of the boat and is Highly NOT recommended. You should rebuild the boat the way the factory Engineers originally designed it. This is for your safety and your passengers.
 

logan944t

Petty Officer 2nd Class
Joined
Jun 26, 2010
Messages
155
Re: Going foamless

If you are rebuilding with no wood, what are you worried about then? I also think you must use foam with your size boat per Coast Gaurd regulations. If you build it right, the foam will not get water logged at all.


I dont want the weight--I thought this boat was a bit heavy for its size and it was all wet foam. No matter how good a job I do it will get water in the bilge again and the foam will soak it up.

The glass of your hull was designed to have the foam to provide structural strength to the Overall hull. Modifying this design will jeopordize the overall structural integrity of the boat and is Highly NOT recommended. You should rebuild the boat the way the factory Engineers originally designed it. This is for your safety and your passengers.

Yea I was afraid that was the answer. I was hoping to skin the cat another way.
 

jigngrub

Fleet Admiral
Joined
Mar 19, 2011
Messages
8,155
Re: Going foamless

There's several things you can do to keep your foam from becoming waterlogged.

1. Showing your boat the proper care it deserves is the main thing. Keeping it trailered and covered when not in use will go a long way in extending the life of your restored work.

2. Make your bilge a draining bilge.

3. If you can't make or don't want a draining bilge, glass in your new deck completely and tab it to the hull, then don't penetrate it with fasteners.

4. Buy a tinny, you'll be glad you did!

Contrary to popular belief, today's expanding urethane foam doesn't absorb water like a sponge... as a matter of fact it takes it quite a while to become waterlogged and has to have constant exposure to do so.
 

oops!

Supreme Mariner
Joined
Oct 18, 2007
Messages
12,932
Re: Going foamless

if you dont want to faome the boat, you have to beef up the glass in the hull....

a full grind (rough and scuff) and a full 2 layers of csm and then a 1708. then stringers and bulk heads as before.


if you want to foam the boat with out worry of ever getting waterlogged again....click the lnk in my sig, then use the index to take you to the post.
 

logan944t

Petty Officer 2nd Class
Joined
Jun 26, 2010
Messages
155
Re: Going foamless

at this time i should also add that i actually like foam now.....i have seen its benifets first hand.....and i think it has many more benefits than draw backs....one of the best benifets is the anti crush of foam....if the hull takes an impact and a thru hull hole develops...the foam works as a patch...kinda like a kid with his finger in a hole in a dyke plugging the hole. in the mean time....you dont even know your hull has been penetrated.

after the stringers are in and you feel you are ready to foam...
add small plastic pvc or other pipes in the hull of the boat where ever you want drainage.

i suggest to add pvc back to front just under deck height.....then "vein" pvc from the top pipe angled down towards the stringer with another pvc running beside the stringer. all pvc pipes will run to the bilge.

the top pvc should come right up to an inspection hatch some where around the drivers foot area under the dash....the same for the other side.......what you are creating is a clear passage for water (or air) to get to all critical limber holes.

for ease or foaming....you can do this in sections......just make sure that all pvc pipes will match up to create proper channels of water/air flow.


Ive read that thread before but dont remember that post. I think its a whole load of awesome.

My boat will get foamed using the opps! method.
 

jones01m

Petty Officer 1st Class
Joined
May 23, 2011
Messages
252
Re: Going foamless

Logan,

I just used the method attached in the picture below. Simple.
If you want more info I would be happy to detail it out for you and provide more pictures.

IMG_0133.jpg
 

logan944t

Petty Officer 2nd Class
Joined
Jun 26, 2010
Messages
155
Re: Going foamless

Jones-- Is that a bull-nose corner for drywall?


Excellent idea if it is.
 

jones01m

Petty Officer 1st Class
Joined
May 23, 2011
Messages
252
Re: Going foamless

Yes it is. 2 bucks for a 10' length. Not quite as much foam surface area exposed to the air as oops method, but you can certainly place as many these throughout your foam as you would like and have them all connect. I just hot melt them together in spots to hold them down, and together as needed. You then just pour right over the top. Let me know if it piques your interest and I will detail out what I did on my thread.
 

Yacht Dr.

Vice Admiral
Joined
Feb 26, 2005
Messages
5,581
Re: Going foamless

Logan,

I just used the method attached in the picture below. Simple.
If you want more info I would be happy to detail it out for you and provide more pictures.

IMG_0133.jpg

I would like more info :) ..

Yes it is. 2 bucks for a 10' length. Not quite as much foam surface area exposed to the air as oops method, but you can certainly place as many these throughout your foam as you would like and have them all connect. I just hot melt them together in spots to hold them down, and together as needed. You then just pour right over the top. Let me know if it piques your interest and I will detail out what I did on my thread.

If you pour foam into that construction..would not the pour just leak into those holes ?

I think this particular build is over thought and brings up more questions then answers.

I would just rebuild just like it was built from the factory ( with wood and pour foam ). There is nothing wrong with it and its not too complicated with a 15' boat.

Put your stringers in..glass/encapsulate your wood..Deck it .. foam it ..and have fun.

Good luck either way.

YD.
 

Woodonglass

Supreme Mariner
Joined
Dec 29, 2009
Messages
25,929
Re: Going foamless

I'm in agreement here with YD! The Pour in foam of today, is MUCH different than the foam that was being used 20 yrs ago. When they say it is Impervious to the absorption of water, it is! If you research the testing that it undergoes you will discover that it takes Many years of constant exposure to total immersion in water for it to absorb a miniscule amount of water. In the past if the outer skin of the foam was penetrated the foam would absorb water and become waterlogged. IMHO the time and effort to attempt to design and incorporate a drainage system in a foam filled hull could be better spent "On the Water". But... I am a
OldDumbOkie.jpg
 

jones01m

Petty Officer 1st Class
Joined
May 23, 2011
Messages
252
Re: Going foamless

1) I ran a hole saw through my stringers prior to installing them and placed a 1.5" stub of 3/4 CPVC to drain in bilge. The 3/4" pipe fits a 5/8" plug very nice. Once glassed in and over it was easy to grind it out. It must be plugged with a bilge plug to prevent water from going in. An inlet was made to the bilge in both the bow and stern. I thought if I ever wanted to blow dehumidified air "through" I could as long as the drain sytem made a circuit.

2) A piece of drywall corner beading was laid in all the low areas and covered the bilge CPVC inlets. It was tacked in place with a couple of drops of hotmelt. The engine runners were a little higher than the main stringers so there is also a segment that connects the two - I have this in the photo. I used epoxy so you will not see glass wrapped around this particular hole, but there is certainly enough epoxy on it.

3) The key is timing and making two pours. When the 2 part foam was mixed I kept stirring until I could actually see the foam just start to expand. At that point the foam will transition to being really sticky so it must all be poured within a couple of seconds after expansion starts. This prevents the foam from going through the holes in a liquid state and does not clog the void you are trying to create. So, the beading is just covered in this pour, then the remaining cavity can be poured in as a liquid becuase your drainage void is already established with a hard foam cover.

The time this took was really not an issue and the cost is negligible. Drywall corner beading took approximately 30 minutes. All the other holes and CPVC installation maybe took an additional 3 to 4 hours total, definitely not more.

I hope this is helpful. Whether or not it is necessary is not for me to debate.

IMG_0140.jpg


IMG_0146.jpg


IMG_0148.jpg


IMG_0150.jpg


IMG_0151.jpg
 

logan944t

Petty Officer 2nd Class
Joined
Jun 26, 2010
Messages
155
Re: Going foamless

Im still waiting for the plywood to dry until I can start on the transom--and then I will start on the stringers and foaming after that.


Im looking at all the sanding that is required before I can apply the new glass( poly) and was wondering if I could just soda or sandblast to ruff and scuff instead of sanding?
 

Woodonglass

Supreme Mariner
Joined
Dec 29, 2009
Messages
25,929
Re: Going foamless

I'd recommend sanding. You'll get much better and consistent results. There's just no shortcuts for some things.;)
 

logan944t

Petty Officer 2nd Class
Joined
Jun 26, 2010
Messages
155
Re: Going foamless

I'd recommend sanding. You'll get much better and consistent results. There's just no shortcuts for some things.;)

Cant blame me for trying!

But the reason I wanted to use blasting is because the stringers have a fillet that is inaccessable with a power sander. So I would be hand sanding 15' X 6. In between the stringers is no problem.
 

Woodonglass

Supreme Mariner
Joined
Dec 29, 2009
Messages
25,929
Re: Going foamless

Maybe I'm not understanding the question. Are you not going to be removing the stringers and cutting out the old stringer casings and replacing with new? Post some pics so we can see what you are talking about. Also, are you trying to dry the wood in the existing transom and then reglass over it?
 

logan944t

Petty Officer 2nd Class
Joined
Jun 26, 2010
Messages
155
Re: Going foamless

Maybe I'm not understanding the question. Are you not going to be removing the stringers and cutting out the old stringer casings and replacing with new?

Right -- Im using the existing stringer casings as a sort of mold for the new glass.The old stringers will have a completely new layer of glass over them. I will leave spaces open to pour 8 lb foam into the old/new cases. Then seal the foam in. The center "stringer" is 4" across --never had any wood in it and the cross section is a upside down triangle with a flat top. The hull itself ( trihull) rises making it impossible to sand in that depression area where the triangle connects with the hull ( middle keel area). I will post pics to make things more clear later-- I dont have access to a pc that will cooperate at the moment.


Also, are you trying to dry the wood in the existing transom and then reglass over it?

No -- Im not that optimistic. I found marine grade 3/4" ply after searching for a few weeks at a local yard. Unfortunately it was the last piece and was wet from rain. So I rough cut the transom shape and shoved it into a small unused bathroom and put in a dehumidfier set to 40% for a few days then 35% and then finally 30% ( which is continously on). Its been almost 2 weeks and I will give it to this weekend. I have no gauge to check moisture content in wood -- but I know that the pieces are significantly lighter than they were to begin with.

This weekend I will coat them with poly---then a layer of csm --then clamp them together to get the thickness needed for the transom.

The old wet wood is already gone from the transom --just awaiting the new wood.
 

Woodonglass

Supreme Mariner
Joined
Dec 29, 2009
Messages
25,929
Re: Going foamless

You really need to post some pics so we can see what the inside of your boat looks like. I'm really struggling visualizing it. But... I am an...
OldDumbOkie.jpg
 

logan944t

Petty Officer 2nd Class
Joined
Jun 26, 2010
Messages
155
Re: Going foamless

My apologies--I wasnt going to really post much about this boat --it was just gonna be a quick kinda thing and the boat is now topless.


So I will start at the beginning.


DSCF5306.jpg

Craigslist boat-- guy wanted 500$ I got him down to 450. 1980 fiberking sportmaster trihull, galvanised trailer (needs tires) suzi dt50 ( he said 40 hp --still not sure what hp it is ) that "slips" in forward gears--but has stainless prop and runs well.. Original paint was metal flake brown/orange but someone had repainted blue/white with blobs of blue.


DSCF5310.jpg


I was sure that the deck at least needed to be replaced since --if you look closely-- there are trees growing.


DSCF5318.jpg


Exploratory before removing the cap revealed soaked wood and some rot.


DSCF5324.jpg

Removing the engine with the hoist that I originally built for the cobia rebuild. Ive swapped resources to this rebuild because this one is financially closer to being done.
 

Attachments

  • DSCF5332.jpg
    DSCF5332.jpg
    151 KB · Views: 0
Top