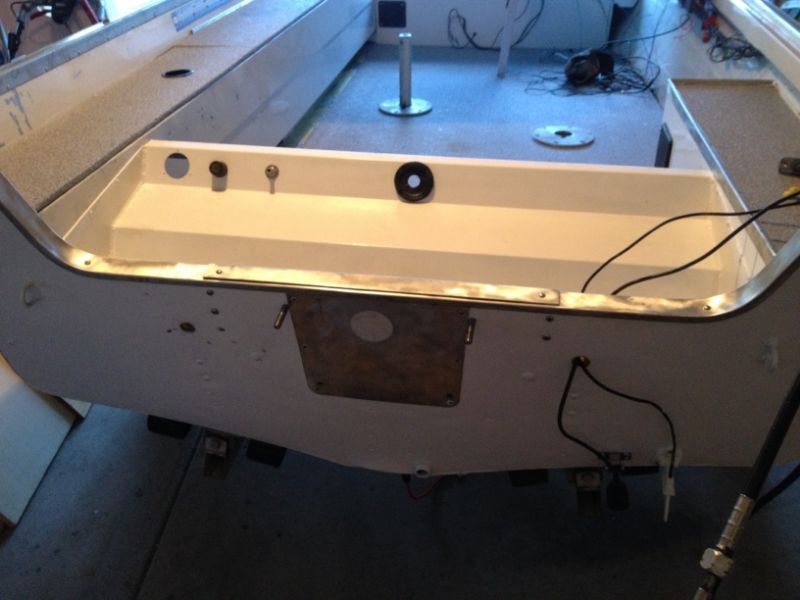
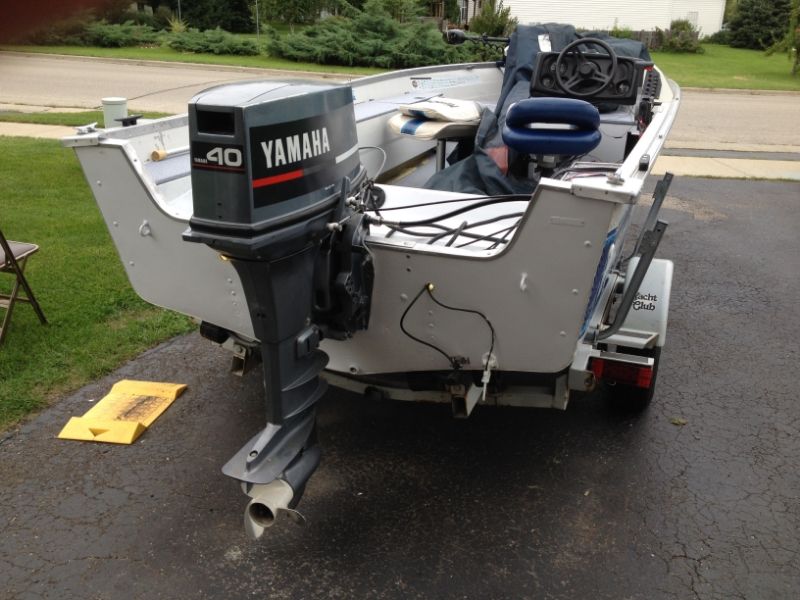
It all started with a leaking livewell. boat restore project. 1993 Mirrocraft

jigngrub

Fleet Admiral
Joined
Mar 19, 2011
Messages
8,155
... about the pvc in the foam, it's useless!!! Once water has worked it's way from the top of the foam to the bottom it is saturated and not even a zillion pvc pipes will save it. Best thing, don't let foam be in constant contact with water over extended periods of time. Boat covered and drain plug out when boat is not in use is worth 44 zillion pvc drain pipes.
 

Browndog10

Petty Officer 3rd Class
Joined
May 13, 2014
Messages
89
Pouring the foam reminds me of Mike Tyson's quote. "Everyone has a plan 'till they get punched in the mouth." Because no matter what you plan the foam is going to do what it wants!
 

jigngrub

Fleet Admiral
Joined
Mar 19, 2011
Messages
8,155
Control your foam!

Pouring foam is a lot like herding sheep :flock::flock::flock:, neither one know where they want to go and you have to make them go where you want them to go.

Start at the back of the boat in the deepest part and make the foam push itself forward and shallower.
 

Browndog10

Petty Officer 3rd Class
Joined
May 13, 2014
Messages
89
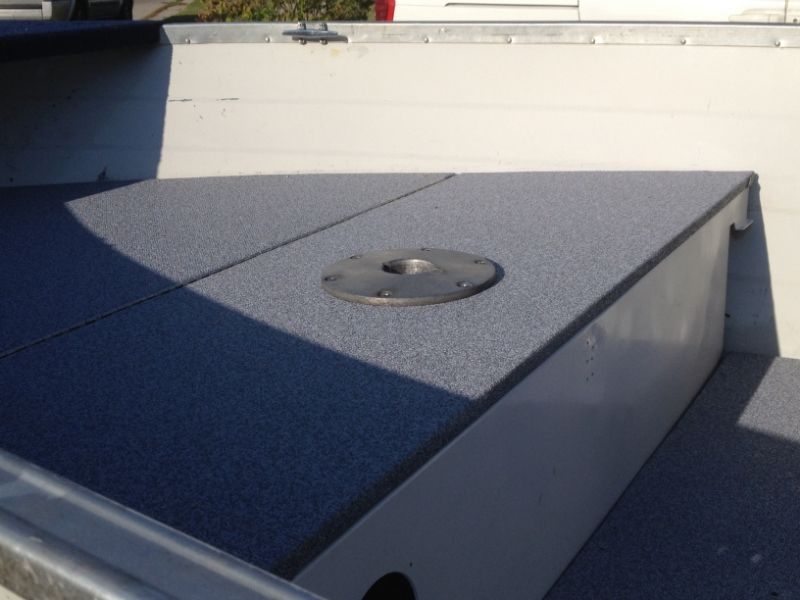
I ran out of foam but was able to get the bow and about half of the boat filled with it so I decided to start putting the floor and casting deck back together in the meantime while waiting for it to get here. I really like how the vinyl came out so far. Hope to be done and on the water soon.

IMG_4018.jpg


IMG_4016.jpg
 
Last edited:

Browndog10

Petty Officer 3rd Class
Joined
May 13, 2014
Messages
89
Thanks! I finished with the rest of the floor last night. Crappy pic at dusk but you get the idea. I am still waiting for the remainder of the foam. I think that I may pour with the floors on and let it fill the voids. The main drain channel is dammed off so it shouldnt be an issue.

IMG_4034.jpg
 

Browndog10

Petty Officer 3rd Class
Joined
May 13, 2014
Messages
89
Not a whole bunch to update only had a few hrs this weekend and next weekend the same. Irritating that I am so close yet no time to finish. I dry fit the port side cabinet, fits well. The starboard side rod locker is another story, as it will not fit due to the 3/4" ply so I need a creative solution. Toying with making a rod holder area and just scrapping the cabinet. I only worry about hooking myself when driving the boat. Honestly, the old rod locker was worthless as the rod tips would get caught in the bow area. Also, I got a little of that 2 part foam on my vinyl, really pissed me off and have a hard time trying to clean it and I dont want to damage the vinyl. Any suggestions?
IMG_4057.jpg
 
Last edited:

jigngrub

Fleet Admiral
Joined
Mar 19, 2011
Messages
8,155
From the USComp. site:
[SIZE=-1]15. Can I dissolve this foam once it has fully cured? [/SIZE]
[SIZE=-1]No. This foam is designed to be completely solvent resistant once cured. Gasoline and acetone will not cause any destruction of this foam. Please prepare ahead of time by covering any objects/areas that you do not want to come in contact with this highly adhesive product. If you do happen to spill some foam and it cures you will have to either sand or scrape the product away.[/SIZE]

Carefully scrape what you can off and let the rest wear off.

What's the problem with the starboard locker? It shouldn't be too hard to fix?
 

Browndog10

Petty Officer 3rd Class
Joined
May 13, 2014
Messages
89
Ugh on the foam. I will have to systematically scrape it off every little nook and cranny of the vinyl. Its only a big issue because I am making it one. So I am hoping that it wears off also. Anyway on the rod locker it will not line up with the rivet holes, a bracket that is riveted in the hull and a cutout that is in the deck area. Basically, it is too high due to the 3/4" plywood that I used. Instead of the 1/2". I am at work and will send pics tonight if the rain holds off.
 

Browndog10

Petty Officer 3rd Class
Joined
May 13, 2014
Messages
89
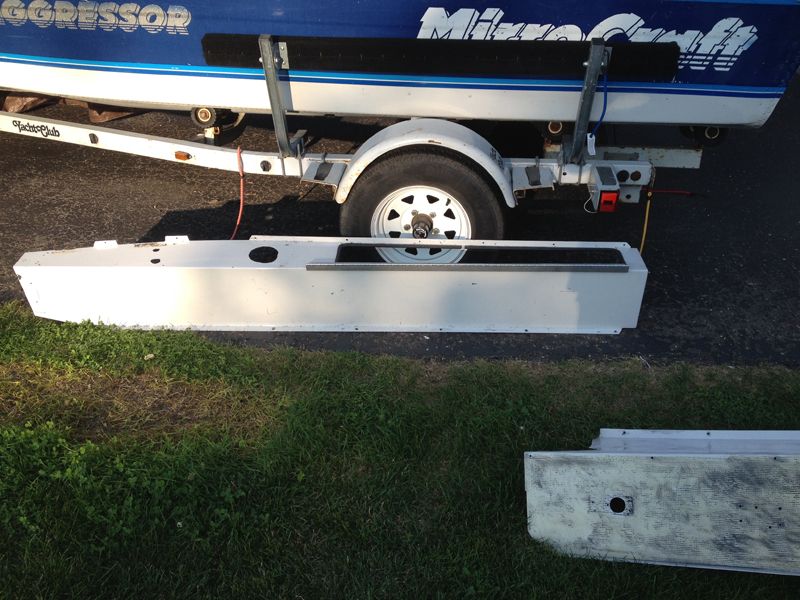
Site was down last night so I couldnt post. Here is the situation. This piece is the rod locker, it goes underneath the drivers side, through the console and into the casting deck in the bow.
rodlocker.jpg


Since I had raised the floors I did not take into account that this may not fit. There is a bracket there for support that now is too low and does not allow passage. It is riveted in and I do not want to remove it but most likely will have to. That is just to see if it will fit in the bow section. If that clears I still have a concern with the rivet holes lining up. They still match on the port and rear starboard sides but here seems different.

Here is the bracket and the bow cut away.
bracket.jpg
 

Browndog10

Petty Officer 3rd Class
Joined
May 13, 2014
Messages
89
This has got to be one of the dumbest designs going. Compartments riveted into the hull and dependent on the thin 1/2" with foam for support. I mean the compartment hinges are RIVETED into the side cabinets. So if you needed to change the hinges you would have to drill out rivets in the hull. What a joke, also I was thinking of doing away with all of the compartments and just having it open but the splash well is also dependent on the them. I am however scrapping the rod locker since it was basically worthless to begin with. I will have to figure it out from there. Just hope that splashwell lines up. Sorry for my rant just a little frustrated, just seems like a hopeless situation right now.
 
Last edited:

jigngrub

Fleet Admiral
Joined
Mar 19, 2011
Messages
8,155
Nah, it aint that bad BD!

You may want to consider cutting the section of the rod locker off that sticks through the bulkhead and just let it butt the bulkhead instead. You could use some aluminum angle to cover the butt joint on the outside and fasten the 2 pieces together through the angle with rivets.

The bracket looks like it's only held on with 4 rivets and you could take it off, then set the rod locker piece and install the bracket back after. Use the same holes through the hull and drill new holes in the bracket.

Even if you don't use the rod locker for fishing poles, you can still use it for storage for other things like life jackets and stuff.

All the hatch cover hinges in my Tracker were attached with rivets like yours are, I drilled them all out and replaced them with stainless screws and nyloc nuts. They use the rivets because they're quick and cheap.
 

Browndog10

Petty Officer 3rd Class
Joined
May 13, 2014
Messages
89
I know just crabbin'. I just want to get out on the water already. :) Its been raining all day hopefully I can get back to work tonight. Alot of the frustration I am having has to do with my time. I have two small kids, work full time days and a wife that works evenings. I sit around all day a visualize what I will complete that night. When that time comes and I don't get it finished it gets disappointing.
 

Browndog10

Petty Officer 3rd Class
Joined
May 13, 2014
Messages
89
Didnt get a ton done this weekend due to weather and family issues but making progress. Slowly but surely. Splashwell isnt fastened yet, I wanted to dry fit everything before I start riveting. Photobucket isnt functioning for now so hopefully these will work this way.
IMG_4077sm.jpg IMG_4078sm.jpg
 
Last edited:

Browndog10

Petty Officer 3rd Class
Joined
May 13, 2014
Messages
89
Splashwell and wiring done. Had to work partially in the garage due to rain. Hoping to get the motor on this weekend.
IMG_4108.jpg
 

Browndog10

Petty Officer 3rd Class
Joined
May 13, 2014
Messages
89
I got the motor on before the storm the other night. Installed splash well drains and put the bow together and wired this weekend. Not sure if I want the electric anchor yet. Hope I have a productive Saturday between the kids soccer and my softball game and be able to float test launch Sunday. I have a few more things to take care of and hook up. I hope I didn't forget to seal something. Sphincter clenching for sure, but getting ready for the fall feedbag! :)
f4c57320-1cc3-4922-a960-f980fc22af6e.jpg
 
Last edited:

Browndog10

Petty Officer 3rd Class
Joined
May 13, 2014
Messages
89
It appears that I was a little overzealous with a screw into the deck. I popped a small hole in the hull. I just pierced it, it a small leak that took pulling up the floor and blasting the hose at it to find. I would like some advice on the best way to seal this. I am going to gluvit for sure but I would like to also add some more protection first. while I got the deck up.Should I drill a hole and rivet, 5200, marine jb weld or a combo? Either way I dont think any of these are bad but would like thoughts on what you would do. I should add that the spot is near the starboard side right at the console, so it may get pounded with water a bit more, if that matters or not I dont know.
 
Last edited:

Browndog10

Petty Officer 3rd Class
Joined
May 13, 2014
Messages
89
I fixed the leak and planning on taking her for the maiden voyage II this weekend and maybe even do a little fishing. I also have come up with a solution to the rod locker and basically will just need to do other aesthetics which I am planning on doing in the winter. I am getting her all ready for fish slime. :)
 
Top