--------------------------------------------------------------------------------

Testing
Well, maybe not. Posting pics is easy. What you need to do first is choose your online host to keep your pics online. Thumbnails are directly loaded to Iboats and Iboats hosts the image in full size when called up from the thumb.
Some choices for hosting pics are Servimg.com, Picasaweb ( I use this exclusively as I can manage all my pictures with Picasa from Google on my computer, pick the ones I want to upload and then upload them. When I'm done uploading them, I can go directly to those new pictures and start using them here ) or even your own websites or FTP sites. Whichever way you choose to host them, then what you need to do is use the image tags and put the url that points to the picture itself, not the page it is on, in the image tags.
For example, the Image tags areYou paste your pictures address inbetween them, with no spaces between the tags and the url.
I should make a tutorial and post it on Iboats for quick reference when this question or problem arises. I could get it done in an evening.
Oh boy am I getting the itch to get back in and start working on the boat! I have been doing quite a bit of thinking on re doing the stringers since it really isn't that bad to get them out. I have come to realize my biggest fear about this is, how do you you know how high to make your new stringers? I know you can take measurments of the old ones but your supposed to bed them on Pl or peanut butter which will add height, and your supposed to put fiberglass and matt over the top which will add more height. So how do you know what to start out with.
Looking out the window at the blue sky makes me want to get started until I walk out there and my nose hairs freeze before I get to the bottom of the steps. haha I got that same itch, I think it is contagious. I just gotta wait for this below zero crap to go away
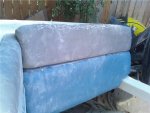
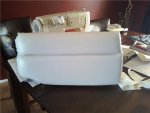
How has your upholstery projects come along?