PlayDoh’s 16 SS resto underway

PlayD0h

Petty Officer 1st Class
Joined
Apr 23, 2009
Messages
326
This might show the issue
 

Attachments

  • photo314274.jpg
    photo314274.jpg
    182.3 KB · Views: 2

PlayD0h

Petty Officer 1st Class
Joined
Apr 23, 2009
Messages
326
The area in red is where it’s gapped.
 

Attachments

  • photo314282.jpg
    photo314282.jpg
    641 KB · Views: 1

classiccat

"Captain" + Starmada Splash Of The Year 2020
Joined
Dec 20, 2010
Messages
3,412
That seems odd. Mine is riveted to the hull. Did you get carried away with the hammer/dolly and body filler and skimmed right over the rivet holes :lol:

2014-01-05%2011.59.04_zpswu9swzn9.jpg
 

PlayD0h

Petty Officer 1st Class
Joined
Apr 23, 2009
Messages
326
That seems odd. Mine is riveted to the hull. Did you get carried away with the hammer/dolly and body filler and skimmed right over the rivet holes :lol:

2014-01-05%2011.59.04_zpswu9swzn9.jpg

Since both sides are exactly the same it couldn’t have been from me or a distortion. Yet I did consider it. Every bracket I’ve seen in people’s pics are direct to hull, yet none of them are exactly like mine. I’m thinking they were just made wrong and they just riveted them with the gap. All I can think of doing is putting an SS washer in the space, or better a piece of Aluminum, 5200’d to prevent rattles.

Ive been putting off riveting it on for awhile now, thinking I’ll figure out what the deal is later. Today was kind of depressing, as I’m trying to get her out in the lake ASAP, yet I hate cutting corners. It seems like I’m always waiting for something to cure or dry, and everyday I find another thing that needs epoxy or 5200. Once I get the deck down and covered, my seats put in, and the paint on, I'm going fishing...... after everything cures, lol. I’d really like to get the trailer done but at the rate of progress I’ll miss the entire summer making everything just right.

With the deck in and covered, and the trailer as a bonus, the rest I can work on anytime and still use the boat.

I did get my nylon rods epoxy’d in today so I should be able to put the transom in for good in a day or 2. Then I can prep the transom skin for paint and then shoot the entire remaining hull at the same time. It’s going to be black with a white rectangular shape on the sides. I’m thinking it’d be best to paint it all black, then add the white on top, masking the area off. That would leave a ridge, and any scratches in the White will or could look black.

Ugh, it’s amazing how many little things there are and how long they take. And how you don’t seriously consider them before taking on a project, more often than not. Maybe once the deck is in I can feel like I’m getting somewhere.
 

Watermann

Starmada Splash of the Year 2014
Joined
Jan 12, 2013
Messages
13,822
Does the angle on the bracket where the gap is have rivet holes and the hull have matching holes too?
 

PlayD0h

Petty Officer 1st Class
Joined
Apr 23, 2009
Messages
326
Does the angle on the bracket where the gap is have rivet holes and the hull have matching holes too?

Yup. It’s weird. I’m going to just either give them a bend so they touch, or add a piece of Aluminum. There not critical to anything and I’ll just deal with whatever later on. I’m near positive nothing went under the bottom tabs, the staggered tab design seems to be a new thing back then. So I guess it’s possible these and likely batch of others were made up with the dimensions off. About all I can think of to explain it. There not easily bent, and I know they didn’t get stepped on or anything. Even if they did it wouldn’t bend them, nor bend both exactly.
And ya, I’m sick of thinking about them, lol.
 

Watermann

Starmada Splash of the Year 2014
Joined
Jan 12, 2013
Messages
13,822
Rivet the top, press the bottom tight and rivet in place. Walk away.
 

PlayD0h

Petty Officer 1st Class
Joined
Apr 23, 2009
Messages
326
Rivet the top, press the bottom tight and rivet in place. Walk away.

Won’t work. The profile(?) that runs between the 2 halves makes it too rigid. Hence why I’m baffled at how it was riveted in the first place.
I drilled them out from the outside, obviously, which is likely why I never noticed.
 

PlayD0h

Petty Officer 1st Class
Joined
Apr 23, 2009
Messages
326
This bracket kicked my butt today. Still isn’t riveted despite attempting probably a dozen rivets. Rivets wouldn’t grab, end up cockeyed and or just buck over to one side.
I realized after 10 or so that my air pressure was too high at 90, not 60 that I though it read. Now the holes in the hull are nearly 1/4”, and I’m tempted just to put SS bolts in there.
Im dealing with some serious tendinitis that gives me agony if I even use my left arm to hold the bucking bar. I think it’s both the shoulder and elbow bicep tendons. Today was another day of wondering wtf Im doing. I’m around $3000 in and that’s a bit more than I paid for the damn boat.
I now understand how people end up abandoning rebuilds. Nearly half the time Im buying things, the rest Im working for hours and there’s little to show for it so far.
Im not sure what happened but there doesn’t seem to be as much activity on the SC section. I’ve been looking back at Dozers threads and others from a couple years ago and for every update post there’s a dozen or so comments. Maybe it’s just me and my rambling posts, lol.
 

PlayD0h

Petty Officer 1st Class
Joined
Apr 23, 2009
Messages
326
Here’s a pic of my nylon rod epoxying job. I rolled the rods in JB and put them in place. I rolled them on the belt sander to scuff them up a bit and ran the 3/16” drill bit tip around in the sides of the overdrilled holes just to make some room for the epoxy. Wiped it all down with acetone before epoxy.
I didn’t like the FG filler job, yet I’m sure it would have worked ok. I put the transom in place today and marked the holes with a sharpie to make sure the holes will be in the center of the rods. I didn’t do that step after my filler filled over-drill job, and a few of the redrilled holes ended up off center and exposing wood.
Tomorrow I’ll sand down the epoxy and then coat it all with the sealer epoxy. I’ll sand down the top edge of the transom as well. Oh, and drill the top cap holes then overdrill and fill them and sealer epoxy the top of the transom.
I paint stripped all the topside stuff today, for the most part. The primer they had on it is a pain to remove. Maybe it’s chromate primer? Stripper won’t do much other than let me scrape it off.
Anyways hopefully tomorrow is much better than this weekend has been. I did save around $250 on my seats and base & pedestals with the Father’s Day sale at Cabela’s. Still $800 though, for 4 seats and fixed bases. Springfield 2 3/8” hi-lo bases, 12” posts and Cabela’s tourney high back seats.
 

Attachments

  • photo314377.jpg
    photo314377.jpg
    2.1 MB · Views: 1

Watermann

Starmada Splash of the Year 2014
Joined
Jan 12, 2013
Messages
13,822
The last thing about working on a boat is that it's easy. Your mind set is everything, rather than think about the failures, look at the successes of guys who have taken it through to completion. All these guys who bite off more than they can chew just don't have what it takes to see it through to the end. The satisfaction when finished is nothing short of fantastic.

Are you trying to set solid rivets by yourself?

SS bolts will work if isolated and sealed with 5200.
 

PlayD0h

Petty Officer 1st Class
Joined
Apr 23, 2009
Messages
326
The last thing about working on a boat is that it's easy. Your mind set is everything, rather than think about the failures, look at the successes of guys who have taken it through to completion. All these guys who bite off more than they can chew just don't have what it takes to see it through to the end. The satisfaction when finished is nothing short of fantastic.

Are you trying to set solid rivets by yourself?

SS bolts will work if isolated and sealed with 5200.

I have a helper, but I can reach both sides of these and after a few failures I let my helper go so I could take my time and figure out the problem. It’s tricky holding down the piece, holding the bucker and keeping the air hammer straight but I’ve done a few with success.

Thanks for the pep talk, truly. I know eventually I’ll be thrilled, it’s just bumming me that I’m missing out on fishing. patience is a virtue I have very little of unfortunately.

Being Mr Rivet, can you tell me your trick to put pressure on the 2 pieces being riveted together, and setting them? I’m sure those ‘cliecos’ however you spell it are for that, and I’ve used bolt and nuts, yet it doesn’t always work. These holes are too far apart.
I think the problem now is that the holes are out of round and too wide, and the rivets won’t fill the hole properly. I’ll try to Tex the holes and redrill. I’m going to try and move the bracket slightly and go through new holes.
 

Watermann

Starmada Splash of the Year 2014
Joined
Jan 12, 2013
Messages
13,822
I'd use a machine screw the same size or smaller than the hole with washers/nut and tighten it down to flush, set the solid rivets in the open holes, remove screw and set rivets in those holes.
 

PlayD0h

Petty Officer 1st Class
Joined
Apr 23, 2009
Messages
326
I'd use a machine screw the same size or smaller than the hole with washers/nut and tighten it down to flush, set the solid rivets in the open holes, remove screw and set rivets in those holes.

That’s what I’ve done, and I bolted every hole on the z-channel and removed 1 and riveted, etc.
I put the other side bracket on today no problem. I had made up strips to fill the gap, yet after riveting the top 2 the bottom was touching. Riveted that and the last one was close and riveted fine.
I Marine Tex’d the trouble side and will drill out and rivet tomorrow. I turned the boat around last week and I now realize the trouble side is the one I drilled 2-3 out to 1/4” on a brain fart. So all I can do is hope it goes on tomorrow first shot.
Drilled out the transom holes, through the nylon. The 1” holes with the hole saw took forever. I had to drill for 2-3 seconds then dip the bit in water and blow the hole with compressed air to keep it from melting too bad. And blow air along the hole saw, otherwise it would melt and just clog the saw teeth. Well it did that regardless after 3 seconds but it was easier to remove and until it was, it wasn’t cutting anything. Moral of the story is get a 1” bit if attempting the same idea. I looked hard at one but the $50 price tag was too hard to swallow.
I drilled then over drilled the transom cap screw (OE nail) holes and filled with epoxy. Sanded down the transom and coated the entire top with MT, thin coat. Also filled any hollows. Tomorrow I sand down the JB epoxy on the transom face and likely put 1 or more coats of sealing epoxy on after. Then she gets bolted in, and I never want to see that transom again, lol.
I got a 5/8 Forstner bit to counter sink my deck rivets, and it works good on my test pieces. I’d like to have some way of setting a max depth stop, but I think I can manage without. I’d guess it’s at the end of the 2nd layer that is fairly easy to see when your at it. I’m not 100% on if I want the rivet head flush or just below the deck. Flush means a stronger hold, under means I can epoxy over completely.
Im thinking 5 rivets per sheet per stringer, at 1 foot spacing and 2 at the edges. Yet I’d guess 4 per stringer would suffice. The deck will go down any day now, once Im completely satisfied I haven’t forgotten anything and it’s clean as can be. Im thinking of sealing off the stern opening, in a removable way.
All my top side metal is stripped, and after sanding, prime and paint it’s good to go. I’d really like to redo or alter the consoles and dashes to be more functional, but that’s all a ways away for now.
 

classiccat

"Captain" + Starmada Splash Of The Year 2020
Joined
Dec 20, 2010
Messages
3,412
Hang in there PlayD0h...you'll soon turn the corner with the steady progress you're making. Think of it as a marathon...don't burn out trying to sprint...just maintain your stride and enjoy the ride man! :thumb:

If you have a drill guide, they often have a stop built in.
 

PlayD0h

Petty Officer 1st Class
Joined
Apr 23, 2009
Messages
326
Hang in there PlayD0h...you'll soon turn the corner with the steady progress you're making. Think of it as a marathon...don't burn out trying to sprint...just maintain your stride and enjoy the ride man! :thumb:

If you have a drill guide, they often have a stop built in.

Thank you very much ClassicCat. Great advice, and thankfully I’m stubborn enough I’d never give up. The downside of that is that I won’t give up when I should, lol.
I made some decent progress lately. Yesterday I hauled my Trailer to Calgary and sandblasted it at a DIY sandblasting shop. They have outdoor stations and you pay $150/hr or pro-rated portions. I have serious respect for people who do that for a living. It’s like using a firehose to wash something. Add the helmet with an air line attached, and full coveralls in decent heat and it’s a workout.
Cost me $120 but she’s bare metal. Even found a broken crossmember that was painted over, thick enough it hid it completely. Sadly it rained on my way home and in 1 hr the entire trailer had surface rust. I had to use a rust converter and scrub the whole thing down. I learned after to bring a can of WD40 or the like and spray down the bare metal soon after blasting.

Im considering modding the crossmembers to add more Vee angle, but also have to work out the rear roller and bunks. Either way it’ll be pretty, lol.

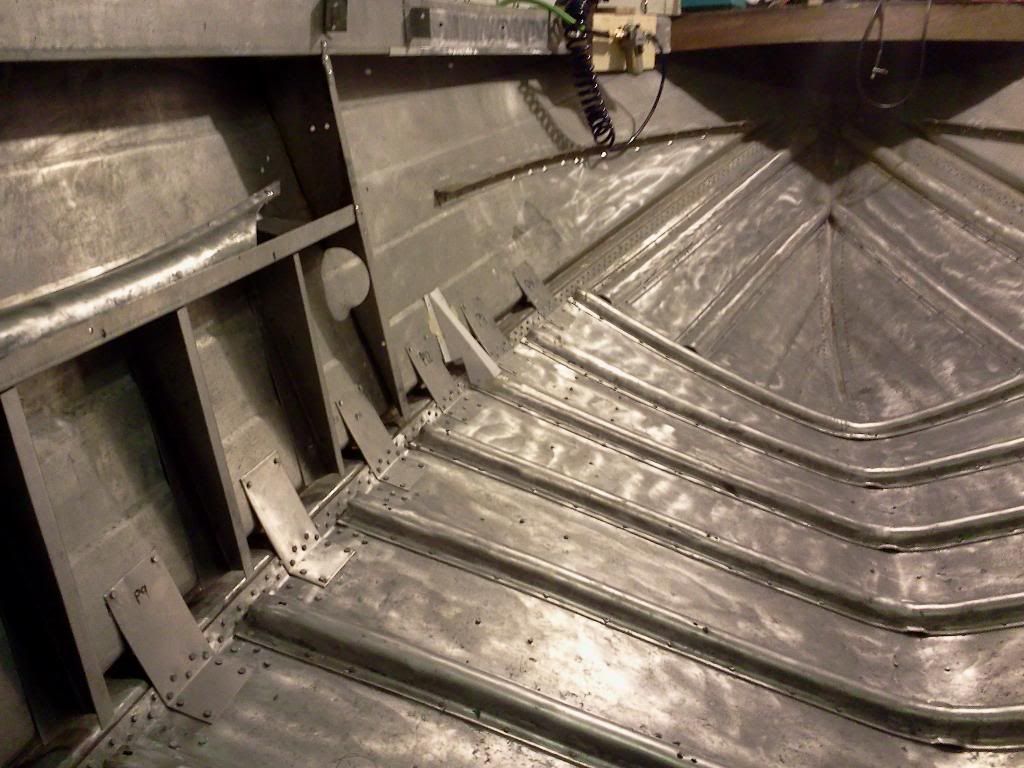
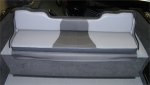
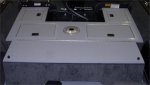
I layed the deck down and drilled everything including my forstner bit counter-sinks. Put 3 coats of penetrating Epoxy sealer on / in the holes. Marine Tex will go over the rivets and screws.

I got the problem bracket on, yet it put up a good fight again. I have no idea why the rivets weren’t gripping, but I used the ‘modified brazier’ head, soft (1000) rivets in 3 of the 4 holes and they worked. I put one 2117 hard rivet in there and still somehow it was a tiny bit loose. Once the 5200 hardened it was secure and I added some gluvit to it on the inside for insurance.

Transom is back home, and after leveling some spots with filler, it’ll be ready for primer, the. The rest of the hull gets painted at once. I’m going to pencil out the area that will be white, and shoot the black first and feather it out past the line a bit. Just to avoid a big abrupt line.

I have the interior all paint stripped and ordered som Aluminum sheet for the 2 long gunnel pieces since mine had some fair dents. That and a hundred extra holes I’d have to deal with. $35 each, 9’ x 5” 0.08 5052. I got some large square off cuts for 1/2 price to replace my bow cap, and possibly my dash(s) since drivers side has sonar unit holes in unwanted places, and the passenger cup holes are something I can live without.

I got some nice 1” c-channels at 62” long that will be perfect for my splashwell redesign. I’m not planning on doing and installing that before splashing. I’d like to auto-CAD out my plans and go look at the new Renegade and take some measurements and ideas from.

We’re taking the kids camping this weekend so I’ll get to rest my angry tendons. And do some fly fishing to boot.
 

poorboy1990

Cadet
Joined
May 11, 2019
Messages
19
Looks like you are doing good. No need to rush these things. Take your time, just not too much, and you will be glad with the outcome. I am really interested in what you come up with for a splashwell design.
 

PlayD0h

Petty Officer 1st Class
Joined
Apr 23, 2009
Messages
326
Looks like you are doing good. No need to rush these things. Take your time, just not too much, and you will be glad with the outcome. I am really interested in what you come up with for a splashwell design.

these pics are of the 2018 Starcraft Renegade 16’. I was thinking along these lines, as the original Splashwell wastes more space than needed, and doesn’t need to be as big. Maybe if you do lots of backtrolling and or fishing the Great Lakes you’d ‘need’ that much well. Yet wave whackers would be a nicer option IMO.
I don’t plan on putting heavy things back there, but some space for the necessities like drinks, food, bait and tackle would be a major advantage. I hate the OE battery placement and the 16 gauge aluminum tray it sat in.
Yet Im thinking I’ll fab up the whole splashwell and stern section in the shop, and when it’s done it’ll be a quick swap type. That, or it will be in the winter where I can use the boat without the Splashwell and make a wood mock up even.
I might fab up some consoles someday. Until then I’m trying to decide how to go with the under-dash space. I’m also trying to decide if my trolling motor batteries should go under the dash, where Ive always had them, or just in front of the consoles. Likely won’t make much of a difference yet I have had trouble making plane with a heavier person at the bow + trolling motor. So I’m leaning towards under dash.
I just got AutoDesk Inventor software, which anyone can get if you register a student account for free. It’s Auto CAD more geared towards mechanical design and manufacturing. So I’m hoping to get to where I can mock up stuff virtually rather than physically. Not sure if my mind can envision things as well on a screen as compared to infront of me, but I’m learning.
Thanks for the advice and support, much appreciated. It’s interesting how much another person cheering you on can motivate you
 

Attachments

  • photo300030.jpg
    photo300030.jpg
    38.8 KB · Views: 2
  • photo300031.jpg
    photo300031.jpg
    32.1 KB · Views: 2
  • photo314726.png
    photo314726.png
    544 KB · Views: 2
  • photo314727.png
    photo314727.png
    733.4 KB · Views: 2

Watermann

Starmada Splash of the Year 2014
Joined
Jan 12, 2013
Messages
13,822
The SW on the older SCs are enormous and need to go on a diet, just make sure you account for the structural support they provide to the stern and you're golden.

No need to reinvent the wheel if you find a boat with a design you like duplicating it as near as possible is a great idea.

Nose heavy boats handle poorly, the more weight you can have close to mid ship the better.
 

PlayD0h

Petty Officer 1st Class
Joined
Apr 23, 2009
Messages
326
The SW on the older SCs are enormous and need to go on a diet, just make sure you account for the structural support they provide to the stern and you're golden.

No need to reinvent the wheel if you find a boat with a design you like duplicating it as near as possible is a great idea.

Nose heavy boats handle poorly, the more weight you can have close to mid ship the better.

Amen! I plan on putting a cross member at the same spot the SW is attached. I’ll likely need it to be a little bit lower yet a triangular brace will make it more than strong enough. The 1” channel I got is 1/8” thick and perfect for the task, strong as hell with very little flex.

What Im trying to find is hatch opening trim that isn’t a fortune. Finding some used for a smile and a handshake would be perfect, lol. It’s the rounded corners that I need / can’t easily fab myself (yet). Of course I’d prefer aluminum, yet I’d think it would be ok if they were steel. Mabey I’ll do some more google-fu and luck out.
 
Top