The R?surrection of the SeaGem

HVAC Cruiser

Lieutenant
Joined
Sep 12, 2009
Messages
1,254
Re: The R?surrection of the SeaGem

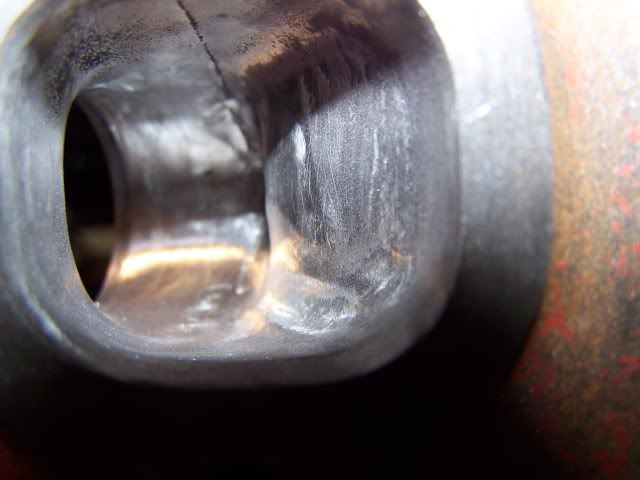
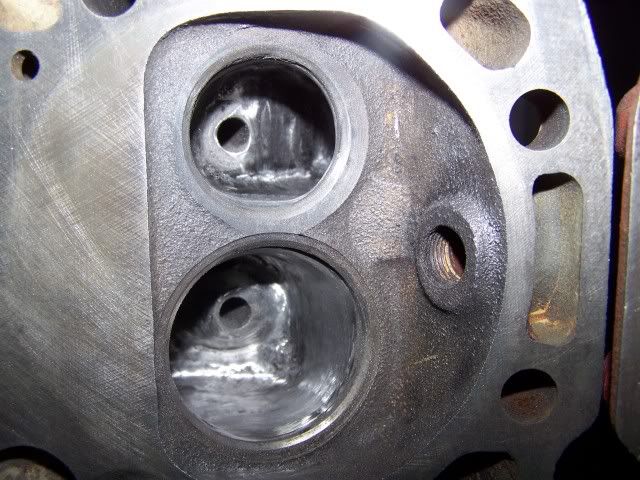
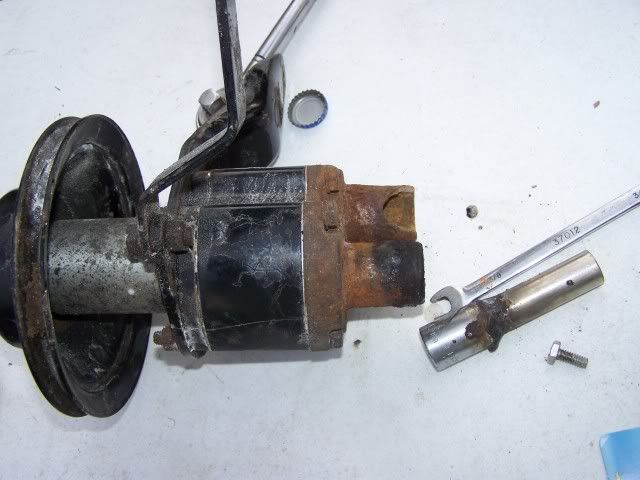
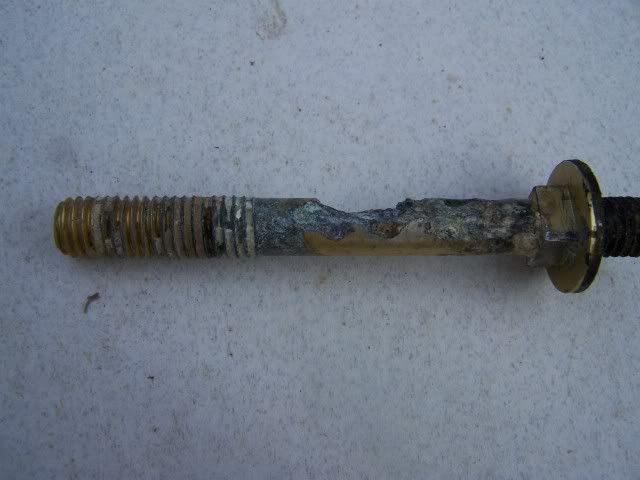
Well I'm going to bring them to him today, it was real easy to spot here is a closeup of one of the stem tips
100_9714.jpg

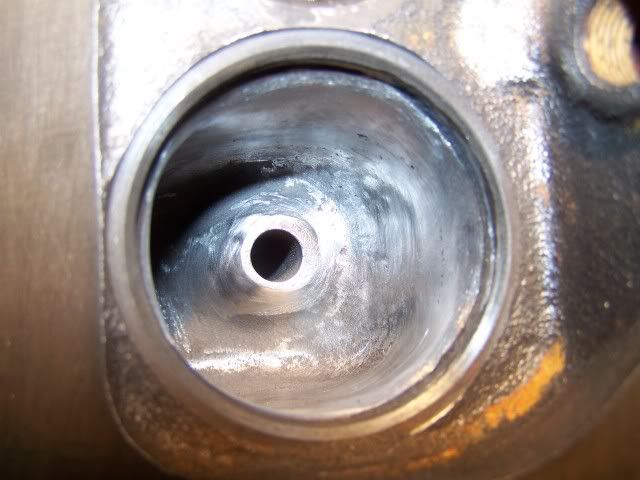
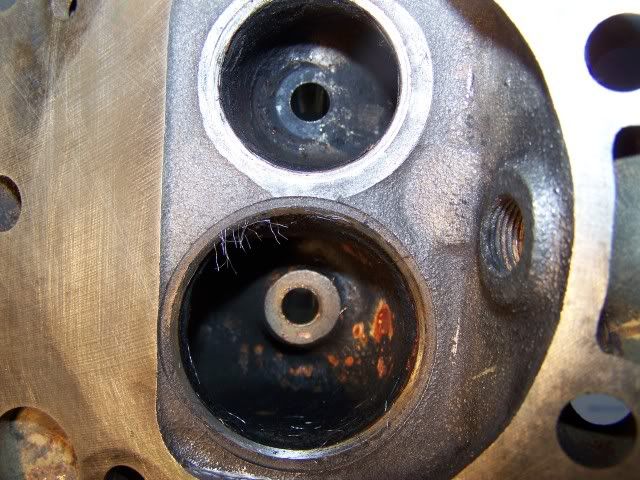
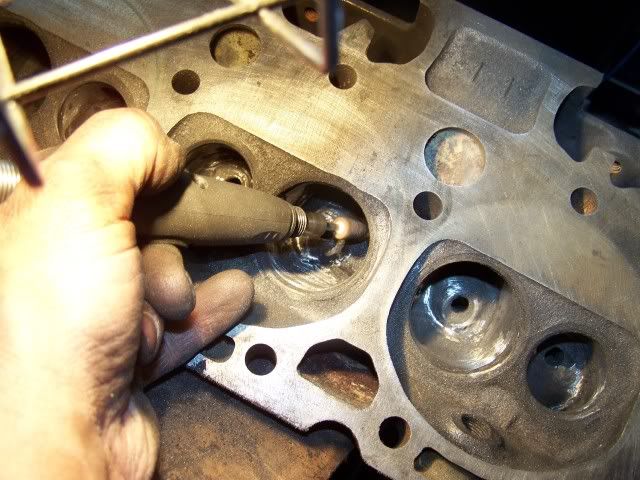
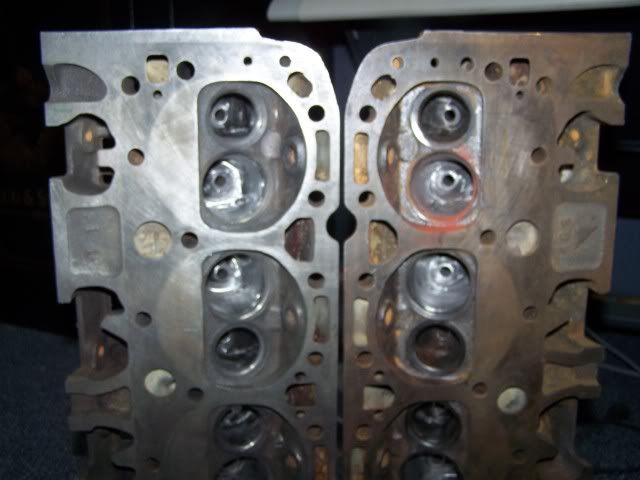
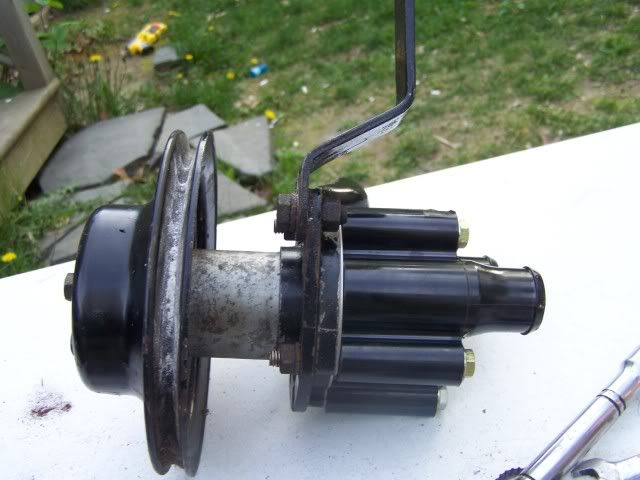
Once I saw that I started checking everything. Today going there should be interesting, what I really want to do is sit with him and rebuild them with him to make sure its done right. I think part of the problem is he is used to dealing with some that are just part changers


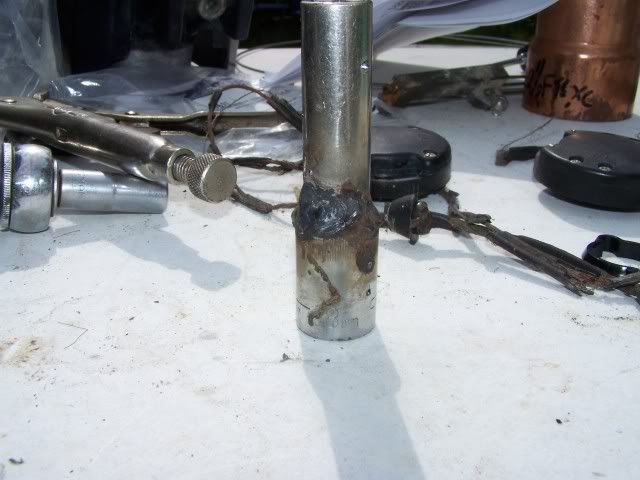
EDIT- On a different topic, can I weld and extension piece on an old input shaft to use that to align my engine-gimbal , or do I have to spend the money on an alignment tool?
 

redfury

Commander
Joined
Jul 16, 2006
Messages
2,657
Re: The R?surrection of the SeaGem

I don't see why you would need to buy an alignment tool if you can make one. We used a dowel my dad turned on a lathe to align the clutch on my VW Bug. Worked everytime.
 

HVAC Cruiser

Lieutenant
Joined
Sep 12, 2009
Messages
1,254
Re: The R?surrection of the SeaGem

I don't see why you would need to buy an alignment tool if you can make one. We used a dowel my dad turned on a lathe to align the clutch on my VW Bug. Worked everytime.


Hey Red,
What I was thinking of doing is using a driveshaft and welding on an extension piece to be able to hold it. I clutch alignment tool is a little in the way that it aligns the clutch up to install the tranny. Once you depress the clutch once it is all good.


Ok so I went to the machinist yesterday, he and I went over everything and changed out the bad valves together. We mic'ed everything up and made sure it was all within specs. I didn't beat him up over not beed blasting the heads and such, I kinda feel bad for him right now he is going through something personal that I wouldn't wish on my worst enemy.

I got up this morning, took the 1st head apart and started porting 1st head is almost done!
Here is where I am now, blended the bowls, and put a radius on the intake valve guides
100_9715.jpg


Exhaust port
100_9720.jpg


Intake

100_9723.jpg


I still have more I can take on the intake, I can go down to .015-.020 at the top of the guide, BUT its not a race car + I don't want the engine making crazy power or I'll have to start messin with the out drive, or blowing them up, whichever comes 1st :eek::D

I am hoping to have the heads finished today. It has stopped raining here so tomorrow I am planning on finishing the glass work on the new motor mount stringers. Thurs and Fri I will hit it with bilge paint.
There will be no work this Saturday again because the family and I are participating in the NYC cancer walk for a cure.
Maybe install next Tuesday????? :D
 

HVAC Cruiser

Lieutenant
Joined
Sep 12, 2009
Messages
1,254
Re: The R?surrection of the SeaGem

I probably should have posted this before but I didn't take a pic of the 1st head before I started. Here is a pic of head #2 before starting any work in it

100_9728.jpg


Notice the sharp edges and thickness around the valve guides. That actually disrupts and restricts the flow over .200 lift on the cam. These heads have been worked on before some of the more critical things like the ridge on the bowl under the valve seat most have been cleaned up some but still not to my liking
 

HVAC Cruiser

Lieutenant
Joined
Sep 12, 2009
Messages
1,254
Re: The R?surrection of the SeaGem

OK, Blend,Blend,Blend and more blend
100_9731.jpg


9 hrs later............

100_9732.jpg


And...............................................

]
100_9733.jpg


DONE PORTING!!!!!:)

Tomorrow I am going to get back to finishing the fiberglass work, Yippee
I figure after I glass I will wash the heads and re-assemble after the sun goes down:)

EDIT-- And it only took a total of 12hrs :eek:
 

BobsGlasstream

Commander
Joined
Sep 11, 2009
Messages
2,128
Re: The R?surrection of the SeaGem

HVAC Cruiser,
Looks like you made some really nice progress on those heads.
I manged to get my hands on some more of that engineered lumber for my additional V6 motor mounts, I'll be good to go when I get the time.
Your glass work looks great. I hate those darn bubbles too.
Looks good, keep it rolling.
Bob
 

HVAC Cruiser

Lieutenant
Joined
Sep 12, 2009
Messages
1,254
Re: The R?surrection of the SeaGem

Thanks Bob, yea Murphy is staying at my house again :( in addition to the bubbles I also tore a umbrella seal for one of the intake valves on one of the heads. My spring compressor slipped and sliced the darn thing


Well, on Wednesday I ground out the air bubbles and the rest of the bad fiberglass and fiber-glassed a new layer of 1708 on the both mounts. I didn't get done till 7pm as a result is was not cured yesterday so I couldn't prep for the bilge paint. I figured I would work on the gimbal, everything is good on it just needs new trim sensor wires and I have to swap the shift cable from my old one.
Being lazy, and not wanting to pull it apart for the wires I figured I would call the local boat shop and ask them how much just to change the wires, and replace the bellows why they are at it. I call them up the guy tells me $800 or so, I almost chocked !!!! I tell him the gimbal is already off the boat its just the wires not the sending units, maybe $200 in parts at best and he says doesn't matter. OMG is that what they are getting at mechanic shops these days or is he just a thief ? I can buy a refurbished for less that that. As a result I am doing it myself.
Today I have to go out to a job site so I doubt if I will do anything on the boat, maybe clean and Glyptal the heads when I get home .


ezmobee

Supreme Mariner
Joined
Mar 26, 2007
Messages
23,767
Re: The R?surrection of the SeaGem

I think the problem is you have too many rich people with boats in your area. That's the only possible explanation. I know if a shop charged that kind of money in my area, business would be pretty slow.
 

HVAC Cruiser

Lieutenant
Joined
Sep 12, 2009
Messages
1,254
Re: The R?surrection of the SeaGem

I think the problem is you have too many rich people with boats in your area. That's the only possible explanation. I know if a shop charged that kind of money in my area, business would be pretty slow.

You might be right on that, or the guy is just out of his mind :eek:


UPDATE!!!! I hit a milestone

IMG00418.jpg


1st coat of Bilgecoat in the engine compartment Yippee!!!!!!!!!!!!! Tomorrow AM I plan on giving it a 2nd coat :D

I see the end in sight, my pal charlie called and asked if I wanted to drop the engine in this weekend. I don't know if I have enough hours in the day though. I'm thinking more like the middle of next week, then again the day is still young. Maybe I can finish off the engine and paint her tonight, rebuild the Gimbal tomorrow, that would make a Sunday install possible .
 

Damifudo

Petty Officer 1st Class
Joined
Sep 14, 2009
Messages
277
Re: The R?surrection of the SeaGem

Very nice man she is looking good. I am sure you can see the light at the end of the tunnel from here. Nothing like nice weather to keep you fucused on the water and the completion. So many people kept asking me if I was done yet. It will keep you on track. I cant wait to see the engine going in. Keep it up. I know your about to get very busy at work too in the HVAC business thats why I wanted to get mine completed before the all the hot weather hits.
 

BobsGlasstream

Commander
Joined
Sep 11, 2009
Messages
2,128
Re: The R?surrection of the SeaGem

HVAC,
Now you got me worried, I just want them to remove my hinge pins. I managed to break my hinge pin tool today. :(
The boat is really looking good too.
Bob
 

HVAC Cruiser

Lieutenant
Joined
Sep 12, 2009
Messages
1,254
Re: The R?surrection of the SeaGem

Damifudo, Thanks yep I'm hustling to get her done before I have no free time on my hands.

Hey Bob, I didn't use a hinge pin tool, I used a 1/2" Craftsman allen wrench from sears. Try putting a little heat to the bell where the pin screws into to soften the loctite. I also gave mine a little love tap on the allen to jostle it. Be careful with the heat as you know its Aluminum
 

SnowHunter

Petty Officer 1st Class
Joined
Apr 4, 2010
Messages
285
Re: The R?surrection of the SeaGem

YAY! Lookin good Bill!!! Nice clean compartment!! One step closer to spashdown!!!
 

HVAC Cruiser

Lieutenant
Joined
Sep 12, 2009
Messages
1,254
Re: The R?surrection of the SeaGem

YAY! Lookin good Bill!!! Nice clean compartment!! One step closer to spashdown!!!


Thanks, Yep getting there slowly but surely


Well I did make some progress this weekend, got the transom assembly done, new gimbal bearing, bellows, trim sensors etc...

100_9775.jpg

I was feeling pretty good, spent the extra $10 to buy genuine Mercruiser Trim switches figuring USA made etc .... Then I saw this

100_9787.jpg


So much for genuine USA parts

I also had time to rebuild the Raw Water Pump
Before
100_9779.jpg


After
100_9780.jpg


NOW for the next dilemma

100_9784.jpg

That is one of the lower bolts for the transom assembly, nobody has them.
I'm thinking maybe I can use a SS carriage bolt. The other thing is should I just cut a washer for the bottom bolts form rubber gasket material?
 

83vert

Petty Officer 1st Class
Joined
Sep 10, 2009
Messages
394
Re: The R?surrection of the SeaGem

Bill, looks like you are doing a fine job over there. Was the water pump easy enough to get to? I tried all day to get those hinge pins out but could not do it. I think the torch I bought from Lowes (one of those little blue plumbing torches) does not give me enough heat. Sorry I missed your call but I was pulling what little hair I have left out. I just may take you up on giving me a hand when my new parts come in. Keep up the good work :D
 

HVAC Cruiser

Lieutenant
Joined
Sep 12, 2009
Messages
1,254
Re: The R?surrection of the SeaGem

Bill, looks like you are doing a fine job over there. Was the water pump easy enough to get to? I tried all day to get those hinge pins out but could not do it. I think the torch I bought from Lowes (one of those little blue plumbing torches) does not give me enough heat. Sorry I missed your call but I was pulling what little hair I have left out. I just may take you up on giving me a hand when my new parts come in. Keep up the good work :D


Just give a holler when you need help. Were the pins stripped or was it the tool? If you need a bigger torch let me know I'll lend you a turbo torch and acetylene b tank.

The pump was real easy to get to, the engine is still out of the boat ;) .
The one problem I did have today is my shift cable on the new gimbal was bad but the one on the old one was good. I figured no problem just swap it out , I even made this nifty tool not to pretty but it works.
100_9773.jpg

So I take out the bad cable on the new gimbal came out nice and easy. Go to the old one, ib breaks loose no wait it just broke in the bell :mad: So now I have to get a new shift cable or find a good cable housing.
 

sprintst

Commander
Joined
Apr 18, 2009
Messages
2,066
Re: The R?surrection of the SeaGem

The thing is when you do it yourself you get a chance to change out anything iffy. Nice new bolts to add to the list.

Your water pump and custom tool fabrications along with the completed mounts and bilge are looking great.
 

HVAC Cruiser

Lieutenant
Joined
Sep 12, 2009
Messages
1,254
Re: The R?surrection of the SeaGem

Hey Sprint, Yea I was thinking that while I was rebuilding the transom assembly to clean the housing mating surface I even used a small soft wire brush an my flexible shaft to make sure it was spotless + I couldn't get my mitts with sand paper in all the areas:eek:

Hey Bob, That would be great if you could send that to me, I have a good cable and ends its just the housing. I am sending you a P.M. just let me know shipping and I can put it in your paypal
 

HVAC Cruiser

Lieutenant
Joined
Sep 12, 2009
Messages
1,254
Re: The R?surrection of the SeaGem

Small Update,
2nd coat of paint in the bilge, I am calling it done;)
IMG00431.jpg


Next I cleaned brackets, Hx (heat exchanger) assembled the heads, cleaned them again, installed timing chain cover, oil pan, just dropped the heads in place and manifold on top and painted
100_9793.jpg


I am really wishing I painted it Chevy orange to much black. I would have gone with a chrome timing chain cover but I didn't know how it would hold up with the salt water/air. maybe some silver pinstripes or anodized valve covers???

Now for the dilemma, with getting carried away on the porting and doing a full porting job, I am borderline disaster with the stern drive. Up until then the Comp cams software was saying 325hp. NOW its saying 398hp :eek: if I use the torker manifold. If I use the stock cast iron its back down to 325hp . Any thoughts???? Go with the cast iron, heck with it use the torker and just don't be a cowboy or stick this engine in my jeep and put the 6 from there into the boat :eek:.
 
Top