Upon Further Review..#$%@..1973 Slickcraft Trans/String Overhaul

oops!

Supreme Mariner
Joined
Oct 18, 2007
Messages
12,932
Re: Upon Further Review..#$%@..1973 Slickcraft Trans/String Overhaul

hang on here kids.....

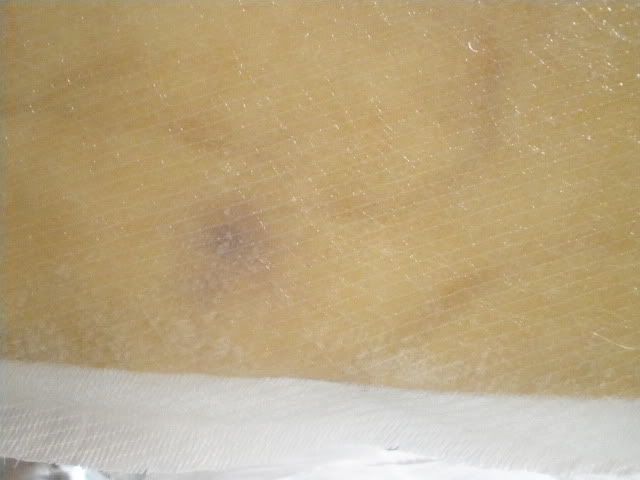
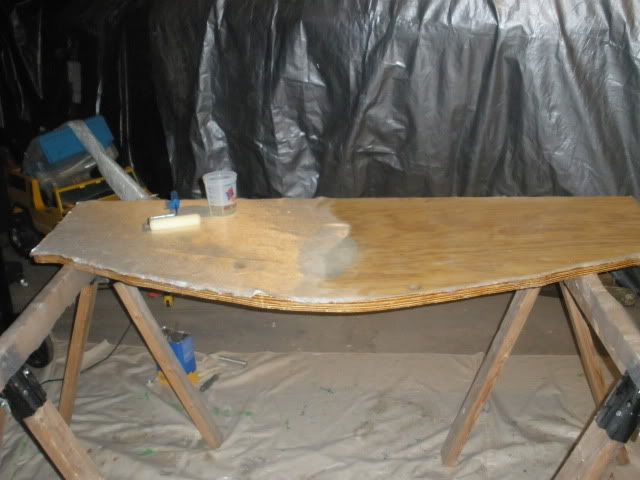
first the i708 is a big cloth for a small repair. csm will do and the styrene will cause the strands to seperate like you saw....so that corner can and will lay down with an air roller

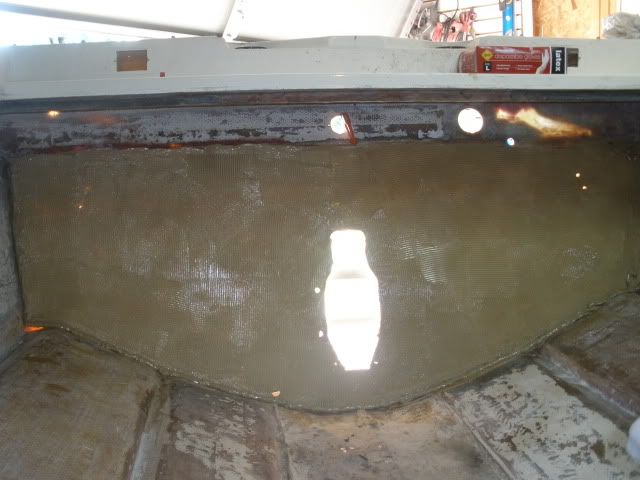
lets also not forget that after the transom goes in.....the area will be filled with structural peanut butter.....then the glassed transom....then a few wraps of 1708 for tabbing....then gellcoat for sealing !

that is a whole lot of protection for a small corner.

just get it so you wont have problems fitting the new transom.

cheers
ward
 

jcsercsa

Captain
Joined
May 21, 2007
Messages
3,401
Re: Upon Further Review..#$%@..1973 Slickcraft Trans/String Overhaul

Hay, I still got some of the 10oz eglass, if you need it !! it might work better than the 1708 !1 John
 

83mulligan

Senior Chief Petty Officer
Joined
Feb 7, 2009
Messages
687
Re: Upon Further Review..#$%@..1973 Slickcraft Trans/String Overhaul

Thanks oops. I just happened to pick up a yard of 1.5 oz. csm the other day. Also, I have some 4 and 6 oz. cloth. I'll get it. I was just real frustrated the other night. Tonight I'm going to glass the transom. 1708 on each side (it needs a little buildup to get to 2 inches required for the mercruiser).

Ward, the repair area is actually above the transom line. I like your idea of filling the voids with csm though. gives me something to work over. The corner itself is not damaged. I was trying to wrap it there. More pics coming, stay tuned.
 

83mulligan

Senior Chief Petty Officer
Joined
Feb 7, 2009
Messages
687
Re: Upon Further Review..#$%@..1973 Slickcraft Trans/String Overhaul

well, i went ahead with my plan but i only got one side glassed. Here's some pics.

First I wetted it out, let it begin to tack, then wet it again and laid on the 1708.
Started wetting out the glass, pouring it on and then spreading with a roller.
P6090116.jpg


then i took my bubble buster roller and rolled it all out. I couldn't find any air bubbles at all. So, i put a halogen under it and i'm waiting for it to kick.
P6090118.jpg
 

oops!

Supreme Mariner
Joined
Oct 18, 2007
Messages
12,932
Re: Upon Further Review..#$%@..1973 Slickcraft Trans/String Overhaul

cool....looks great...

just remember....when glassing the csm....the styrene will break down the binders in the matt quick....so follow ondarvr's instructions for glassing with it...

also a trick with the 1.5 oz..is to rip it apart and make .75 oz sheets for small areas......just grab a corner of the matt and separate it.
 

83mulligan

Senior Chief Petty Officer
Joined
Feb 7, 2009
Messages
687
Re: Upon Further Review..#$%@..1973 Slickcraft Trans/String Overhaul

oops, i just went out and checked it and its starting to kick, but i noticed a lot of little bubbles on the surface. what's the deal with that?
 

oops!

Supreme Mariner
Joined
Oct 18, 2007
Messages
12,932
Re: Upon Further Review..#$%@..1973 Slickcraft Trans/String Overhaul

id need to see it....it could be because of an improper wet out.....or just the heat from curing is bringing bubbles to the surface....some will break...some wont.

dont sweat the air in the glass bud. it happens and is really hard to control....just try to get the major bubbles from wrinkled glass.

if you are glassing 1708 or csm and get a major bubble that you cant work out, take a set of sizzors and cut the glass. then just roll it into the resin.
if the peice is absolutely terrible and you know that you will have to grind it out the next day....just remove the wet glass alltogeather and pitch it. !
 

oops!

Supreme Mariner
Joined
Oct 18, 2007
Messages
12,932
Re: Upon Further Review..#$%@..1973 Slickcraft Trans/String Overhaul

to prevent an improper wet out of the substraight....when you wet it out....really work the resin into the area.....if you just paint it with a fuzzy roller or other.....you will miss microscopic areas where the resin will tend to stick to it self and not the substraight...(kinda like water beading....but on a micro bubble scale)

so when you wet out an area....really work the resin in by sliding the roller in a different direction other than the roll....if you look closely you will see a big difference between the two
 

83mulligan

Senior Chief Petty Officer
Joined
Feb 7, 2009
Messages
687
Re: Upon Further Review..#$%@..1973 Slickcraft Trans/String Overhaul

Oops!: It looks really good this morning!! Bubbles on the surface are mostly gone. No nasty areas of bubbling on the substrate. The bubbling must have been from the heat of the resin setting up. I'll post a picture later.

Thanks for the great info above. Good Stuff!!! Always like to see you stopping by.

Now.....Amine blushing. How do I know if i have it? Sand and acetone. Or, wash with soap and water, sand and acetone
 

83mulligan

Senior Chief Petty Officer
Joined
Feb 7, 2009
Messages
687
Re: Upon Further Review..#$%@..1973 Slickcraft Trans/String Overhaul

Ok, here is a pic of the transom all cured!
P6100119.jpg


Here is a repair i've been doing on the outside corner of the boat. I filled it with some csm, torn into thinner layers, as suggested by oops! Its coming along nicely.
P6100120.jpg


I have also re repaired the hole in the hull. I'll get a pic of that up soon.

Last night i put a layer of 1708 on the backside of the transom. I worked on the outside of the hull (pic above).

I also worked on the inside corner. I filled some low areas with csm. Then I had a nice piece of 1708 i started to wet out and put in to cover it all. Only, I didn't work fast enough with the resin between cutting the csm, wetting it out and fitting this new piece. It started to kick when i was wetting it out after applying it :mad: Man, so close.
 

83mulligan

Senior Chief Petty Officer
Joined
Feb 7, 2009
Messages
687
Re: Upon Further Review..#$%@..1973 Slickcraft Trans/String Overhaul

Todays work: filled in another layer of csm on the outer skin repair pictured above.... Rough and scuffed inside face of transom, vacuumed, washed, acetoned and added second layer of 1708. I'm ready to build the clamp system and get that installed.

Still need to grind out inside corner of boat where glass set up too early and i couldn't get it all wet out.

Things are slowly coming together.
 

83mulligan

Senior Chief Petty Officer
Joined
Feb 7, 2009
Messages
687
Re: Upon Further Review..#$%@..1973 Slickcraft Trans/String Overhaul

Last night I put a second layer of 1708 biax on my transom. I thought I got all the bubbles but when i woke up this morning and checked I found some areas like the one in the picture below. Is this acceptable or do i need to grind these areas out and repair them? I don't know if i'm being too critical of my own work or not. Opinions please................

P6120149.jpg
 

redfury

Commander
Joined
Jul 16, 2006
Messages
2,657
Re: Upon Further Review..#$%@..1973 Slickcraft Trans/String Overhaul

I'm not worrying about small bubbles like that in my glass work. It's the larger pockets of air that are the problem, as the actual fiberglass is resin starved, or if it isn't, just free floating and waiting for something to fill that void ( read:water )
 

83mulligan

Senior Chief Petty Officer
Joined
Feb 7, 2009
Messages
687
Re: Upon Further Review..#$%@..1973 Slickcraft Trans/String Overhaul

Red: Thanks man, makes me feel better

Update........Been working on the transom and the damaged corner. The transom has two layers of 1708 on the inside, one on the outside. She's rock solid!! One more sand on the edges and then a coat of epoxy there and it's ready for install.

Corner is coming along nicely. Filled some low spots with csm and got a sheet of 1708 to lay in pretty good. I didn't wrap it around the corner since the corner itself is not damaged. My main goal was to fill the low areas with glass, strengthen it and give it a nice face to tab to when i put the transom in.

The outside came out nice. Need to sand that and skin it with some marine tex and its good to go.

Today was a clean up all the mess day. Got tools reorganized and put away. Next is to vacuum the hull again. Then build the clamp frame for the transom. Going with BobsGlasstream's method there.

I'll tell you, it sure is nice to be constructing instead of demolishing. I'll be gone for work mon thru wed so no progress til then.
 

tdrudd87

Petty Officer 1st Class
Joined
May 28, 2009
Messages
288
Re: Upon Further Review..#$%@..1973 Slickcraft Trans/String Overhaul

Hey 83, glad you made some progress and the glass is cooperating! I agree, isnt it awesome to build rather than grind!

Terry
 

83mulligan

Senior Chief Petty Officer
Joined
Feb 7, 2009
Messages
687
Re: Upon Further Review..#$%@..1973 Slickcraft Trans/String Overhaul

Hey 83, glad you made some progress and the glass is cooperating! I agree, isnt it awesome to build rather than grind!

Terry

Terry, it sure is! Tonight I hope to get the clamp system built. Then, maybe tomorrow, the transom will be ready to be pl'd into place. That will be a good milestone. Also tonight I hope to do some cutting to length and test fitting of the stringers.
 

83mulligan

Senior Chief Petty Officer
Joined
Feb 7, 2009
Messages
687
Re: Upon Further Review..#$%@..1973 Slickcraft Trans/String Overhaul

Transom is in. I have to say, I'm a little concerned though. scraping up the PL Premium in some cleanup areas about an hour after the job i found it to be crumbly in my fingers. Is this normal? I'd expect it to be more rubbery, i guess. I'll post some pics later.
 

83mulligan

Senior Chief Petty Officer
Joined
Feb 7, 2009
Messages
687
Re: Upon Further Review..#$%@..1973 Slickcraft Trans/String Overhaul

Here are some install pics...........The transom was rough and scuffed, as was the hull. Both were vacuumed and then wiped down with acetone. Then PL Premium was troweled on transom skin.......
P6190151.jpg


The transom was put in place and pinned with bolts at the lifting hooks and outdrive holes. Then the wooden clamp was put on. Here is outside the boat.............
P6190155.jpg


And the view from inside..................
P6190153.jpg


You can see the inside brace is made of 2 x 4 and the outside of 2 x 8. I wanted to make sure the board drew to the skin and not the other way around. Unfortunately, the board is really stiff with the layers of glass on it and I had a hard time, even with this clamp, getting it to seal up without gaps in a couple spots. I guess I'll have to deal with this using chopped strands and epoxy injected. We'll see.
 

83mulligan

Senior Chief Petty Officer
Joined
Feb 7, 2009
Messages
687
Re: Upon Further Review..#$%@..1973 Slickcraft Trans/String Overhaul

Here is a picture of the hole in the hull repair. 3 layers of 1708 placed in a beveled out area over the hole..

P6190154.jpg
 

HVAC Cruiser

Lieutenant
Joined
Sep 12, 2009
Messages
1,254
Re: Upon Further Review..#$%@..1973 Slickcraft Trans/String Overhaul

Hey Steve,
Everything is looking great, she is really coming along :) Keep up the great work
 
Top