1968 Holiday Restoration w/pics

Azlo

Senior Chief Petty Officer
Joined
Jun 21, 2009
Messages
706
Re: 1968 Holiday Restoration w/pics

WOW, I did not know this was one of those touchy subjects. Im glad im finding out. So I googled "crimping vs soldering" and theres is quite some controversy over this. It baffles me that there is one side that says to crimp and the other that says to solder. Me, im just learning. but its great to see all this great knowledge. But i feel like in a buffet, i dont know what what to get because it all tastes good or this case it makes sense. On one side u have the solders that say that there is less resistance, stronger hold but it does stiffen that connection therefore causing a stress point, so u tie the cable or wire so it wont vibrate vs leaving it loose to vibrate. On the other team u have the crimpers that say crimping is the best cause it does not stiffen, and also last longer, hence why u have Nasa, aero, and automotive and some medical applying this method. The solders reply is that its faster to crimp than to solder and in a commercial enviorment u need fast to make money. Wow. Going back to the buffet, what i usually do when i cant make a decision is to eat everything. So does it make sense for me to be on both teams and crimp, solder, liquid tape and then shrink tube?!?!? :redface:
 

Last Mohican

Chief Petty Officer
Joined
Aug 27, 2010
Messages
573
Re: 1968 Holiday Restoration w/pics

Years ago I was working on getting my A&P license. We spent quite a bit of time on electrical connections. After the course I was convinced that cripmping is the way to go. It has nothing to do with how long it takes to make a connection. It has everything to do with making a reliable connection that will hold up over time. Sure you can do both but if you use the proper size terminal for the cable you are working with and use a good set of ratcheting crimpers there is no need to solder it. Follow that with marine heat shrink and you will have a solid connection that will stand the test of time. Just my .02. I say do the research and make your own call. I'll stay out of it from here.
 

proshadetree

Lieutenant Commander
Joined
Jul 19, 2008
Messages
1,887
Re: 1968 Holiday Restoration w/pics

Azlo

I do forklift repair and they get the snot beat out of them. Solder joints will break under these conditions. If you want to do both I would crimp first then solder the terminal end of the joint. In that article it states that when you can hang a gallon of liquid on a crimped wire and it will not separate it is correct That is 8 to 10 lbs. This joint will not corrode. A junk crimp will.
 

Azlo

Senior Chief Petty Officer
Joined
Jun 21, 2009
Messages
706
Re: 1968 Holiday Restoration w/pics

Fair enough, then crimping it is.
 

chrisp929

Petty Officer 2nd Class
Joined
Jul 29, 2010
Messages
189
Re: 1968 Holiday Restoration w/pics

There is no shortage of information explaining why a crimp is a much better connection that a solder connection especially in an environment where there is vibration. Google it if you don't believe it. There is a reason all automotive and aviation connectors are crimped and not soldered.

I apologize if i sounded rude, it wasn't my intention. Since you have much more experience than i do in this matter, I'm sure your right. Since crimping is faster as well, there doesn't seem to be a reason not to crimp. I'm also going to use the heat shrink tubing like Azlo does. Makes it all look so nice.
 

Azlo

Senior Chief Petty Officer
Joined
Jun 21, 2009
Messages
706
Re: 1968 Holiday Restoration w/pics

Brother chrisp929, dont sweat it bro. Its just a forum. I knew nothing when i came here and its everybodies experiences and diffrences that has helped me out a lot. But i always have an open mind and at end make my decisions. U like blondes, I like brunettes but in the end they are all a pain in the a$*, right? U dig. Anyways, debates are always good to stir the imagination. I will try something & let experience guide me. Everybodies helpful comments are welcome here. :)
 

CBGale2

Lieutenant Junior Grade
Joined
Apr 22, 2009
Messages
1,026
Re: 1968 Holiday Restoration w/pics

Im with Azlo, the thought never crossed my mind that one would be better than the other. Ya learn something new everyday, eh. Thanks for the info guys. Im better with crimpers than a soldering iron anyways. LOL

Azlo you are doing some fine/clean work there, keep it up.
 

Last Mohican

Chief Petty Officer
Joined
Aug 27, 2010
Messages
573
Re: 1968 Holiday Restoration w/pics

I apologize if i sounded rude, it wasn't my intention. Since you have much more experience than i do in this matter, I'm sure your right. Since crimping is faster as well, there doesn't seem to be a reason not to crimp. I'm also going to use the heat shrink tubing like Azlo does. Makes it all look so nice.

Hope I didn't come off too harsh. I certainly don't deserve any credit for experience. It's all good in my eyes. :beers:
 

Azlo

Senior Chief Petty Officer
Joined
Jun 21, 2009
Messages
706
Re: 1968 Holiday Restoration w/pics

Ok so now i have to learn upholster a little. I went ahead and got some marine vynil with 1/4 foam for my dash. and waiting anciously for it. But also Im waiting for fshngo to do his so I can learn from his mistakes :p. Sorry buddy. But if I get my stuff first well then everybody can leanr from mine. Anyways, i went ahead and sealed my dash with epoxy. Love this stuff but I just hate applying it.

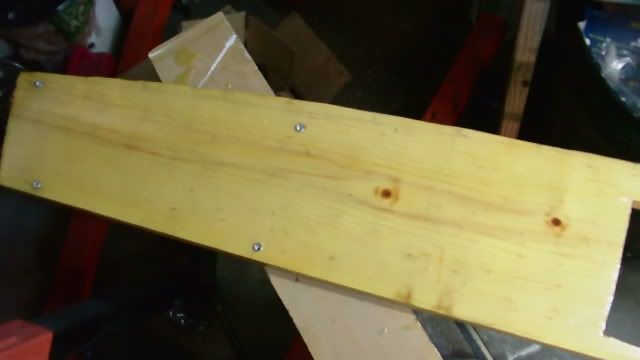
MAH009631.jpg


If u notice I also installed my aluminum rivets to the dash were u can bolt it from behind the dash. This little soccers have been so usefull.

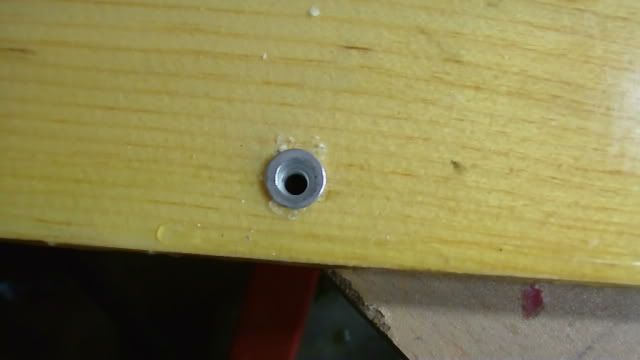
MAH009634.jpg


I didnt have to compress them like usuall, but just install them with a hammer and let the epoxy settle with them.

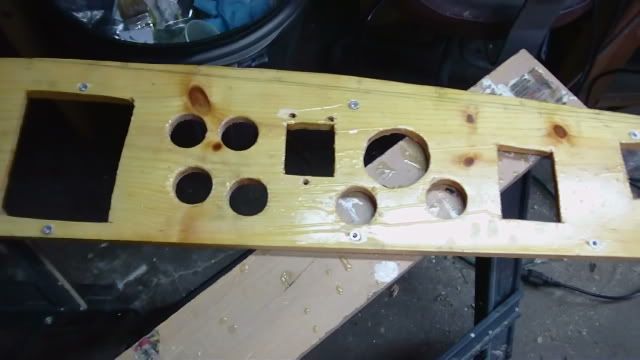
MAH009636.jpg


Now this a messy epoxy but this will be covered with vynil.
 

Huron Angler

Admiral
Joined
Apr 7, 2009
Messages
6,025
Re: 1968 Holiday Restoration w/pics

Azlo, you have knocked everything out of the park on this project so far and this dash is gonna be sweet. Probably the coolest part of the older Starcrafts in my opinion...especially the I/O's since you guys need more gauges:D

Looking forward to seeing the rig all finished, and you are well on your way. Nice work:)
 

Azlo

Senior Chief Petty Officer
Joined
Jun 21, 2009
Messages
706
Re: 1968 Holiday Restoration w/pics

Im with Azlo, the thought never crossed my mind that one would be better than the other. Ya learn something new everyday, eh. Thanks for the info guys. Im better with crimpers than a soldering iron anyways. LOL

Azlo you are doing some fine/clean work there, keep it up.

Thanks CB!Hey man by the way, nice paint job. I had to rotate the pic to actually see how it will look on the lake. Dam nice!!
 

Azlo

Senior Chief Petty Officer
Joined
Jun 21, 2009
Messages
706
Re: 1968 Holiday Restoration w/pics

Azlo, you have knocked everything out of the park on this project so far and this dash is gonna be sweet. Probably the coolest part of the older Starcrafts in my opinion...especially the I/O's since you guys need more gauges:D

Looking forward to seeing the rig all finished, and you are well on your way. Nice work:)

LoL, u outboardies are allright.
 

rpontius77

Cadet
Joined
Mar 25, 2011
Messages
8
Re: 1968 Holiday Restoration w/pics

Hey guys. This is an awesome thread. You all have given me many ideas and lots of info. I have a new to me 1970 starcraft chieftain 21v that I have just started myself. almost everything worked, but the wiring was like a birds nest in every corner. I bought it from a marine tech, and aferwards realized why they say "don't buy a mechanics car or boat". I used the same crimp method on all my wiring with shrink tube as well. AZLO, it would be very hard to believe that you have never done this before just because it looks so good, and everything seems to be very well thought out. Keep up the great work.
 

Azlo

Senior Chief Petty Officer
Joined
Jun 21, 2009
Messages
706
Re: 1968 Holiday Restoration w/pics

Hey guys. This is an awesome thread. You all have given me many ideas and lots of info. I have a new to me 1970 starcraft chieftain 21v that I have just started myself. almost everything worked, but the wiring was like a birds nest in every corner. I bought it from a marine tech, and aferwards realized why they say "don't buy a mechanics car or boat". I used the same crimp method on all my wiring with shrink tube as well. AZLO, it would be very hard to believe that you have never done this before just because it looks so good, and everything seems to be very well thought out. Keep up the great work.

Thanks rpontius, yeah your right. This project has actually made me more thoughtful. I plan more now. But I made mistakes that had made me be more cautious for example I ruined my hood by sandblasting!!:mad: Man that was an expensive lesson but well learned. All in all it has made more active and more a planner.
 

4Winns2

Petty Officer 1st Class
Joined
Nov 2, 2006
Messages
327
Re: 1968 Holiday Restoration w/pics

I just went through your entire resto thread. I've seen a lot of resto threads on this forum over the years but hands down yours is the best. You give a new meaning to the phrase thorough job. I'll be following along as you ready your tin for the splash date.

Lived all over DFW in the eight years (80-88) I was there. Buddy of mine had a boat and we'd go on Ray Hubbard every so often. What scared me about that reservoir was the amount of trees just beneath the surface. And, they looked quite hungry for fiberglass I might add.

Got to say it here at end of this post: unbelievable job!
 

Azlo

Senior Chief Petty Officer
Joined
Jun 21, 2009
Messages
706
Re: 1968 Holiday Restoration w/pics

I just went through your entire resto thread. I've seen a lot of resto threads on this forum over the years but hands down yours is the best. You give a new meaning to the phrase thorough job. I'll be following along as you ready your tin for the splash date.

Lived all over DFW in the eight years (80-88) I was there. Buddy of mine had a boat and we'd go on Ray Hubbard every so often. What scared me about that reservoir was the amount of trees just beneath the surface. And, they looked quite hungry for fiberglass I might add.

Got to say it here at end of this post: unbelievable job!

Thanks bro, one of the reasons I want to be thorough is I dont want to be stranded or worse sinking. But thats a phobia I have. When u see me on splash day u will probably be laughing at how many floats I will be wearing. :D Yeah u aint kidding about the trees in ray hubbard!! But I see a lot people fish there. Good luck to them.
 

4Winns2

Petty Officer 1st Class
Joined
Nov 2, 2006
Messages
327
Re: 1968 Holiday Restoration w/pics

Thanks bro, one of the reasons I want to be thorough is I dont want to be stranded or worse sinking. But thats a phobia I have. When u see me on splash day u will probably be laughing at how many floats I will be wearing. :D Yeah u aint kidding about the trees in ray hubbard!! But I see a lot people fish there. Good luck to them.

Nothing wrong with being safe- -even if you over do it a little. And, I will spare you any sarcastic comment on your industrial sized bilge pump. I imagine you could pop a 2 foot hole in the hull and not worry about sinking.

Here's where my boats and family call home, if you're interested.

http://nyfalls.com/lakes/skaneateles.html

I sure could use some Cowboy chicken with smashed potatoes and thier famous peach cobbler.
 

Azlo

Senior Chief Petty Officer
Joined
Jun 21, 2009
Messages
706
Re: 1968 Holiday Restoration w/pics

OK, have been reading about upholstery, so i got a stapler, glue and my heat gun ready for my dash. Finally my gauges have arrived also. This is going to be an intresting weekend. I been reading jasoutsides vinyl project and has motivated me to take the plunge. But for now I have been cleaning, sanding and gluing my dash.

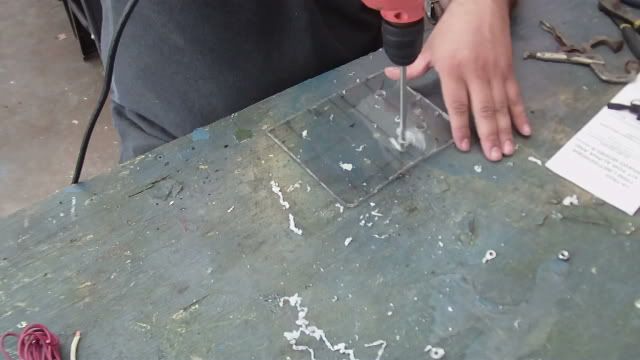
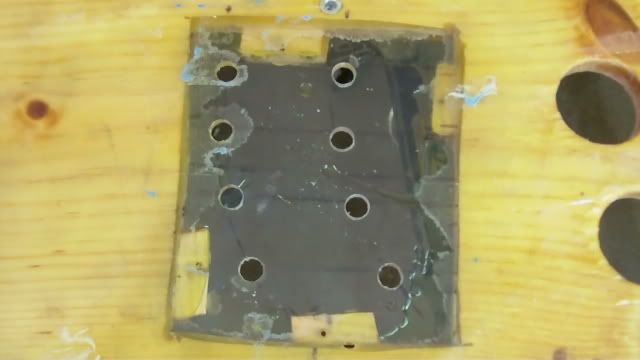
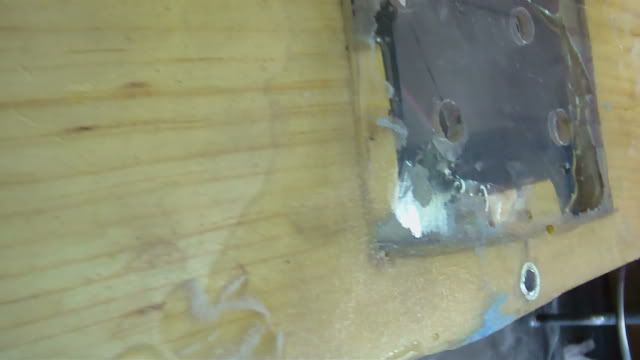
First had to get my switch platform ready. The reason i went with plexiglas is because i tried and tried to cut the holes for the switches and couldnt get it right. Since my dash is 1/2 thick switches wouldnt go through all the way. So i got plexiglass and glued it to the dash. I dont have carpentry skills yet and im on a time crunch here.

MAH009711.jpg


So as you can see, cut 4 tabs were the plexi can rest and be glued to.

MAH009741.jpg


I am actually surprised how strong and leveled it came out. I satisfied. I know it looks ugly, but it will be covered.

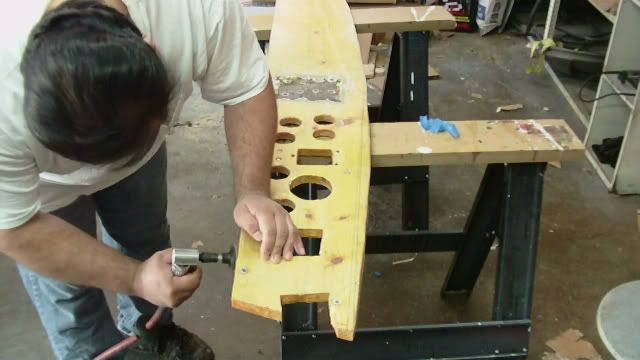
MAH009742.jpg


Sanded all the spikes down so I wouldnt tear my vinyl. Very nasty smell.

MAH009733.jpg


Now for the Upholstery.....will post soon fellas.
 

jasoutside

Supreme Mariner
Joined
Dec 20, 2009
Messages
13,269
Re: 1968 Holiday Restoration w/pics

I like that curve design for your switches man, that'll be cool:cool::cool:
 
Top