1976 Arrowglass transom replacement and then some

GT1000000

Rear Admiral
Joined
Jul 13, 2011
Messages
4,916
Re: 1976 Arrowglass transom replacement and then some

Howdy Jitterbug,

Just barely started to read through your thread and I gotta say, real nice lookin boat and you are doing a real nice job...

The best tip I could give you before I get back to finish reading through is...and I know I'm kinda late to the party on this when it comes to the transom, but for the rest of the templates that you have to make, such as the stringers, or if any bulkheads, or decking...you can get a cheap hot glue gun and some free cardboard...cut the cardboard into 1-2" wide strips, more or less, and lay them along the edge of what you need a template for, hot glueing the strips together as you go along...
it will get you real close to th finished cut line

DSCF1491.jpg


DSCF1490.jpg


Hope this helps some and keep up the great progress...

Regards,
GT1M
 

Seasonally.boating.jon

Petty Officer 1st Class
Joined
Jul 10, 2011
Messages
283
Re: 1976 Arrowglass transom replacement and then some

Alright, Spent 5 hours or so on the boat today. In reality I've prolly spent like 2, entertaining my children the other 3. A mix of the boat and them. I'd rather have them outside instead of sitting in front of the tv playing those games anyway.

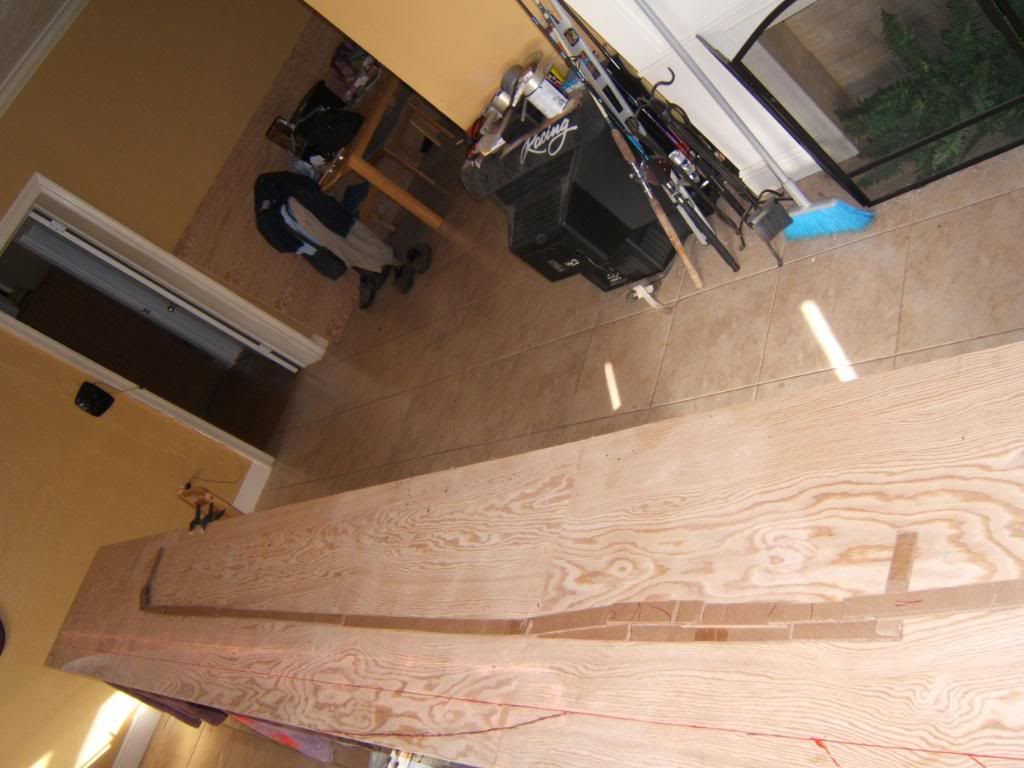
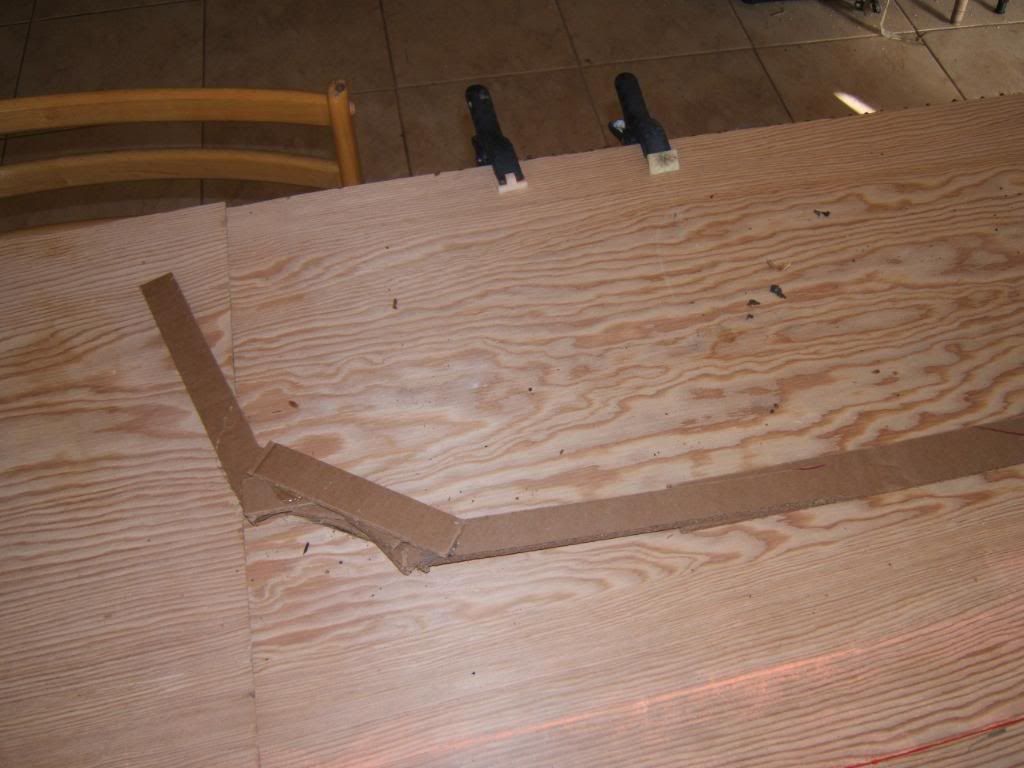
I made 4 clamps which are made for holding the transome plys together wile they cure. I'll modify them for the actual "glueing to the hull" process. I might even make 2 or 4 more for that. I cut the 2nd transome out. Sooo, the transome plys, upper and lower, are officailly cut out. And glued.

Now for the Titebond glueing. MESSY. I wore flip-flops during the glueing, Got the stuff all over my toes.

Wood, I tried to use the trowel, but the glue just flatten out as soon as I troweled it. Not very thick stuff. I thought, maybe I could let it thicken a bit then trowel but I went into panic-mode and just started clamping.

I played it safe and grabbed a gallon of the titebond. Four 2x4's, four all threads 3' long. All of that was cut in half. Got mixing buckets and a mixer. I think I bought more, just cann't remember. dropped $99 and some change today at Lows

More Pics tomorrow.

lowertransglue.jpg


makeinclamp.jpg


cjfitting1.jpg


mixer.jpg
 

Seasonally.boating.jon

Petty Officer 1st Class
Joined
Jul 10, 2011
Messages
283
Re: 1976 Arrowglass transom replacement and then some

I WAS going to water proof the lower trans today. Change of heart on that. Reason being that I want to MAKE sure that the glue fully hardens. Think I give it a week before I remove the clamps. Just to be on the safe side. It would probably be Ok by the end of today.

So glad I bought a gallon of the glue. It took damn near all of it. I just poured it on the ply, grabbed the trowel, tried a few passes with it, and the lines just disappeared. So I smoothed it over covering the whole ply. Slapped the other piece down, and it just started floating away. So I Rubbed the two plys together for a minute and started clamping. The run-out drips were kind of soft but the thin drip spots that landed on my new, unused mixing cups were nice and crispy.

Have a great day fellas.

today.jpg


sqeezeout.jpg
 

Decker83

Commander
Joined
Apr 5, 2011
Messages
2,593
Re: 1976 Arrowglass transom replacement and then some

The transom is looking great. Nice job on the clamps.
The glue will never let go. The wood will give up first.
Get ya some glass on that wood. :D
 

Woodonglass

Supreme Mariner
Joined
Dec 29, 2009
Messages
25,929
Re: 1976 Arrowglass transom replacement and then some

Well you for sure got enuf glue on her!!!! If that thing comes unglued I'm headin for the hills!!! Sorry I shoulda told you to drive a couple of small finish nails in each corner to keep it from movin on ya. the glass and glue woulda sealed em in forever. I'm gettin Old, and can't remember everything.:eek:
 

GT1000000

Rear Admiral
Joined
Jul 13, 2011
Messages
4,916
Re: 1976 Arrowglass transom replacement and then some

Nice job on gluing the transom plates together...I too, had the same thing happen with mine, the two pieces started to float away from each other, but after getting the clamps started on them, they finally settled down...good idea to wait a few and make sure it is fully cured...even though the bond on mine seemed solid after only 24 hours, what's the rush?:rolleyes:...mine ended up sitting around for what, almost a month, give or take, before it ever saw its first drink of resin...:redface:

Great feeling to be getting ready to start some assembly...
 

Seasonally.boating.jon

Petty Officer 1st Class
Joined
Jul 10, 2011
Messages
283
Re: 1976 Arrowglass transom replacement and then some

Thanks alot fellas.

GT1000000}Great feeling to be getting ready to start some assembly...

Ain't it? Nervous about the glassing though.

I shoulda told you to drive a couple of small finish nails in each corner to keep it from movin on ya.

Wood, ain't no thang, I roll with the punches. That is some GOOD stuff.

The glue will never let go.
Decker, Yeah I trust it with my life.:eek:


Modified the clamps today so they will clamp the transome skin and wood together. Was giong to "TRACE" the skin edge onto the overhang part of the ply and get it ready to cut, but dinner bell rang. After I cut it out I'll fine tune everything and hopefully have glass on it by the end of the weekend.

Are my clamps too big? I may cut a few inches off the bottom and I'll make two more just to make sure I get coverage.

tclamp.jpg


tclamp1.jpg
 

Seasonally.boating.jon

Petty Officer 1st Class
Joined
Jul 10, 2011
Messages
283
Re: 1976 Arrowglass transom replacement and then some

Today I tried my hand at glassing. I glassed one side of the lower transom. Didn't get to the other side because it started raining. Guess I'll be grinding the stray hairs after it cures. The bubble roller works great. Csm wrapped very nicely around the edge. Didn't see any air bubbles but we'll just have to see alil' later. The "peg board" works nicely aswell. It made it very easy to do the wrap. Mixed the resin with the small paint mixer. A+ on that.

Now for the ratio for the resin. I didn't know that 0.7% would make that big difference in the catalyze. I used the manufacturers ratio, which is at 1%. I hope it cures eventually. I mixed 1/8 oz mekp to a pint of resin. This will probably end up as a redo, but if so, I still have enough scrap from the transome trim-off to use I think. I really hate to try to refit it though. Whats done is done. I killed about three beers to ease the nervousness and just went for it. Dont know why I was nervous about it. Guess I just spent so much time to get to this point and I didn't want to screw it up. It will be 2% next time. What is the ratio for a pint?:redface::redface:
 

Seasonally.boating.jon

Petty Officer 1st Class
Joined
Jul 10, 2011
Messages
283
Re: 1976 Arrowglass transom replacement and then some

glassn1.jpg


gap.jpg


Threw some shims in between the upper and lower trans to compsate for the csm. You like the lil' hole in there?:D
 

TruckDrivingFool

Lieutenant Commander
Joined
Jul 30, 2007
Messages
1,818
Re: 1976 Arrowglass transom replacement and then some

If you're using the little shot glass from USC and mixing 1/8oz your under catalyizing and it will dry really slow. Use the cc/ml scale for measurements not the fractional ounce scale. Read the rest then look back and it will make sense.
PICT0035edit.jpg


oops! in another thread said:
sorry bud i work in metric.

try using that system....its much easyer.

for 100 ml......you use 2 ml of mekp.
for 500 ml you use 10 ml of mekp.
for 1000 ml you use 20 ml....

really simple

Keep in mind he mixes @2%

Pint = 473ml
quart= 946ml

So you're close using either system.
I was going 7.5ml to a pint at my last batches (so long ago) and then I got the above quoted answer and have yet to try it.
 

GT1000000

Rear Admiral
Joined
Jul 13, 2011
Messages
4,916
Re: 1976 Arrowglass transom replacement and then some

Looking Golden! Trust me, I know the "I'm not so sure" Feeling all too well...it constantly creeps into my brain everytime I am about to take another step...It does seem to be getting a little easier, but even so, it gets nerve racking wondering about all of the details...

Depending on the temps, 1% catalyst will work fine as far as kicking off, it just will take longer...2% may be too fast if its warm out...
I have tried to keep it about 1.5%, and at around 80?, it gives me about 15-20 minutes to work with it...

And it is way easier to figure out if you keep all the measurements metric...100ml resin=1-2ml MEKP

A pint [16oz.] is approximately equal to 473 ml...at 1%MEKP=4.7ml, at 1.5%=7.1ml, at 2%=9.4ml

Hope this helps...

Great Progress...

And yes, I kinda like the little hole...:rolleyes:
 

Seasonally.boating.jon

Petty Officer 1st Class
Joined
Jul 10, 2011
Messages
283
Re: 1976 Arrowglass transom replacement and then some

Wish I had something to brag about but I don't.............I'm gonna show my goof.

To explain whats in the pictures. Yes my shirt is raggy, its work cloths. I weld ALOT. Doen't take long to bleach and burn little holes in it.

The glass work was not this bad, well.......... it wasn't too much BETTER before I tried to peel the csm off.
It took almost two days for this to harden. Temps were 60 and below, WAY below that at night. Turned cold on us again. I mixed the good at 1%. Lessen learned there. I will listen to you guys FOR NOW ON.:D I just had to try the manuf. specs.

I beleave I rolled everything properly, got all the air bubbles out and stuff. I beleave the reason the air bubbles appeared is because of the slowness of the curing process. *** Atleast I hope. *** I could have swore I did a swell job of getting those bubbles out.

I do have some scrap pieces that I cut from the transome that are already glued. So this will be recut and fitted. Not a big deal.

GOOF1.jpg


GOOF.jpg
 

Seasonally.boating.jon

Petty Officer 1st Class
Joined
Jul 10, 2011
Messages
283
Re: 1976 Arrowglass transom replacement and then some

Redone my lil' trans part today. I have to thank GT1M and TDF for your replys to my thread. Helped so much. I just done one side. Got the edges too but I will have to do a bit of grinding to it. I did expect that. We have tornado warnings so this is as far as I got. Had alot of cleaning up to do.

I only had two little tiny, itty bitty air bubbles. The resin set up in perfect time. When it started to turn into a jelly, I knew it was time to stop rolling and dabbing. Agian, it turned out very good. Thanks guys.


newlay1-1.jpg


Its cured pretty good in that picture. Barely sticky.

newlay.jpg


EDGE.jpg


I will do some trimming before I do the otherside. I had to cut it off the "lay-up board".

CUP.jpg


I might start making my own cups.:D

I would have got more done today but my son and I spent alot of time down at the river today trying to catch the biggest bullfrog we could find. He has a frog derby coming up in school next week.

Have a good one guys.
 

Seasonally.boating.jon

Petty Officer 1st Class
Joined
Jul 10, 2011
Messages
283
Re: 1976 Arrowglass transom replacement and then some

Finally! I water proofed the transome. I went though so many chip brushes, you'd think I was getting them for free. Getting the mat to round the edges was a little challenging but I got it. I know I should have used the STRIPS of wood for the lay up board now. Useing the chipboard made it a pain because when I rolled the mat around the edge of the ply and resined it, I pretty much had to CUT it from the the chipboard. No biggie though. Gotta pay attention to all the details and tips you guys give.

I started late on my project due to the fact that everbody needed some help doing something. Helped my wife plant some flowers. Ofcourse we spent about 2 hours searching for flowers. Helped brother-in-law paint a ol' chevy. So that was almost 3/4 of daylight gone.:) I didn't have to listen to any complaining when I came in late though.:D

Anyway, I got that thing water proofed. Yeeeyaah!!!!!

glassed.jpg


glassed2.jpg


glassed3.jpg


Plans for AFTER the build will be a work shop. Man, this work shop ain't cutt'n it. I really didn't expect to get in so deep with this project.

workstation.jpg
 

Woodonglass

Supreme Mariner
Joined
Dec 29, 2009
Messages
25,929
Re: 1976 Arrowglass transom replacement and then some

Yer glassin skills are improvin!!! Keep up the good work!!!
 

GT1000000

Rear Admiral
Joined
Jul 13, 2011
Messages
4,916
Re: 1976 Arrowglass transom replacement and then some

Save your chip brushes...immediately after use and before the resin gels on them, wash them in a cup of acetone, shake them out real good and repeat...use talcum powder to remove the left over stickiness, dump some on and work it into the bristles and the handle, before reuse, rinse with acetone...
 

Seasonally.boating.jon

Petty Officer 1st Class
Joined
Jul 10, 2011
Messages
283
Re: 1976 Arrowglass transom replacement and then some

Thanks wood and GT. I appreciate it.

{edit} I had questions but did some reading and got my game plan.:)

I intended on packing the filler in corners , trowel the skin and glassed transome, then clamping tight enough to get a really good sqeeze out. Ofcourse I will dry fit it multiple times and I have my clamps set were it wouldn't take but just a second to tighten.

I think I will have someone to trowel the ply wile I do the skin.

Thanks fellas.
 
Last edited:

Seasonally.boating.jon

Petty Officer 1st Class
Joined
Jul 10, 2011
Messages
283
Re: 1976 Arrowglass transom replacement and then some

I've come to the conclusion that I am not a fiberglasser. I know what I have done with the filler. WAAAAAAAY too much chopped fibers. I know I have a good squeeze out cause really applied the PB thick. As I was smoothing everything out the hairs just gathered in clumps. I suppose it will be fine. I'll just sand them off later. Feel free to beat me up about this but all I can say is "you'll have that". I'll do better on the larger piece, HOPEFULLY. A pinch of chopped fibers and more cabosil. I had a good PB texture though. I'm used to mixing the hardner and resin. Whether it be a quart to 8oz., I got 20 or so minutes working time. Adjust the stuff depending on the weather. Now I'm learning this PB thing. I did add some 1708 to the hull just to strenthen it up a lil'.

Anyway, I kept paying attention to the west side of the sky because we had a chance of rain. Did not watch the east, as a big dark cloud was growing. I heard it before I seen it . Its like the thunder rumbled as soon as I added the mekp.
:eek:Panic mode!

Had family down this weekend so I didn't get much done but I LEARNED alot.

Have a good one yall.


Photo0453.jpg


Photo0454.jpg


Photo0455.jpg


And NO I didn't put anything on the bolt as I glued. Like said, It was a very dark cloud and I just started tripping and clamping.
:facepalm:

Photo0456.jpg
 
Top