1978 River Ox Restoration Project

gatorfan6908

Petty Officer 2nd Class
Joined
May 17, 2010
Messages
149
Re: Staring at this vessel in my yard... Is she worth fixing?

Re: Staring at this vessel in my yard... Is she worth fixing?

Good idea... something I can pick up tomorrow on the way home from work.
 

jbcurt00

Moderator
Staff member
Joined
Oct 25, 2011
Messages
25,114
Re: Staring at this vessel in my yard... Is she worth fixing?

Re: Staring at this vessel in my yard... Is she worth fixing?

It too will day light your hull (slice thru where you didn't intend it too).... A couple of times, perhaps :facepalm: No matter the brand you pickup, get a few different blade styles & a couple of each. Different profiles were very helpful in various places.... I think I've completely used up 2 different profiles, and have very well worn a 2nd of 1 of them. But it doesn't tend to throw the FG dust EVERYWHERE like a circ saw or angle grinder, and can generally be used 1 handed, so the other can direct the shop vac nozzle for capturing as much of the dust as possible.
 

gatorfan6908

Petty Officer 2nd Class
Joined
May 17, 2010
Messages
149
Re: Staring at this vessel in my yard... Is she worth fixing?

Re: Staring at this vessel in my yard... Is she worth fixing?

Well,
So far I have been well guarded from the dust, but I haven't gotten to the grinding yet. Have a full face-breather, and for today I was just putting a t-shirt over my face and letting it drape back over my neck and then putting the mask on. Gave great protection both on the front and back of my neck along with gloves, long sleeves and jeans. Thanks for the idea for that little saw. I seen one last weekend and thought about picking it up, but I decided against it to try and save some $$. But looking at it now, I am going to bite the bullet and get one.
 

jbcurt00

Moderator
Staff member
Joined
Oct 25, 2011
Messages
25,114
Re: Staring at this vessel in my yard... Is she worth fixing?

Re: Staring at this vessel in my yard... Is she worth fixing?

And a good respirator. Lungs aren't as easily replaced as LUNG TRANSPLANT suggests :facepalm:

Eye protection too, w/ side skirts to minimize dust getting around the safety glasses/goggles.

I use liquid soap to 'close' the pores on my arms, face, neck & hands before I grind. I just apply it like lotion, and it works for me to minimize the itchy & scratchy show. WOG dusts w/ talc. Most wear a tyvek suit, esp if you are grinding in close quarters. I'm working in a small single car garage, so I generally suit up to grind. And try to do everything you can to contain your dust. It floats forever, and doesn't dissipate in the environment

So unless you want to sponsor all the kids in the neighborhood w/ full face respirators, well yeah, then you know......

Contain the dust :redface:
 

gatorfan6908

Petty Officer 2nd Class
Joined
May 17, 2010
Messages
149
Re: 1978 River Ox Restoration Project

HAHAHA, thanks for the tip! Well, I have a full face respirator/shield combo, looks similar to this one:
MMM7161.jpg


I just wrap the t-shirt sleeve around my face and it covers the rest of my neck/face and prevents the dust from entering the mask or getting caught around the sides and rubbing into my face.

Have two tyvek suits ready for when I start grinding, just don't think they are necessary right now while I am just cutting.
 

gatorfan6908

Petty Officer 2nd Class
Joined
May 17, 2010
Messages
149
Re: 1978 River Ox Restoration Project

Well... got a lot accomplished this weekend. Got the floor out and removed all of the foam... had no idea how time consuming that would be! Anyways, a lot of it was soaked... and I got a clear look at what was left of the stringers. Seems as though there were only a few spots not completely rotten. The sturdiest thing was the glass. I'm not even sure how we weren't crashing through the deck this season! Anyways, my priority now is the transom. Spent hours today with a crowbar and hammer trying to separate the wood from the skin. Had to completely remove the inner layer. I wanted to try and salvage as much as possible to make a template later, but this thing was ridiculous. So at this point in time, I am going to be forced to make a new template for the transom. Going to do some more research and see what other folks have done in this situation.

Will post some pics tomorrow.
 

gatorfan6908

Petty Officer 2nd Class
Joined
May 17, 2010
Messages
149
Re: 1978 River Ox Restoration Project

Absolutely nothing accomplished today. Had a get-together for a friend of mine about to deploy. Wanted to spend some time with him and his family before he leaves. Anyways, here are some pictures of what I did get done this weekend. You can see now a better picture of the rot in the stringers since the foam has been removed.
100_2897.jpg

100_2896.jpg

100_2895.jpg


This is a picture of the transom after I removed the majority of old wood. You can see at the bottom how wet it was, even though here it is covered with the dust from grinding the fiberglass and gelcoat on the sides. I hope to get a new transom template created this week and hopefully a new template cut out. We are leaving to go on a cruise to the bahamas this Friday and I won't be able to work on it for at least a week after that.

100_2892.jpg

100_2893.jpg

100_2894.jpg


So... You can see the work I have to deal with in the upcoming weeks. Still motivated, and at this point the only thing I am anxious about is the transom itself.
 

gatorfan6908

Petty Officer 2nd Class
Joined
May 17, 2010
Messages
149
Re: 1978 River Ox Restoration Project

So ... I have this section of the bow which is kind of a pain to store things in and I would like to rebuild it differently to where access is a little easier. Maybe even build out a little seat which someone could sit on or something. I kind of feel that a lift-up seat would be a little easier anyways. If any of you have any better ideas about how to rebuild this portion of the boat or if I should just leave it as-is, I would love the ideas. There is a teak swing-open door that goes in the opening, only I removed it because the latch was broken and the door would not stay closed.

100_2898.jpg
 

gatorfan6908

Petty Officer 2nd Class
Joined
May 17, 2010
Messages
149
Re: Staring at this vessel in my yard... Is she worth fixing?

Re: Staring at this vessel in my yard... Is she worth fixing?

Alright. Today was another productive day. Haven't had that much time as of late, as my wife and I went on a cruise this past week. Was able to grind down the transom with the exception of the sides and bottom corners. Those are tricky to get to.
I want to make sure that I am grinding down far enough to good glass, but I'm not exactly sure what I am looking for in-particular. I have gotten down far enough to what looks like the old woven from the factory layup. Is that far enough or should I grind deeper towards the hull itself? Below are a few pictures of what I am seeing.

Here is the port side
6B4F529E-B3A4-4931-9B5C-EDB9373C2C2B-2173-000000F6BA353EFC_zps39307333.jpg


Center looking down
AB5098F5-0A10-469F-B6E2-1132848D0BB8-2173-000000F6C161853F_zpsc5b40bbf.jpg


and starboard
D4361F6F-E9BA-4DD1-B2F1-434F05E0FAE4-2173-000000F6C6A06B4B_zps9363eebb.jpg


And here is a cool pic I took with my new iPhone 5... (Don't make fun) It is a panoramic photo from port to starboard. Kinda cool if you ask me, although the middle is kind of skewed since it was closer to the camera.
931665F0-A04E-48C2-9043-B314BA38A3A7-2173-000000FD0799B278_zps3012bee6.jpg


Tomorrow I will continue with the grinding of the corners and try to get a template made for the transom. Will be going over WoG's thread for the transom install tips and tricks again.
 

nrasnake

Seaman
Joined
Aug 13, 2012
Messages
62
Re: Staring at this vessel in my yard... Is she worth fixing?

Re: Staring at this vessel in my yard... Is she worth fixing?

Look at you go man! Nice work keeping at it... GO! GO! GO!... until you're done or divorced.

:)

forums.iboats.com/showthread.php?t=577100&page=2
 

GT1000000

Rear Admiral
Joined
Jul 13, 2011
Messages
4,916
Re: Staring at this vessel in my yard... Is she worth fixing?

Re: Staring at this vessel in my yard... Is she worth fixing?

Looks like excellent work Gator...getting down to good glass basically means removing anything covering the glass, like bilge paint, gel-coat, etc, or any loose, flaking glass...and opening up the surface pores of the old glass, so that the new glass/resin can make a good mechanical bond...similar to prepping a painted surface for refinishing...just a lot itchier...:redface:

To get right down into the corners, I used a Dremel tool with either a diamond shaped burr or a round one...a little slow going, but gives you really good control and let's you get all the way in there...

You could also use a regular drill with a similar bit, but it can be a bit awkward to handle...

Keep up the great progress.
 

gatorfan6908

Petty Officer 2nd Class
Joined
May 17, 2010
Messages
149
Re: Staring at this vessel in my yard... Is she worth fixing?

Re: Staring at this vessel in my yard... Is she worth fixing?

Well I did some more grinding yesterday and made sure all the flakes were gone, good glass shows, etc. and now I am just trying to clean out the boat so I can be ready for glassing in the transom when the time comes.
GT, I tried the oscillating tool with a spade shaped sandpaper attachment on the tip, didn't work to well even with 80-grit paper. I went to the hammer and screwdriver to get the majority of it done and back to the grinder when I could. I can tell you now that I am so tired of suiting up each time I go to grind... but down here in FL, the temperature is finally dropping so it wont be as bad anymore I hope.
I went and bought the supplies for the transom, all except glass and resin. Haven't quite found the spot to buy supplies from yet. The bill ended up being close to 200$... I had to pick my heart up and stuff it back in after paying the bill. I got everything to build the clamps with, which I am hoping will work out correctly. I used the ones designed by WOG in his Blue Flamingo thread. Might be a pain, but it would be nice to have a good supplies list. I am also not quite sure of how the process will work after these are in. I am guessing that you will be turning the nut to spread the boards apart to get pressure on the transom. It will be a learning experience either way, that is just what my common sense would tell me.
I'll be sure to post some more pics when I get further along.
 

gatorfan6908

Petty Officer 2nd Class
Joined
May 17, 2010
Messages
149
Re: 1978 River Ox Restoration Project

One question I do have though is how will the transom glass to the top of the outer skin... with the size of the old transom, it didn't look like any more than a couple of inches, probably two, were available for glassing from top of transom to top of skin... This just doesn't seem like enough real estate for glass to properly bond itself to the outer skin and give the strength I am looking for. I will try and post some pics of what exactly I am talking about... but if anyone has help, I would appreciate it.
 

emoney

Commander
Joined
Jul 19, 2010
Messages
2,551
Re: 1978 River Ox Restoration Project

Next trip out, if you haven't already gotten some, a gallon of Acetone would be a smart purchase. Always better to wipe the existing glass down with the stuff before you're ready to start reinstalling new. A hint for the transom template, btw: use 2 pieces of your template material (cardboard etc.) so that it's easier to work with. Then you can draw a "center" line on the two to turn that into one. It's easier than trying to deal with a longer piece that wants to fold, etc. on you. Not sure what you mean in your question, so I'm no help there. Heck, even if I did understand it I probably wouldn't be much help. Carry on, though, you're doing well!
 

gatorfan6908

Petty Officer 2nd Class
Joined
May 17, 2010
Messages
149
Re: 1978 River Ox Restoration Project

If you look at the pics of the transom on post #69, you can see the inside pics of the transom outer skin. About an inch or two down from the top, you see a faint line. This is where the top of the wood was glassed to the outer skin. I am concerned about the amount of space there to tab the transom in. Doesn't seem like much space, and I am wondering what the best option is. It is also quite weak, and has a faint crack beginning to spread out sideways from the middle. I just want to know how to cut the transom wood best for this particular layup... Should I cut the transom lower on the sides to allow for more space to glass it in? Will doing so weaken the transom at all?

Many questions, and I'm not sure if I am asking them correctly or not, but if you need any clarification just let me know.
 

greenbush future

Lieutenant Commander
Joined
Aug 28, 2009
Messages
1,814
Re: 1978 River Ox Restoration Project

The area above where your new transom wood will be installed, shouldn't be an issue for tabbing. I think the tabbing is for the sides of the transom/to the sides of the boat, and the base of the transom to the sole of the boat, on mine I didn't tab the top in at all. After I glued the new transom wood to the back of the boat, I focused on the above areas to tie it all togeather. Cant see where tabbing the top would provide much structural help beyond glueing it in. Others will chime in if I'm wrong.

Good looking project, don't stap, and don't look back!
 

GT1000000

Rear Admiral
Joined
Jul 13, 2011
Messages
4,916
Re: Staring at this vessel in my yard... Is she worth fixing?

Re: Staring at this vessel in my yard... Is she worth fixing?

greenbush future is 100% correct...

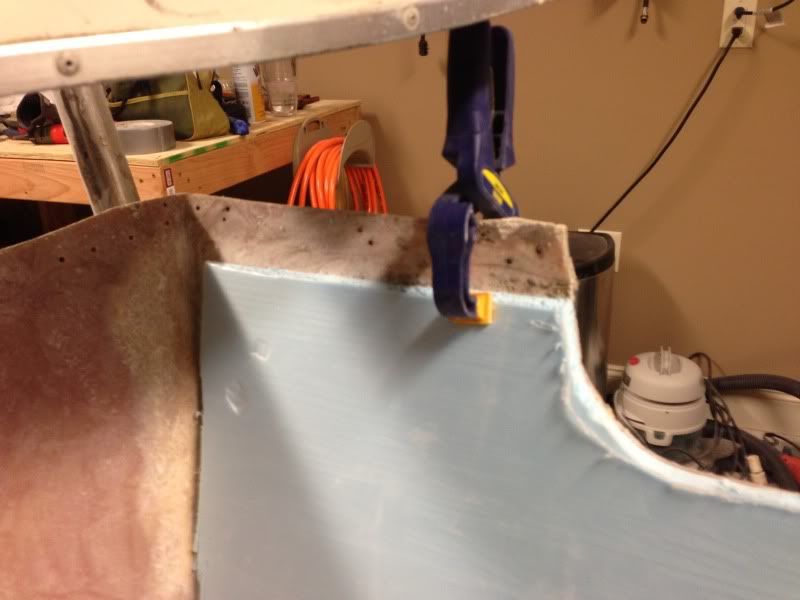
It is not necessary to do any tabbing there...as a matter of fact, try and leave that space clean and clear for the attachment of a "nailer" that will eventually go all the way around that inside rim...that is what will give the rub rail a solid purchase on the screws that hold it in place...it can be a strip of plywood, coated in resin and CSM, attached with some PB and a little CSM if you'd like, approximately 3/4" X 1"to1-1/2" ...when the cap goes back on, and you are ready to attach the rub rail back on, pre-drill the holes for the screws, smear some 5200 on the screws and run them home through the rub rail...

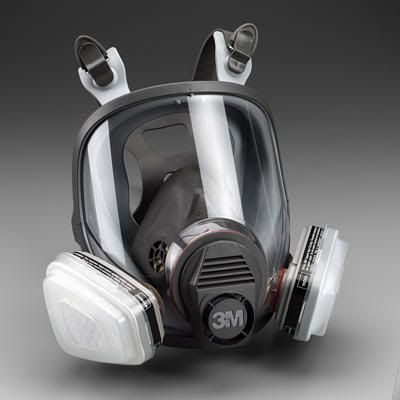
Definitely get some Acetone...you will use it over and over to clean your chip brush and bubble roller after each use to keep from ruining them, you will also be using it to wipe down everything that is about to get glassed, and cleaning up in general...if you don't already have, get a box of disposable latex gloves, when you are ready to do some glassing, put on two or three pairs, as they get gummed up and hairy, you can rip off a layer and keep going... and talcum powder...not only is it good to keep the itch down, you can use it when things get too sticky...like on your gloves or your chip brushes after you clean them out with Acetone...
 

gatorfan6908

Petty Officer 2nd Class
Joined
May 17, 2010
Messages
149
Re: Staring at this vessel in my yard... Is she worth fixing?

Re: Staring at this vessel in my yard... Is she worth fixing?

Well I definitely appreciate the advice. I cut out the template today and left a few inches above on both sides for what you are talking about GT. When I removed the cap, there was no wood there, only screws from the cap to the outer skin to secure both of them. What you are talking about sounds like a much more secure option. Only, it was like that throughout the entire cap, not just the transom. It was fiberglass on fiberglass screwed/bolted together. I could tell it had been off before with the sloppy work that was done piecing it back together. I have bought extra latex gloves, and my wife is a nurse, so she brings me some home when she gets the chance. And I picked up a jug of acetone today with the other fiberglass supplies; biax, CSM, poly, fumed silica, and milled fibers... so as of now I think I will be good to go when the time comes to tab in the transom.
I have decided to use titebond 3 woodglue to glue the transom pieces together. I've read some good reviews on it and it will save a little money. Not trying to cut corners, just trying to stay in budget. I am going to experiment with making PB though... I've never done it and I want to make sure that I get it all right when I put in the new wood.

Anyways, here are a few pictures I took for the experts to review and give some feedback. I am finally starting to have a little confidence in my abilities here... just haven't gotten to the down and dirty of glassing and all... still have the stringers and the deck to go.

91C18EE6-70B0-4BA0-879C-826A2BF26DFF-1364-00000091DBD37520.jpg


89CEA998-1B6C-425E-BC65-68FC3B54265D-1364-00000091D66DB47D.jpg


18BD54D1-63AD-410C-B302-754E5975AB3D-1364-00000091D15B91B6.jpg


A4CE9396-4B84-409F-8D4F-92AFC1F9902A-1364-00000091C6F02B8A.jpg


08182759-EFC0-43F6-B7E9-5A9AD1991405-1364-00000091BFE91CB3.jpg


90903A14-84C7-4903-A164-0786B999DB85-1364-00000091B3184E9E.jpg
 

gatorfan6908

Petty Officer 2nd Class
Joined
May 17, 2010
Messages
149
Re: Staring at this vessel in my yard... Is she worth fixing?

Re: Staring at this vessel in my yard... Is she worth fixing?

I am brainstorming now as to how I am going to run everything under the deck. All of the electrical wiring, fuel lines, steering cable, etc... During demo, there was a big 5 inch pvc pipe which cut through the middle-port side stringer and straight back to the corner by the transom and came straight up. Everything minus the fuel line ran through a hole in the deck and down this pipe, the fuel line ran straight back through one of the drainage pipes in the foam. I don't really want to do that same thing, but I don't know how else I am going to work this with the steering cable. I don't have the space at the stern to run the steering cable any way other than to that port-aft corner...
I am sure I can run the electrical wiring straight back from the console underneath the deck, but what I am unsure of is what will be the best way to make a hole in the deck itself and ensure that it won't allow water to penetrate underneath, but will allow me to pass wiring and cables through it... Any ideas?

i00470.jpg


100_2896.jpg
 

GT1000000

Rear Admiral
Joined
Jul 13, 2011
Messages
4,916
Re: Staring at this vessel in my yard... Is she worth fixing?

Re: Staring at this vessel in my yard... Is she worth fixing?

Couple of thoughts come immediately to mind...

First one...why not do the runs under the gunwales?

Second one...PVC pipe, but set up similar to a center console, with up turns coming through the deck...just add some kind of "Boots" over the ends with cables ties and maybe some sealant to try and seal the ends off...or maybe, instead of just up turns, design them similar to the J-pipe under your sinks, just reversed...?

Sorry, not much help...best I could come up with on short notice...:redface:
 
Top