Bayliner Capri unintentional restoration project

jmmacky

Petty Officer 2nd Class
Joined
Jun 20, 2011
Messages
177
Re: Bayliner Capri unintentional restoration project

Subscribed! You look like young folk like myself, 27 here, I am also attempting a complete rebuild. Except my project is on a 15ft skiff :)
Good luck!

Yep i'm 27 as well. Just subscribed to your thread. Cheers!
 

jmmacky

Petty Officer 2nd Class
Joined
Jun 20, 2011
Messages
177
Re: Bayliner Capri unintentional restoration project

I've been reassembling my windscreen pieces the last couple of days. When I got them out (for the first time in almost 2 years) I found the aluminium frames are old looking with areas of corrosion. So I decided the clean them up with a wire brush, prime and paint to try and make them look better and more in keeping with the new boat look. I've ordered some black marine sealant to bed them with (as the frames are now black) and will hopefully do this next week. Sorry I took photos but they haven't come out very well so I haven't posted them.
 

ezmobee

Supreme Mariner
Joined
Mar 26, 2007
Messages
23,767
Re: Bayliner Capri unintentional restoration project

The black frame will look great with the yellow.
 

jmmacky

Petty Officer 2nd Class
Joined
Jun 20, 2011
Messages
177
Re: Bayliner Capri unintentional restoration project

Managed to get the windows together and re-mounted today. It was as awkward as I thought it would be! I used black marine sealant (sikaflex) to bed everything in with and to finish off at the seams between frame and boat. It's good to see the windscreen back on...think it starting to look more like a finished boat! I just have a few areas where I need to touch up the black paint which is why some of the glass is still masked off.

file_zps431bd9ac.jpg
 

Triangleboater

Petty Officer 1st Class
Joined
Mar 5, 2013
Messages
207
Re: Bayliner Capri unintentional restoration project

That looks great! good job for sure.
 

jmmacky

Petty Officer 2nd Class
Joined
Jun 20, 2011
Messages
177
Re: Bayliner Capri unintentional restoration project

Some progress has been made the last couple of days. I've installed the new cleats and the two small bits of teak trim. These bits of teak are about the only original item going back in! They looked pretty old before so I sanded them down, working towards finer grit and then gave them 2 coats of teak oil.

file_zpsdd6ab65e.jpg


file_zps91d096f6.jpg


file_zps0877b613.jpg


All holes and around the teak have been sealed with sikaflex 291i.
 

jmmacky

Petty Officer 2nd Class
Joined
Jun 20, 2011
Messages
177
Re: Bayliner Capri unintentional restoration project

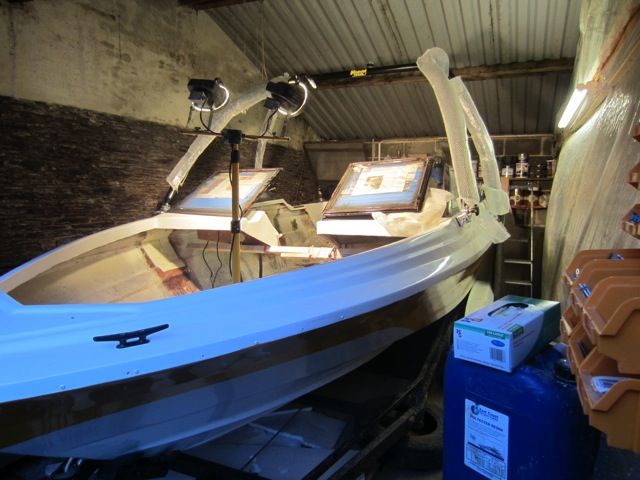
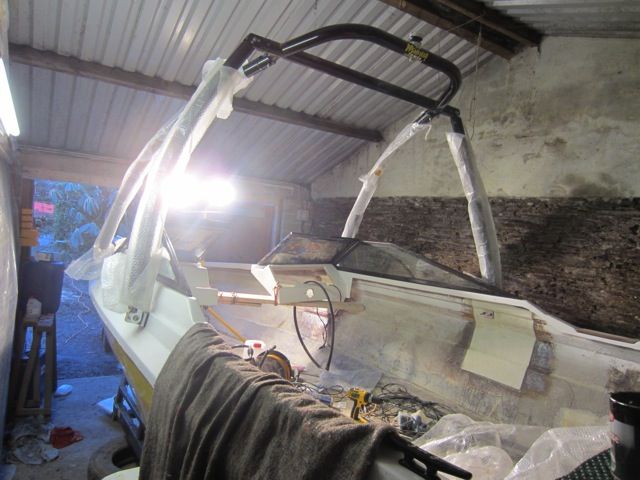
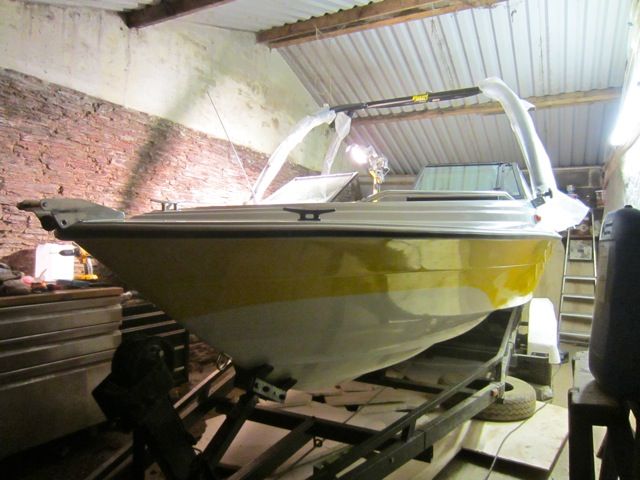
I've also fitted the slightly extravagant/bank-breaking purchase of...a new wakeboard tower! The old ski pole that was on the boat was corroded and I thought a tower would be better and now is the time to fit it while it is all apart so I decided to go for it. It is a Monster MT1 tower which was on sale and in black as I thought this would look good with the yellow and white. The instructions that come with t are really good and I found it pretty easy to fit...although I think it would be a much more daunting task if I didn't now have some fibreglassing/boat building experience.

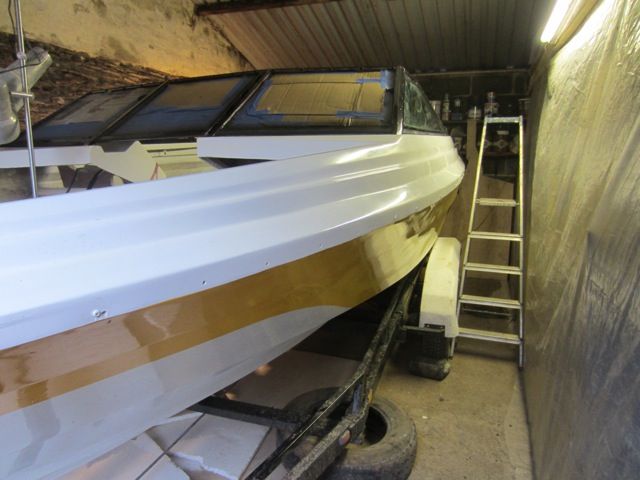
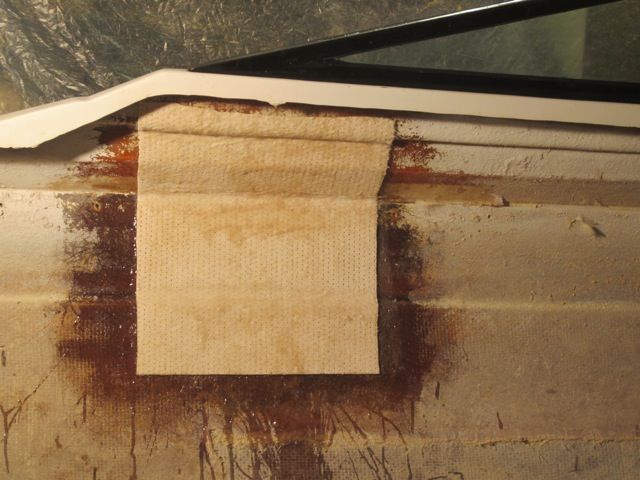
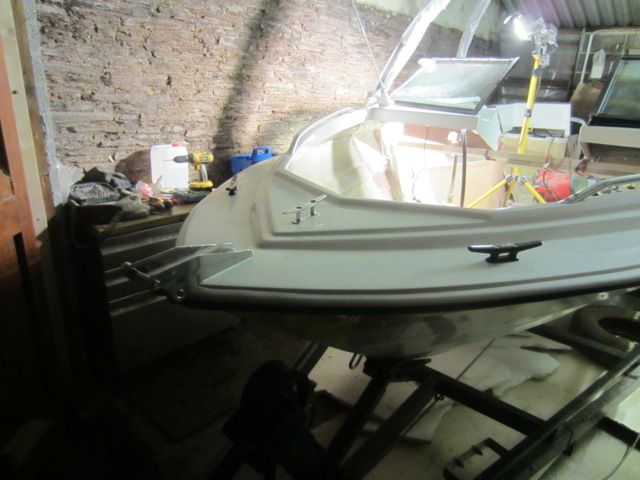
The tower fits onto the cap which is a little flexible in places and not particularly thick fibreglass (although I haven't fitted a rub rail yet; just put some temporary bolts through to hold everything in place). I wanted to reinforce the areas where the tower was going to attach and ideally spread this load down to the hull so it's not just the cap taking the towing strain. I was going to do this with plywood stuck in place using PB (fibreglass putty/whatever it's called now) and csm over the top, but the guy from the wakeboard tower shop suggested I try core matt. The area that the tower attaches on has several different angles and curved in places so I decided to use the core matt as it should be easier to manipulate to the contours of the boat and get a good bond all over. I've not seen anyone else on iboats use this product but I expect I just haven't seen any threads with it in. I bought 5mm core matt so I could increase thickness and strength of the fibreglass quickly and easily. The boat was sanded with 80 grit in the attachment areas and cleaned with acetone. I placed a layer of csm first and cut a piece of core matt to slightly less than the size of the csm patch. The core matt feels a bit like a thin layer of foam and you need to apply resin to the underside before putting it in place otherwise it soaks up all the resin from the csm and creates a poor bond to the hull. I then put it in place and applied resin to the top side. It soaks up resin like a sponge! It conforms really easily but is difficult initially to make it stay in place on a vertical/upside down lay-up but saturates eventually and sticks well. It's really easy to remove air bubbles as it doesn't come apart very easily like csm does. I think if you are using it somewhere where it might get wet you need to glass the edges with csm afterwards to seal it (read this online somewhere) but I didn't bother as it is in an area that should stay dry when the boat is finished and it's fully saturated with resin so I don't understand the reason for this anyway.

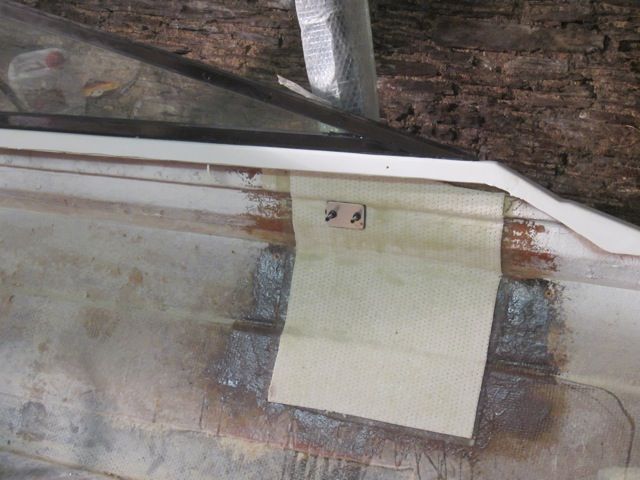
Here is one of the finished patches of core matt:

file_zps3fa2ce3e.jpg


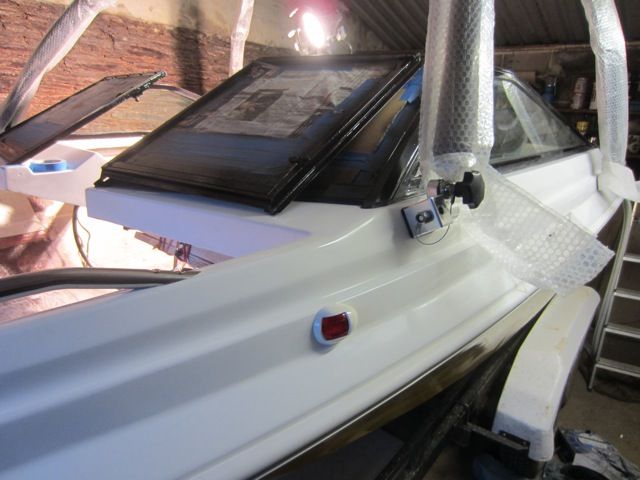
With the tower attached through:

file_zps0a332707.jpg


file_zpsfec6a390.jpg


*Still need to touch up the black paint in a couple of places on the wind shield frames.

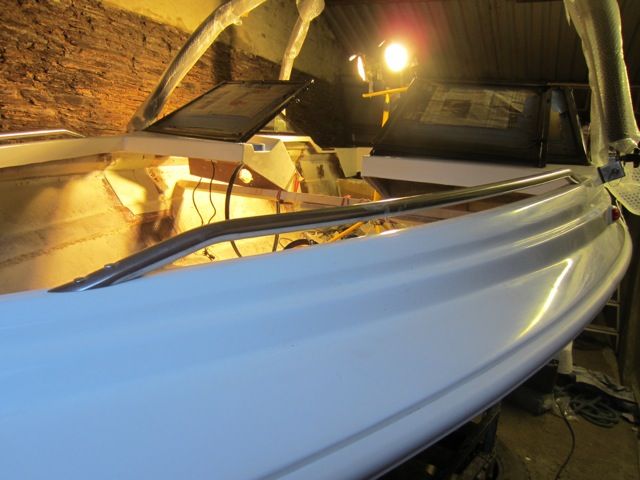
And here is the tower all put together. The bubble wrap is staying on the legs for a while to protect it against accidents! I think it looks really cool and it feels rock solid.

file_zps8739a91b.jpg


file_zps4c0b2cff.jpg


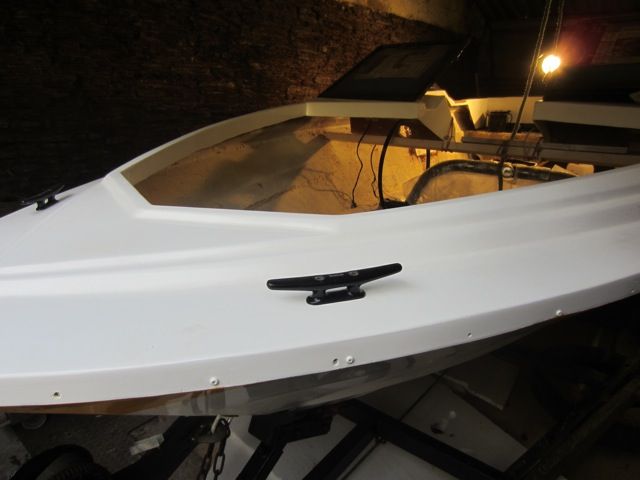
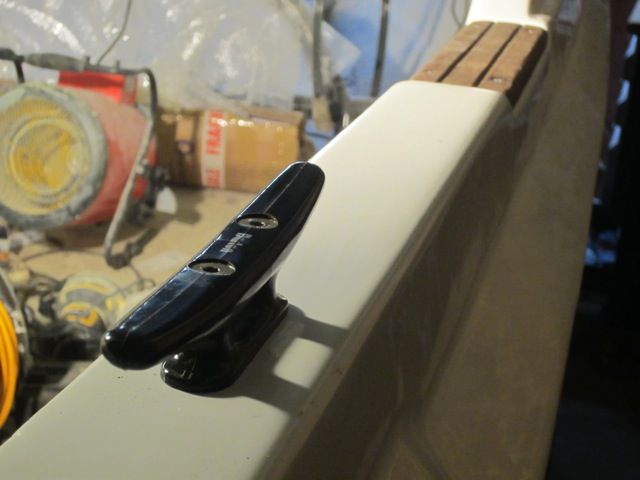
All bolts through the boat have been sealed with sikaflex.
 

jmmacky

Petty Officer 2nd Class
Joined
Jun 20, 2011
Messages
177
Re: Bayliner Capri unintentional restoration project

Bit of a frustrating day today. Dad was available to help this afternoon so the plan was to fit the new rubrail. I thought I had everything ready and prepared but stupidly the SS bolts I had ordered weren't quite long enough for some parts of the hull where I have added extra fibreglass. It is a very tedious job. Also the new rubrail is PVC and becomes malleable enough when you heat it with a hairdryer but cools and stiffens very quickly and because of this I need longer bolts to use as anchor bolts to get it fitted in place quickly before it cools and shrinks. Very frustrating but we will try again on Saturday.

I did however get the hand rails fitted back on:

file_zps4b1129ba.jpg


The original port and starboard navigation lights were in 1 cluster right at the front on the bow of the boat. This is no good now as I want to be able to anchor off the bow and I don't think having the lights so far forward and off parallel to the centre line is entirely ideal/legal. So I have mounted LED nav lights on each side:

file_zps6424d04d.jpg


file_zps190249f2.jpg


UK law for a boat this size requires a stern nav light as well and a 360 degree light higher up. Because of the outboard (and wanting it to be symmetrical) I have mounted a stern light on each side. The 360 light I will put on the tower later.

file_zps071021e9.jpg


Going to start making the aft bench seats tomorrow. Think I will fix the back rests to the sides and have the bases so they hinge for storage. Not quite sure how much space to leave for foam between the back and seat? If I glass both sides of the seat wood this won't cause any problems for upholstery will it? Staples will penetrate through the glass and into the wood I presume? That's probably a stupid question but I haven't stapled through fibreglass before (it will just be 1 layer of csm). Are there any good threads where someone has detailed their bench seat build (I've seen it mentioned before but not much detail given)?

Thanks, JM
 

ezmobee

Supreme Mariner
Joined
Mar 26, 2007
Messages
23,767
Re: Bayliner Capri unintentional restoration project

Looking awesome!
 

Triangleboater

Petty Officer 1st Class
Joined
Mar 5, 2013
Messages
207
Re: Bayliner Capri unintentional restoration project

Keep up the good work, seriously looking sharp!
 

LorenHaus

Petty Officer 2nd Class
Joined
Aug 6, 2010
Messages
140
Re: Bayliner Capri unintentional restoration project

The board tower was a VERY nice touch. It looks factory, which means you did an excellent job installing it!
 

jmmacky

Petty Officer 2nd Class
Joined
Jun 20, 2011
Messages
177
Re: Bayliner Capri unintentional restoration project

Keep up the good work, seriously looking sharp!

The board tower was a VERY nice touch. It looks factory, which means you did an excellent job installing it!

Thanks for the positive comments guys!

Finished installing the rub rail today. I used SS bolts through the cap and hull to attach it with sikaflex sealant. I've also installed a bow roller and bow cleat for anchoring purposes. The boat looks quite 'finished' now...until you look inside! Sorry for the bad photos but it was dark when I finished. I've cut most of the pieces for the rear bench seats and i'm off work next week so will glass them tomorrow and hopefully get most of the seating done during the week.

file_zpsc1e0322b.jpg


file_zps9377950d.jpg
 

jmmacky

Petty Officer 2nd Class
Joined
Jun 20, 2011
Messages
177
Re: Bayliner Capri unintentional restoration project

Glassed most parts of the rear box seats today, sealed in the aerial and fitted the aluminium end sections for the rub rail. Nothing interesting to photograph though. I've glued two lengths of 2x2 to the underside of the actual seat section as the ply is only 9mm thick to strengthen it a bit. It's been glued with waterproof glue and clamped/screwed in place while it dries. I will remove the screws and glass tomorrow.

One thing I haven't figured out yet...the back of the seats will bolt at the top to the cap and at the bottom to another piece of wood I will fit. I want to finish everything before upholstery and my design means that I won't be able to get access to behind the seat back to put the nuts on. I was planning to put the bolts through the back section in the correct locations and hold in place with a t-nut or something. Does anyone know of a type of bolt/fastening or can think of a way that I can just push the seat back(with bolts sticking out the back) into the predrilled holes after upholstery and have it 'lock' in place? Originally the manufacturer had button type things on the upholstery itself hiding a screw head underneath but I would rather not have the 'buttons' on the upholstery if I can avoid it. Would be grateful for any ideas to solve this problem!!
 

newtoj1

Cadet
Joined
Jan 16, 2013
Messages
8
Re: Bayliner Capri unintentional restoration project

Looking great, man! Love the tower addition, maybe when my boys get a bit older I'll add one to my Capri.
 

Alwhite00

Master Chief Petty Officer
Joined
Apr 14, 2011
Messages
885
Re: Bayliner Capri unintentional restoration project

Nice job on everything, You will be ready for spring in your "new" boat.

LK
 

GWPSR

Senior Chief Petty Officer
Joined
Jul 25, 2012
Messages
758
Re: Bayliner Capri unintentional restoration project

Does anyone know of a type of bolt/fastening or can think of a way that I can just push the seat back(with bolts sticking out the back) into the predrilled holes after upholstery and have it 'lock' in place?

You might consider 'christmas trees'. They come in a variety of configurations such as:

christmas_tree_boat_upholstery_fasteners.jpg
 

SDSeville

Lieutenant
Joined
Mar 19, 2010
Messages
1,481
Re: Bayliner Capri unintentional restoration project

Looking great jmmacky!!
 

jmmacky

Petty Officer 2nd Class
Joined
Jun 20, 2011
Messages
177
Re: Bayliner Capri unintentional restoration project

Looking great, man! Love the tower addition, maybe when my boys get a bit older I'll add one to my Capri.

Thanks New, ask me when you're thinking about getting one and I'll let you know how I find having one on mine!

Nice job on everything, You will be ready for spring in your "new" boat.

LK

Looking great jmmacky!!


Thanks LK and SDS!

You might consider 'christmas trees'.

That's a great idea. Really simple and would probably work perfectly. Thanks GWP
 
Top